
You shall not pass(key)!
In a previous blog post, I briefly touched on all the current caveats involved with passkeys in Entra ID. One of the most raised questions is around the onboarding and recovery of passkeys. So, in this blog post, we will dive deeper into the chicken-egg situation where you want to enforce passkeys for all resources, but none of your users have one registered. Here is where the “fun” begins.
Interrupt vs. Manage mode#
An important thing to know is that Entra ID knows two types of combined registration modes:
- Interrupt mode (sometimes referred to as wizard mode)
- Manage mode
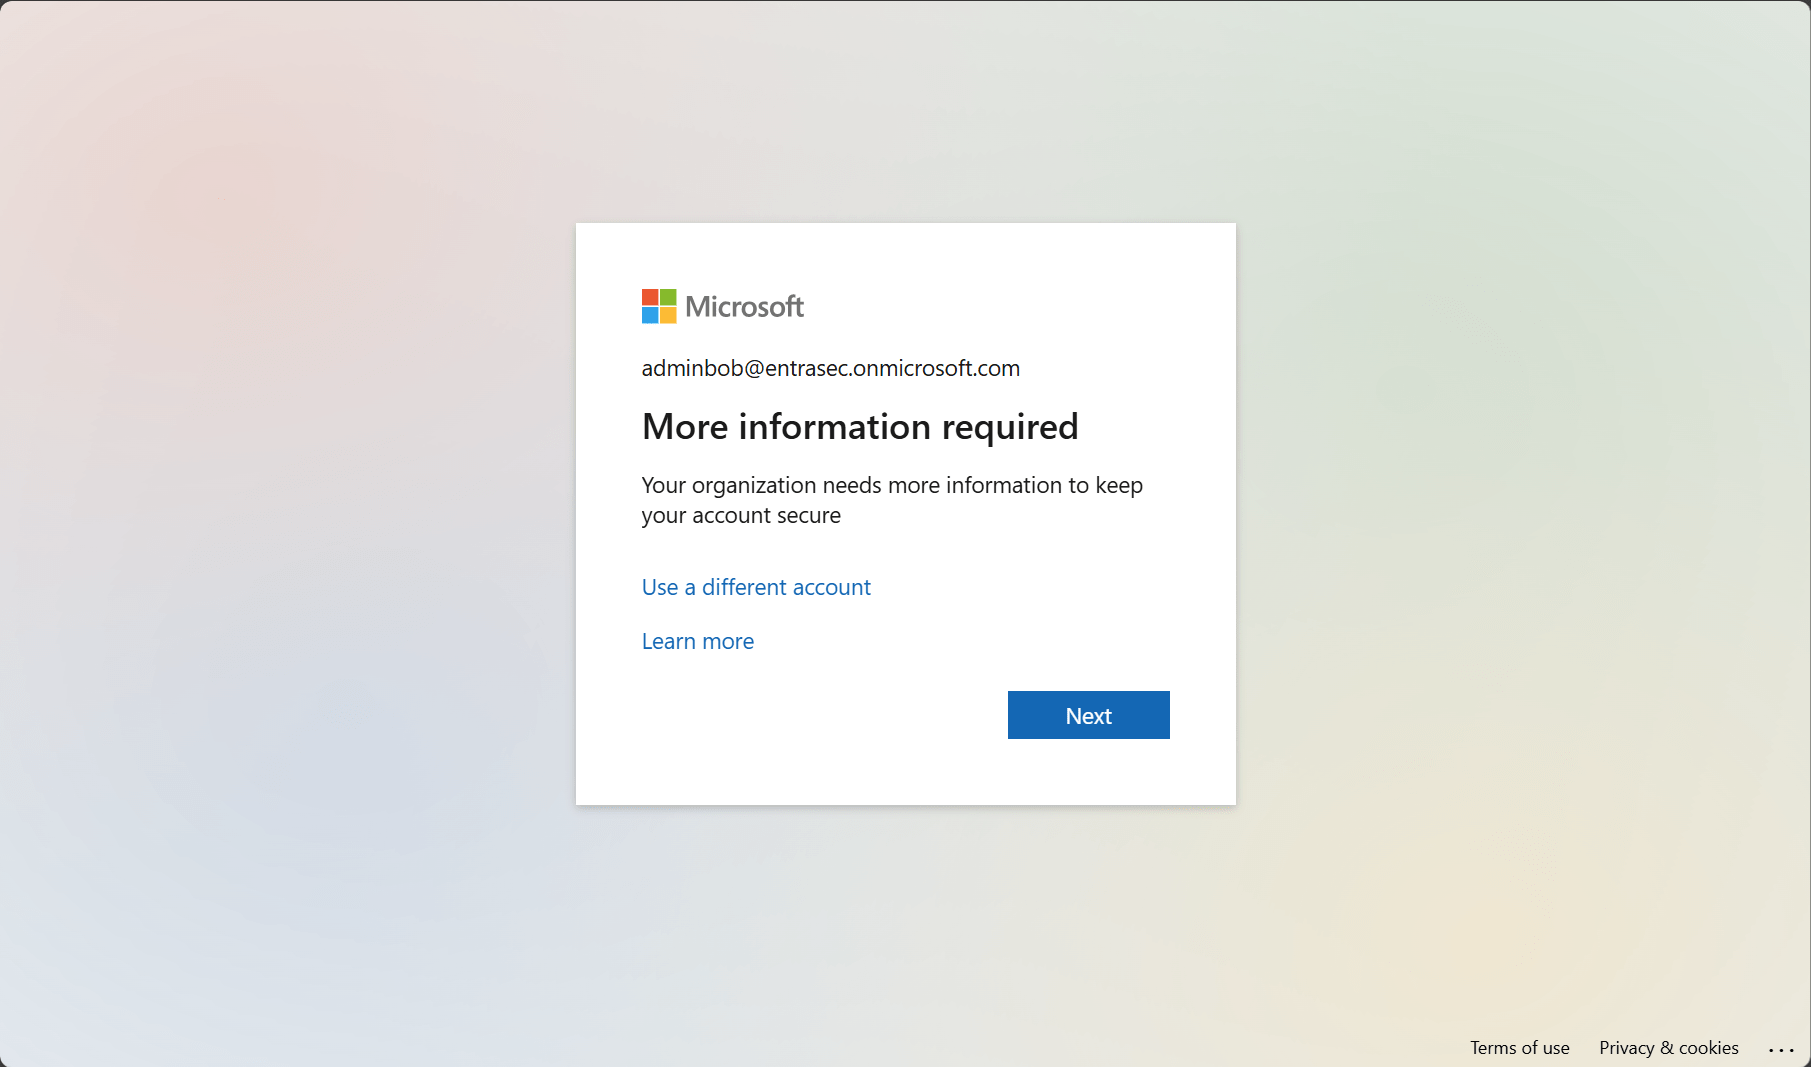
Simply put, interrupt mode is a wizard-like experience presented to users when they register or refresh their security info during sign-in.
Manage mode is part of the user profile and allows users to manage their security info using https://aka.ms/mysecurityinfo
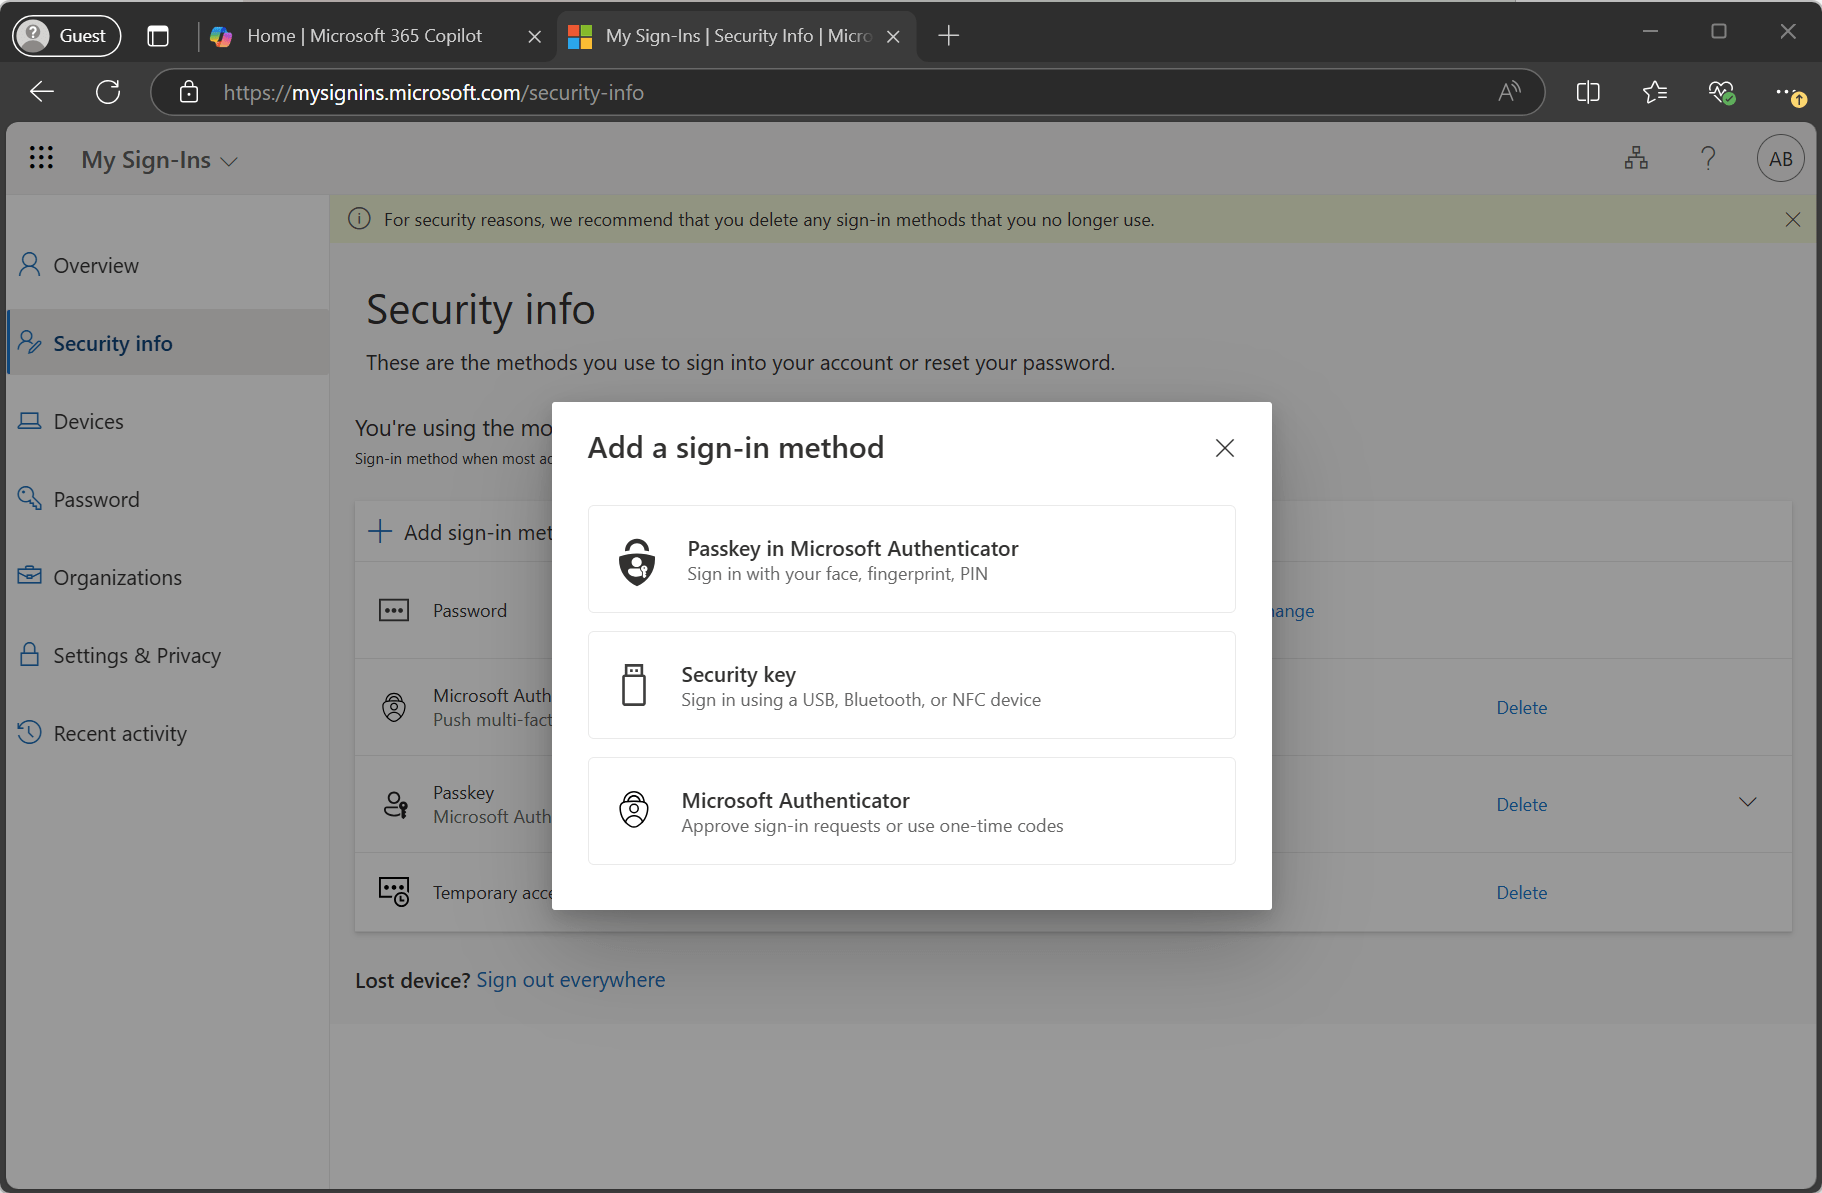
For both modes, users who have previously registered a method that can be used for Microsoft Entra multifactor authentication need to perform multifactor authentication before they can access their security info. Users must confirm their information before continuing to use their previously registered methods.
Desktop vs. Mobile app#
If you want to roll out passkeys successfully, you’ll need to think about your strategy. Is your workforce mobile first, desktop first, or both? The experience is different for all ecosystems, OS versions, and interfaces.
The easiest and fastest way to add a passkey is to add it directly in the Authenticator app.
But in my experience, most users will be interrupted for passkey enrollment on desktops/laptops, so additional guidance might be needed. One important thing to know is that when you enforce passkeys with Conditional Access authentication strenghts, and the user ends up in the interrupt wizard on desktops, it will force cross-device registration using a QR code and Bluetooth connection between the two devices (your desktop/laptop and the phone holding the Microsoft Authenticator app).
Do know that this will fail if you have attestation enabled in your passkey settings in Entra ID.
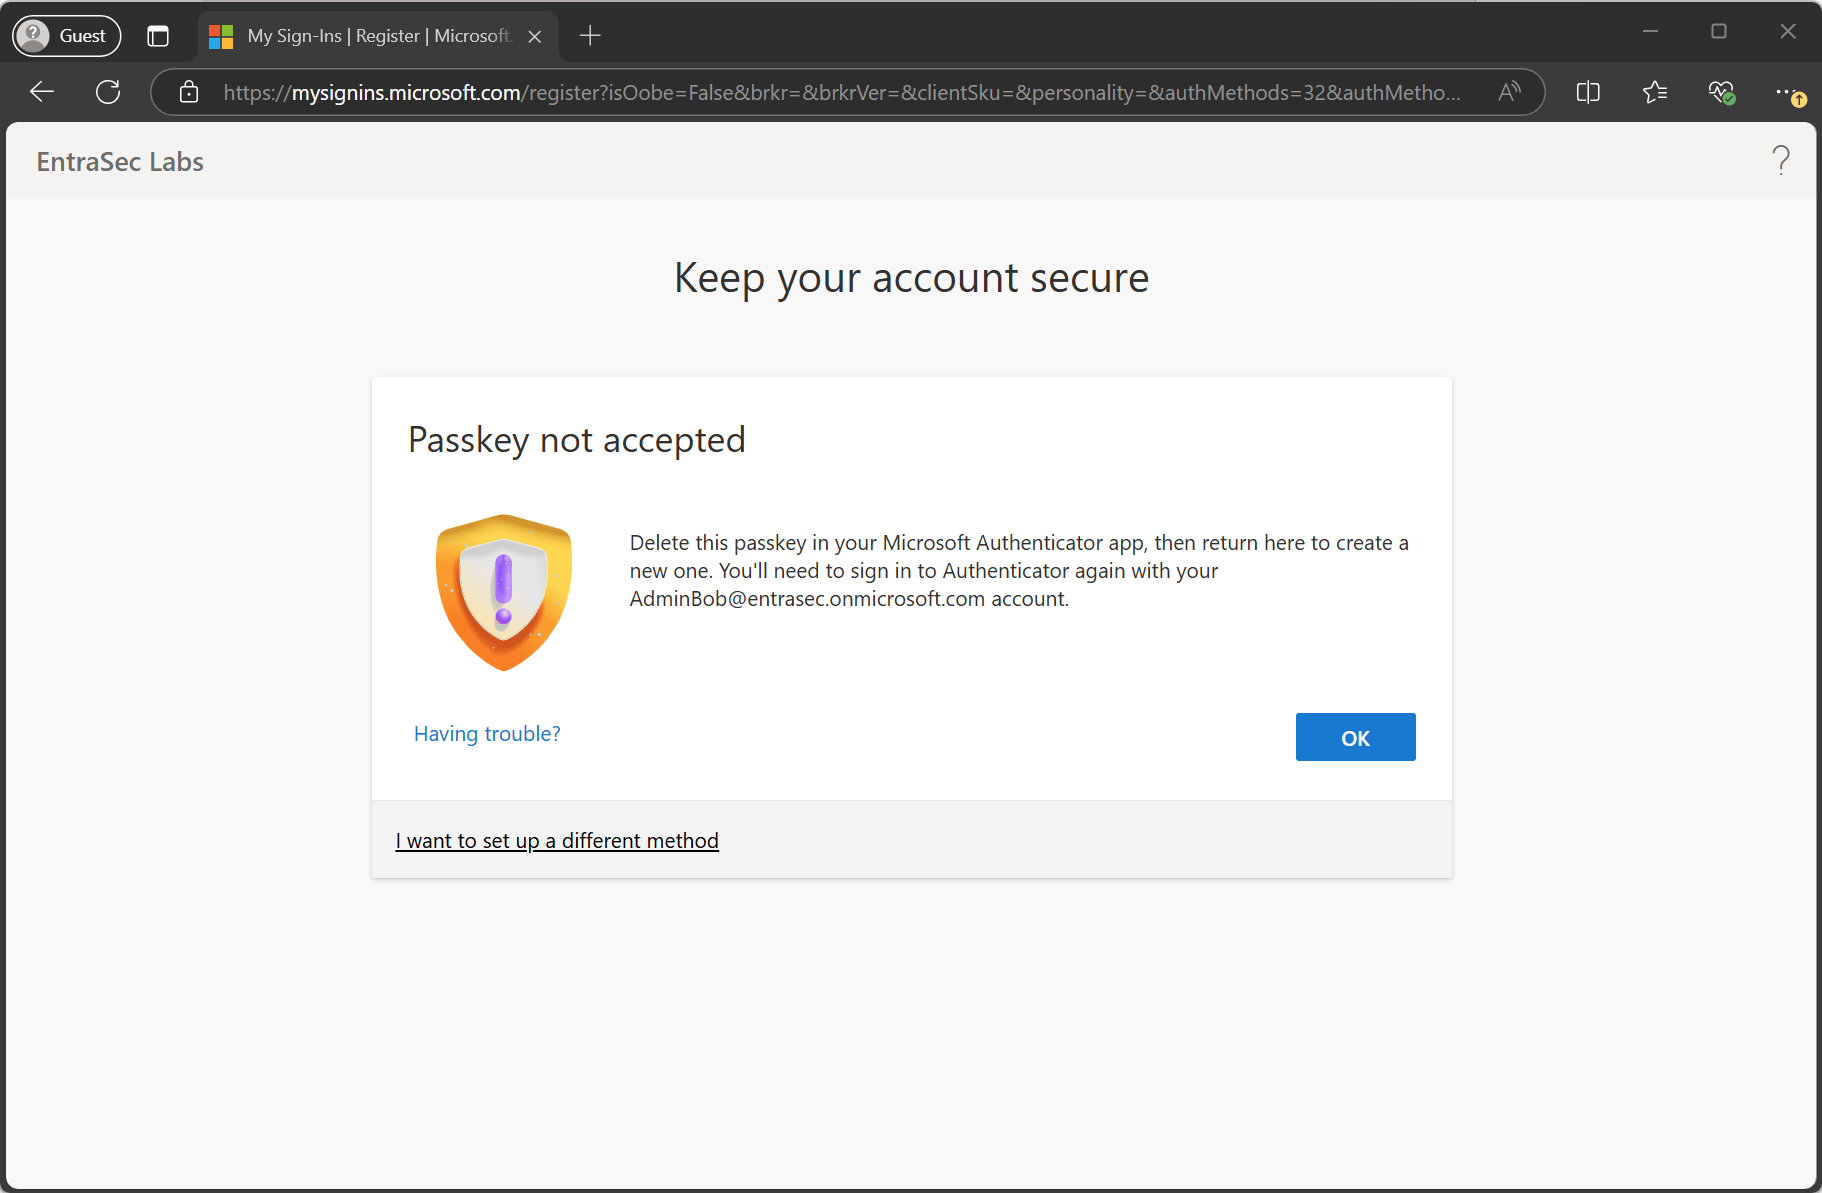
To break out of this (WebAuthN) wizard, the user must select “I want to set up a different method " and then pick “Passkey in the Authenticator app”. This will launch another wizard instructing the user to complete the setup in the Authenticator app. I know this isn’t very clear to the end-user, so either instruct your users to start in the Authenticator app on the mobile phone or instruct the user to click that button. See for yourself:
Conditional Access baseline (sample)#
I have done many tests with Conditional Access and Authentication Strengths, trying to get the smoothest experience for my end-users, and this is the baseline sample I came up with, that works best in most scenario’s.
You’ll need three custom authentication strengths to support this framework:
| Bootstrap & Recovery | Password + Microsoft Authenticator (Push Notification) OR Temporary Access Pass (One-time use) OR Temporary Access Pass (Multi-use) |
|---|---|
| Desktop Apps | Passkeys (FIDO2) |
| Mobile Apps | Passkeys (FIDO2) OR Temporary Access Pass (One-time use) OR Temporary Access Pass (Multi-use) |
Then, build three policies:
- Secure security info registration. In this example, I require a Temporary Access Pass for security info registration, but you can also require a compliant device or a trusted location. Do know that setting up a passkey (strong credential) does require MFA, so your users need either an existing method or a TAP to satisfy this (hard-coded) requirement.
- Enforce phishing-resistant MFA for all apps - Desktop. A separate policy for your desktop/laptops using macOS, Windows, or Linux.
- Enforce phishing-resistant MFA for all apps - Mobile. A separate policy for your mobile phones using Android or iOS.
IMPORTANT NOTE: For security info registration Interrupt mode, the authentication strength evaluation is treated differently – authentication strengths that target the user action of Registering security info are preferred over other authentication strength policies that target All resources (formerly ‘All cloud apps’). All other grant controls (such as Require device to be marked as compliant) from other Conditional Access policies in scope for the sign-in will apply as usual. Learn more: Overview of how Microsoft Entra authentication strength works in a Conditional Access policy - Microsoft Entra ID | Microsoft Learn
| Policy | Target | Device Platforms | Grant control - Custom Authentication Strength | AAGUIDS |
|---|---|---|---|---|
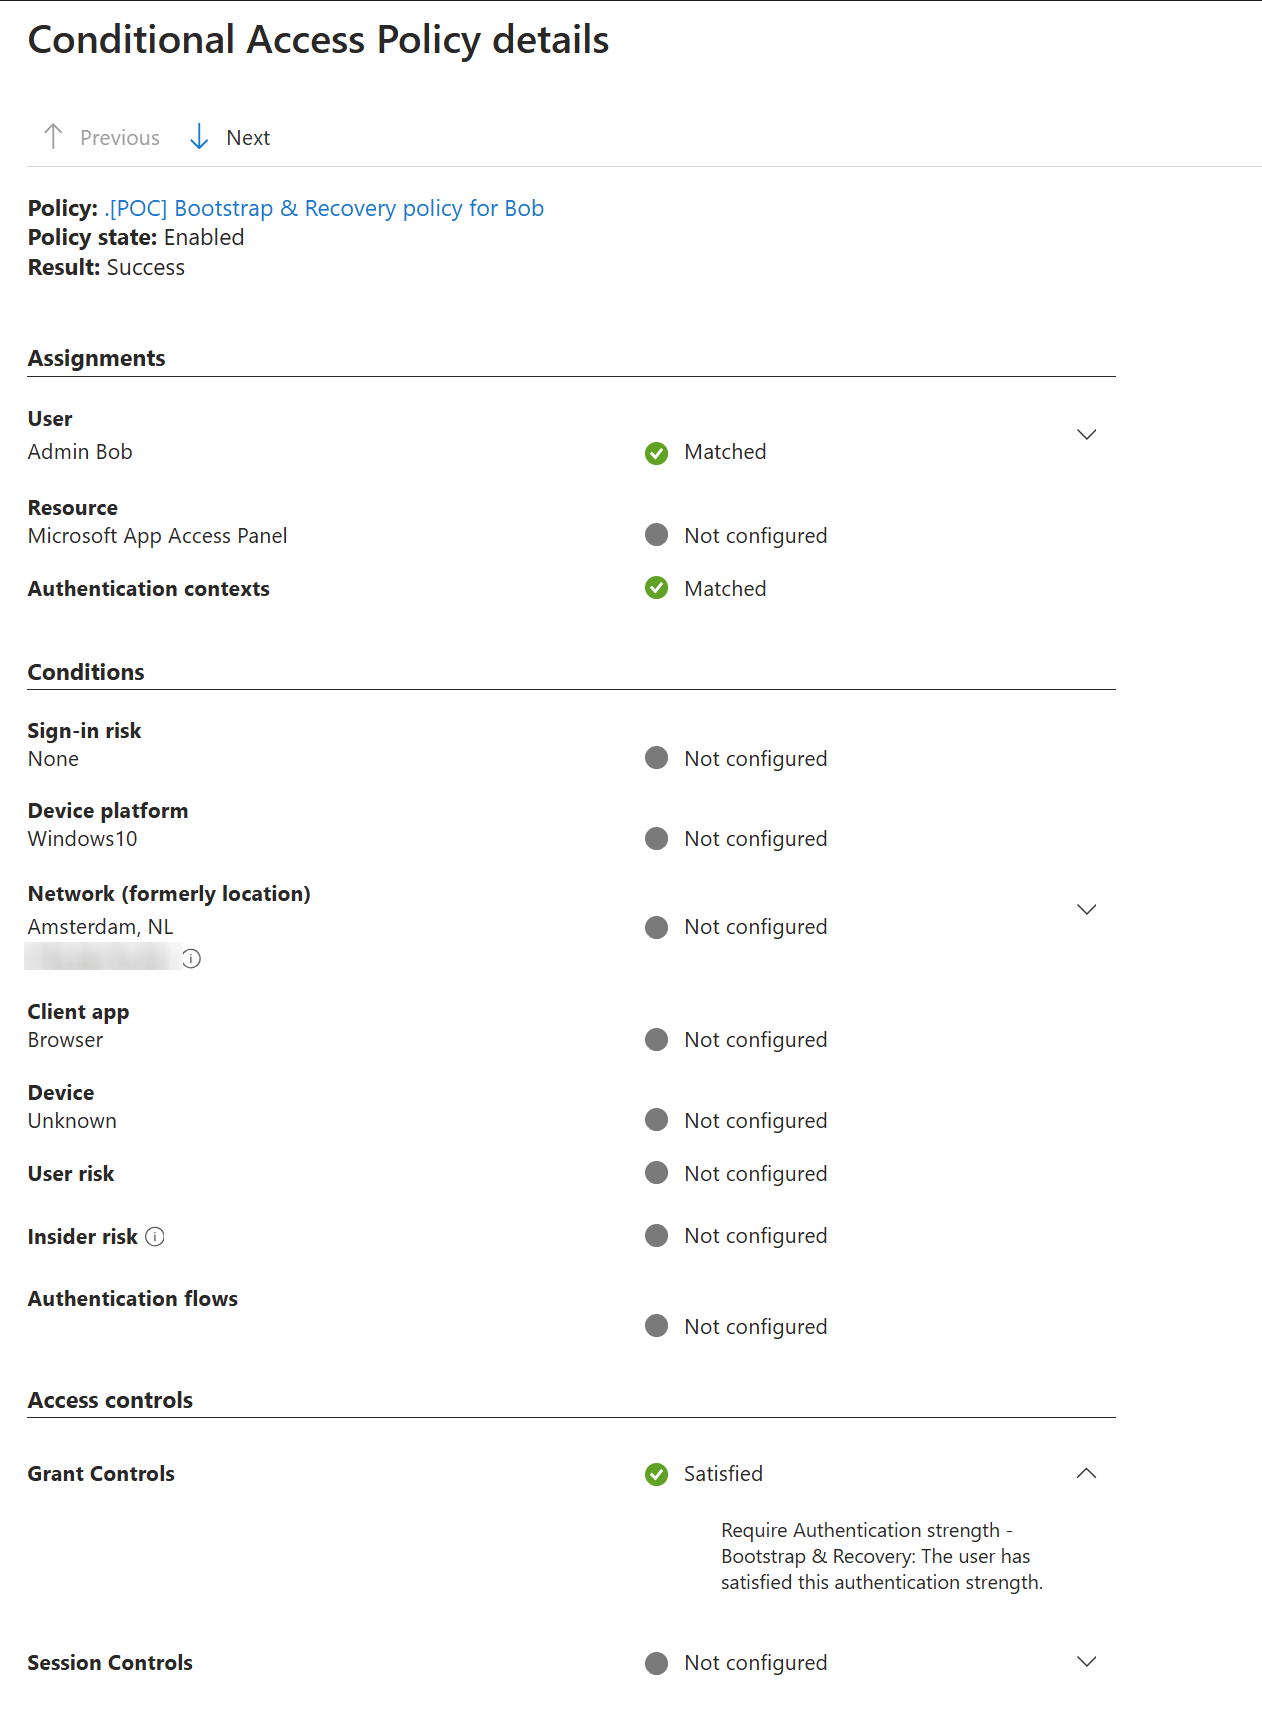
| .[POC] Bootstrap & Recovery policy | Register security information | N/A. | Password + Microsoft Authenticator (Push Notification) OR Temporary Access Pass (One-time use) OR Temporary Access Pass (Multi-use) | N/A. |
| .[POC] Secure Desktop Apps | All resources | Exclude: iOS Android | Passkeys (FIDO2)* | Microsoft Authenticator (iOS) Microsoft Authenticator (Android) |
| .[POC] Secure Mobile Apps | All resources | Include: iOS Android | Passkeys (FIDO2) OR Temporary Access Pass (One-time use) OR Temporary Access Pass (Multi-use) | Microsoft Authenticator (iOS) Microsoft Authenticator (Android) |
*Optionally, allow any phishing-resistant method you prefer, like Windows Hello for Business
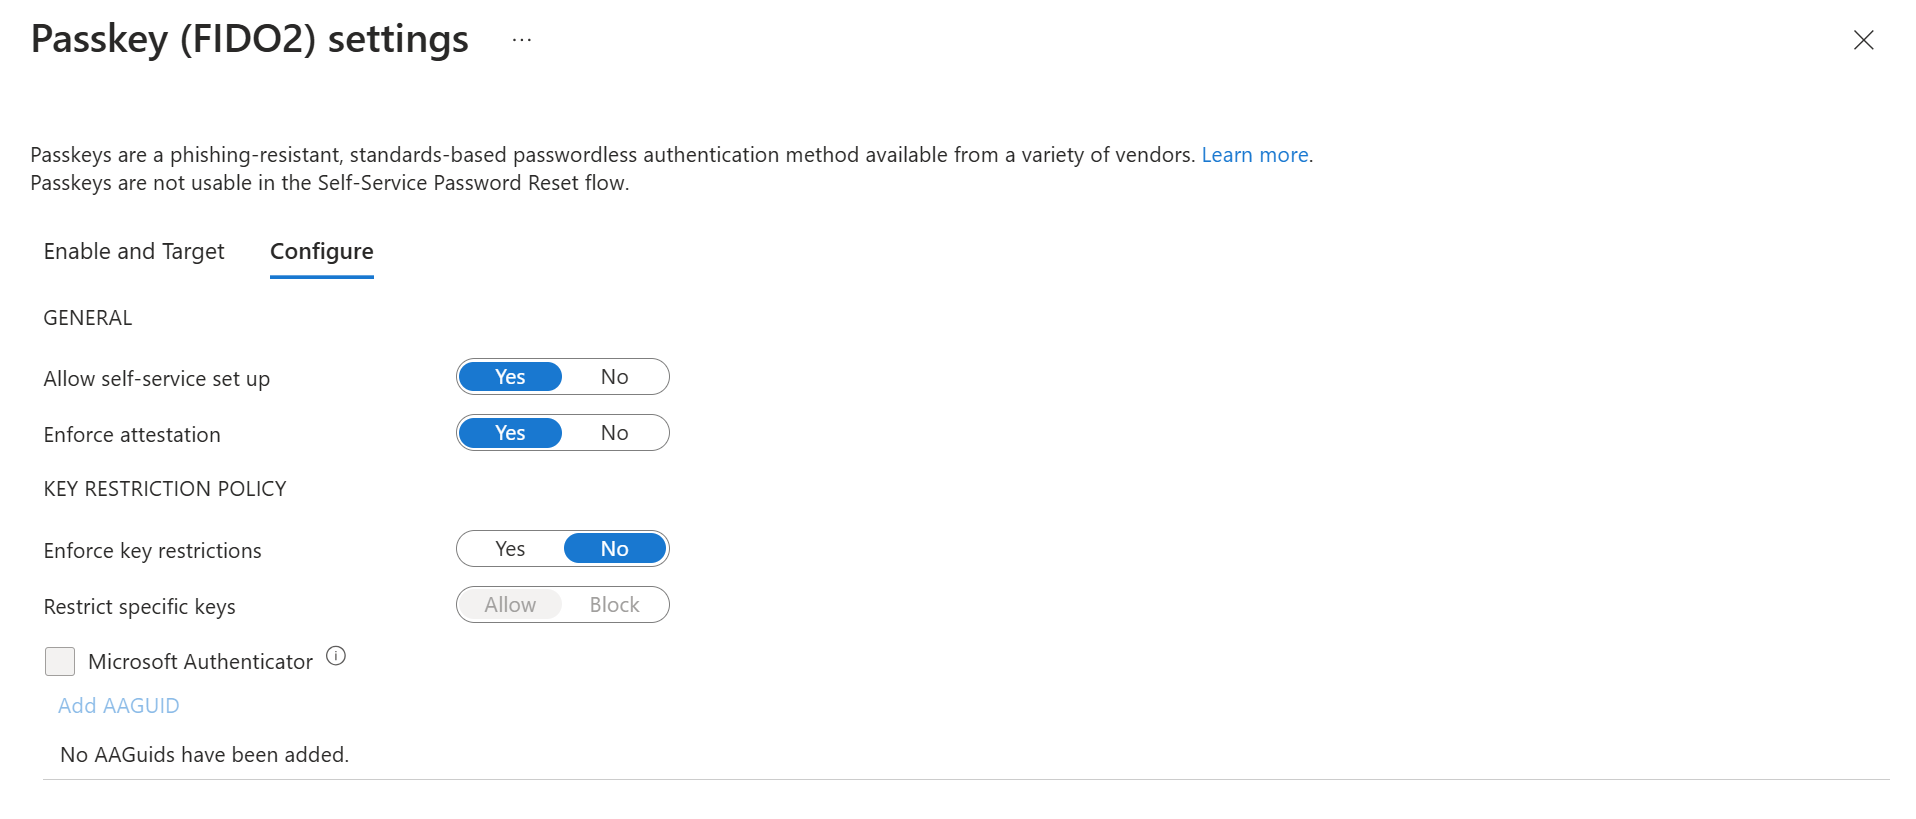
Entra ID settings for passkey (FIDO2)#
| Setting | Value |
|---|---|
| Allow self-service set up | Yes |
| Enforce attestation | Yes* |
| Enforce key restrictions | No** |
*You can disable attestation, so cross-device enrollment will also work, but this is not a best practice.
**If needed, you can enforce key restriction to only allow specific keys, but make sure you tick the “Microsoft Authenticator” box, to allow passkeys in the Microsoft Authenticator app.
End-user experience#
For my end-user experience, I tested different flows, but in general, I use either a Temporary Access Pass or an existing MFA method to enroll a new passkey or upgrade to a passkey in the Microsoft Authenticator app. The Temporary Access Pass is multi-use, as I found too many loops when using single-use TAP. I use push notifications in Microsoft Authenticator for the existing method, which is very common in many scenarios.
All browser tests have been done in guest or in-private mode.
| Operating System | Browser/App | Auth method | Policy result |
|---|---|---|---|
| Windows 11 24H2 | Microsoft Edge | TAP | Passkey successfully created |
| Windows 11 24H2 | Microsoft Edge | Password + Push | Passkey successfully created |
| Windows 11 24H2 | Google Chrome | TAP | Passkey successfully created |
| Windows 11 24H2 | Google Chrome | Password + Push | Passkey successfully created |
| iOS 18.4 | Microsoft Authenticator App | TAP | Passkey successfully created |
| iOS 18.4 | Microsoft Authenticator App | Password + Push | Passkey successfully created after re-authentication with password + push MFA |
| iOS 18.4 | Safari | Password + Push | Not prompted for passkey registration. Passkey creation failed (attestation enabled) |
| macOS | Microsoft Edge | Password + Push | Passkey successfully created |
For the best user experience, create the passkey from the Authenticator App directly.
To have an idea of the registration flow from desktop, here is a video of the entire flow:
Wrap up#
Migrating to phishing-resistant MFA like passkeys is not an easy job at the moment. Yet, it is important to start rolling out passkeys for your end-users, and although the process might not be as smooth as you would like, it is important to start with your most privileged accounts. This will get you experienced and ready for a bigger rollout.
Hopefully, this post will help you get the smoothest flow for your end users.
Please reach out to the official documentation on Microsoft Learn for the most accurate information about passkey registration:
Register passkeys in Authenticator on Android and iOS devices - Microsoft Entra ID | Microsoft Learn
It’s also good to understand how Conditional Access Authentication Strengths work:
Overview of how Microsoft Entra authentication strength works in a Conditional Access policy - Microsoft Entra ID | Microsoft Learn
If you’re stuck, always start with your sign-in logs in Entra ID, which might tell you exactly what’s happening.
For now, good luck on your passkey adventure!
Stay safe!