
Use Power Automate for your custom "dynamic" groups
On this page
Azure AD Dynamic Groups#
Dynamic groups in Azure AD are awesome. I use them a lot. Dynamic groups can create groups based on attributes. For example, you can create a group that includes all the users from the Sales Team. The query for the group would look like this:
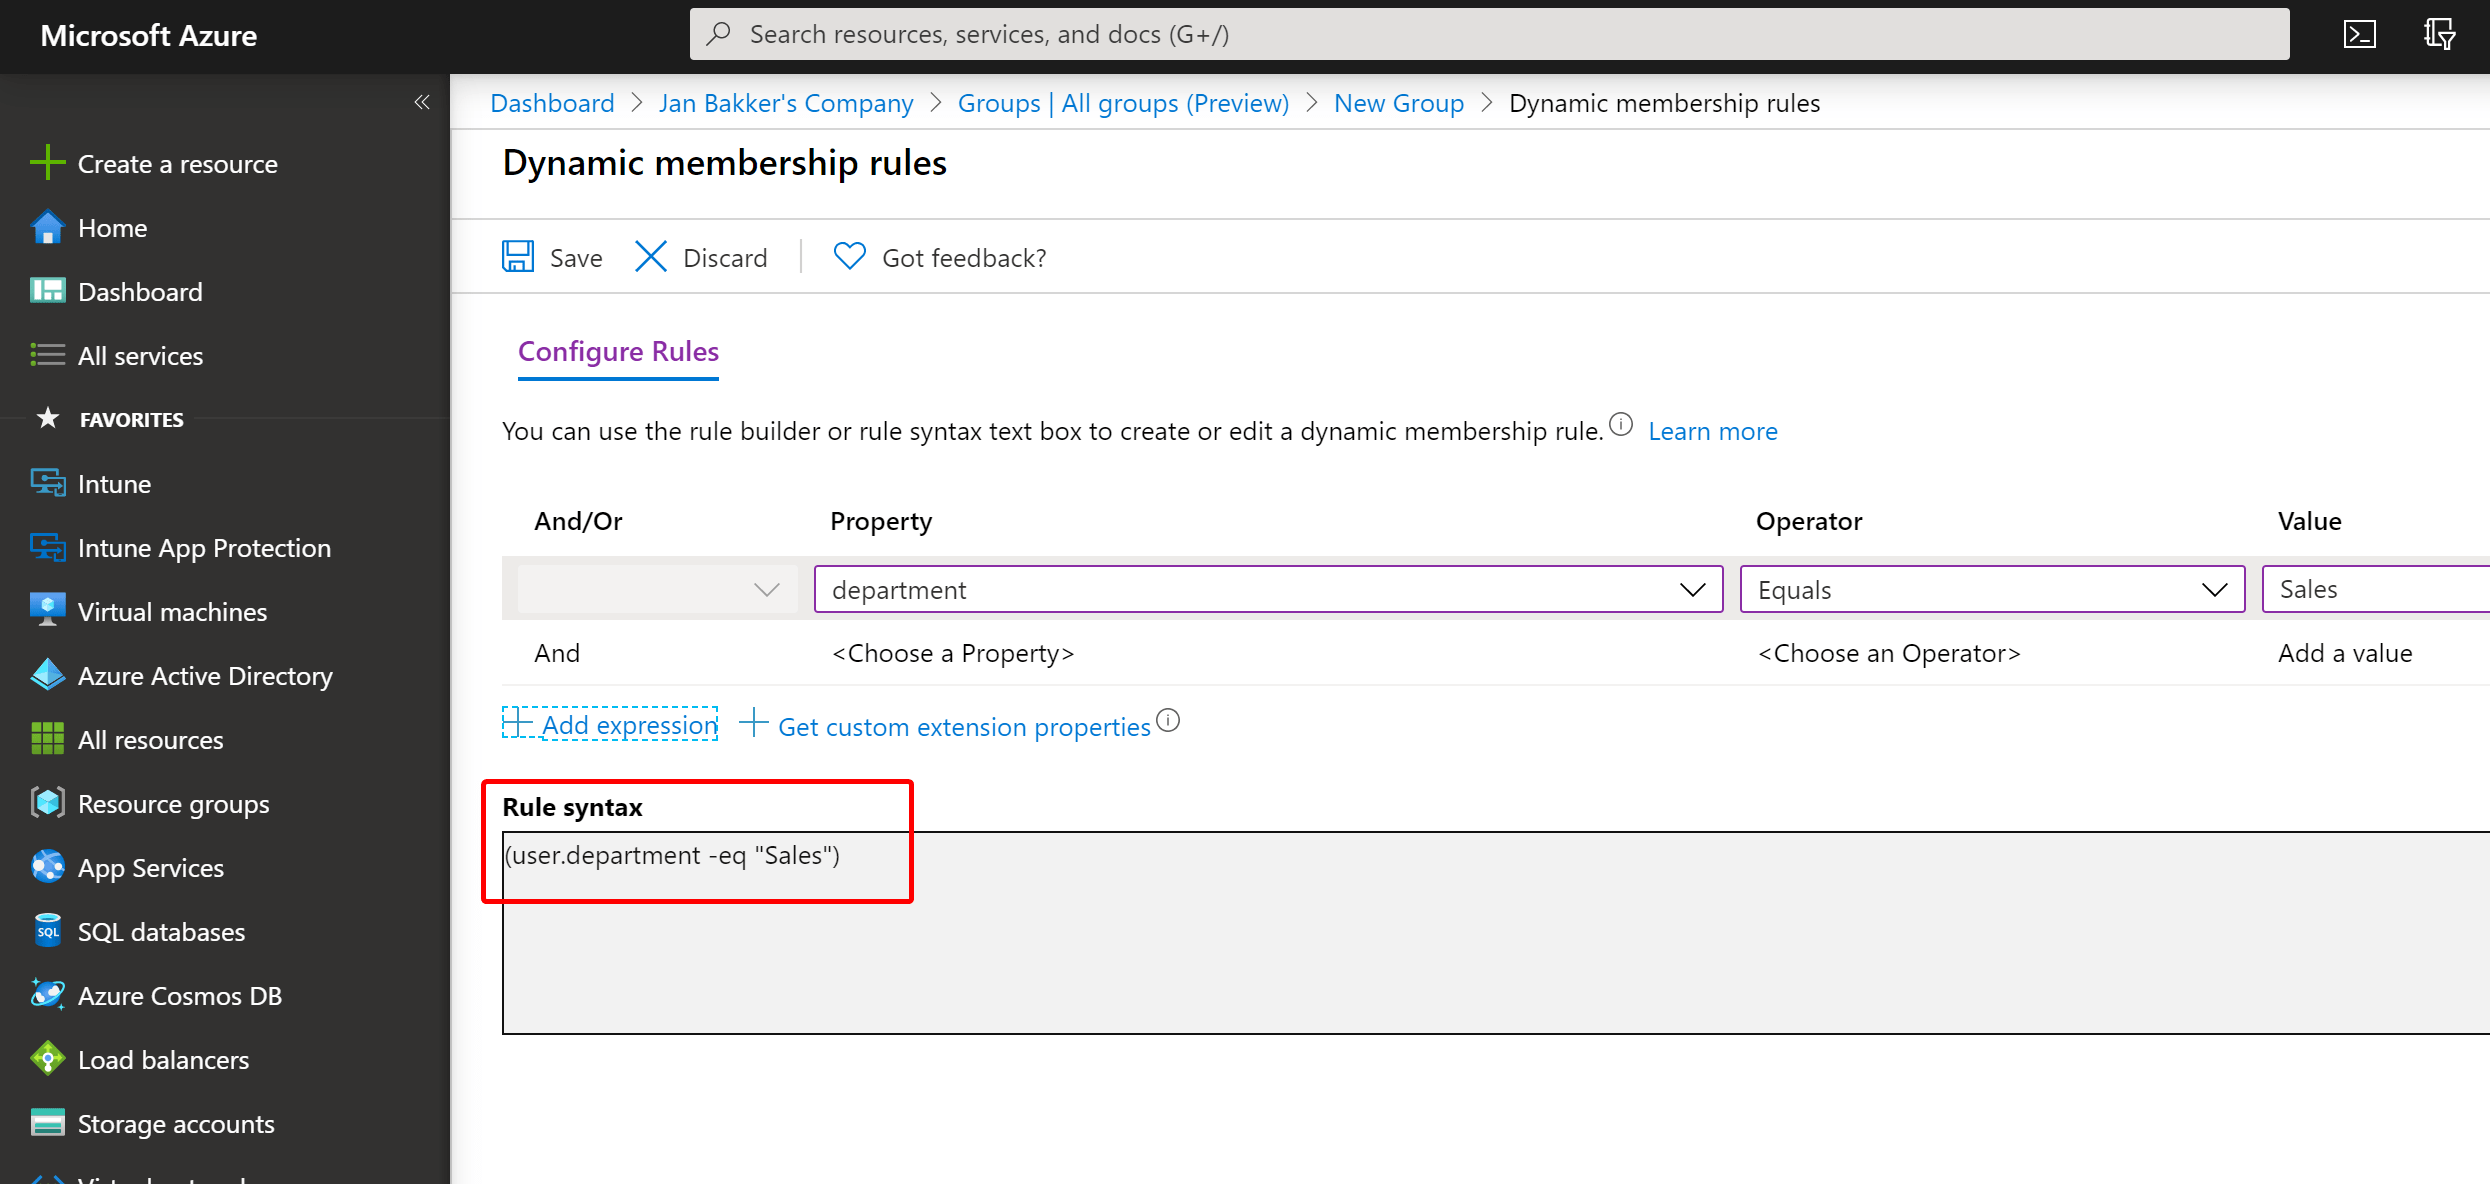
If a new user comes along with the same attribute, the user will automatically be added to this group. This can be really helpful for onboarding.
You can pick a lot of attributes, and you can create rules with multiple expressions or even custom extension properties are supported. Check the Microsoft docs that you can do with Azure AD Dynamic groups.
So, what’s the problem here?#
But what if you want to create a dynamic group, based on an attribute that’s not that easy to find? I stumbled upon this Uservoice and that got me thinking. Can I create a group based on the StrongAuthenticationMethods values? At the time of writing, these values are only accessible through PowerShell or Graph API.
In this blog post, we are going to use Graph API to collect these values and we use Power Automate to create the Azure AD group. What we’ll end up with is a “dynamic” group, containing all the MFA registered users in your Azure AD tenant, both synced and cloud-only accounts. Depending on your recurring value, the group is updated periodically.
I can imagine you are looking for the opposite: a group with all the users that did not register for MFA. I’ll get to that later.
I use the credentialUserRegistrationDetails API. This will give me the following values:
{
      "id" : "id-value",
      "userPrincipalName":"userPrincipalName",
      "userDisplayName": "userDisplayName-value",
      "authMethods": ["email", "mobileSMS"],
      "isRegistered" : false,
      "isEnabled" : true,
      "isCapable" : false,
      "isMfaRegistered" : true
    }
Let’s dive right in#
So, what do you need?
- Power Automate subscription with premium connectors (or trial)
- Enough rights to create an app registration in Azure AD (+admin consent), create a security group and add members to it.
- A bunch of users registered for Azure MFA
Create the app registration#
In order to use the Graph API from Power Automate, we need proper rights. Therefore we create an app registration in Azure AD and give it the right permissions.
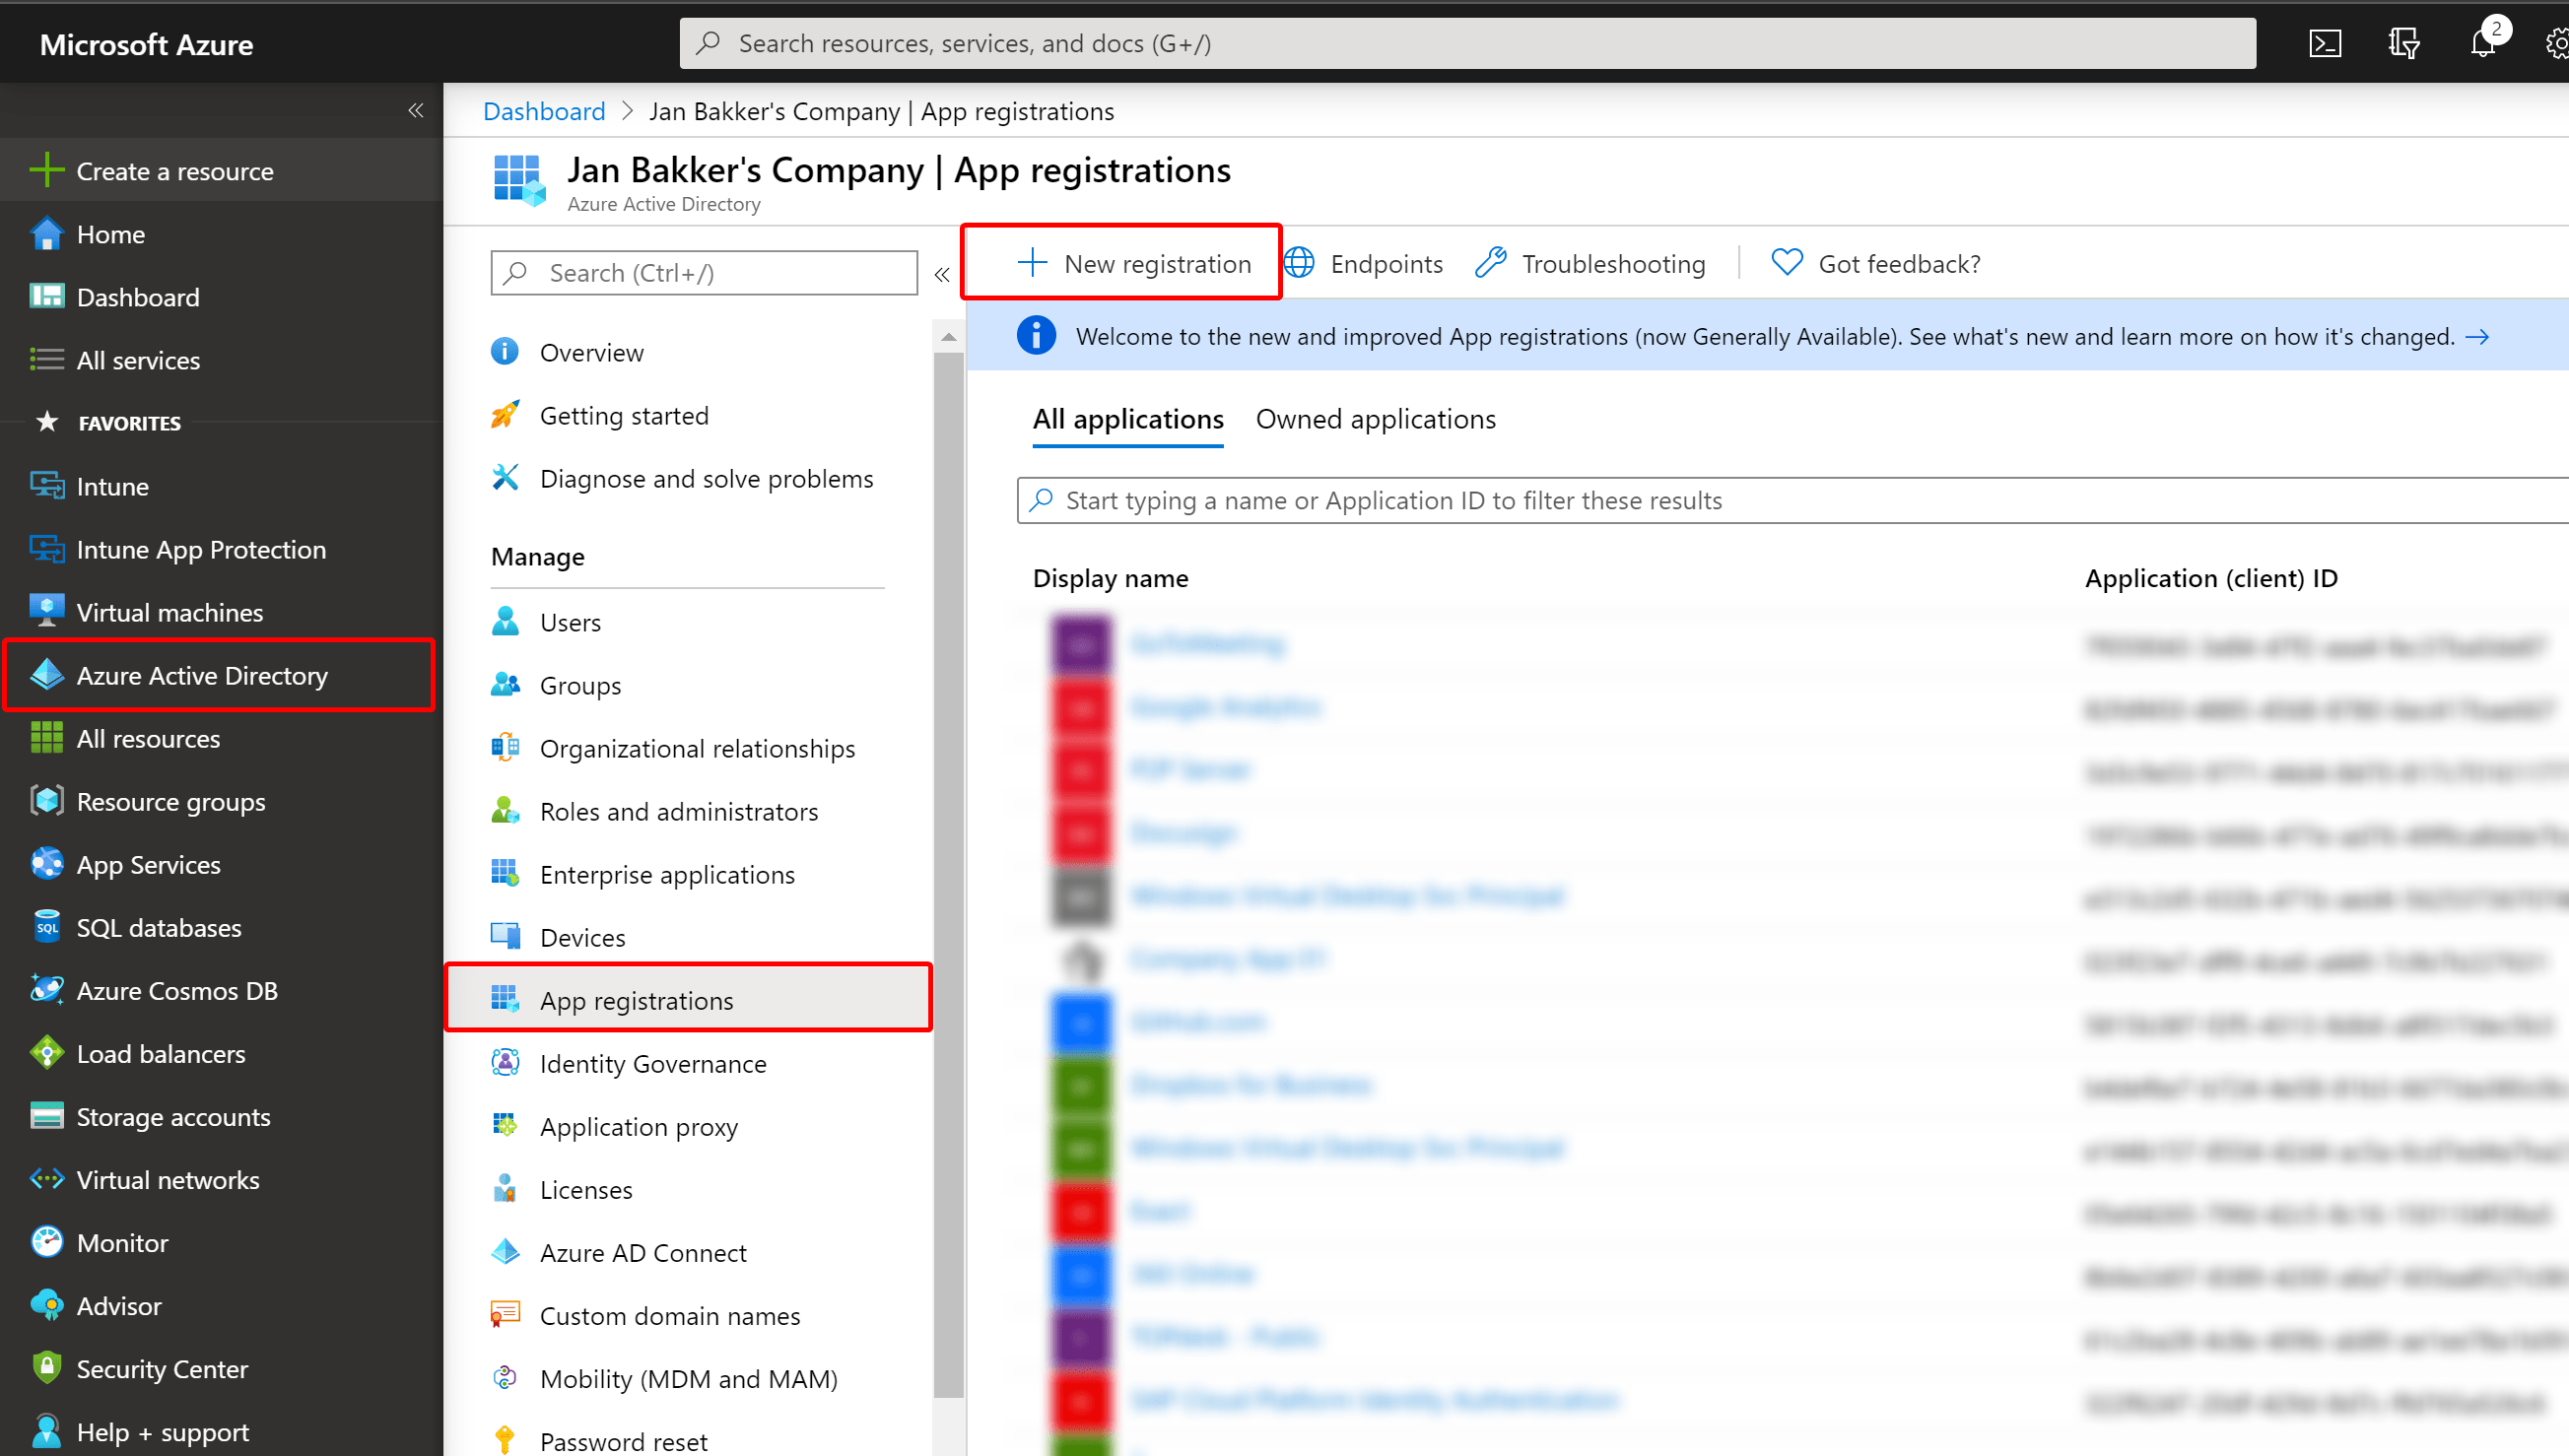
Go to Azure Active Directory -> App registrations and click the + New registration button.
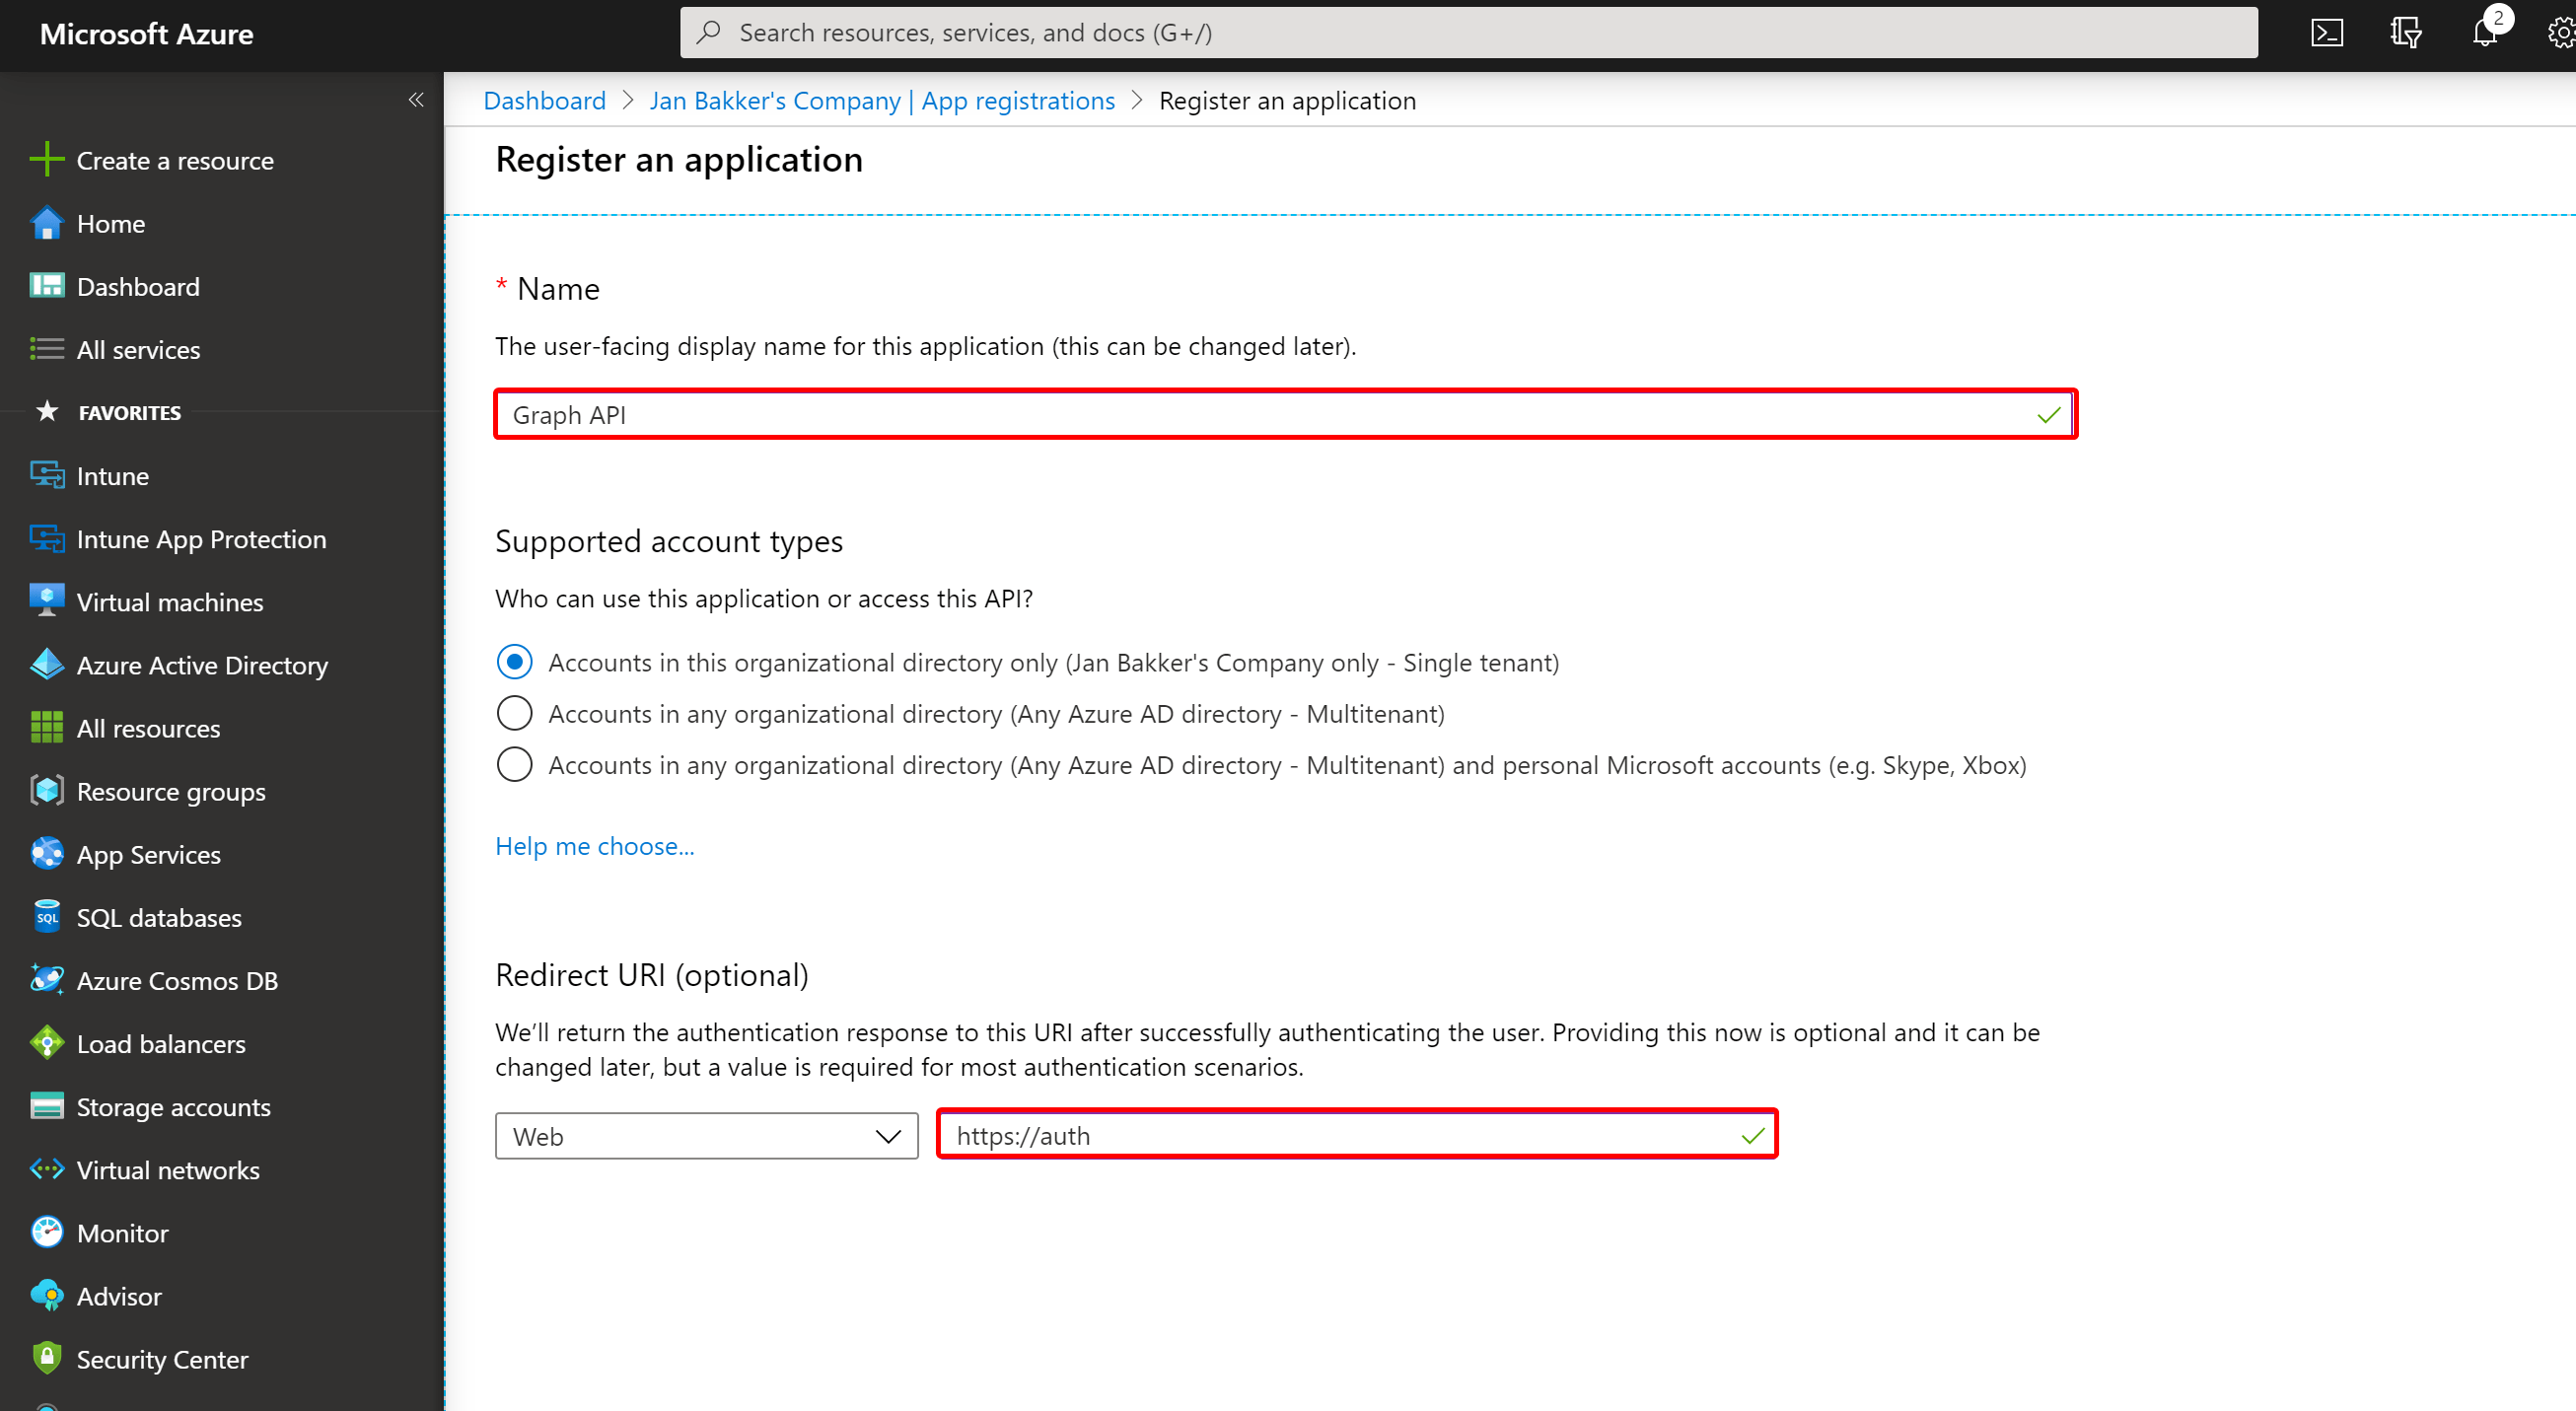
Next, give it a proper name, and fill the URL with the value https://auth
Once created, go to the API Permissions tab.
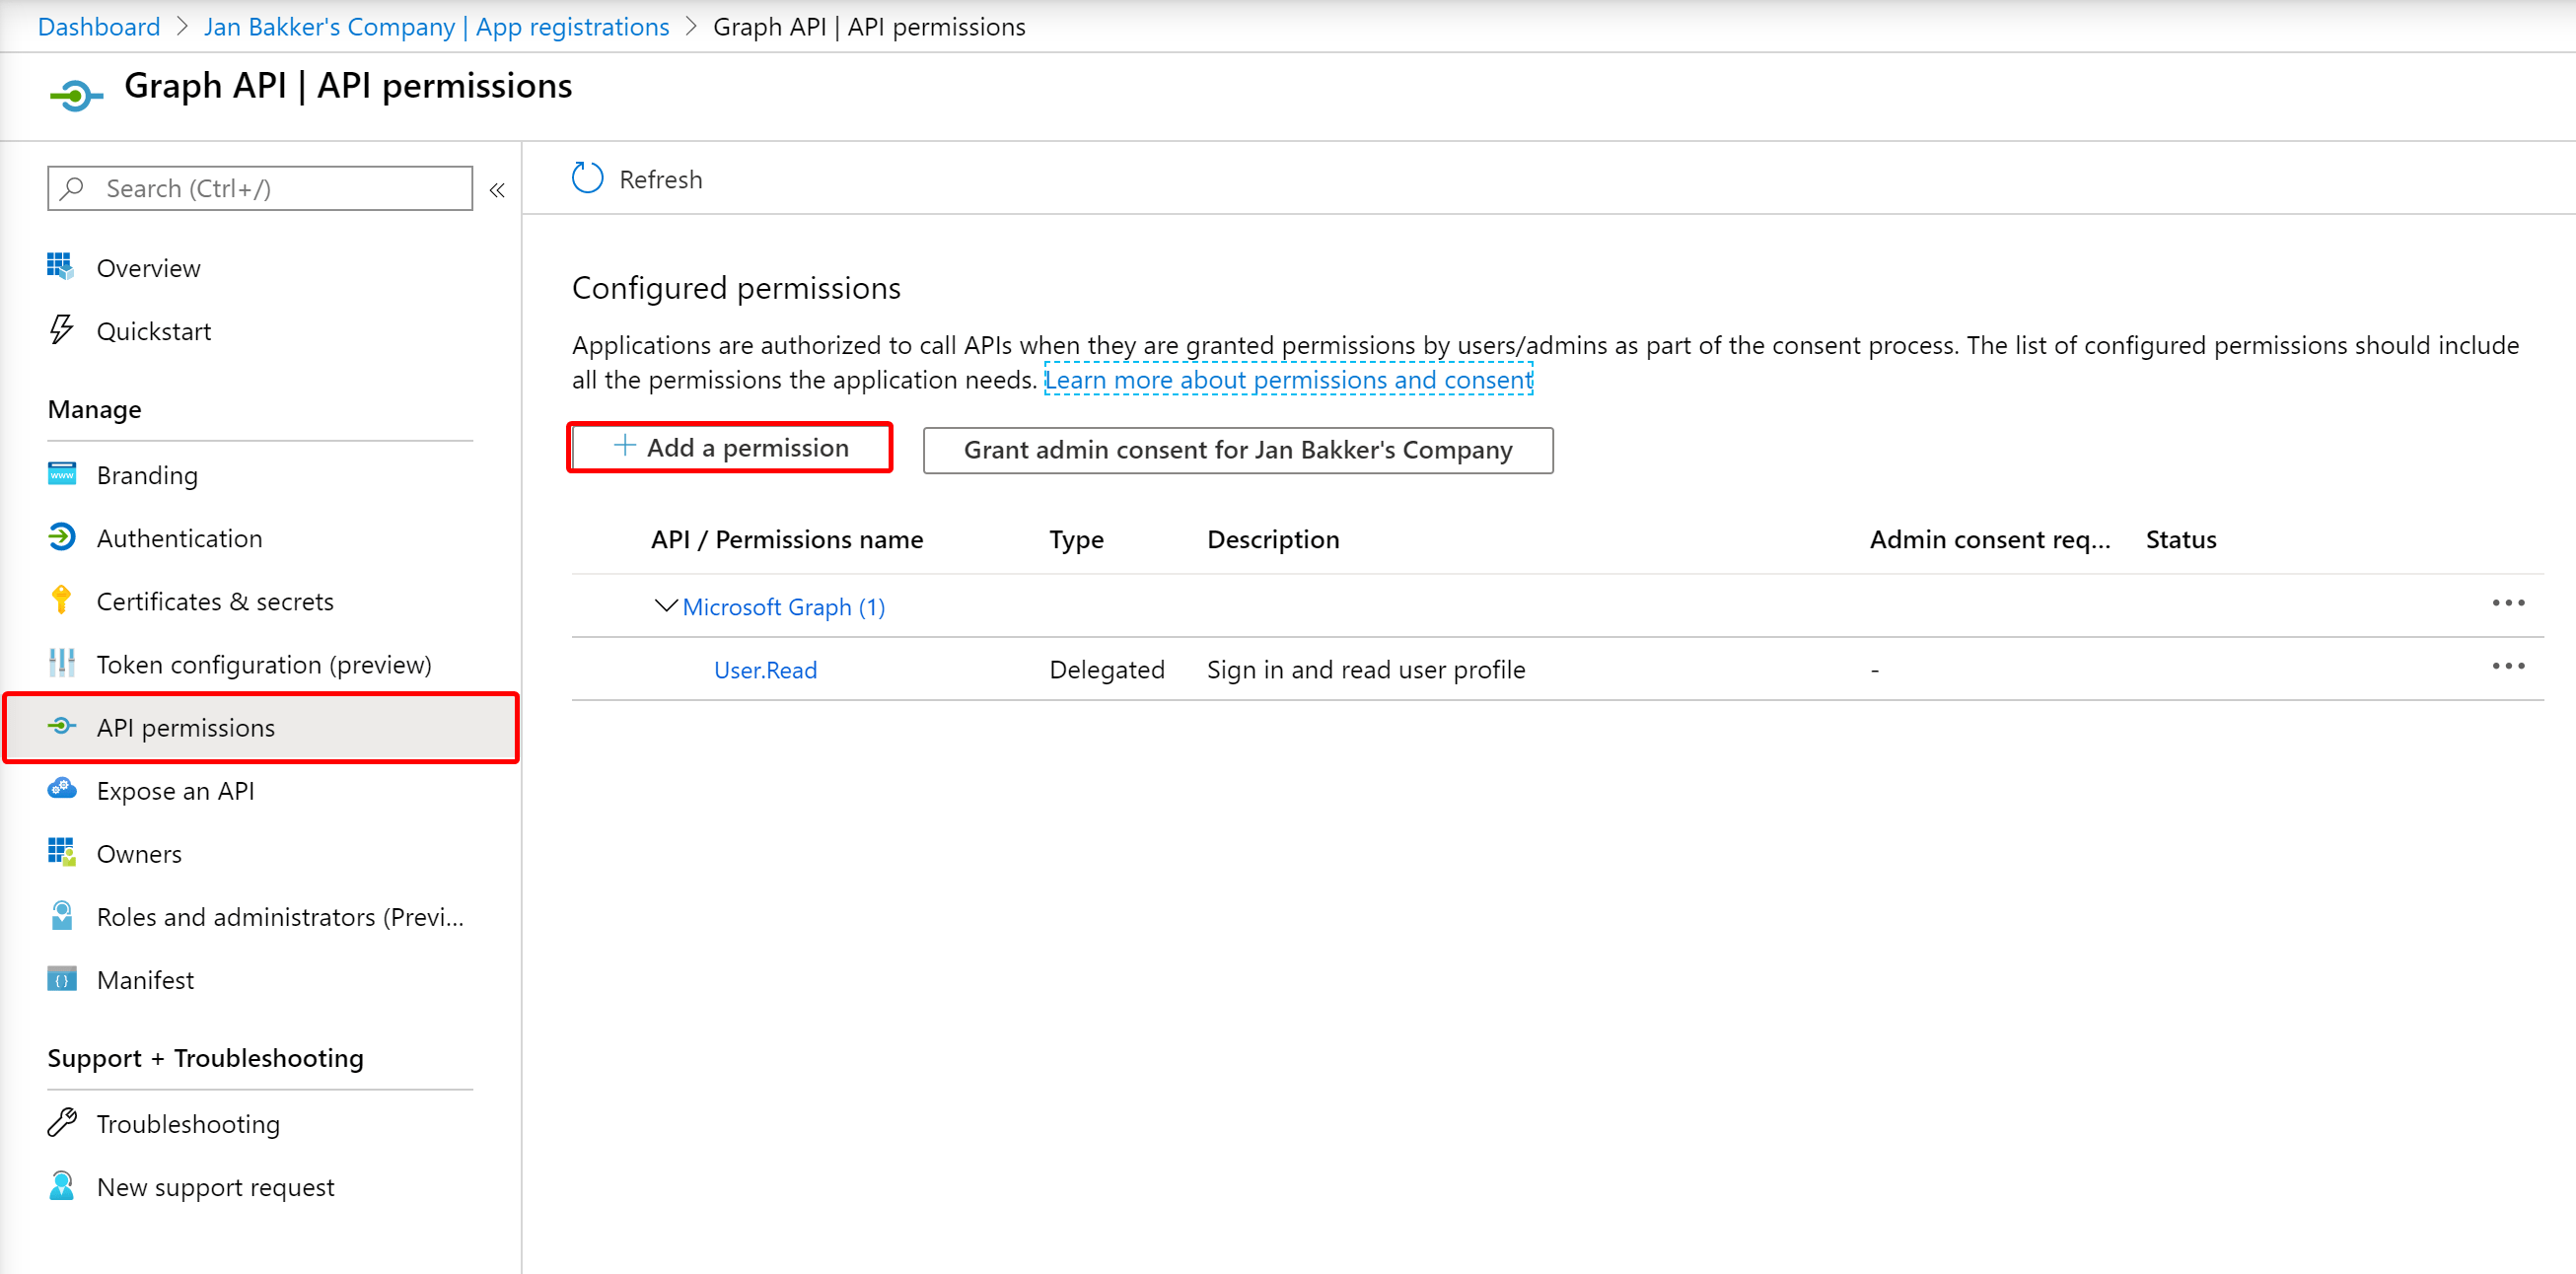
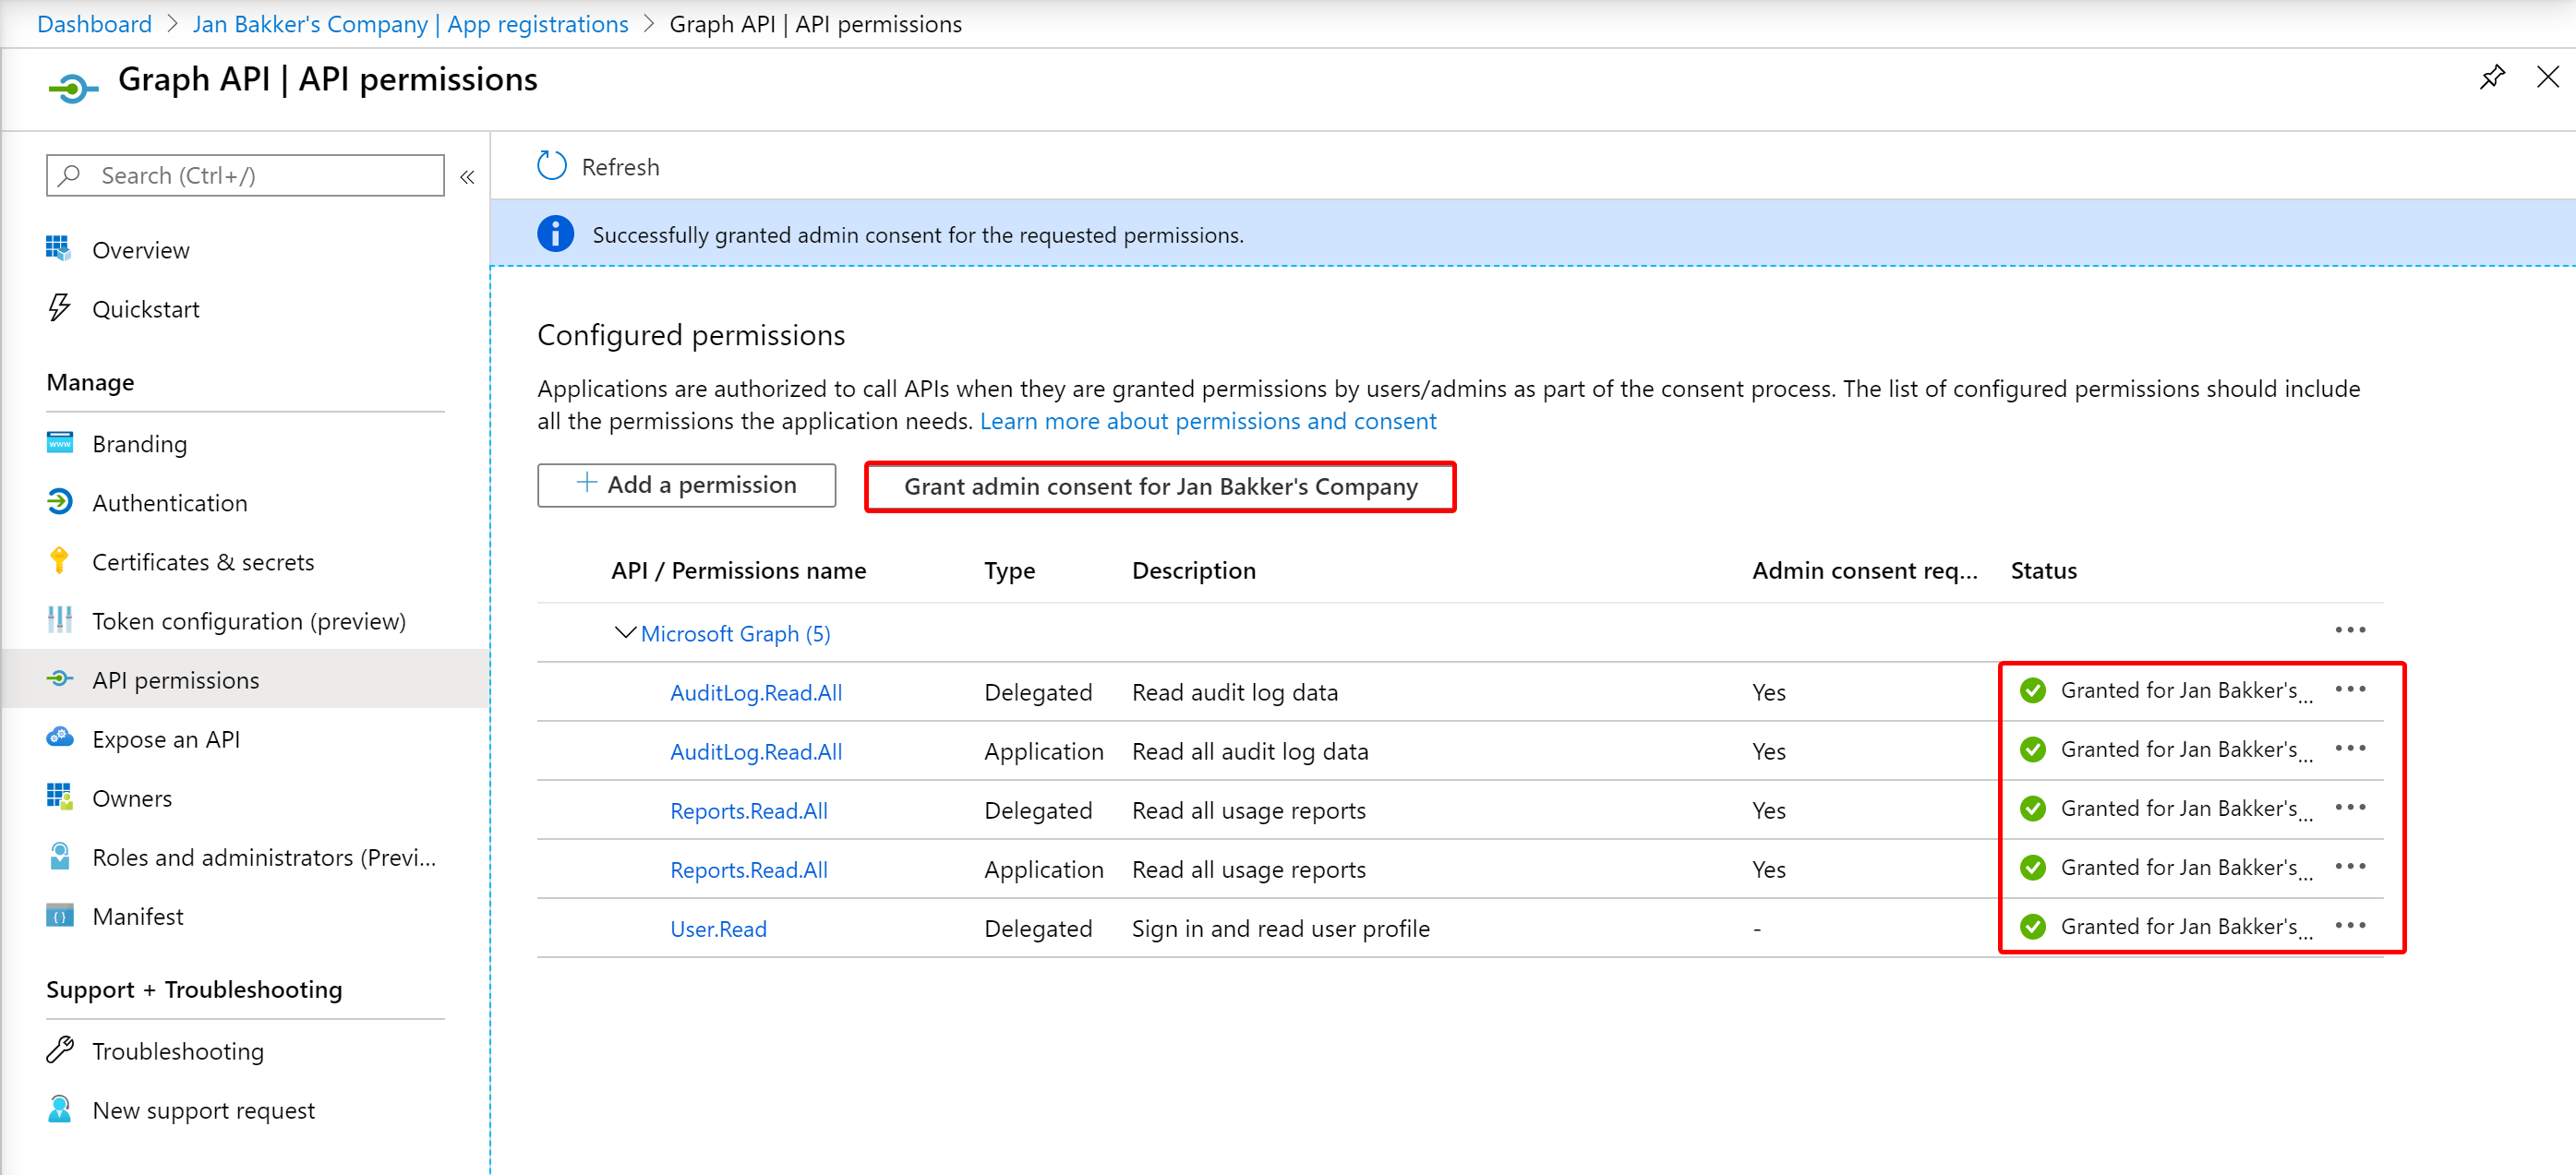
Add the following permissions for the Microsoft Graph:
| Permission type | Permissions |
|---|---|
| Delegated | Reports.Read.All |
| Application | Reports.Read.All |
| Delegated | Audit.Read.All * |
| Application | Audit.Read.All * |
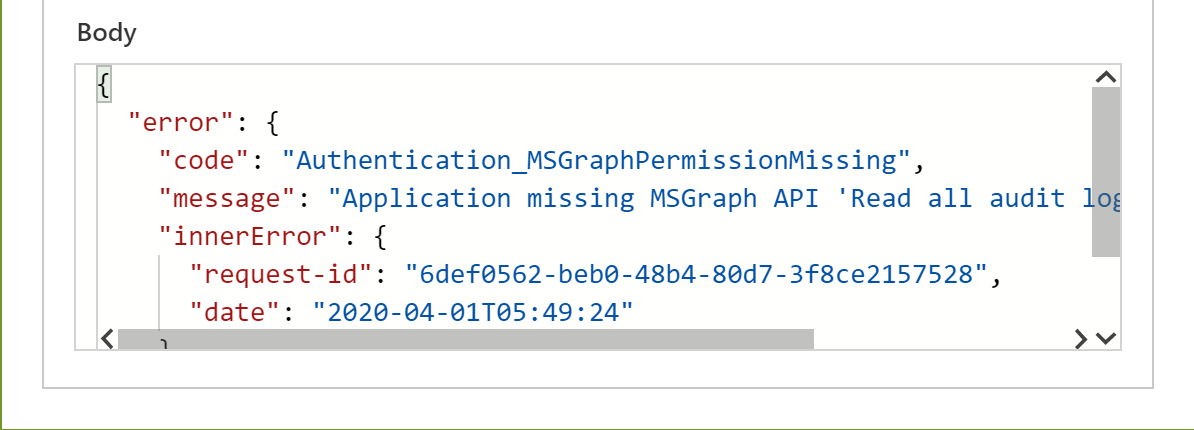
*At the time of writing, there is a bug in this API. You should temporarily add the Audit.Read.All permission (as well), otherwise you will not get the right permissions to call this API. You can check the current documentation on this for further information. If you just follow the documentation, you will end up with the following error:
When you added the permissions, grant admin consent
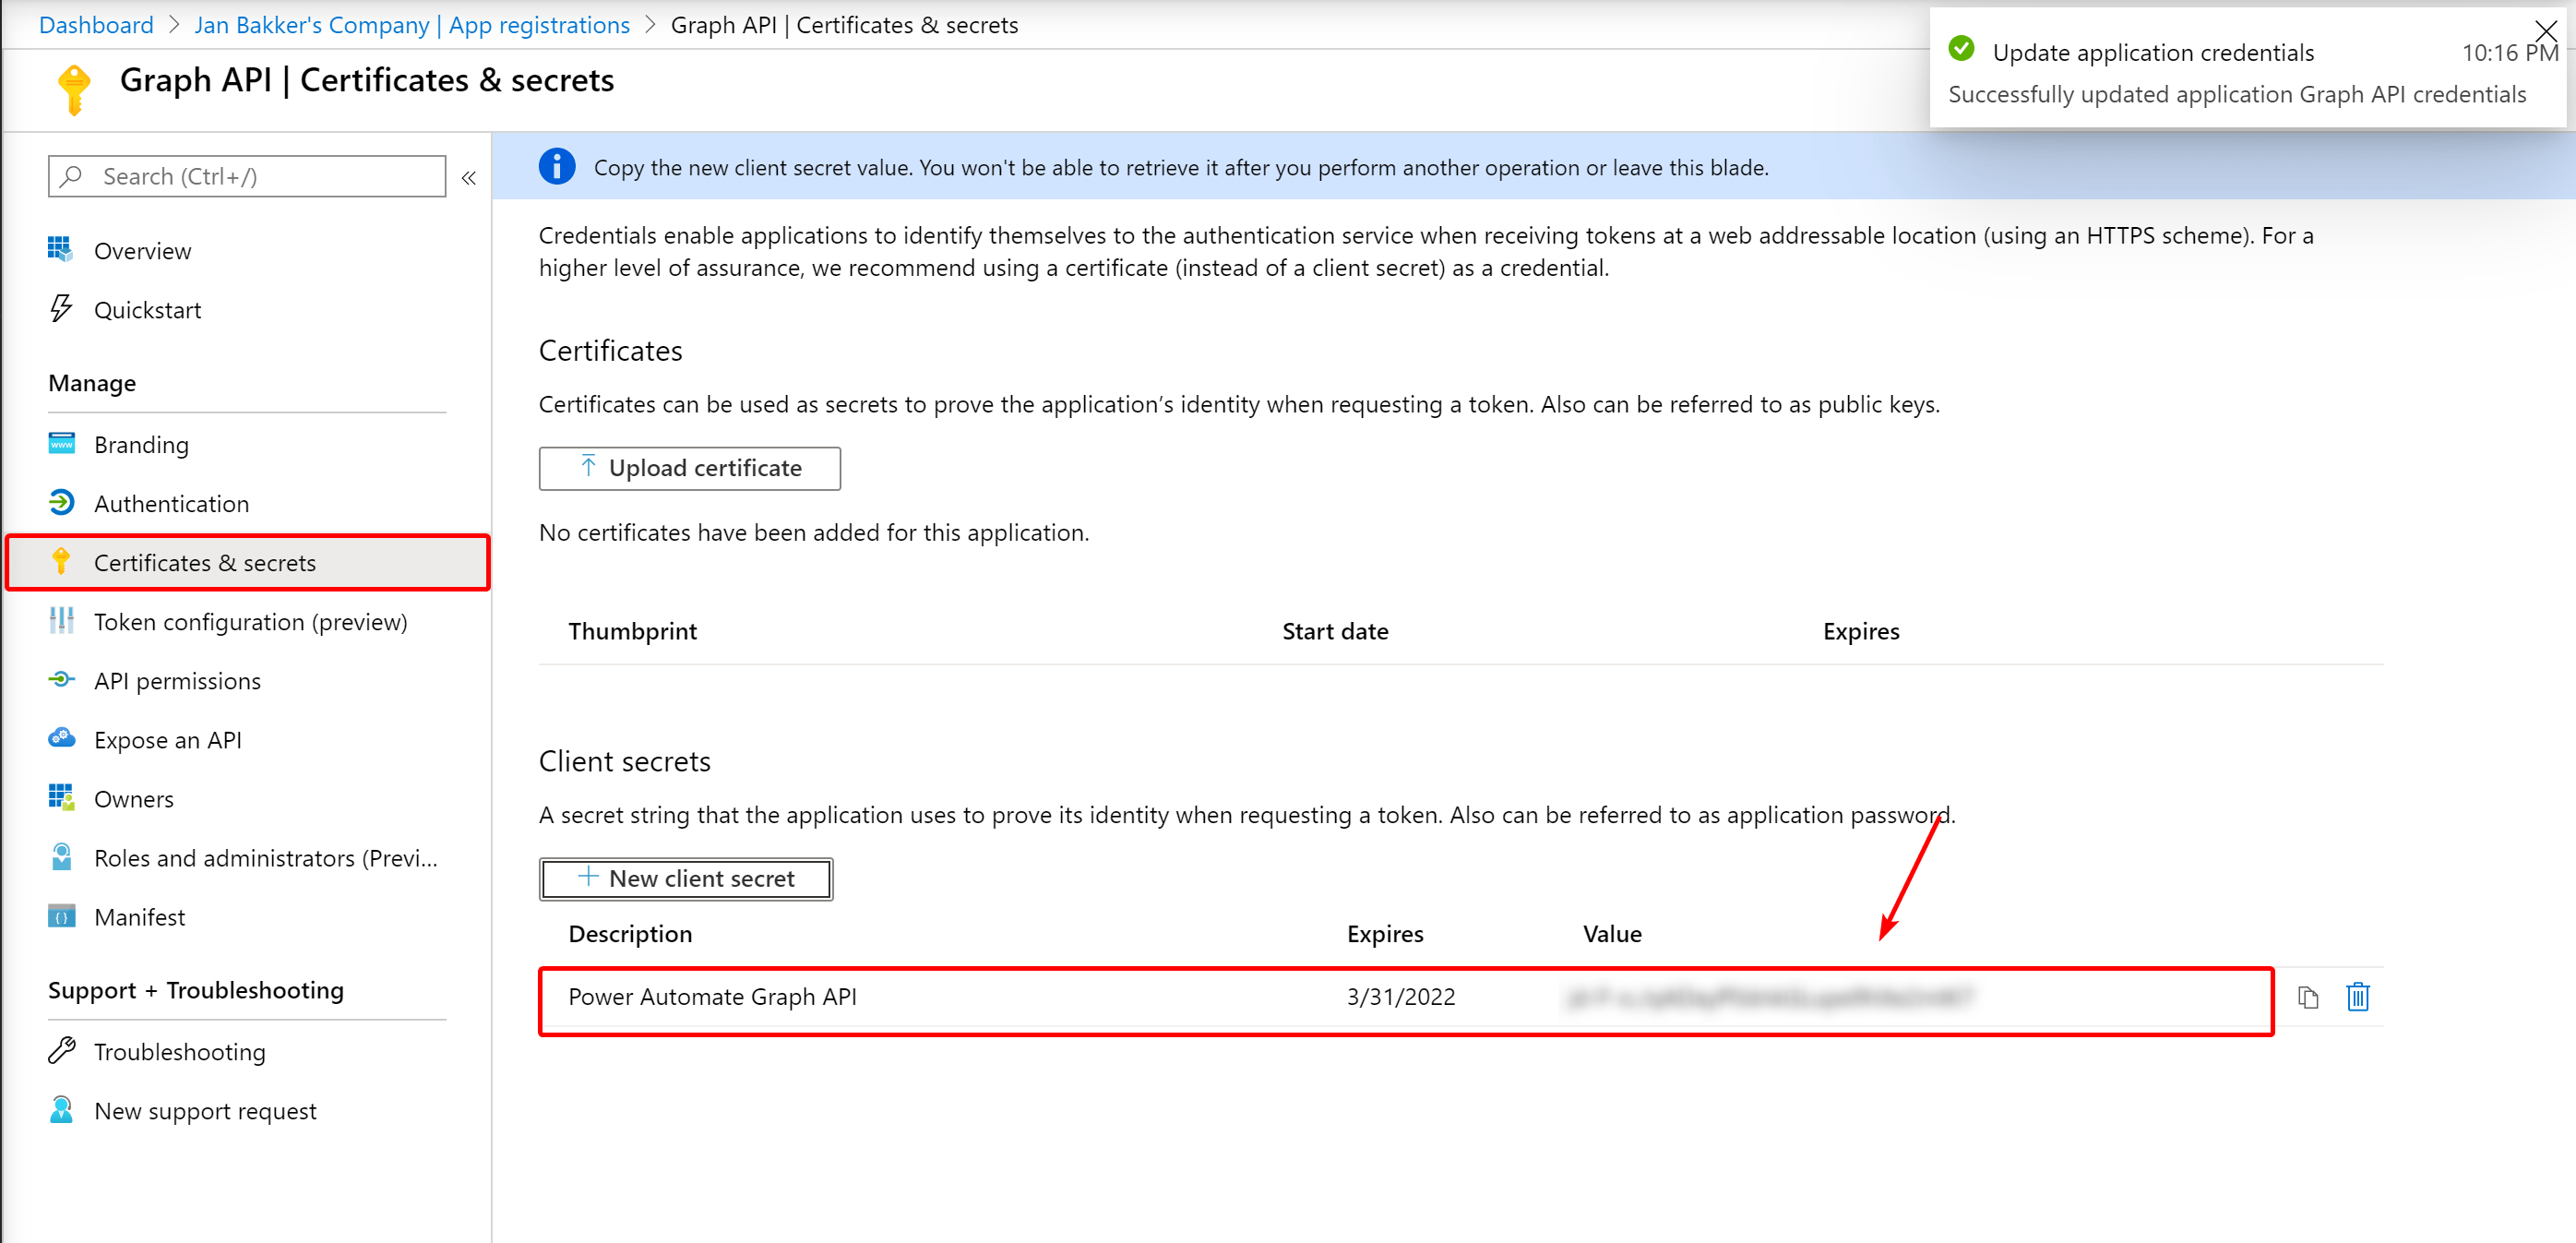
The last thing we need is a client secret. Go to the Certificates & secrets tab, create a new client secret. Copy the secret value, you’ll need it later on. Also, take note of the Tenant & Client ID on the Overview page.
Create the group#
Now that we have created the app registration in order to pull the data out of the Graph API, we need an Azure AD Group to put our users in.
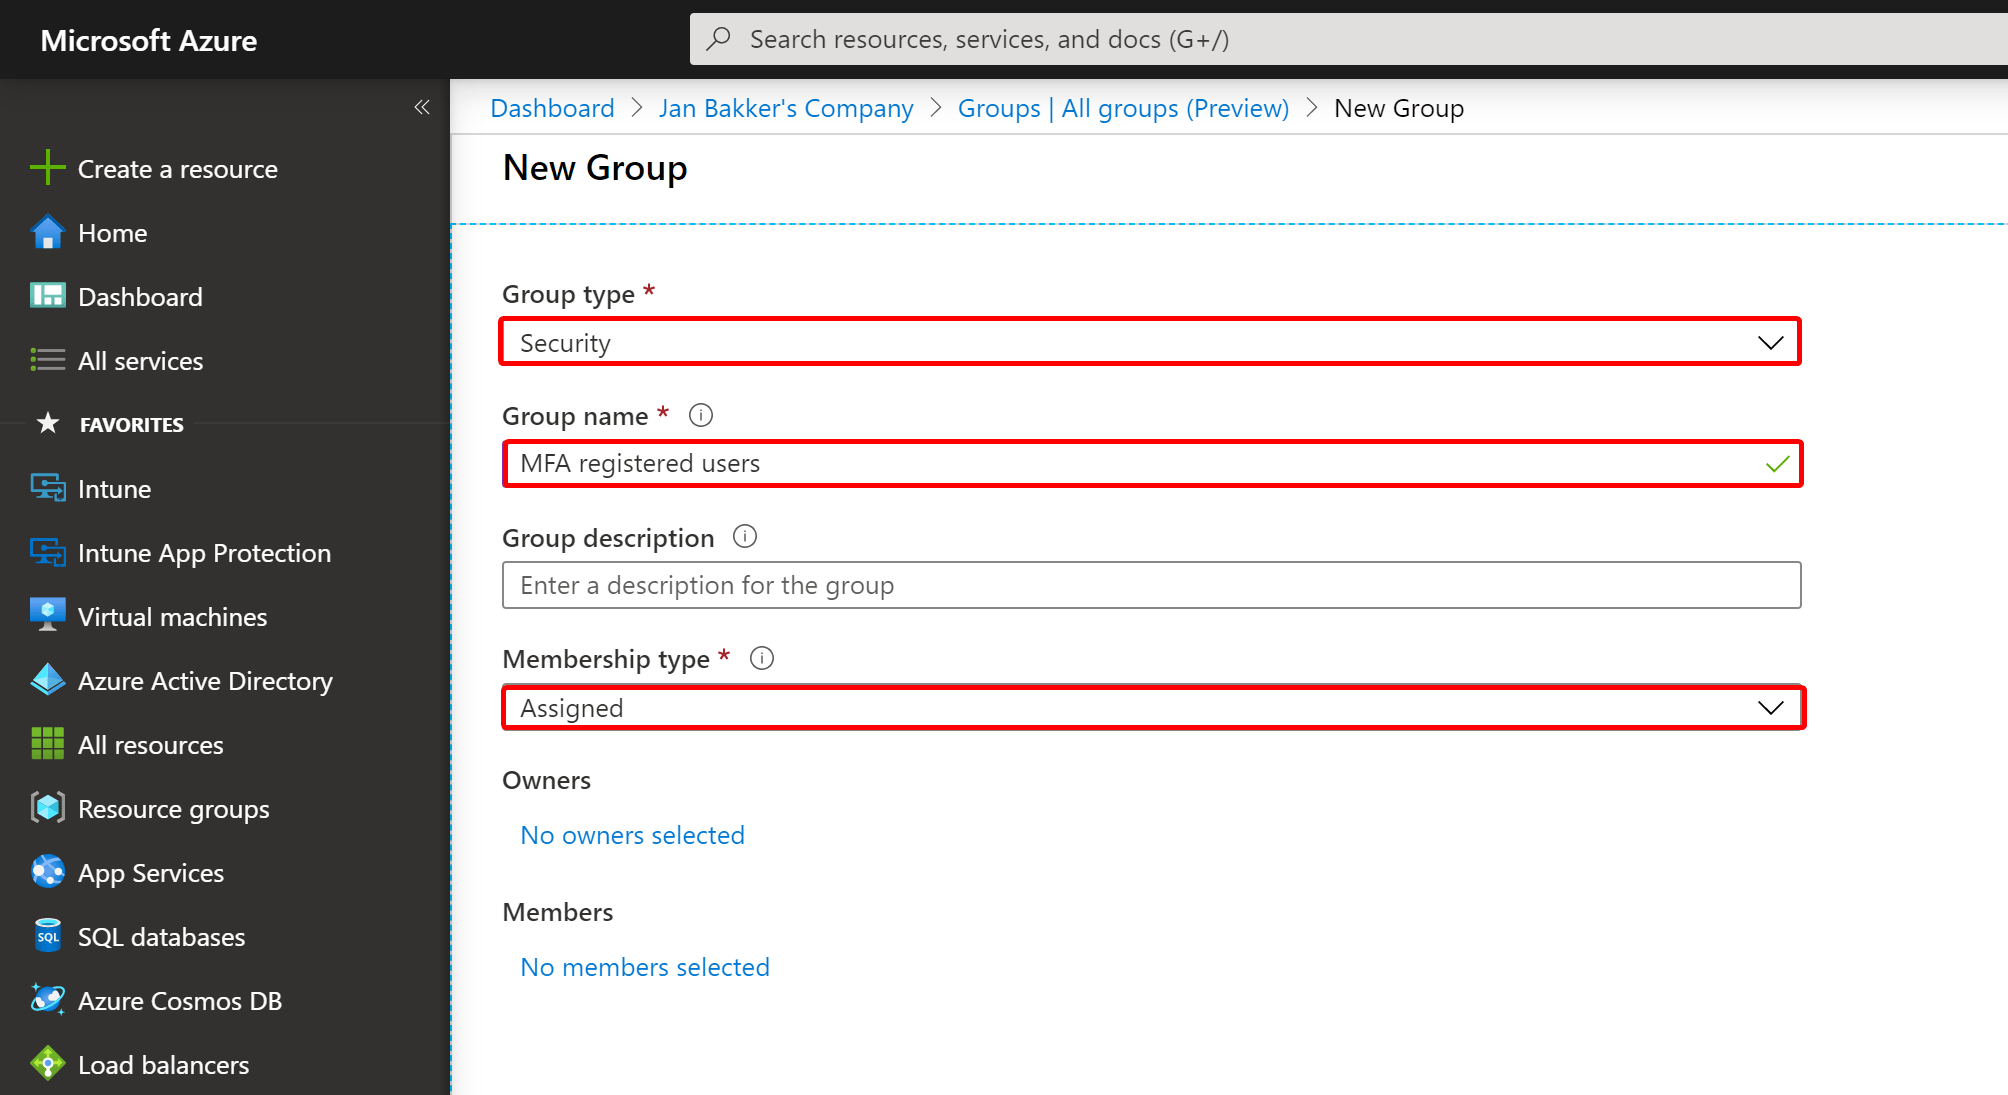
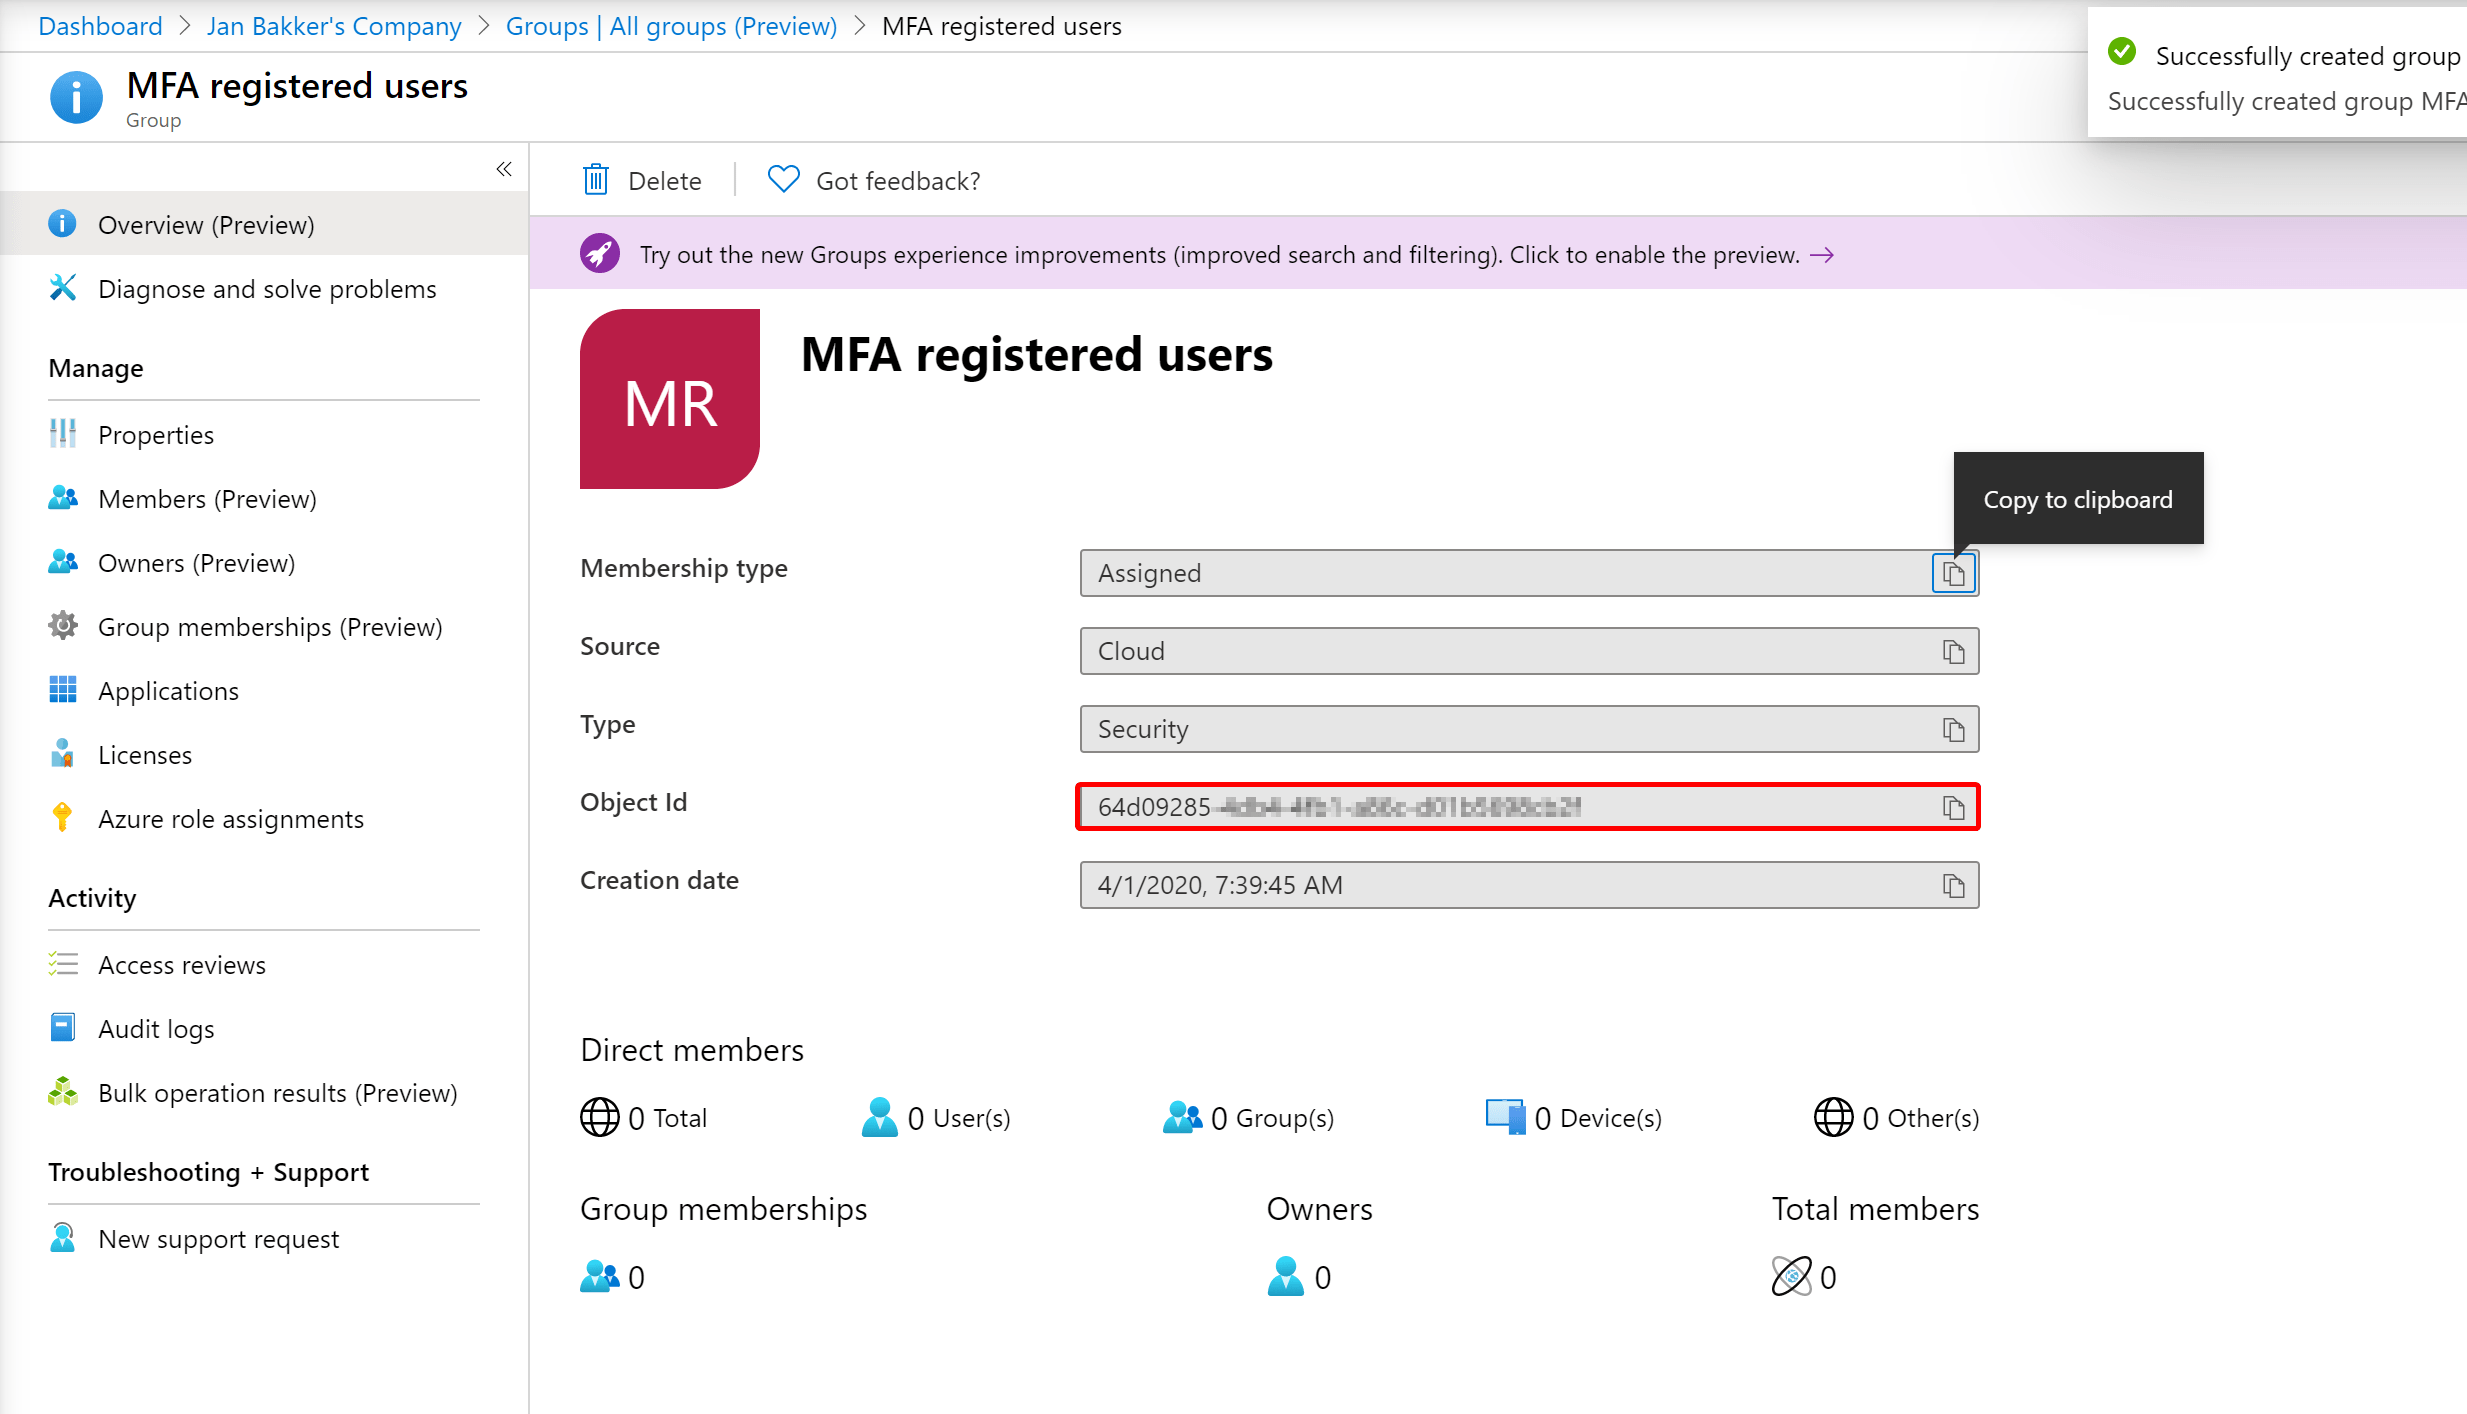
Created an Assigned Securitygroup in Azure AD and leave it as is. For later use, take note of the Object ID of the group.
Go with the Flow#
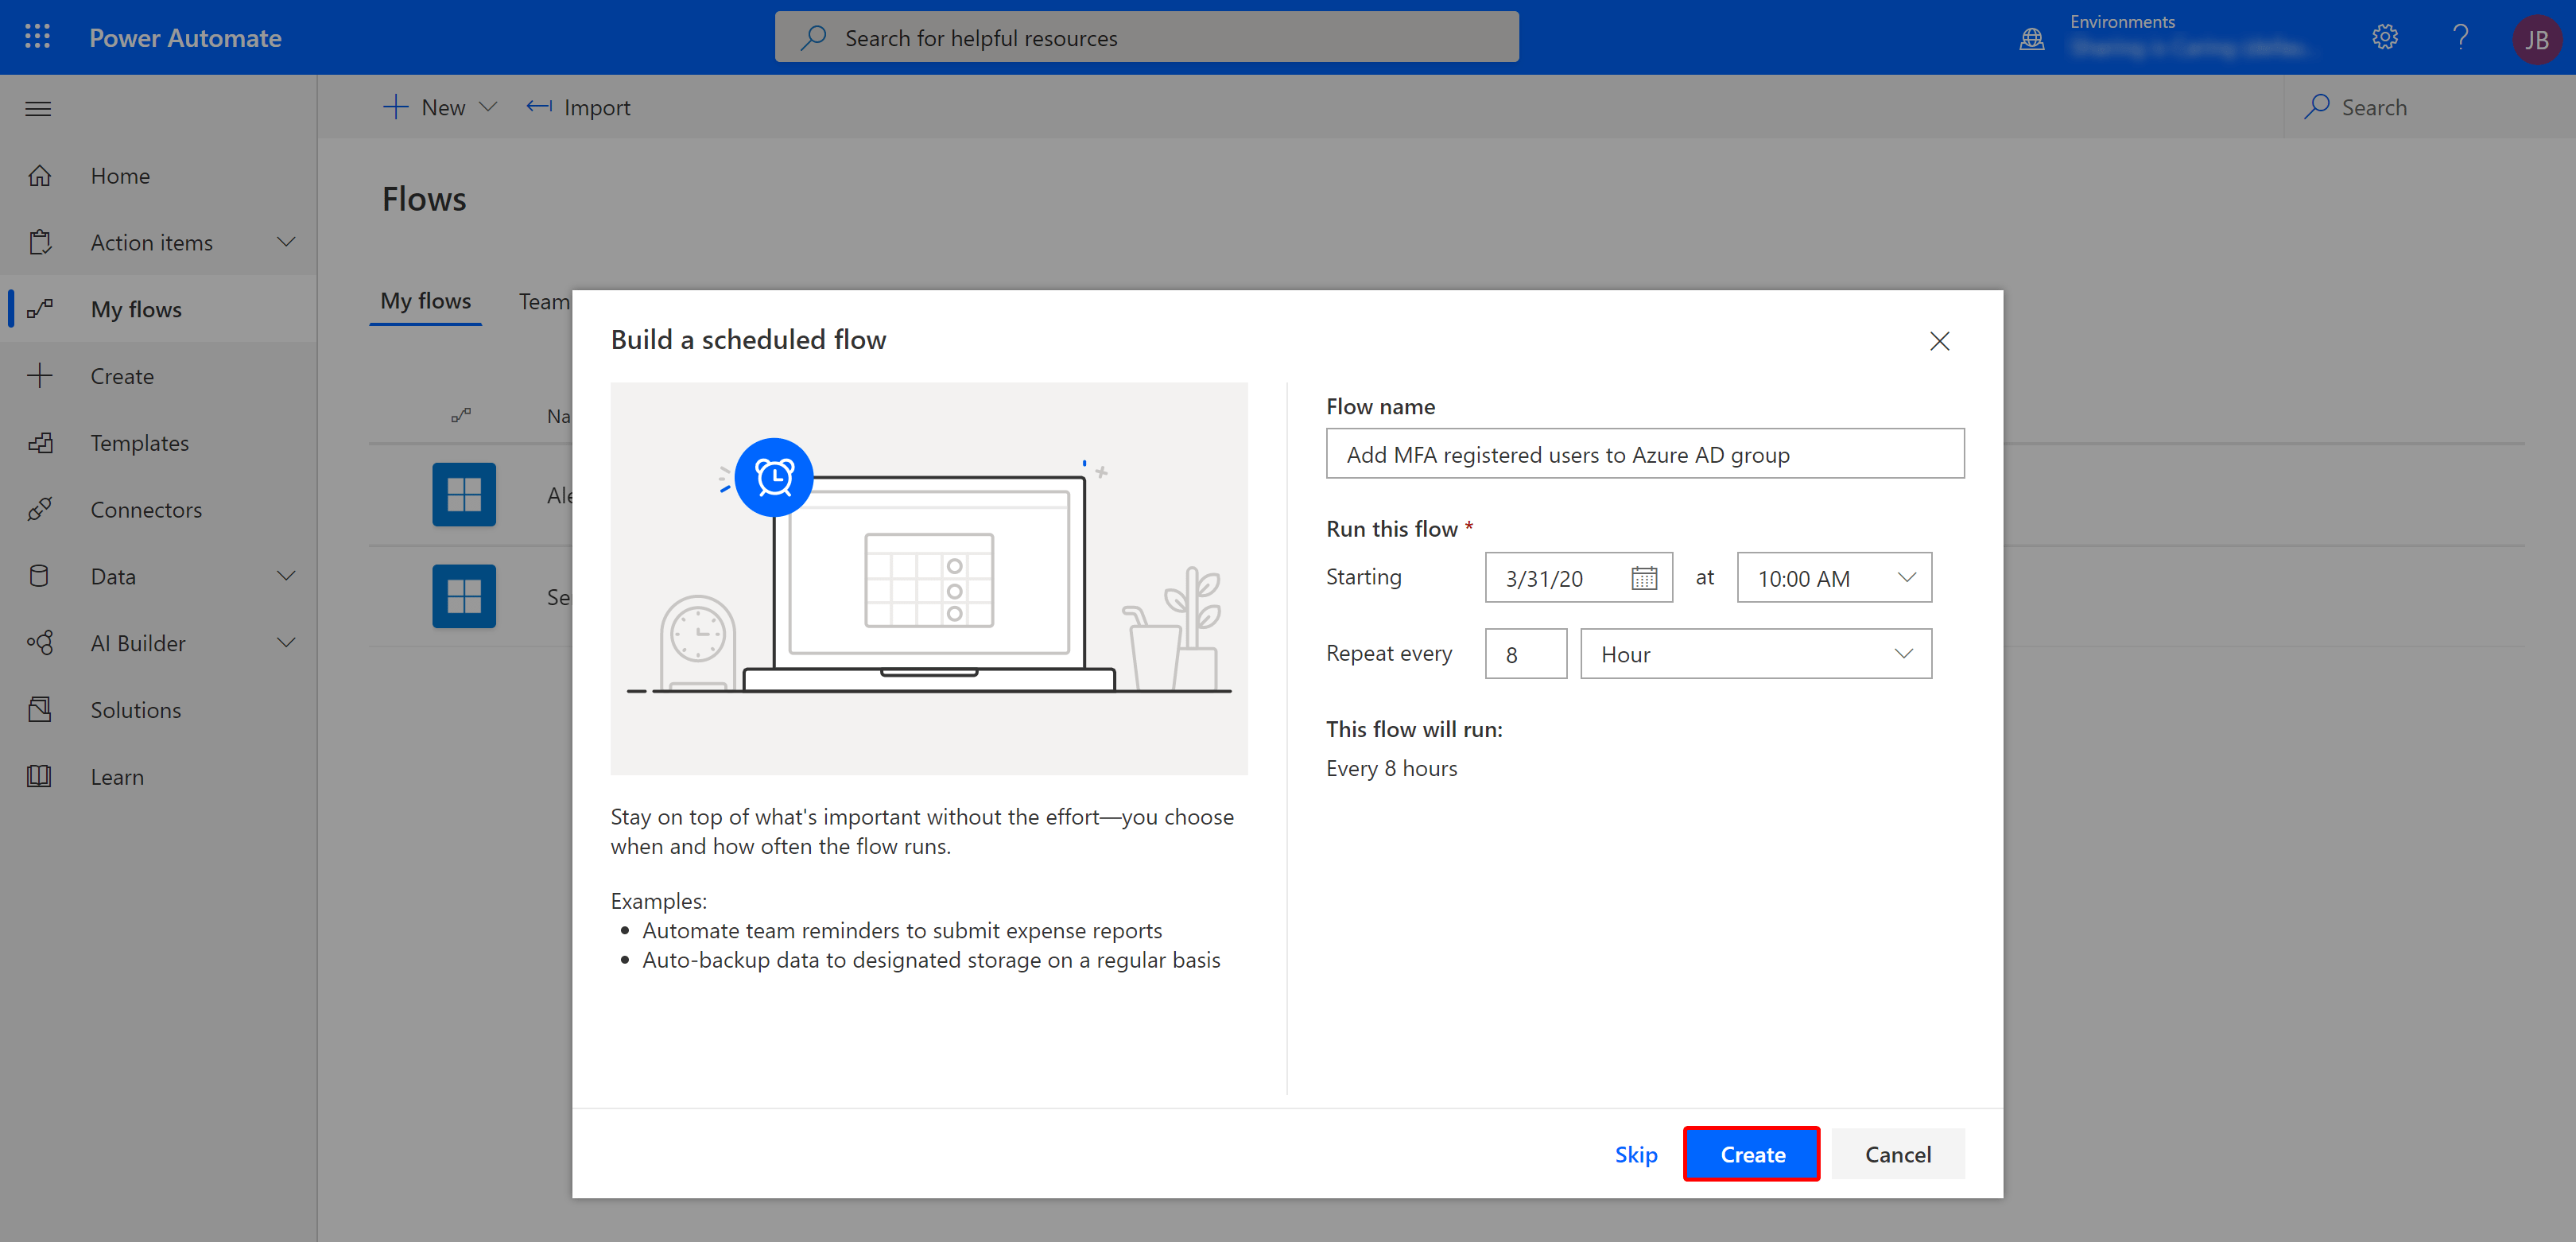
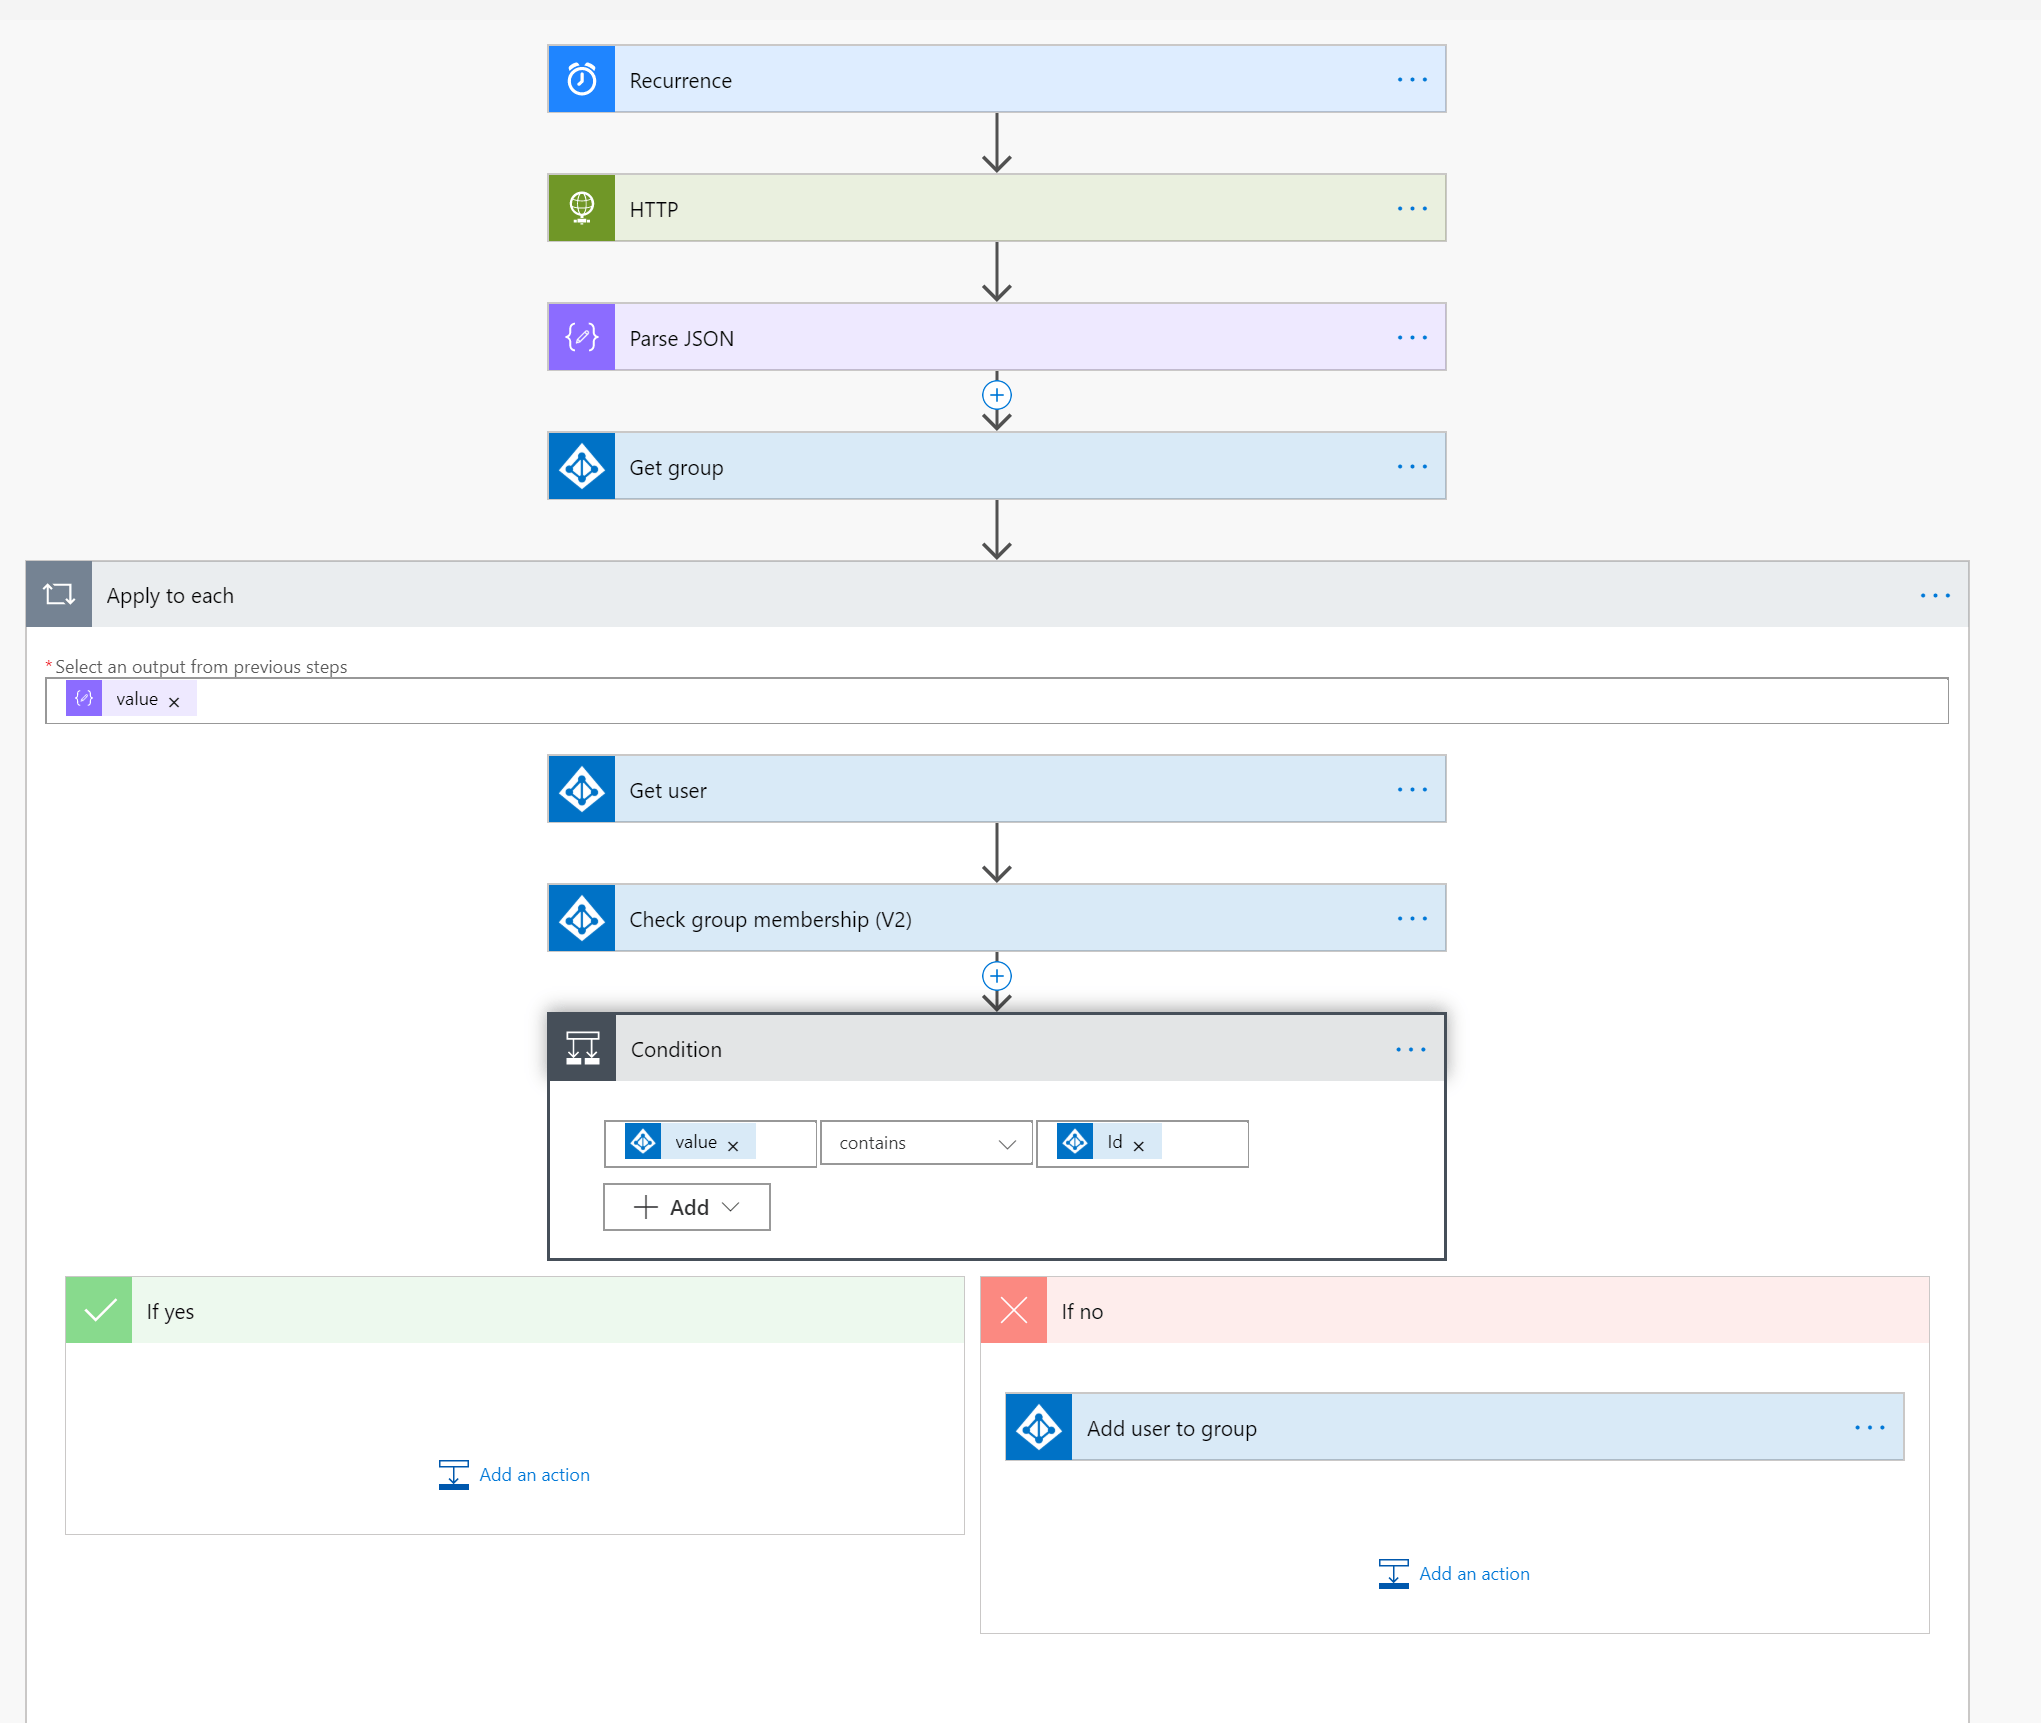
Now our preparations are done, we can continue to Power Automate to create the flow. Head over to https://flow.microsoft.com to create a new Flow. Choose for a scheduled flow, start from blank. Choose the name and schedule. I suggest running this every 8 or 12 hours.
We start by adding a new step to the flow. Search for HTTP. This is a premium connector, If you don’t have a proper license, you can start a trial right away. This step will pull the data from the Graph API. The filter is to just get the users that are registered for MFA.
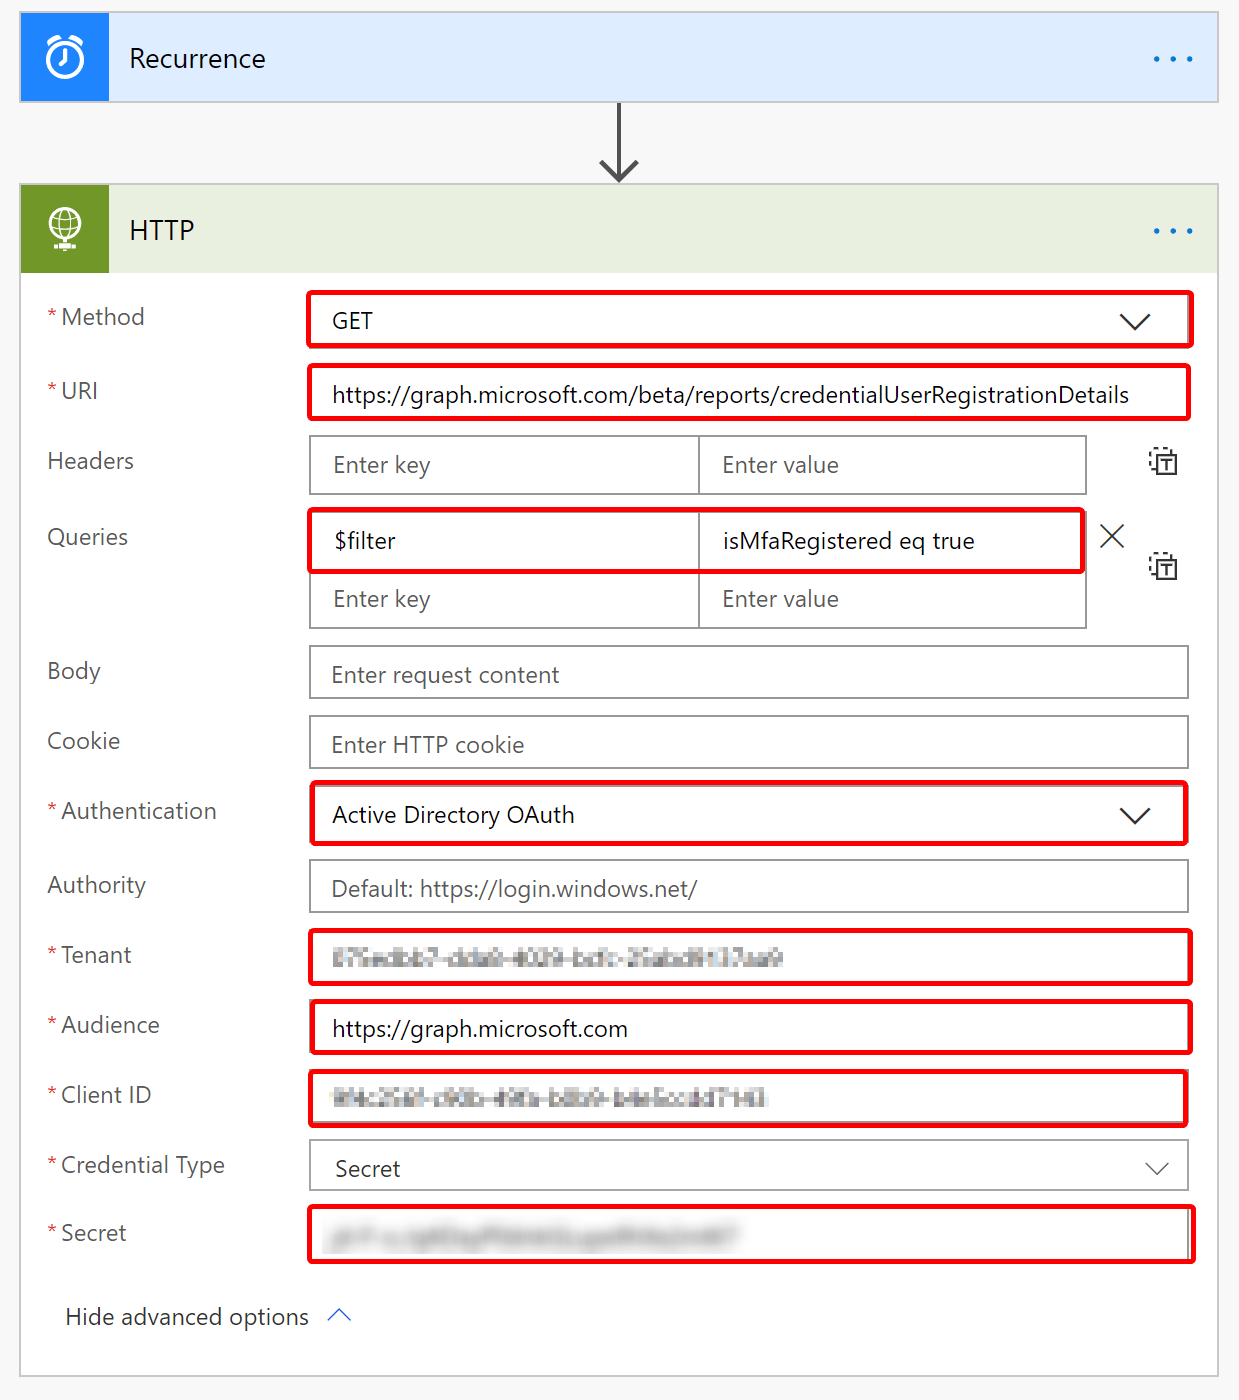
Method: GET
URI: https://graph.microsoft.com/beta/reports/credentialUserRegistrationDetails
Queries: $filter | isMfaRegistered eq true
Authentication: Active Directory OAuth
Tenant & Client ID: Pick the tenant and client ID from the overview page of your app registration you’ve created earlier
Audience: https://graph.microsoft.com
Secret: Paste the secret that you created.
If you are looking for a group with all the users that did not register for MFA, just change the value isMfaRegistered eq true to isMfaRegistered eq false
All the other steps remain the same. You only might want to change the displayname of the group.
Paging and Asynchronous Pattern#
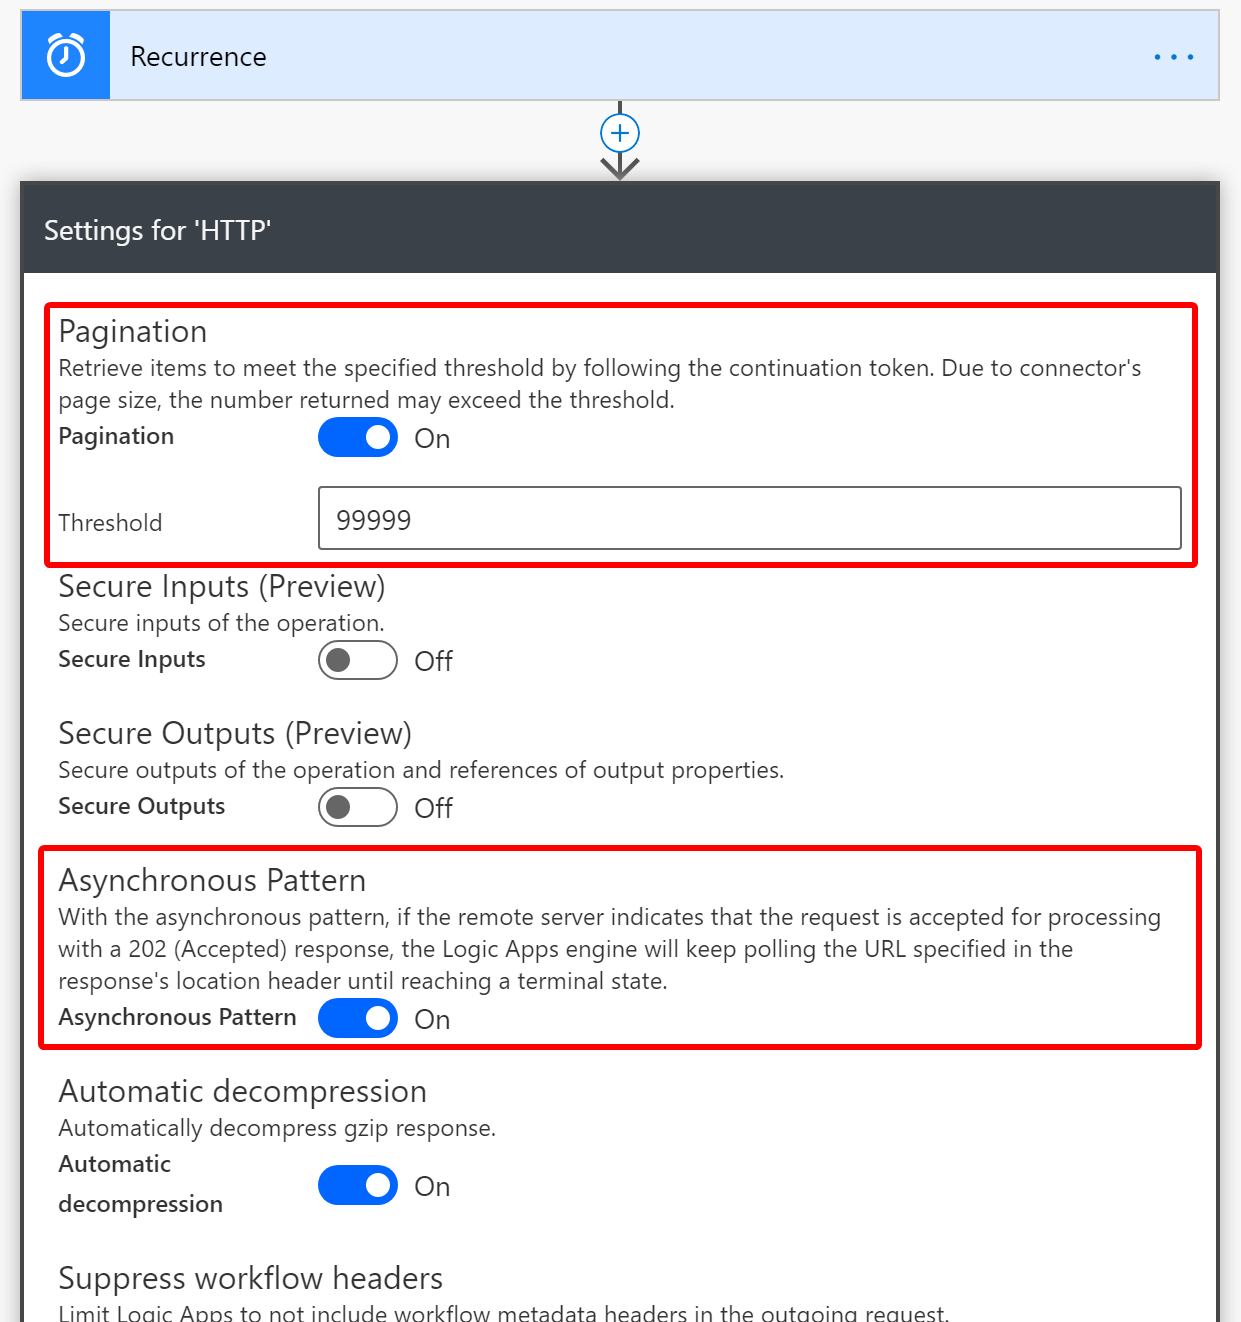
Make sure you enable paging on your HTTP request when you handle a lot of objects. Make sure Asynchronous Pattern is enabled.
Next, we need to parse the data that we received from the Graph so that we can grab the values that we need for the next steps. So click + Add New step and look for the “parse JSON” action. In the content field, select the Body from the HTTP request.
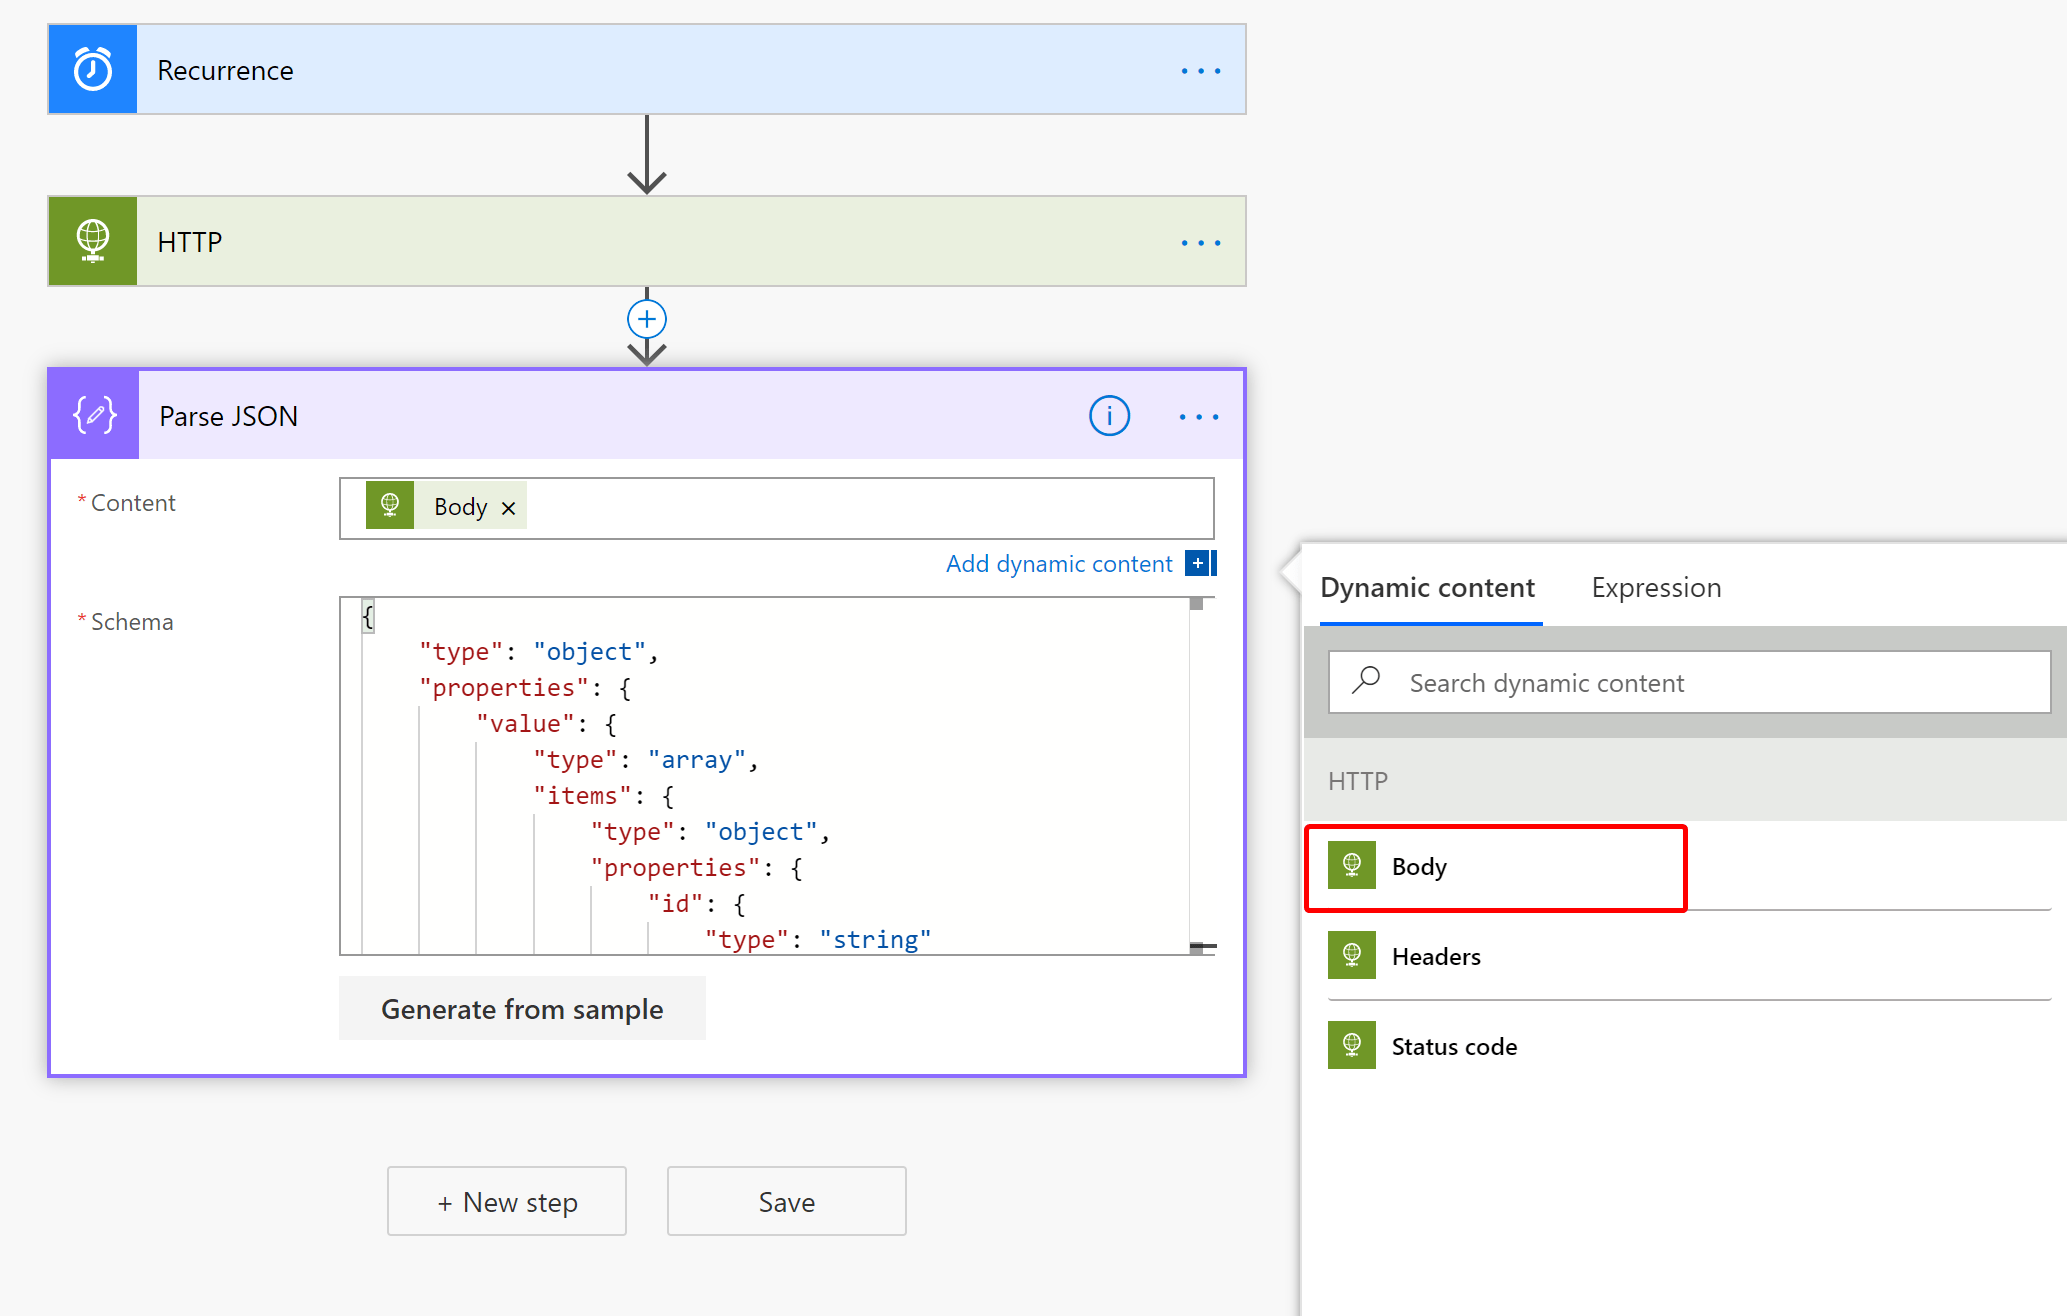
Copy and paste this section into the schema section:
{
    "type": "object",
    "properties": {
        "@@odata.context": {
            "type": "string"
        },
        "value": {
            "type": "array",
            "items": {
                "type": "object",
                "properties": {
                    "id": {
                        "type": "string"
                    },
                    "userPrincipalName": {
                        "type": "string"
                    },
                    "userDisplayName": {
                        "type": "string"
                    },
                    "isRegistered": {
                        "type": "boolean"
                    },
                    "isEnabled": {
                        "type": "boolean"
                    },
                    "isCapable": {
                        "type": "boolean"
                    },
                    "isMfaRegistered": {
                        "type": "boolean"
                    },
                    "authMethods": {
                        "type": "array",
                        "items": {
                            "type": "string"
                        }
                    }
                },
                "required": [
                    "id",
                    "userPrincipalName",
                    "userDisplayName",
                    "isRegistered",
                    "isEnabled",
                    "isCapable",
                    "isMfaRegistered",
                    "authMethods"
                ]
            }
        }
    }
}
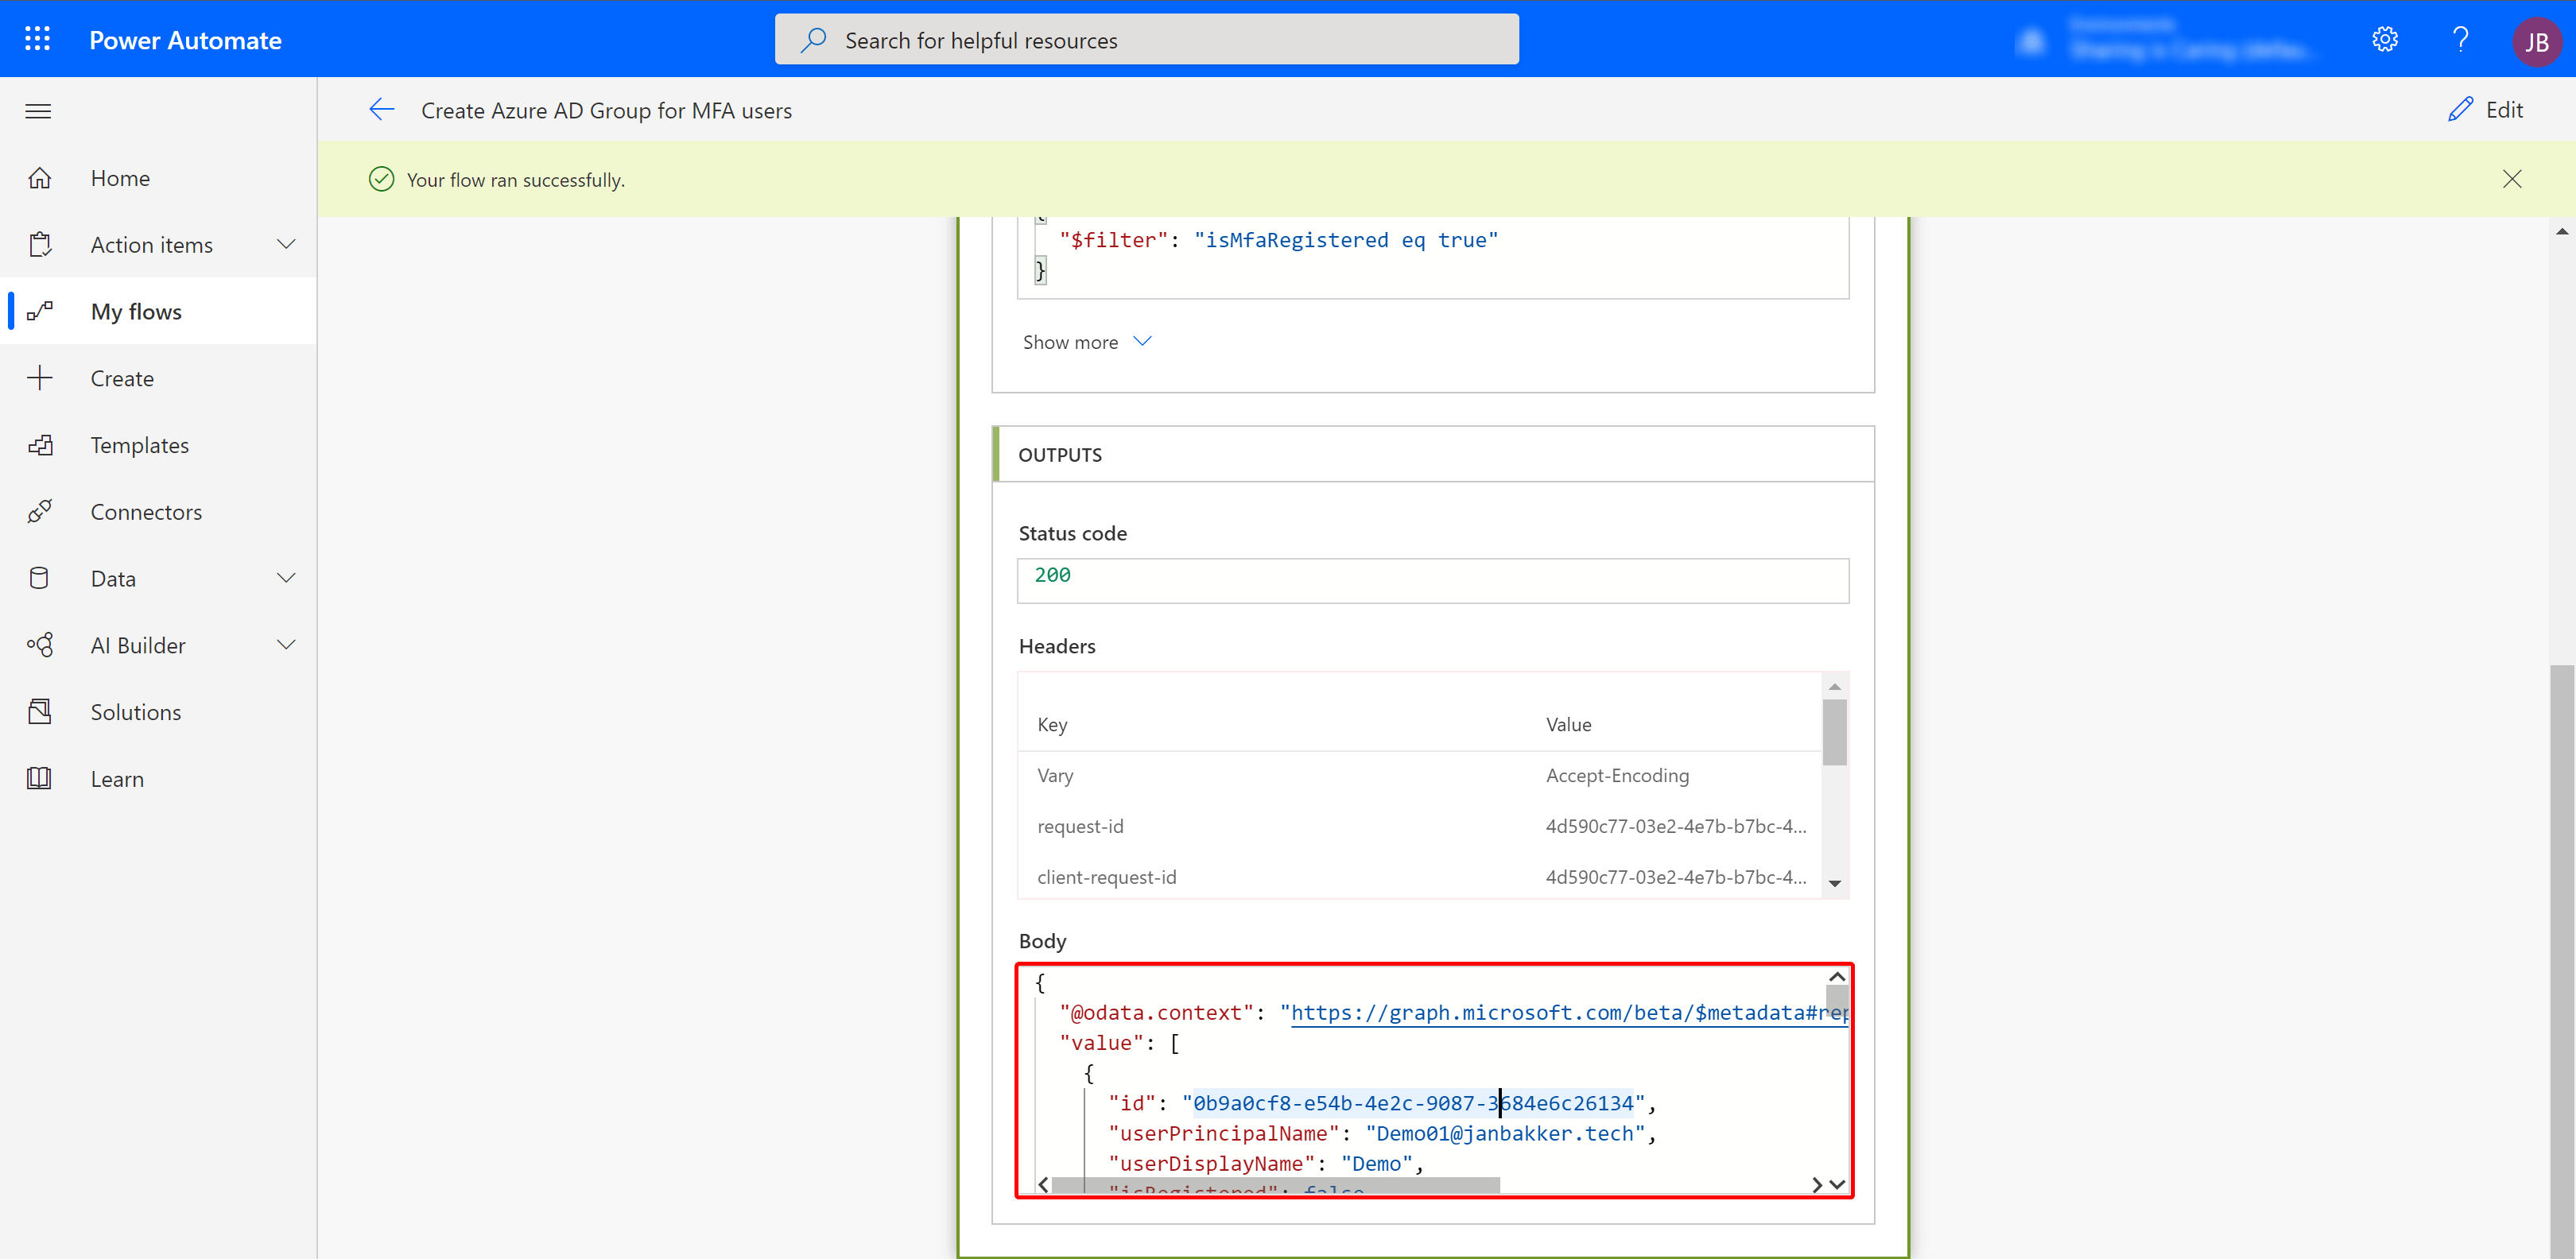
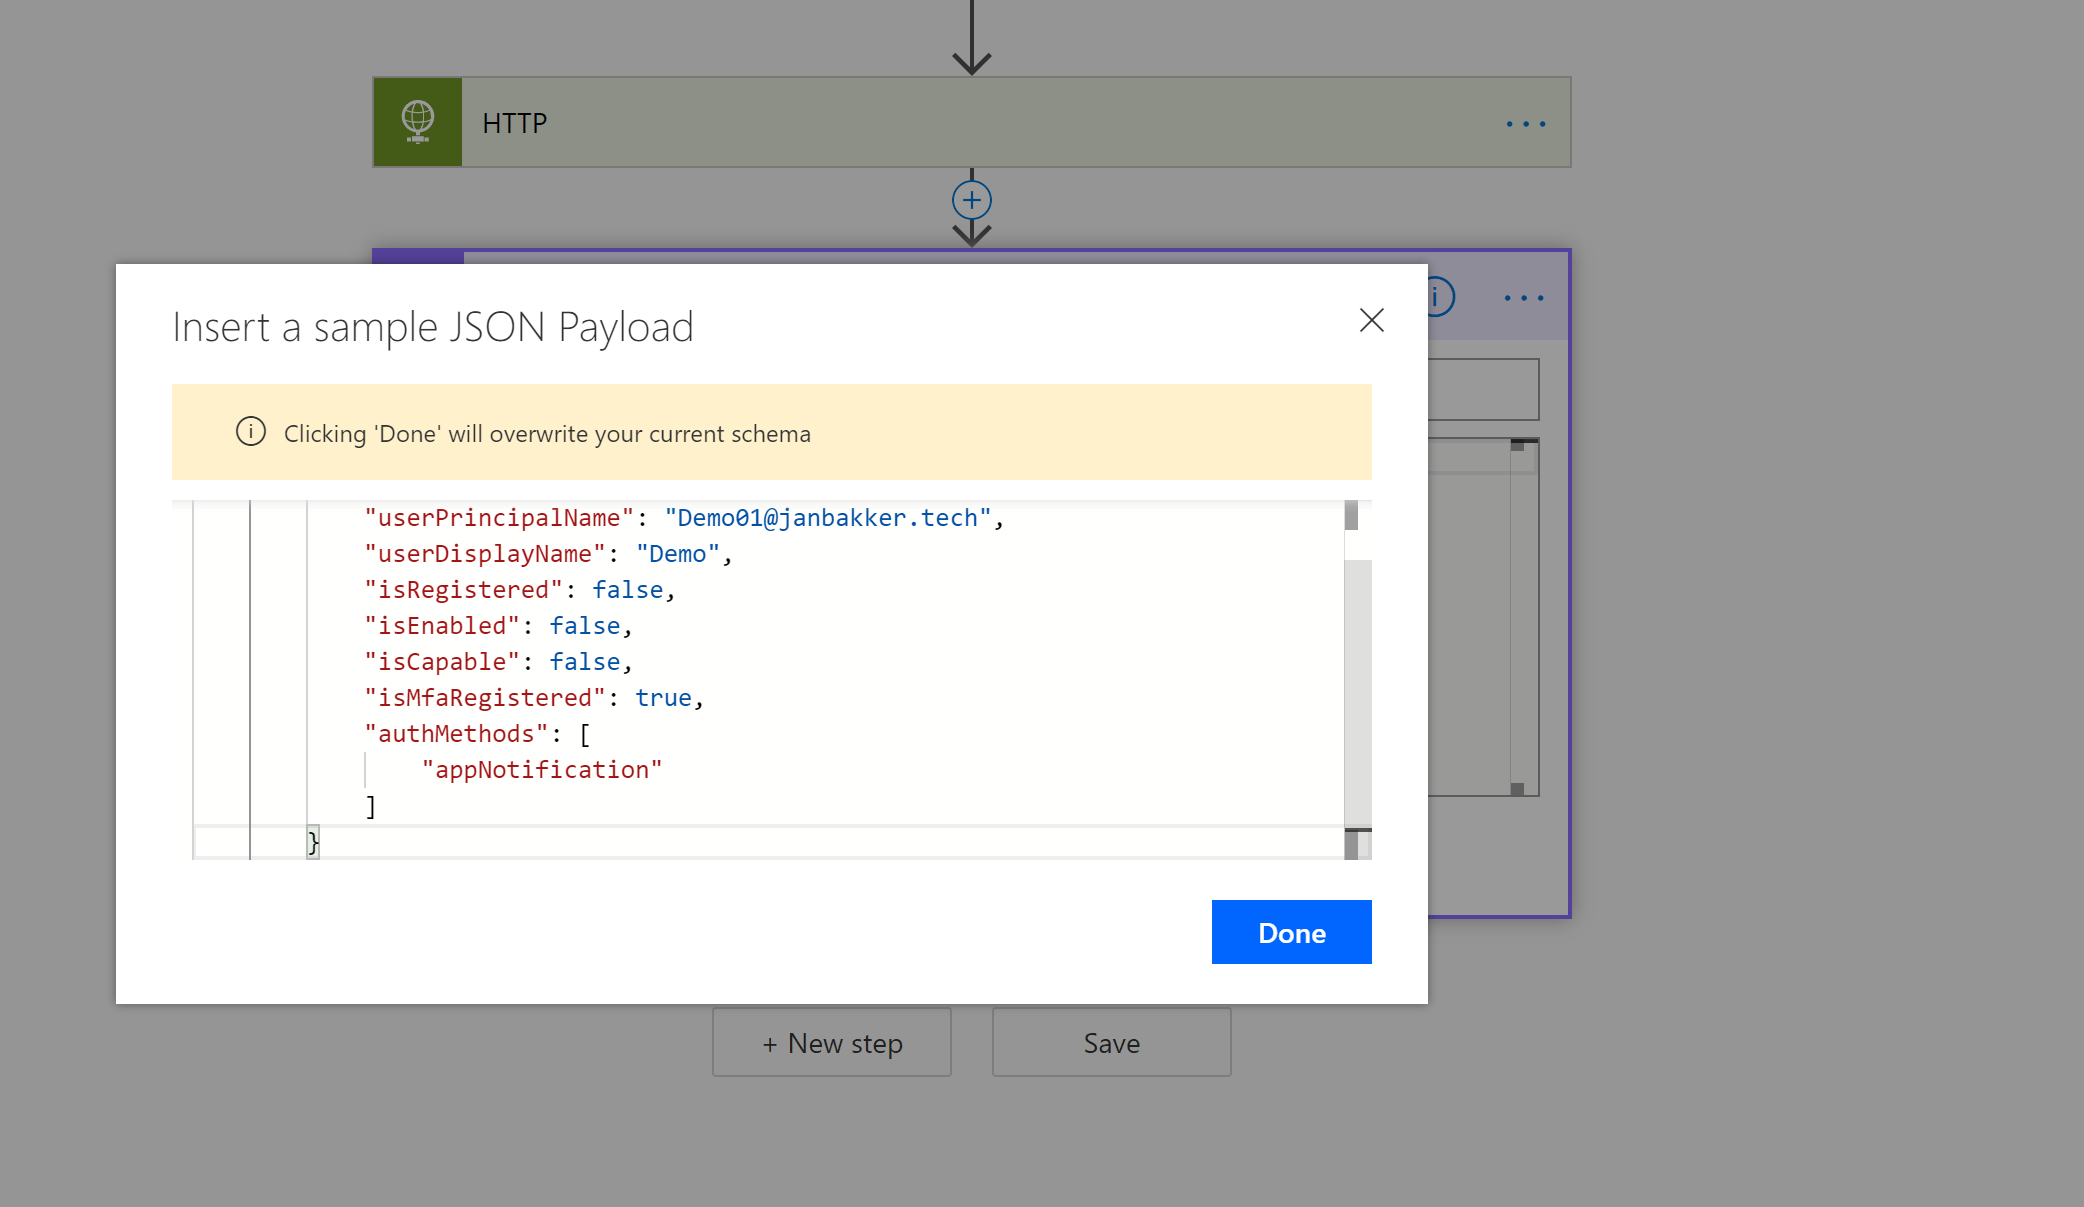
(TIP) In order to get the right schema, just run/test the flow and copy the HTTP output. Instead of directly pasting the schema, just click Generate from sample and paste the output data from either your HTTP connector or the Graph Explorer. The schema will be generated, based on the sample data.
Optional step: filter array#
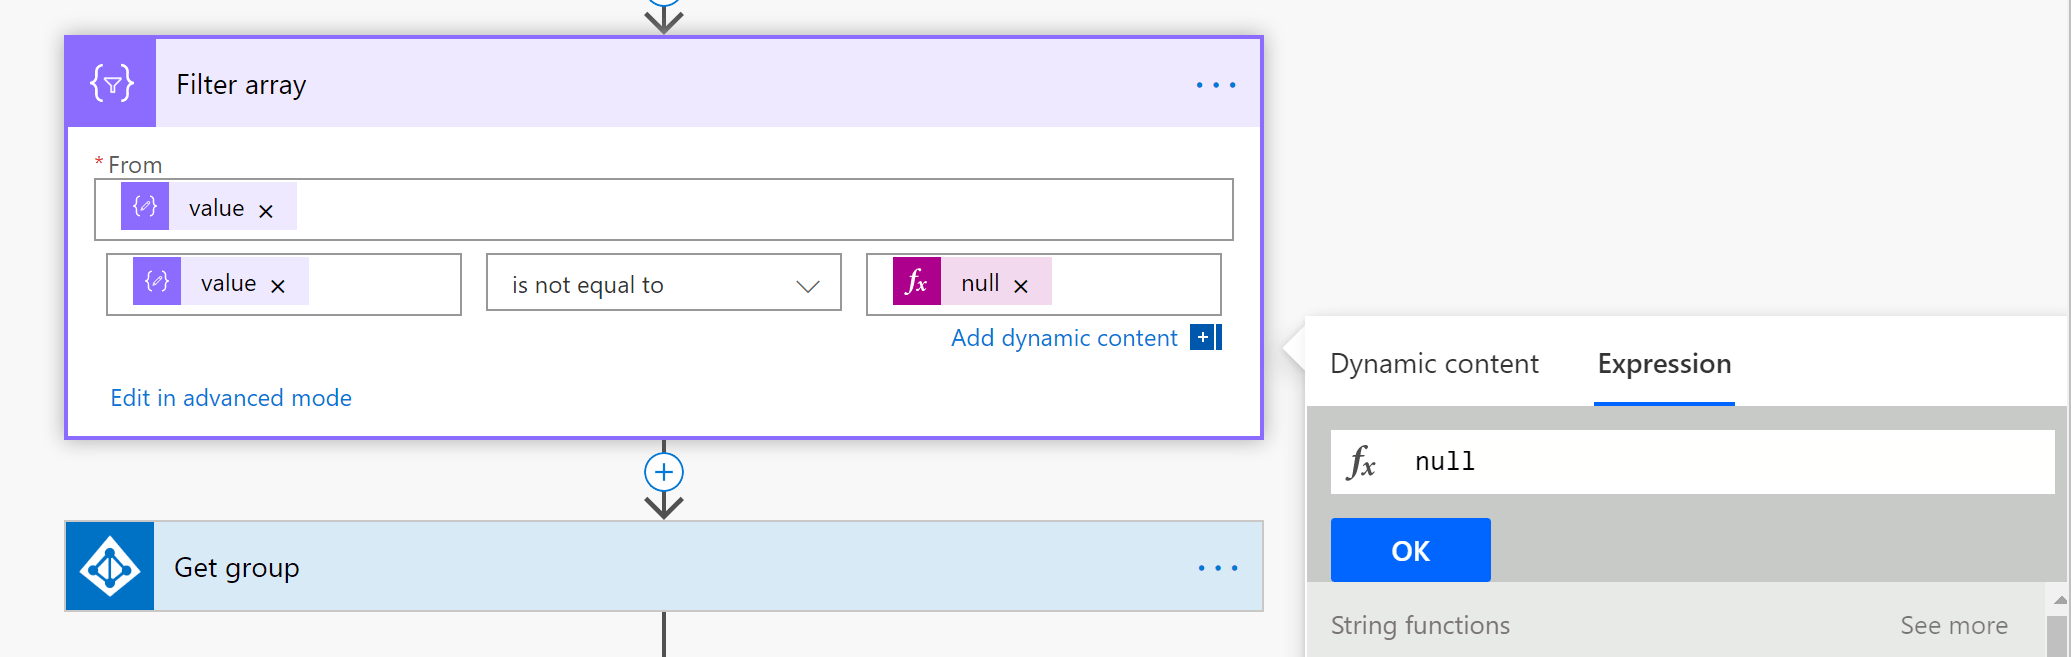
Sometimes the outcome of the JSON has empty (null) values. This will result in this error:
The execution of template action ‘Apply_to_each’ failed: the result of the evaluation of ‘foreach’ expression ‘@body (‘ Parse_JSON ‘)? [‘ properties’]? [ ‘value’] ‘is of type’ Null ‘. The result must be a valid array.
You can add an aditional step to filter out the null values.
In our next step, we are going to add the Azure AD group to the flow. To do that, click + New Step and choose the Get group action for the Azure AD Connector. If this is the first time you use it, you’ll need to login in first.
Next, copy the Object ID from the Azure AD group you created earlier and past this in the group Id field in the flow.
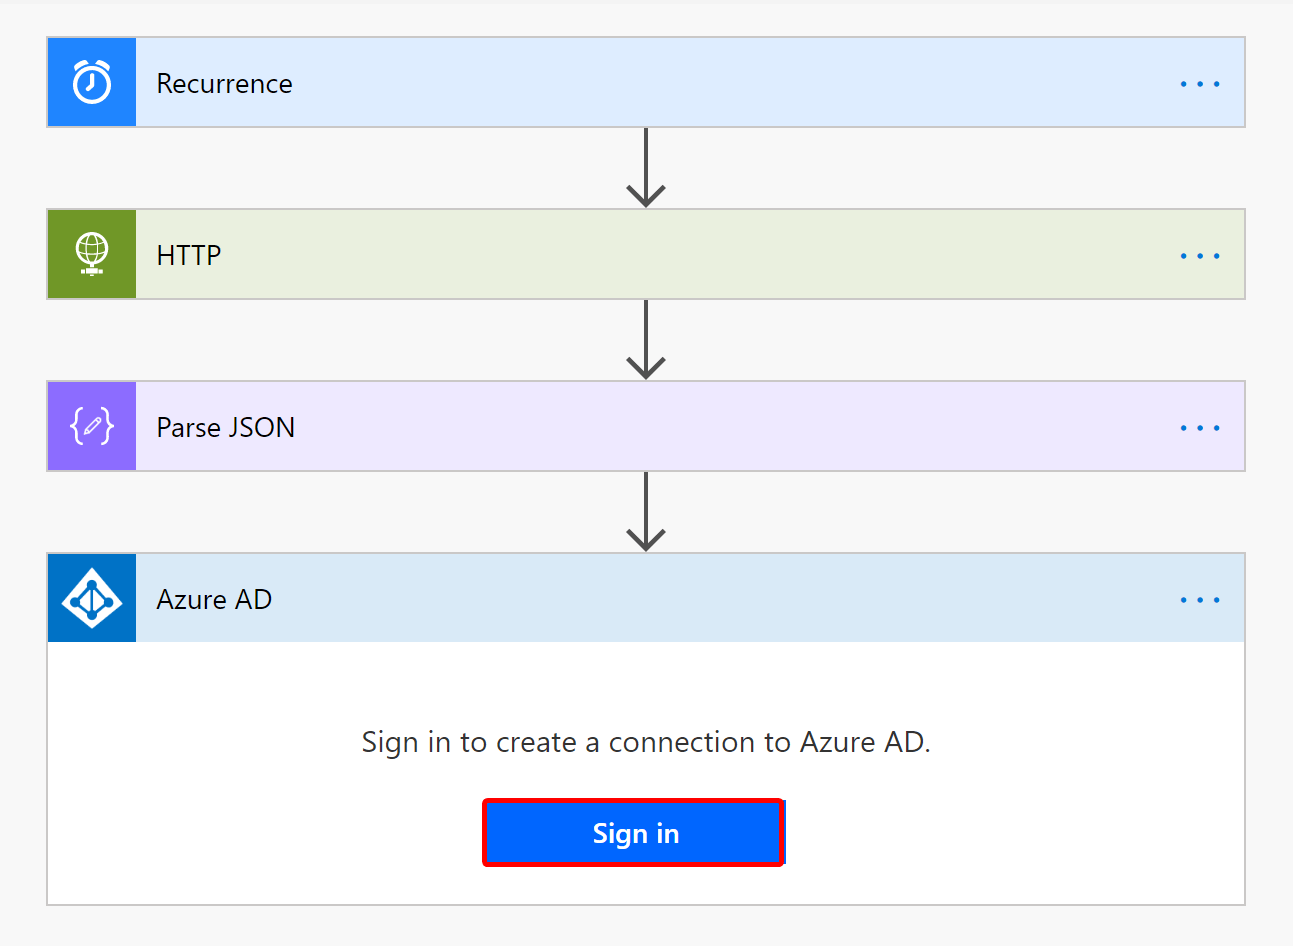
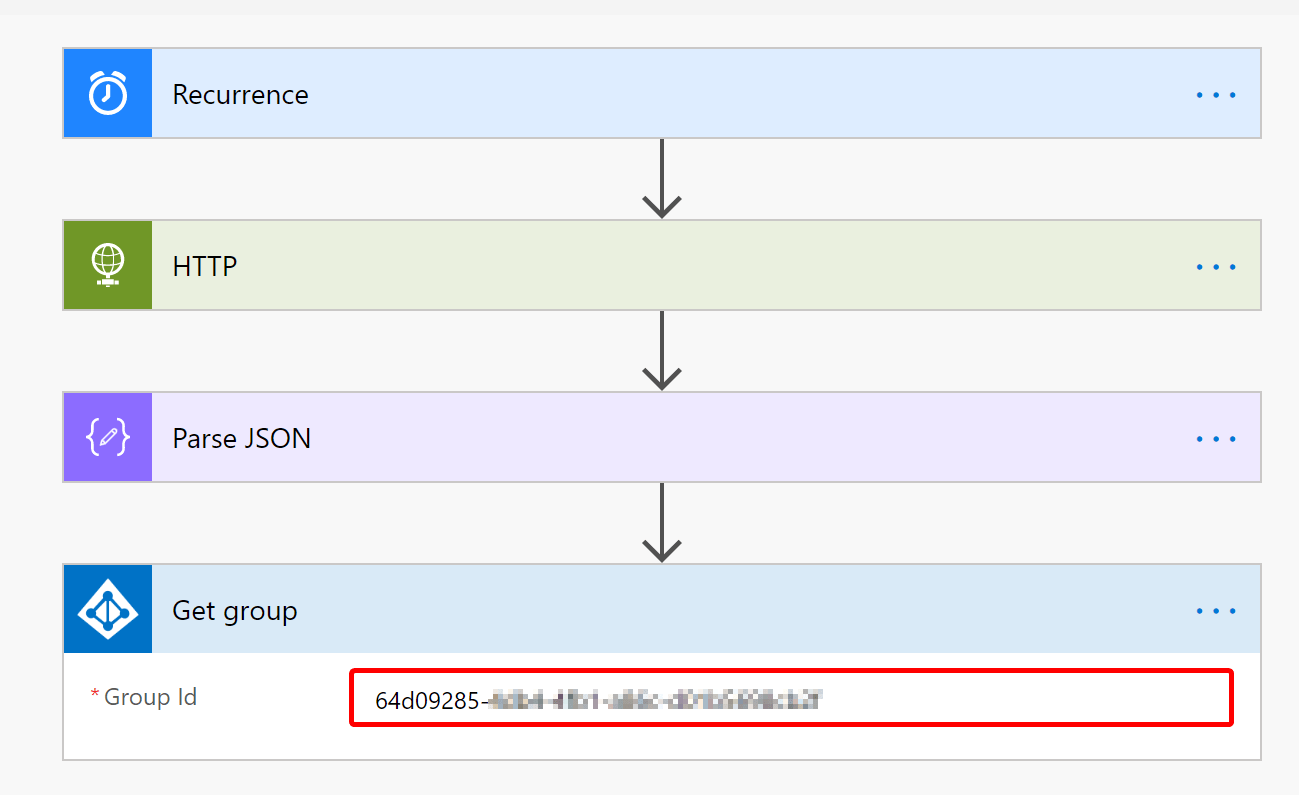
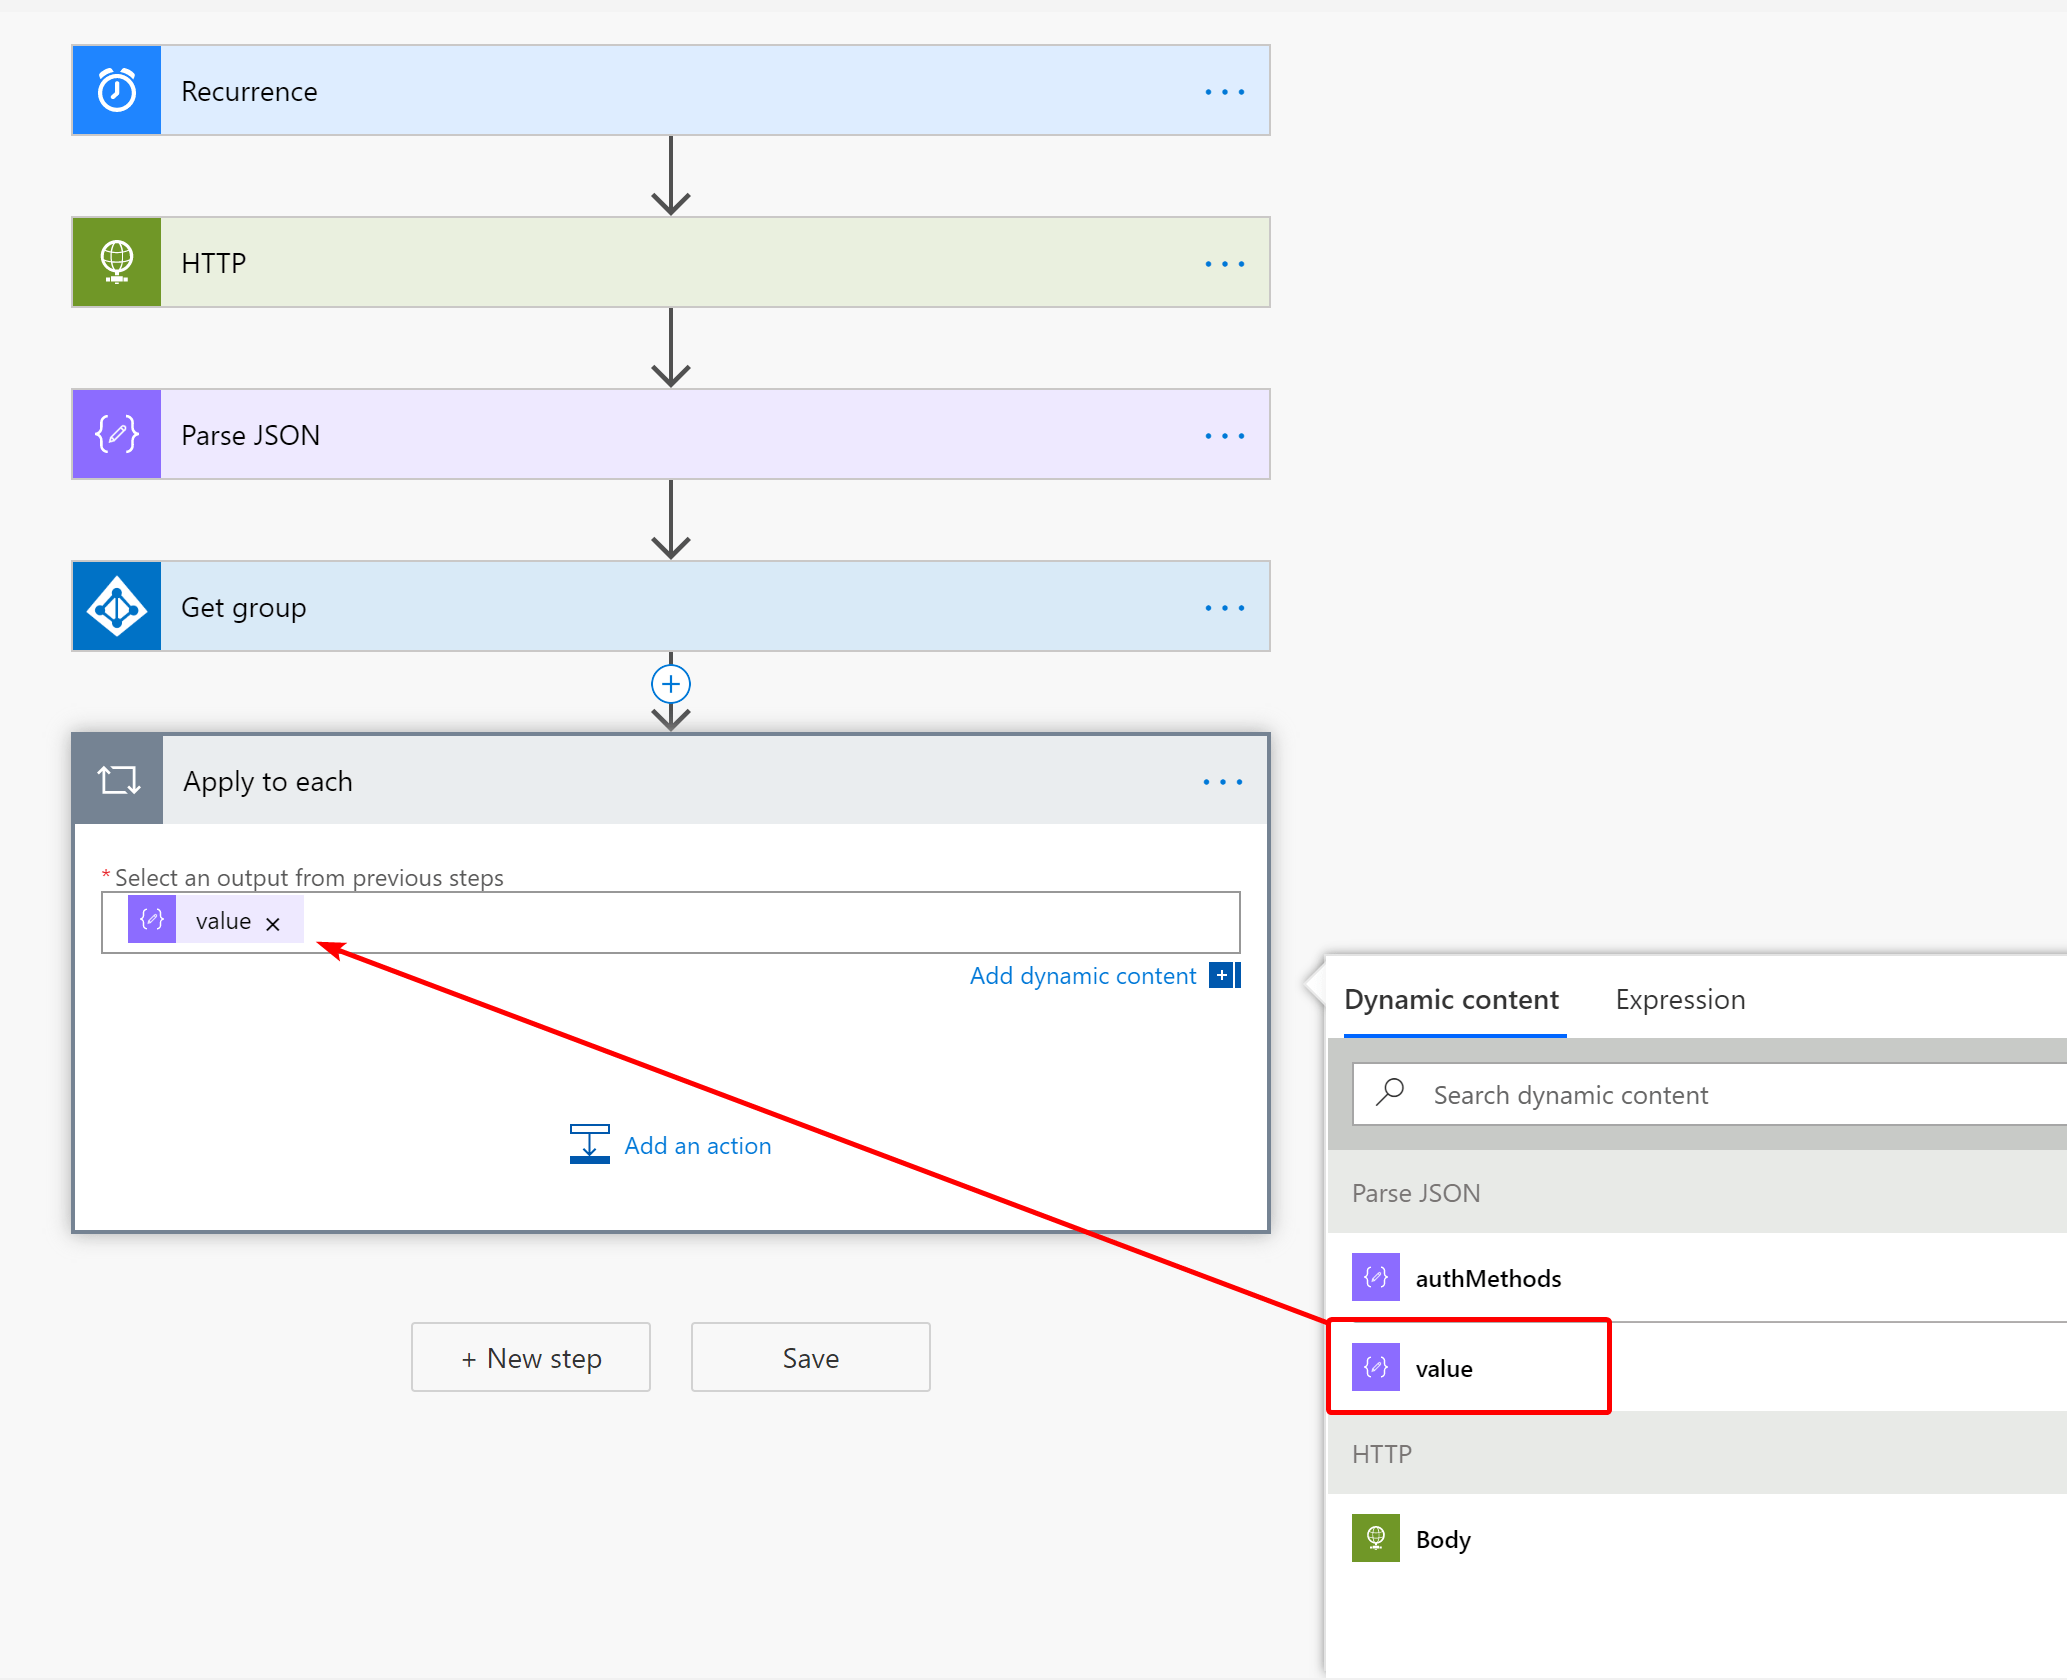
So, now we created the base for our flow. We’ve captured the users, and specified the group. Next up, we are going to add each user to the group. In order to do that, we use an Apply to Each action and use the value form the parse JSON action.
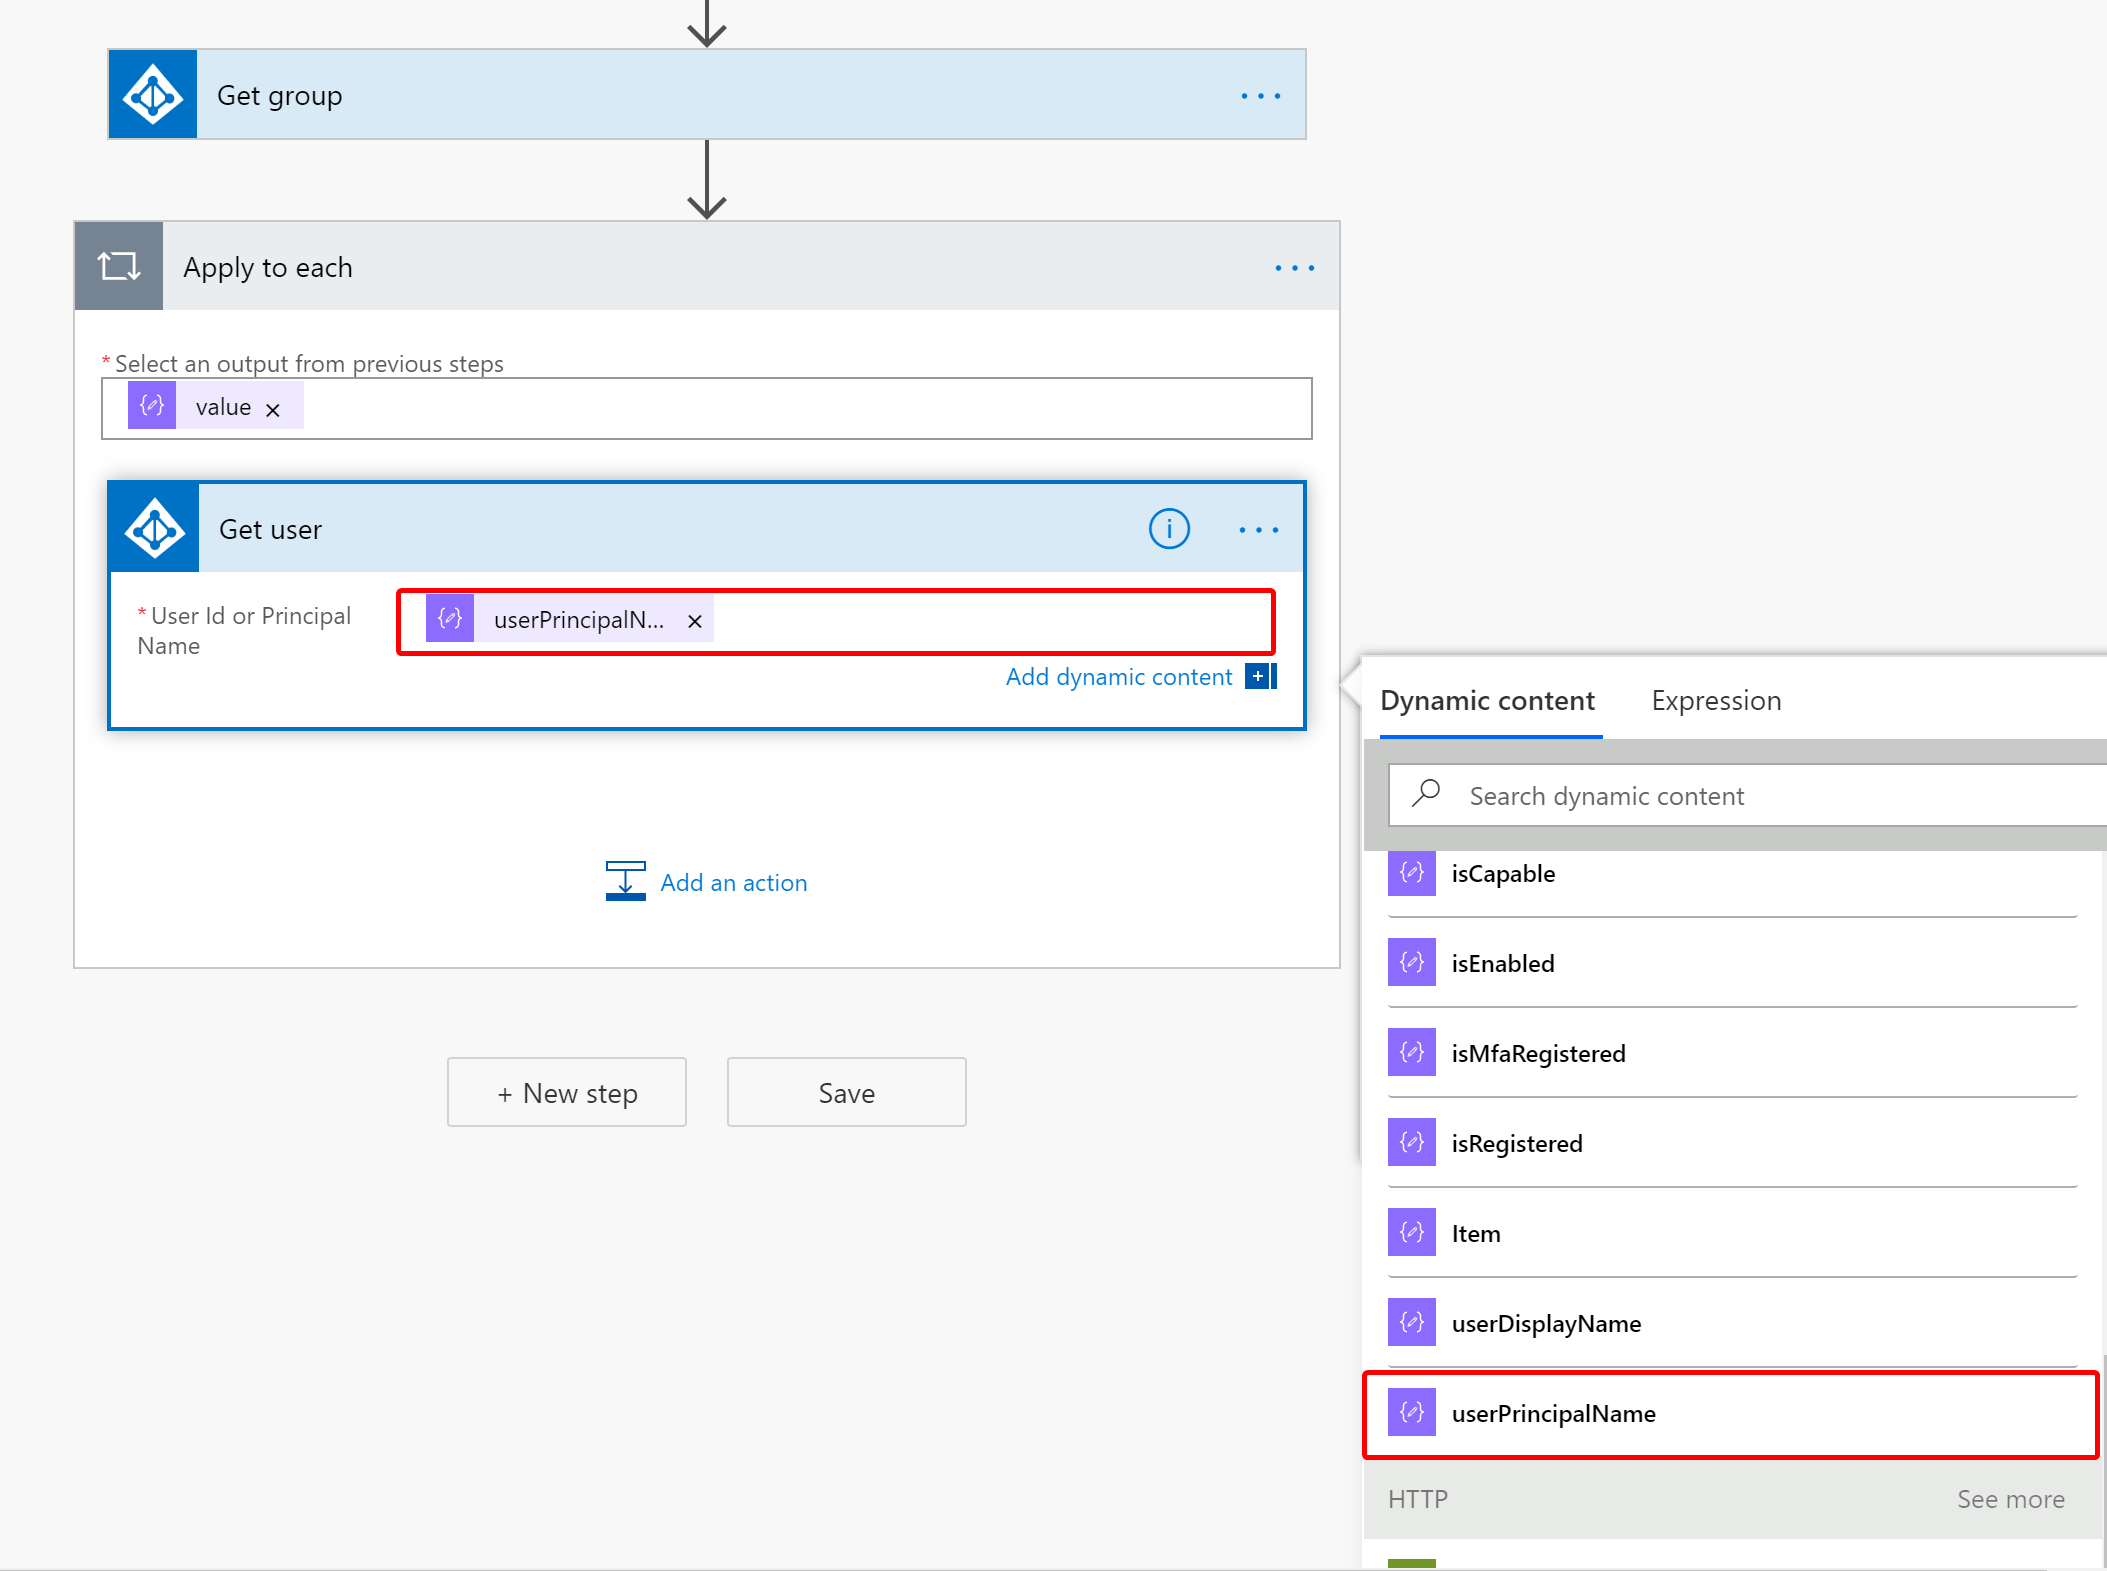
Within the Appy to each section, click Add an action, and look for the Get User action (Azure AD). Here, we use the UserPrincipalName to get the ID for the users. This is needed to add the user to the group later.
Next, we are going to check of the user is already a member of the group. Add another action and look for Check User Membership V2. Select the User ID from the Dynamic content panel for the top field and the Group ID for the second field.
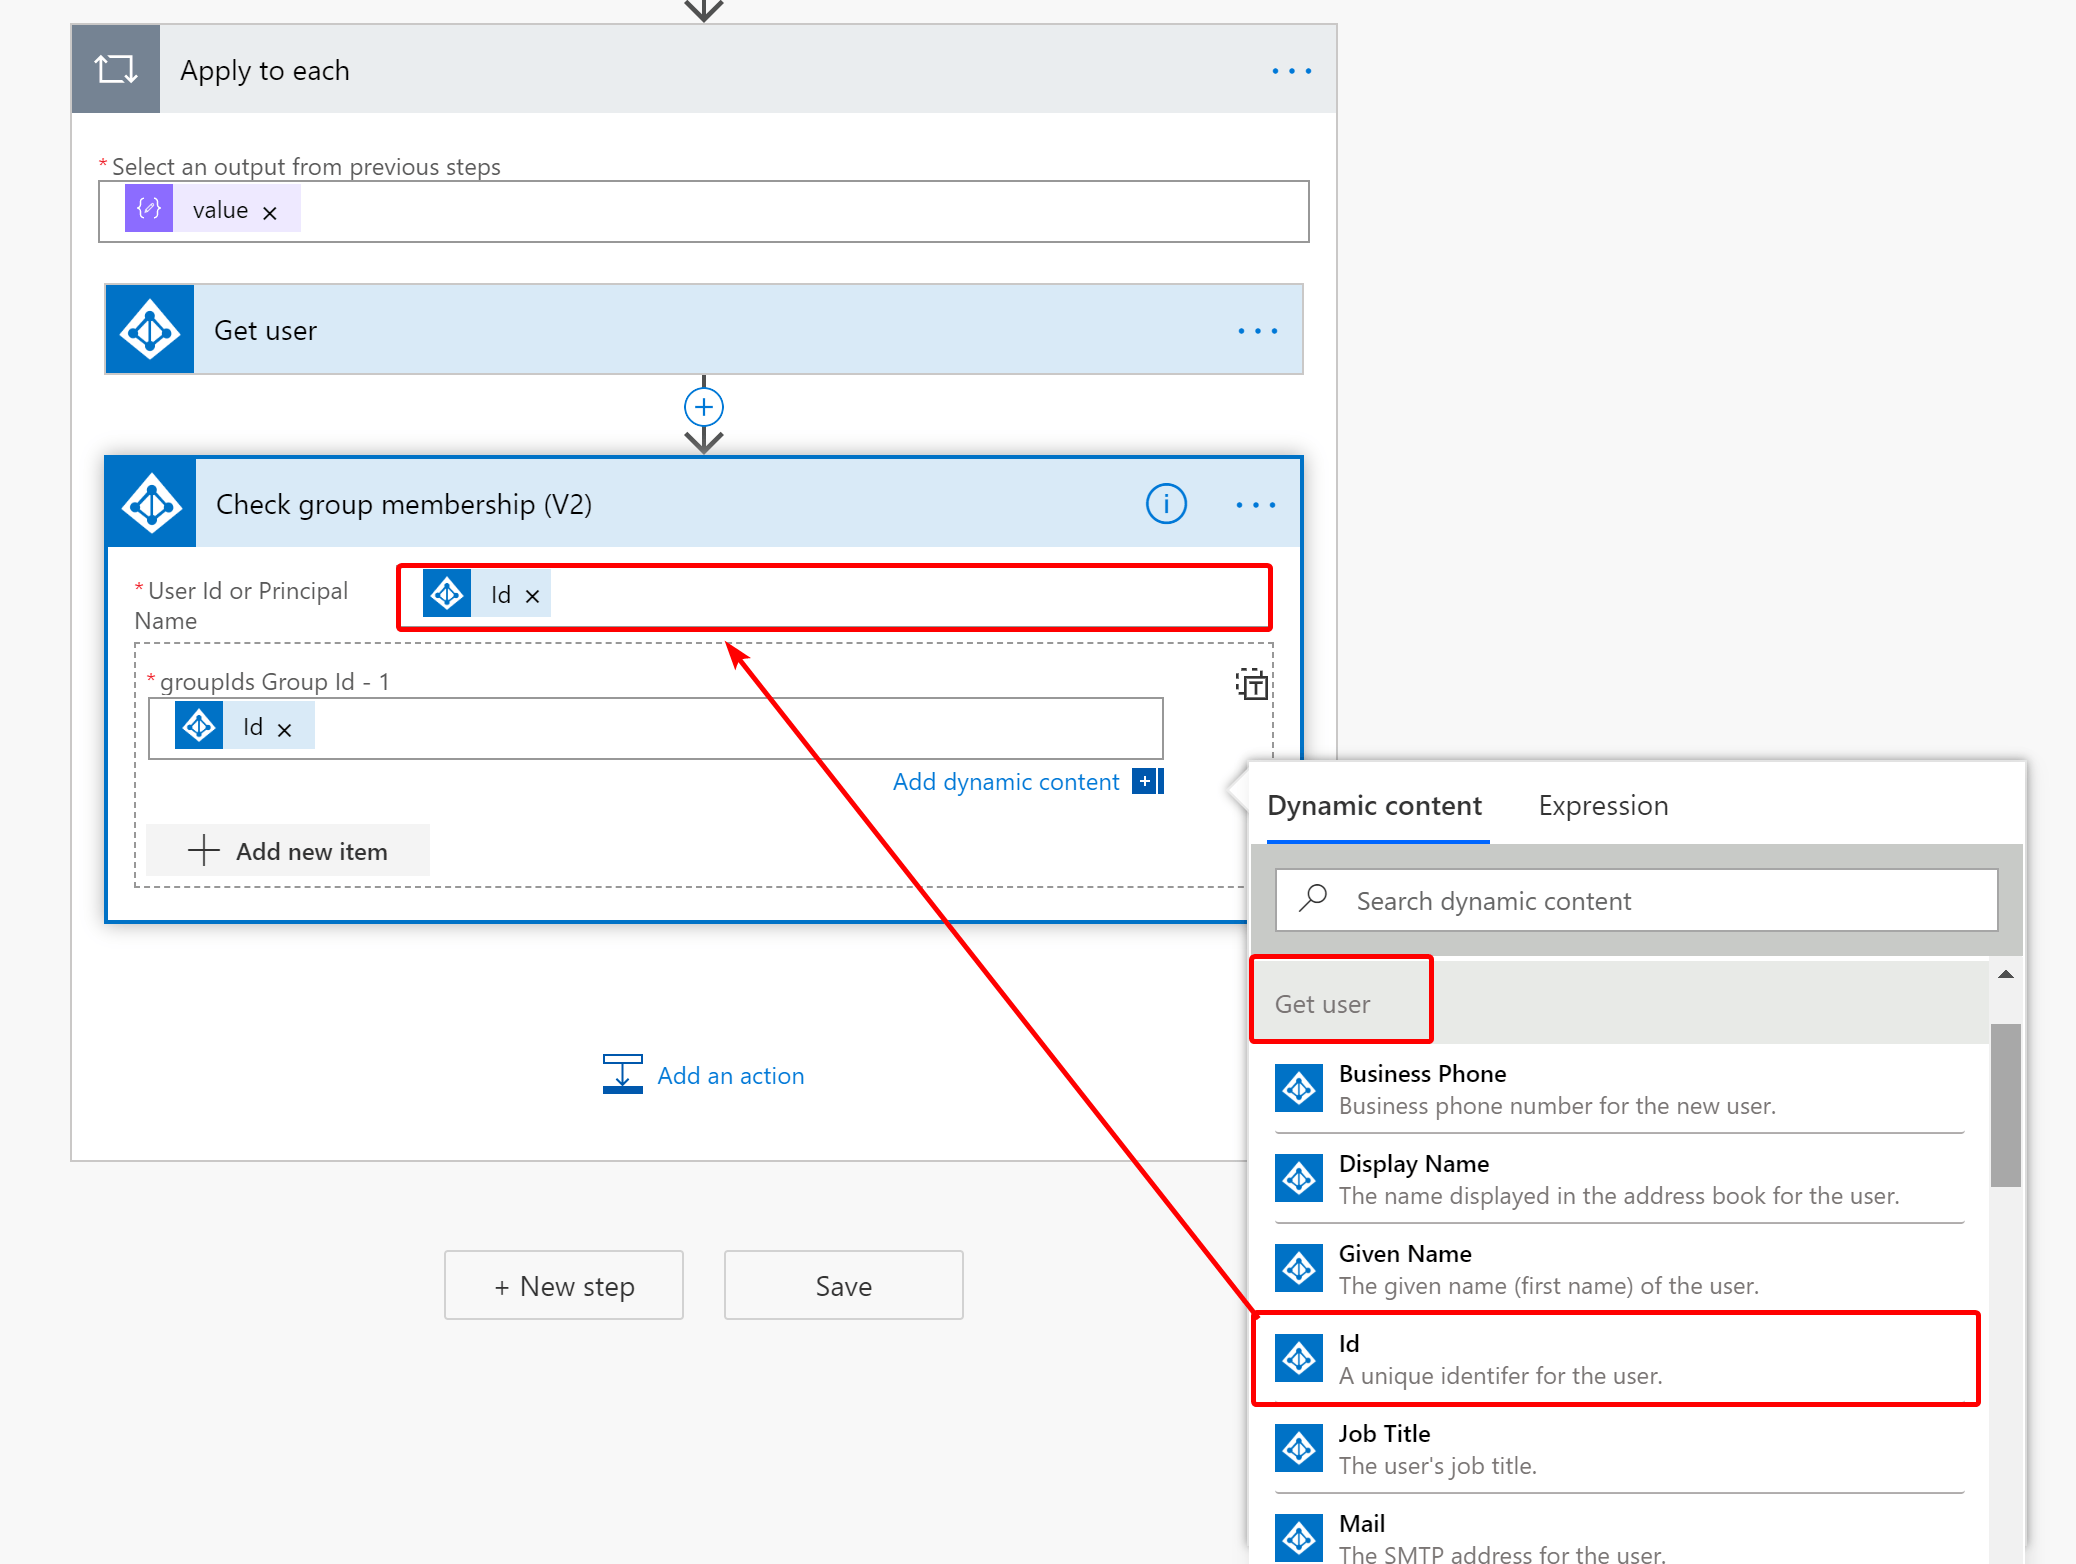
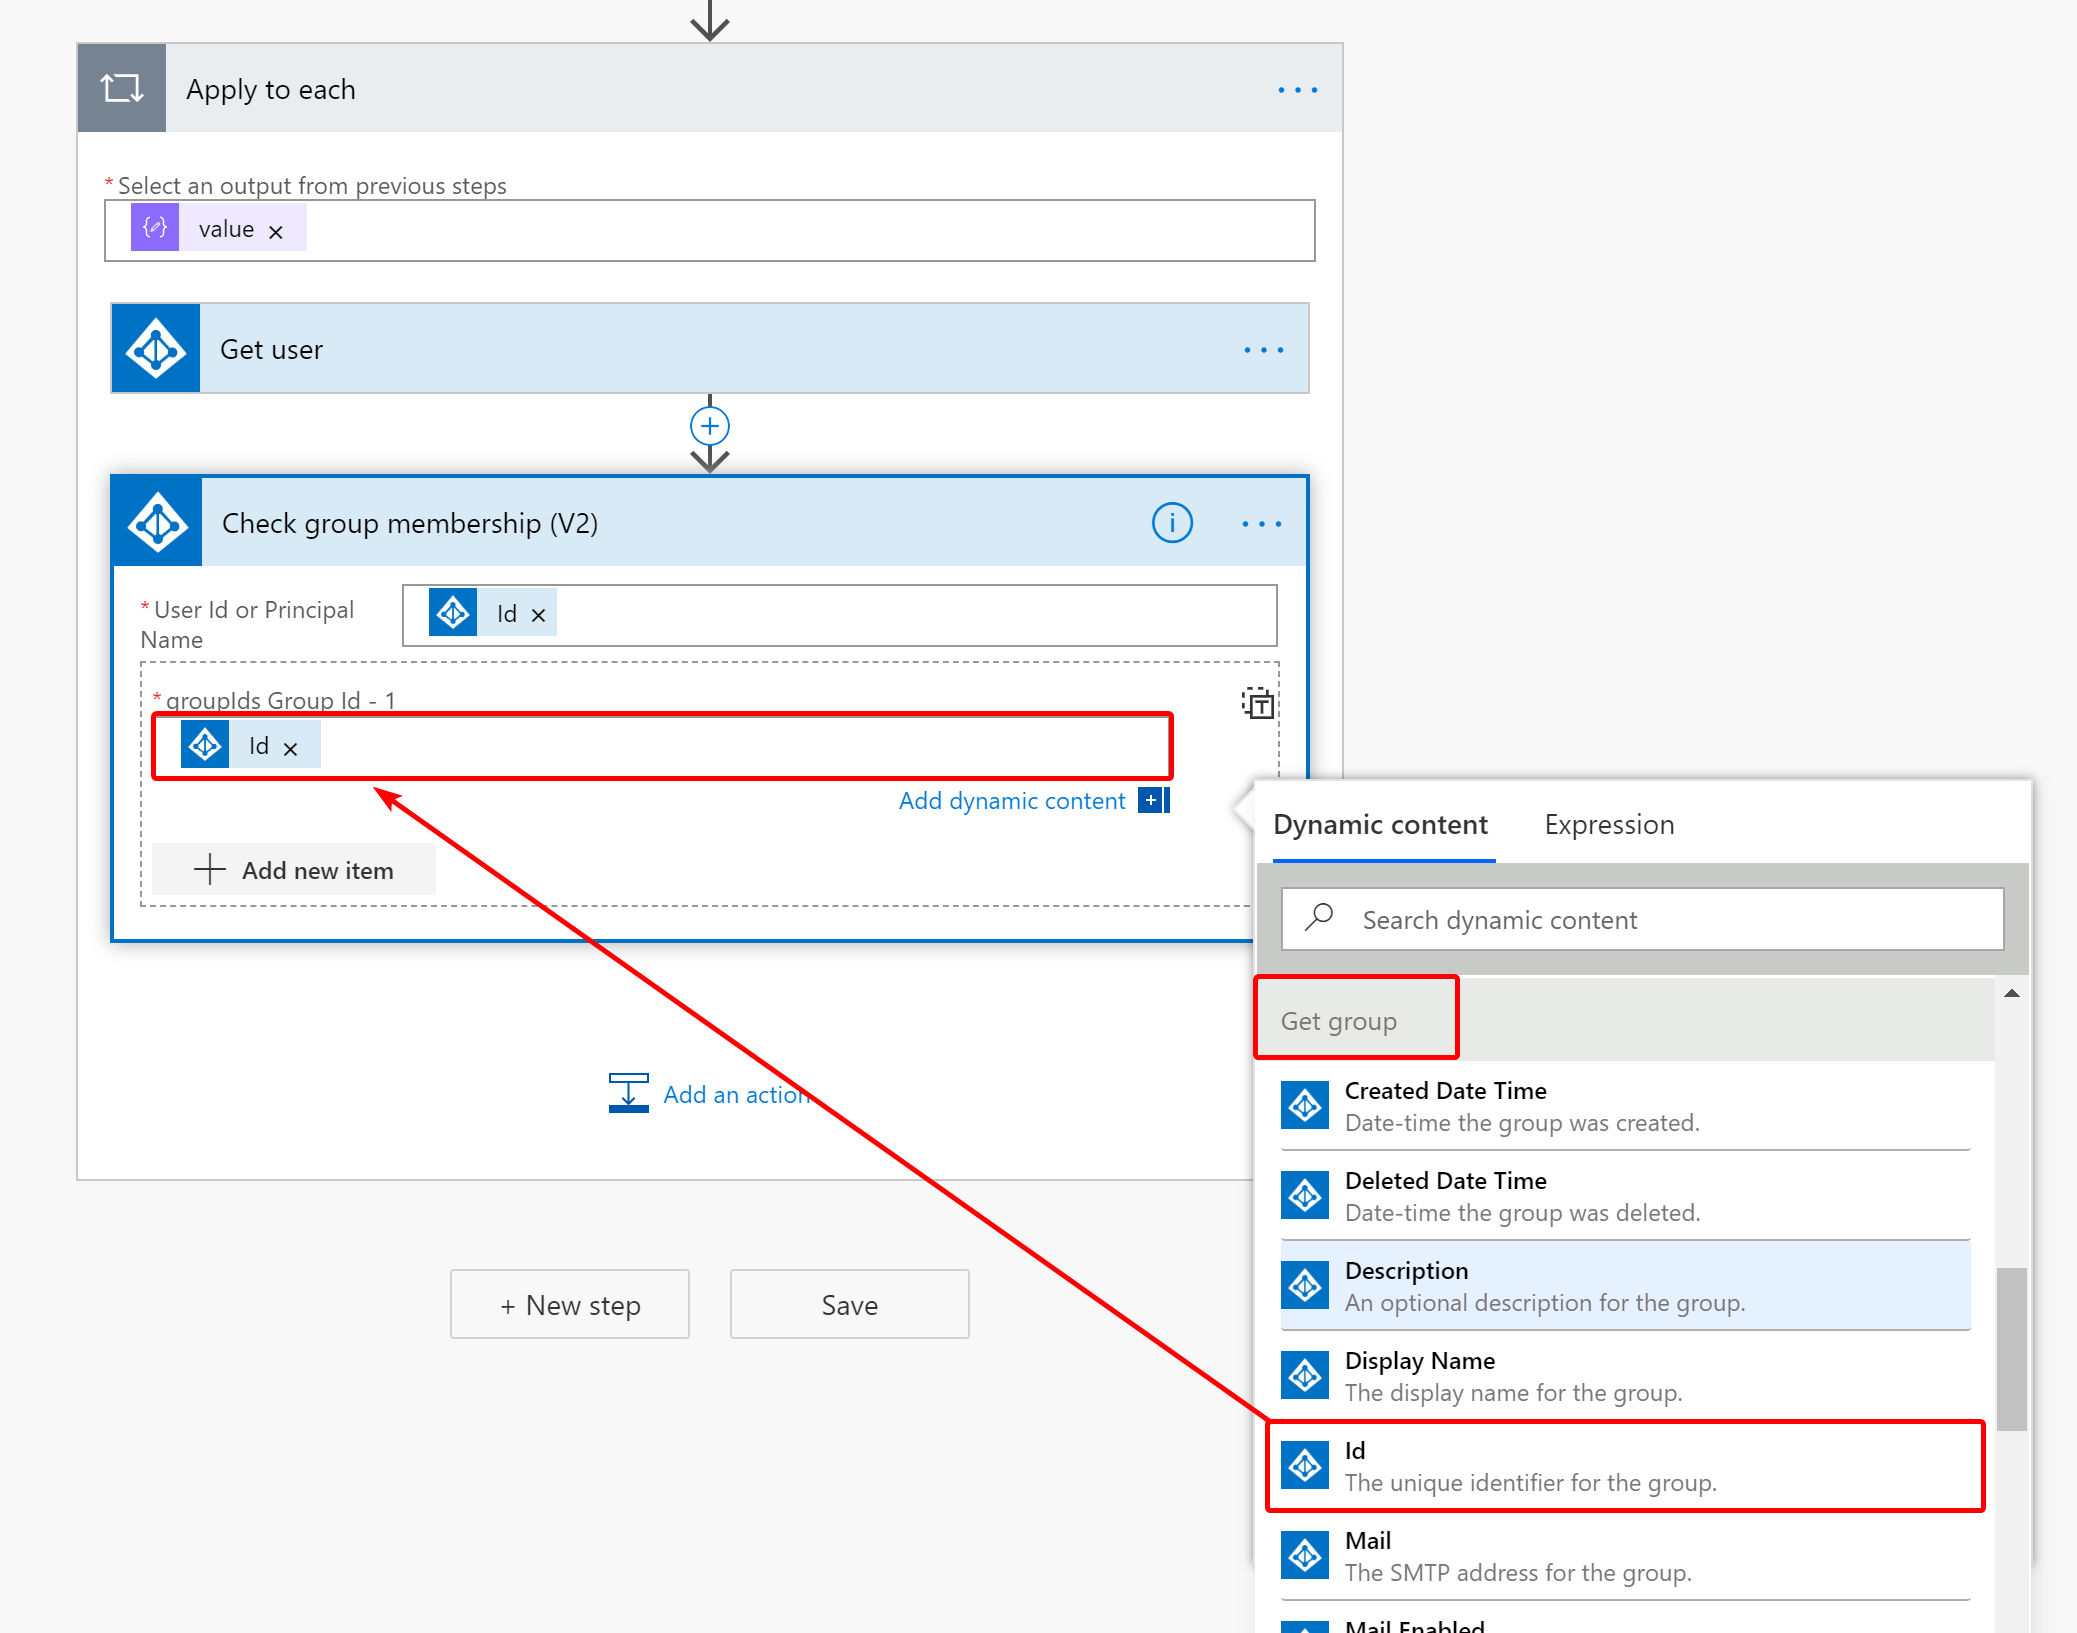
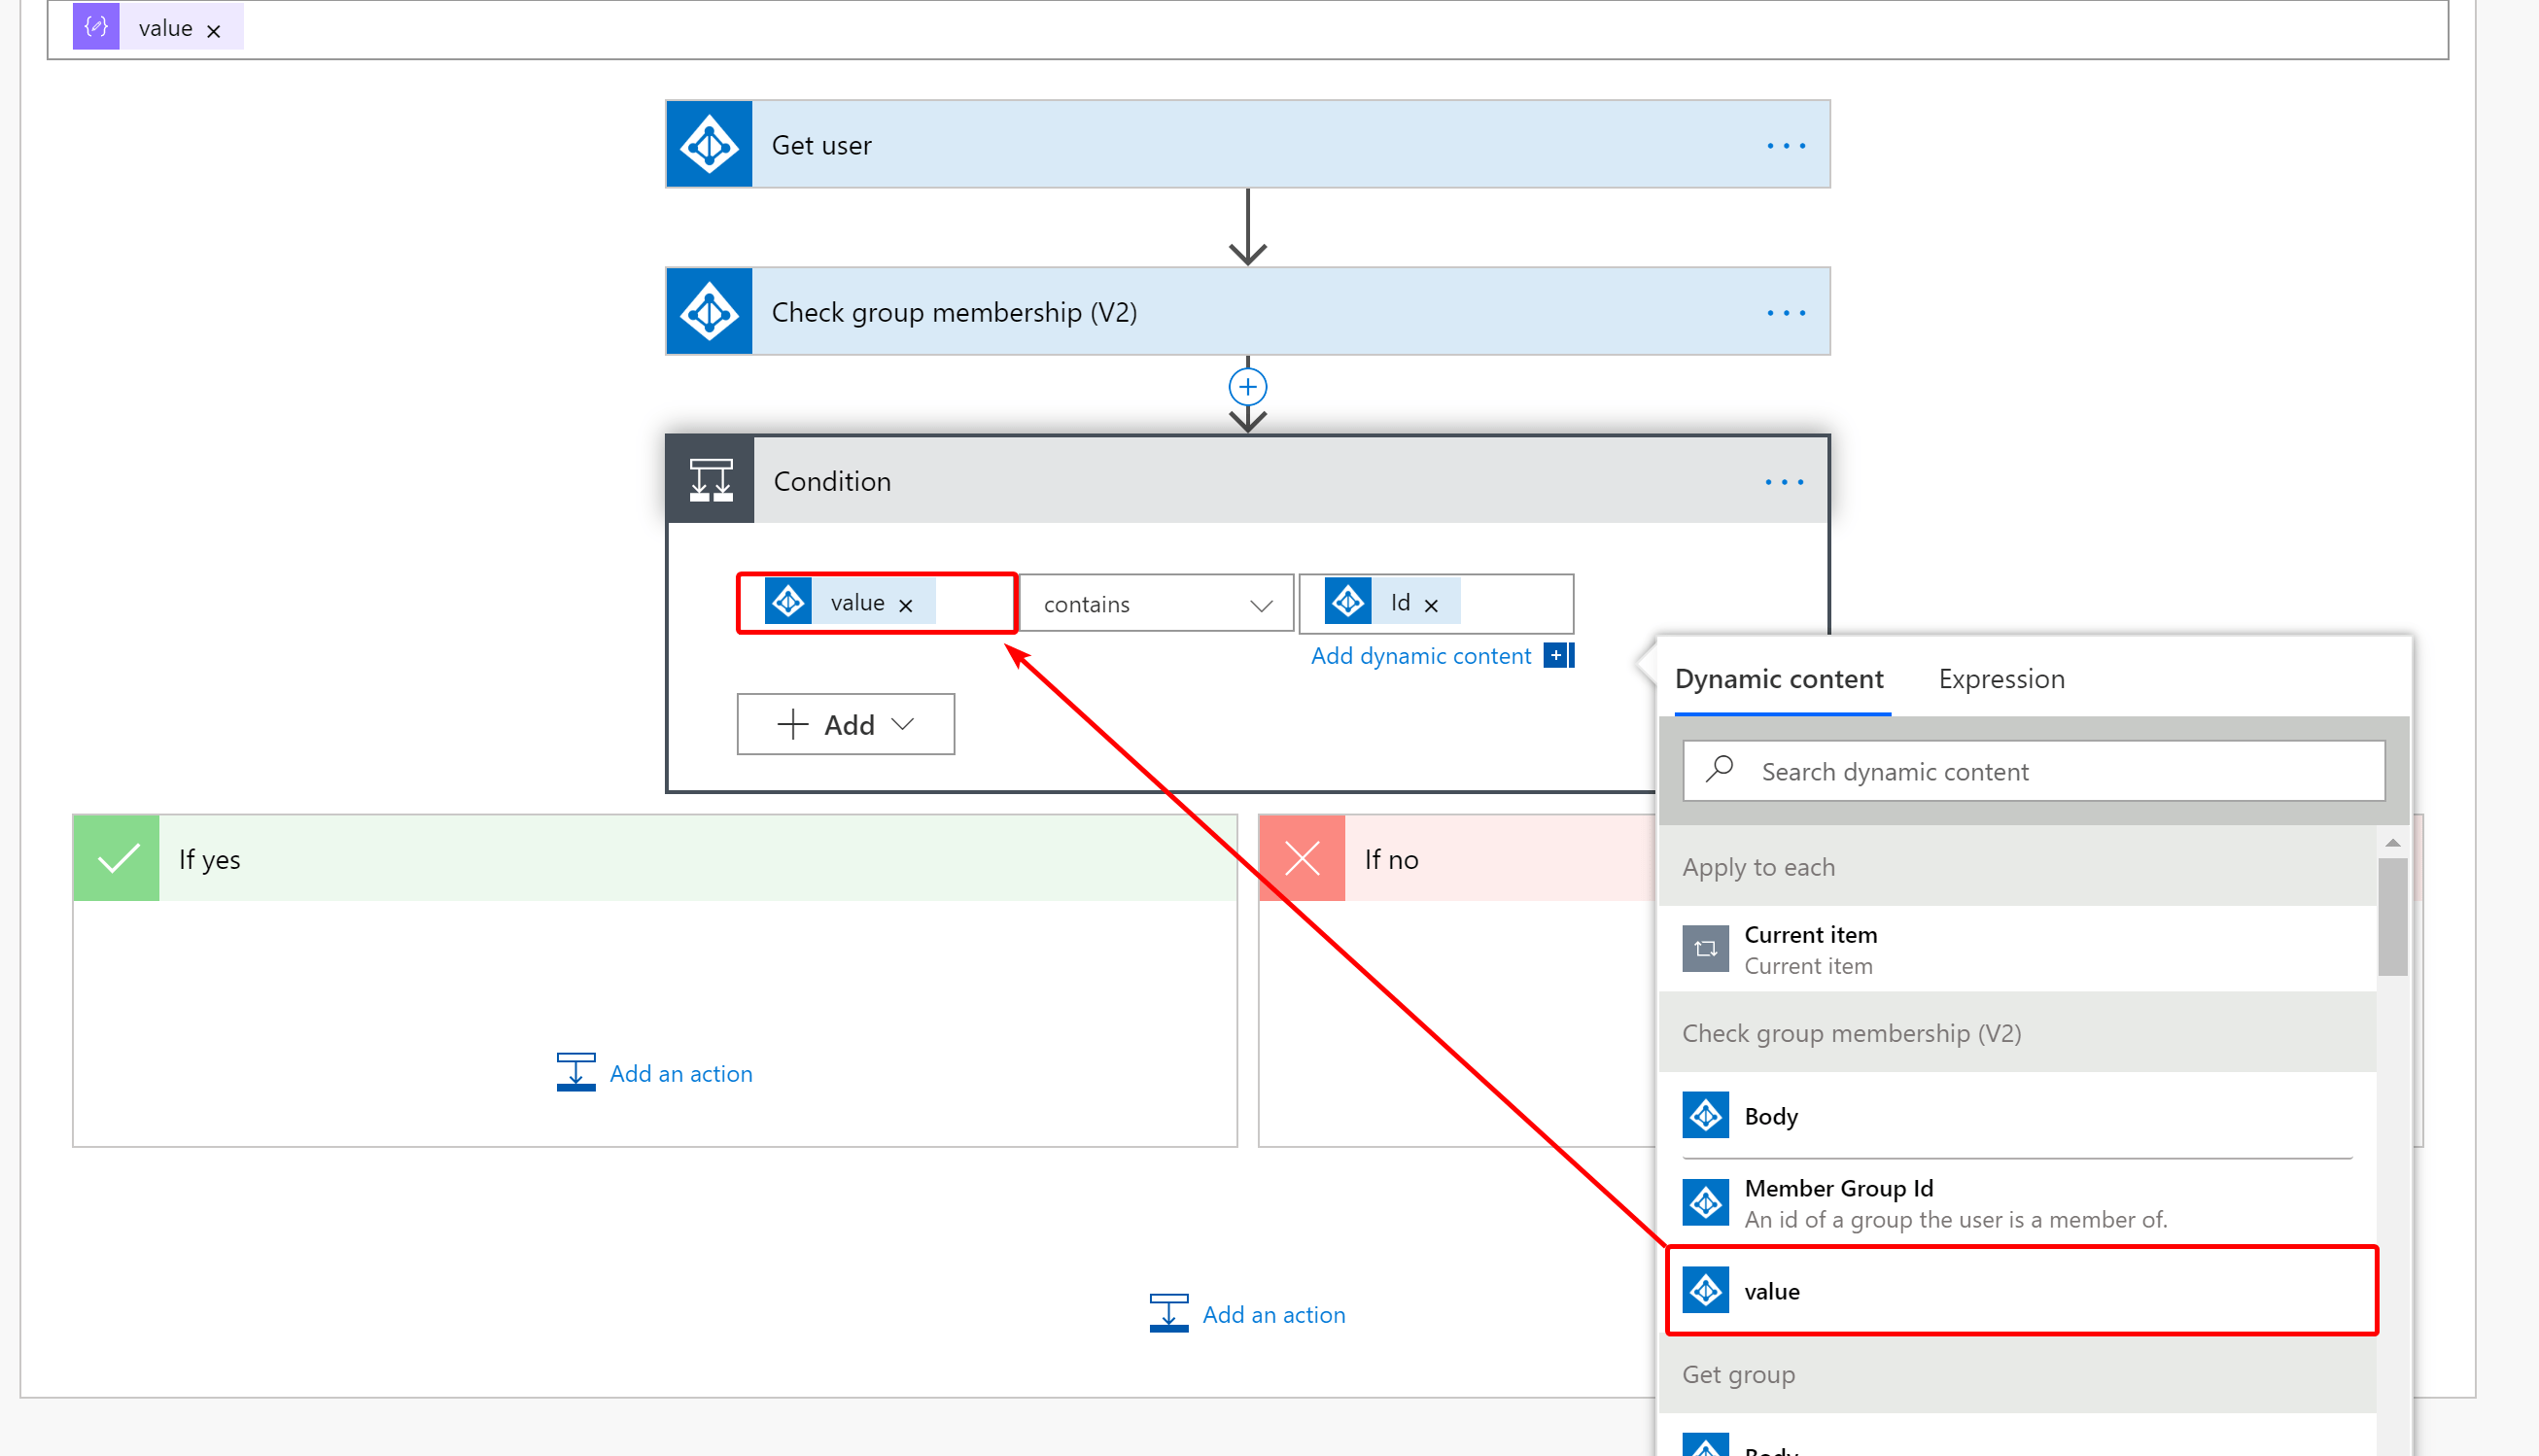
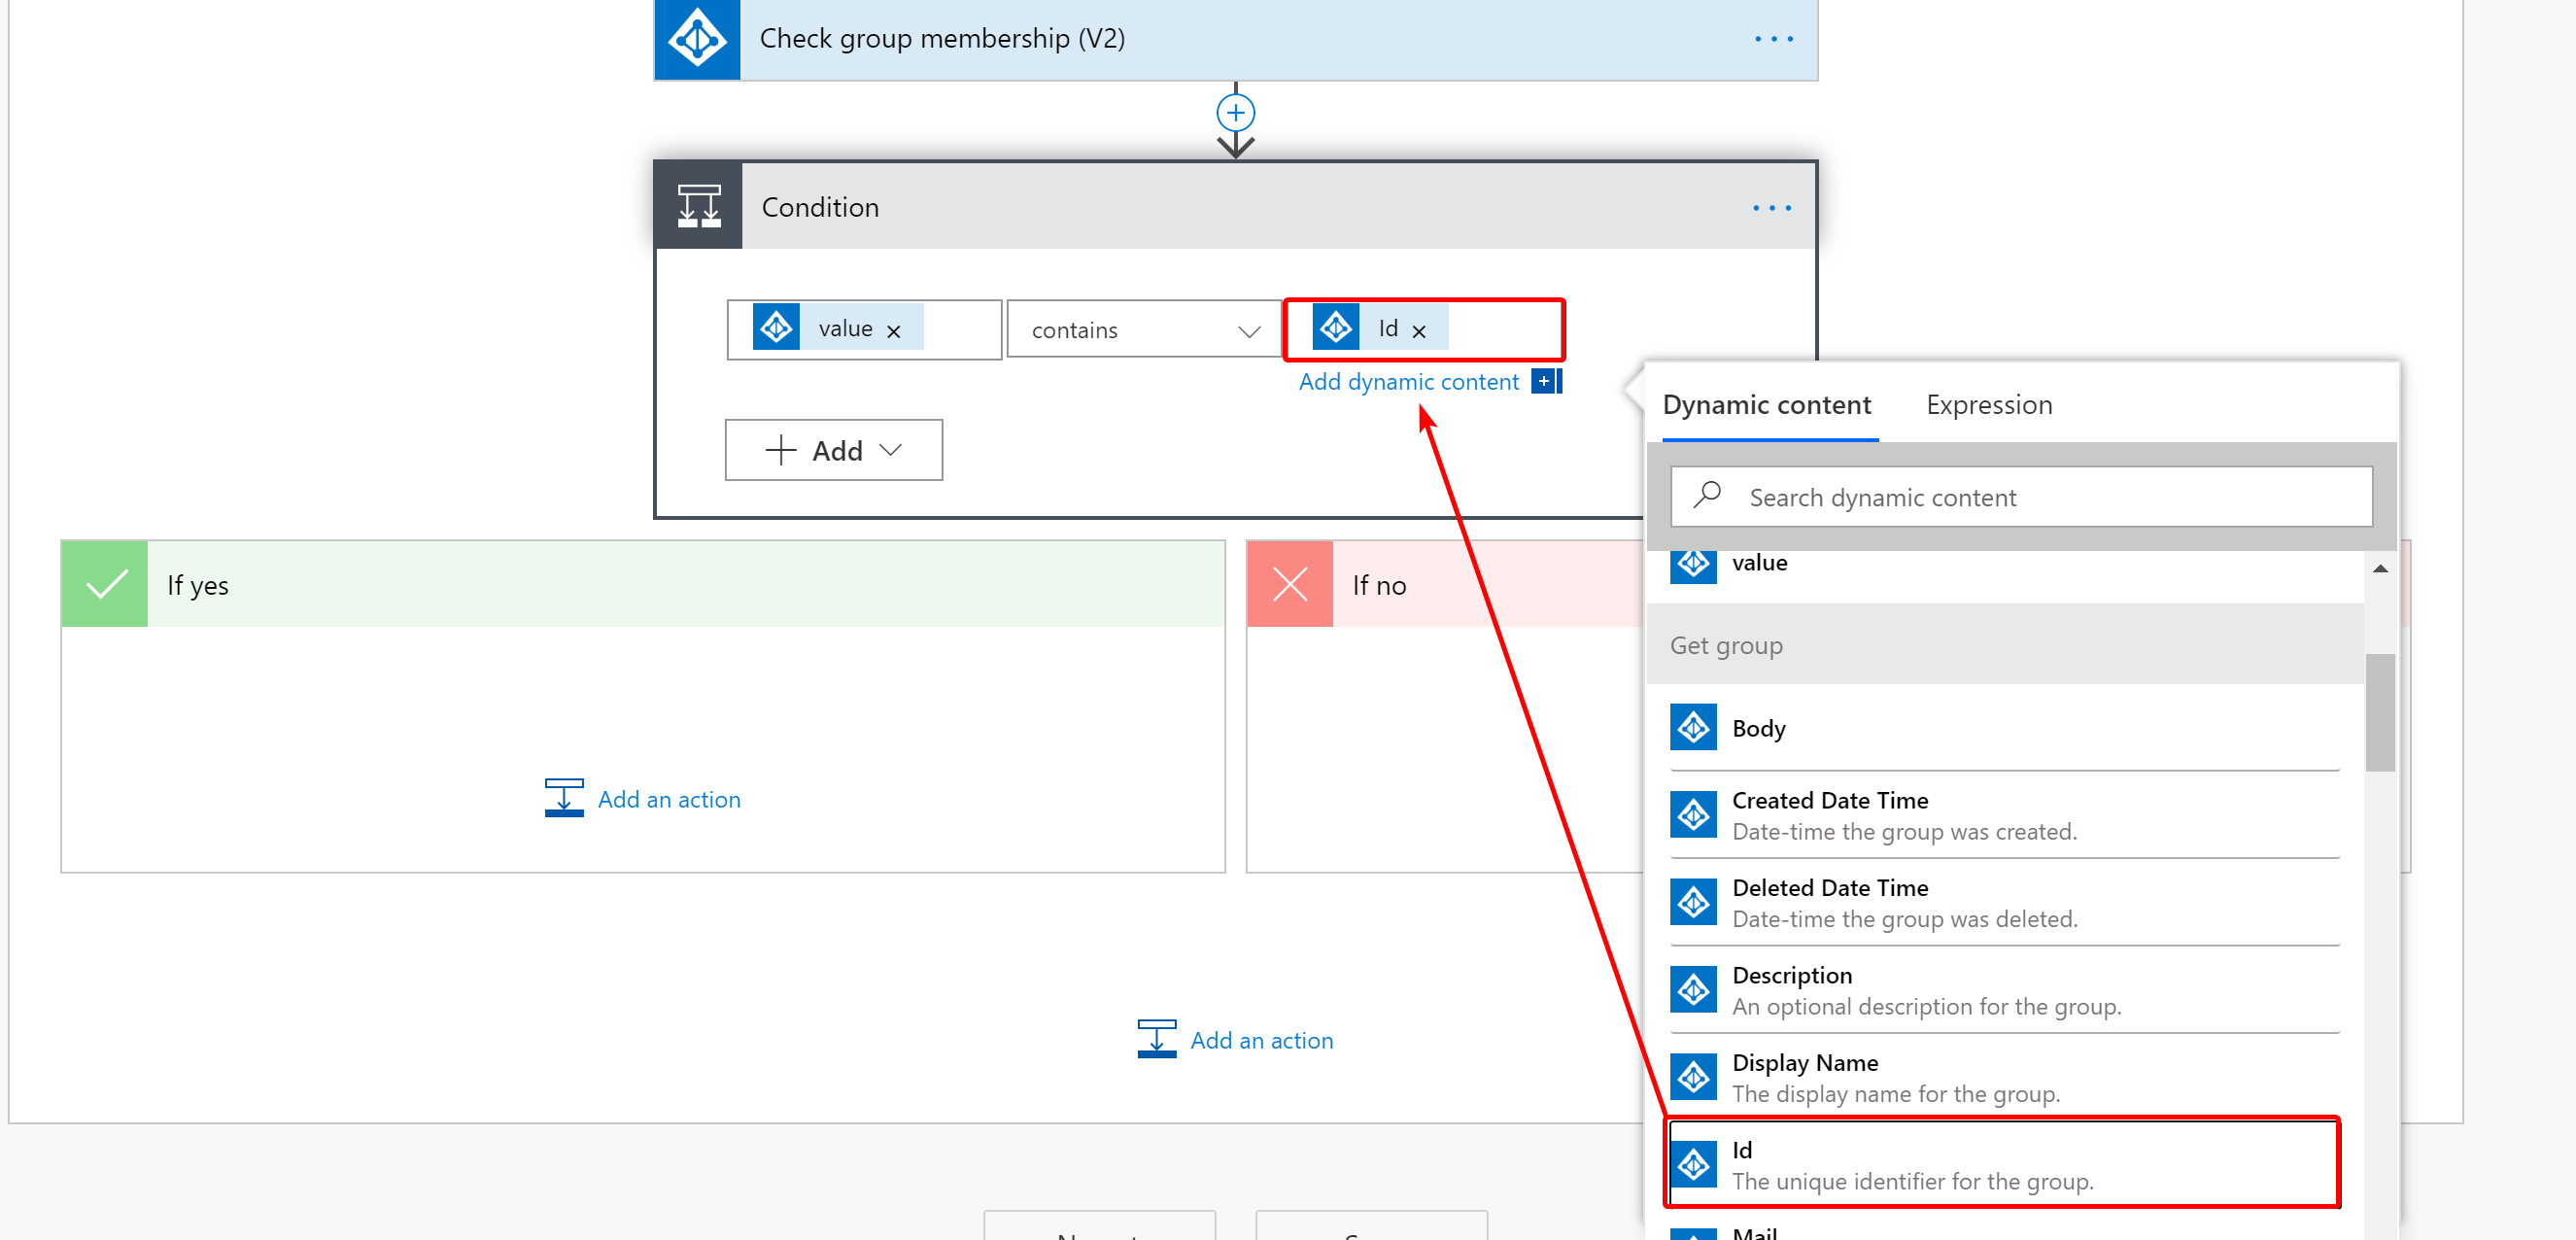
Now, we are adding a Condition Control. The outcome will be Yes or No. Here we check if the user is a member of the group. So if the value contains the group ID, the user is already a member of the group. Else, it’s No, so we need to add the user in the next step.
Make sure you use the contains statement.
The last step in the flow is to add the user to the group. Add a new action in the “If No” section and look for Add user to group. Next, pick the right values from the dynamic content panel.
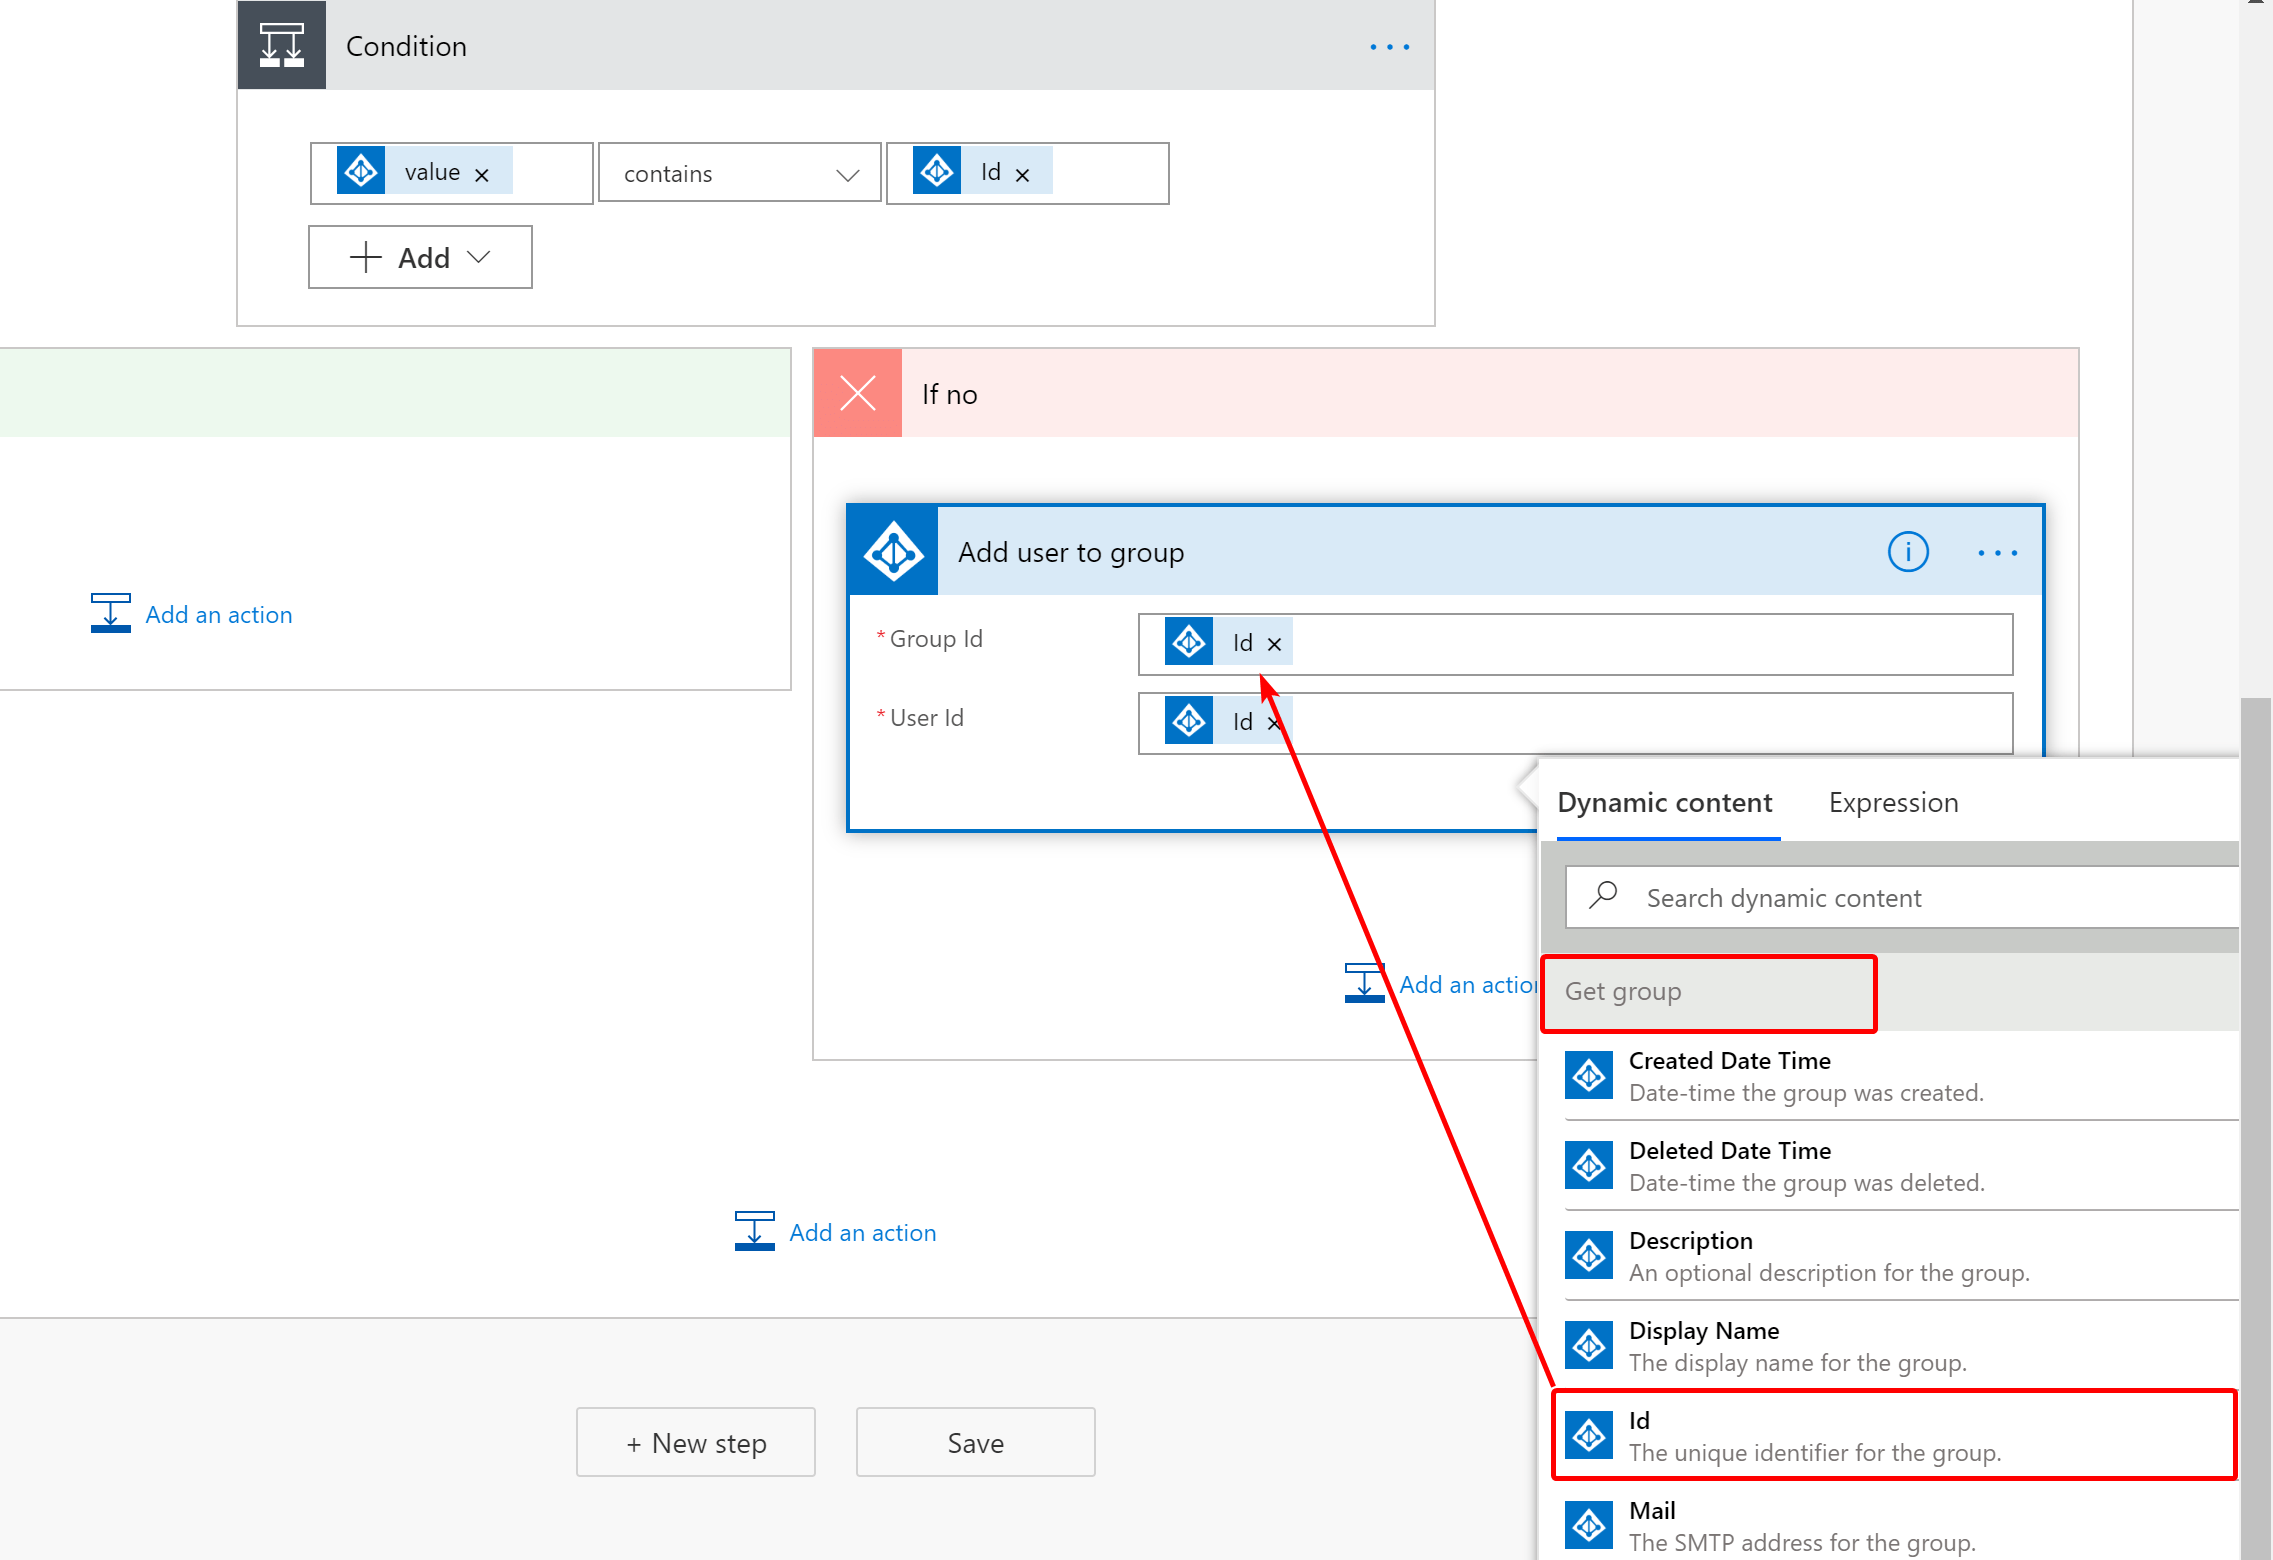
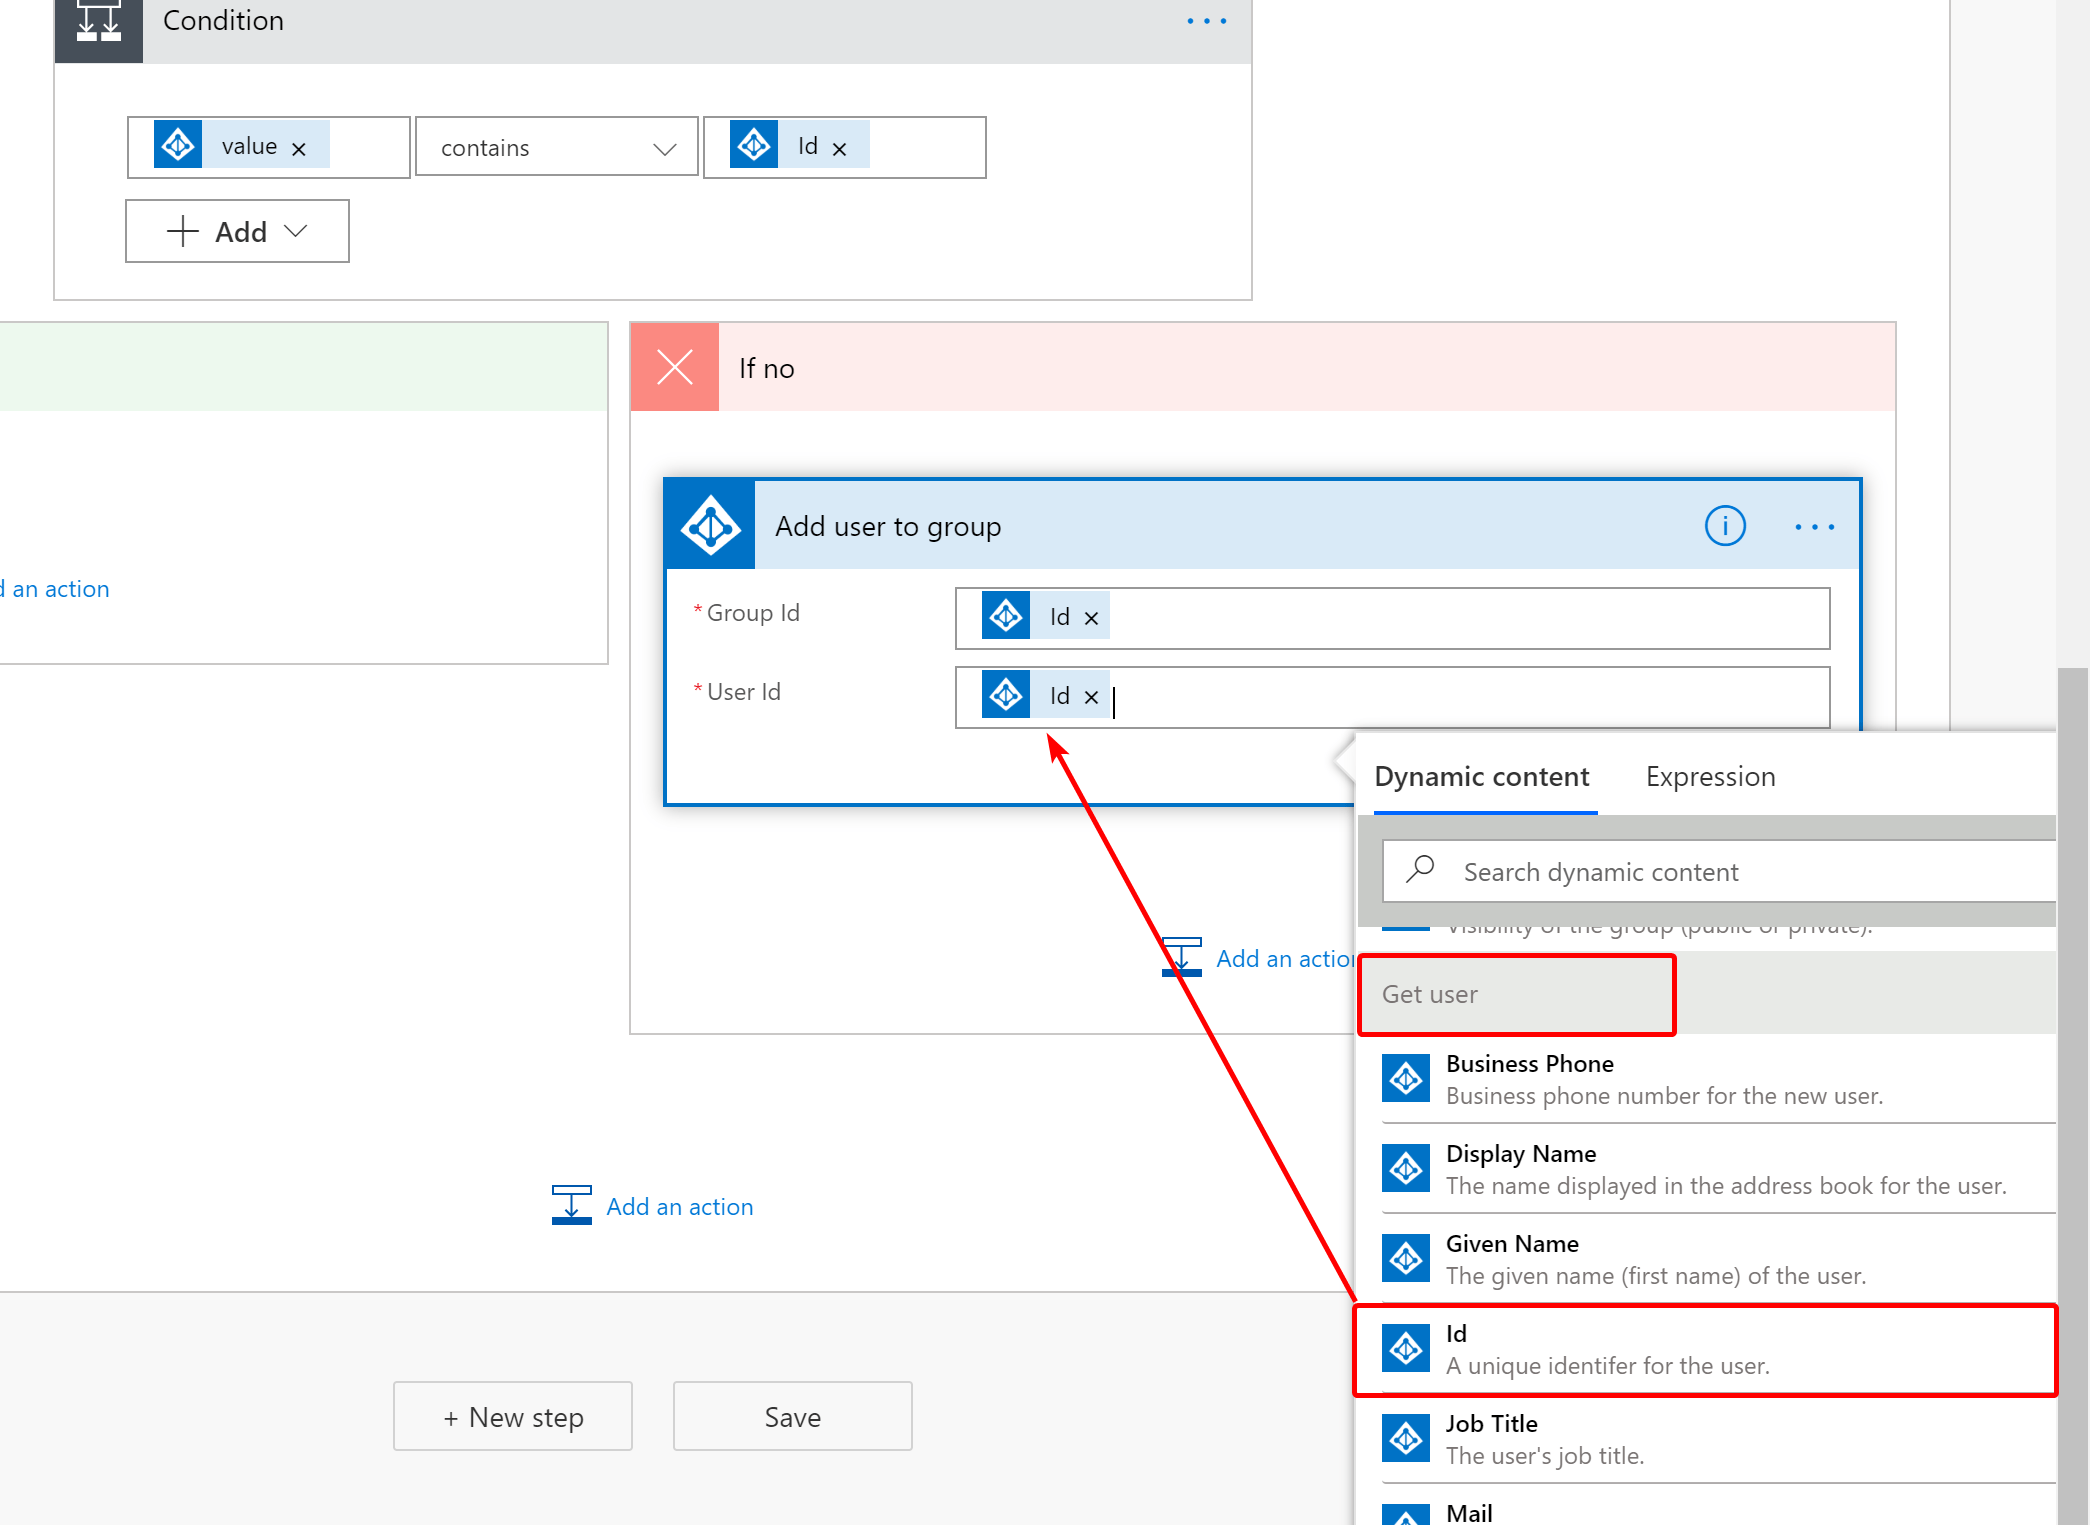
The “If Yes” section can stay empty. Next, save the flow. The flow should look like this:
Test the flow#
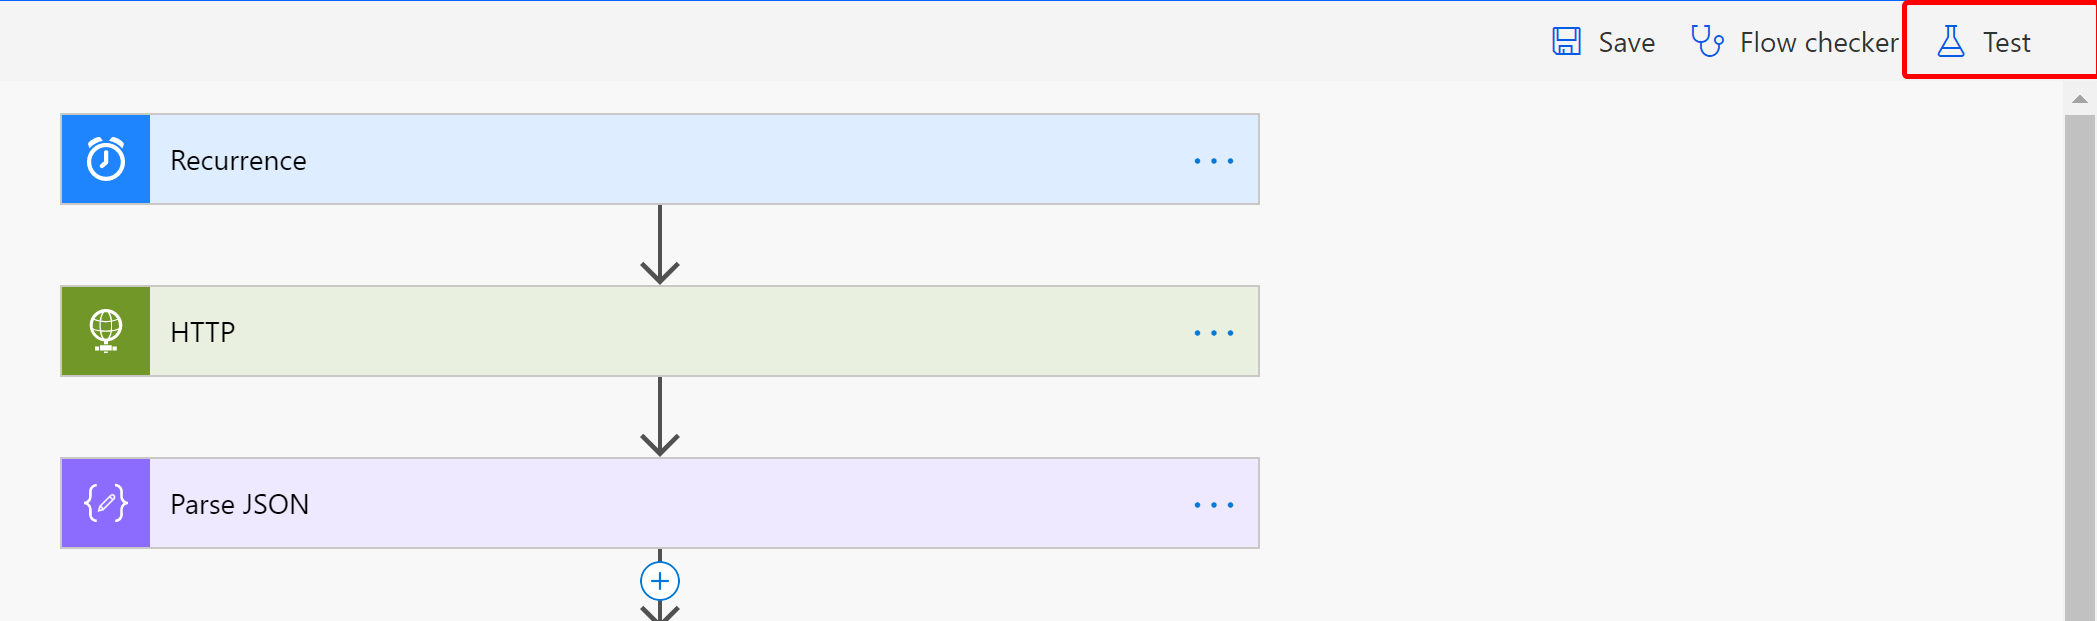
To test the flow, click the Test button in the right upper corner.
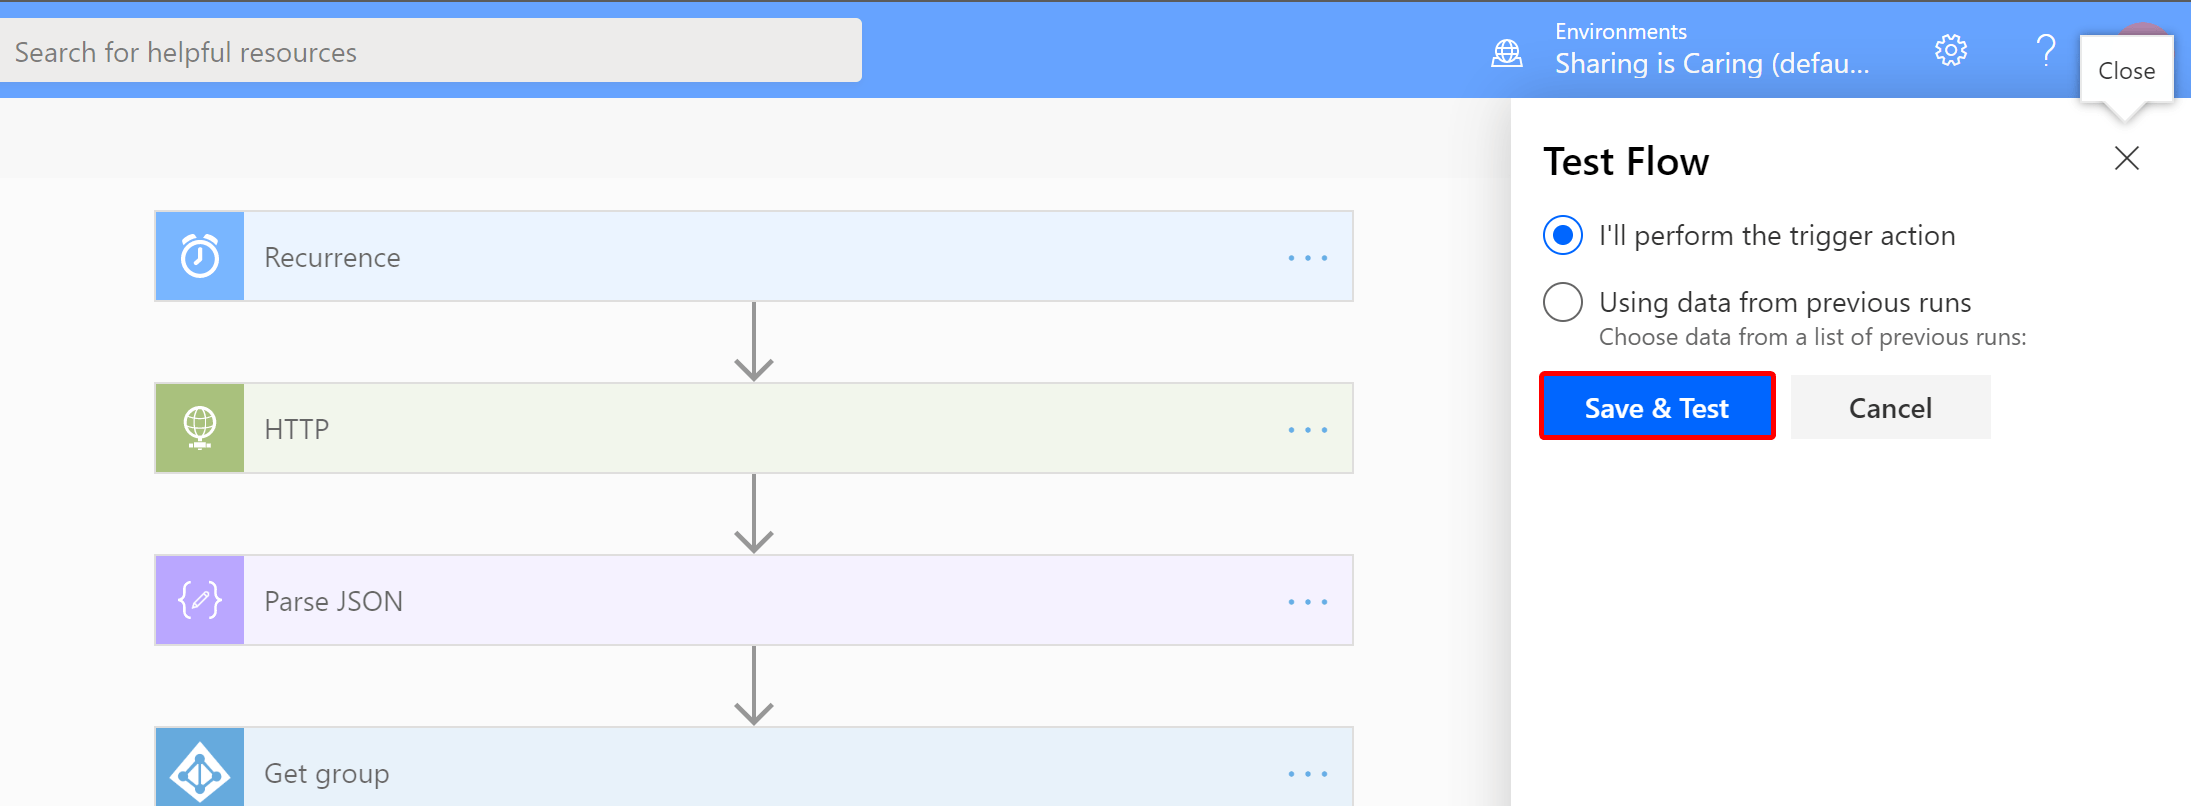
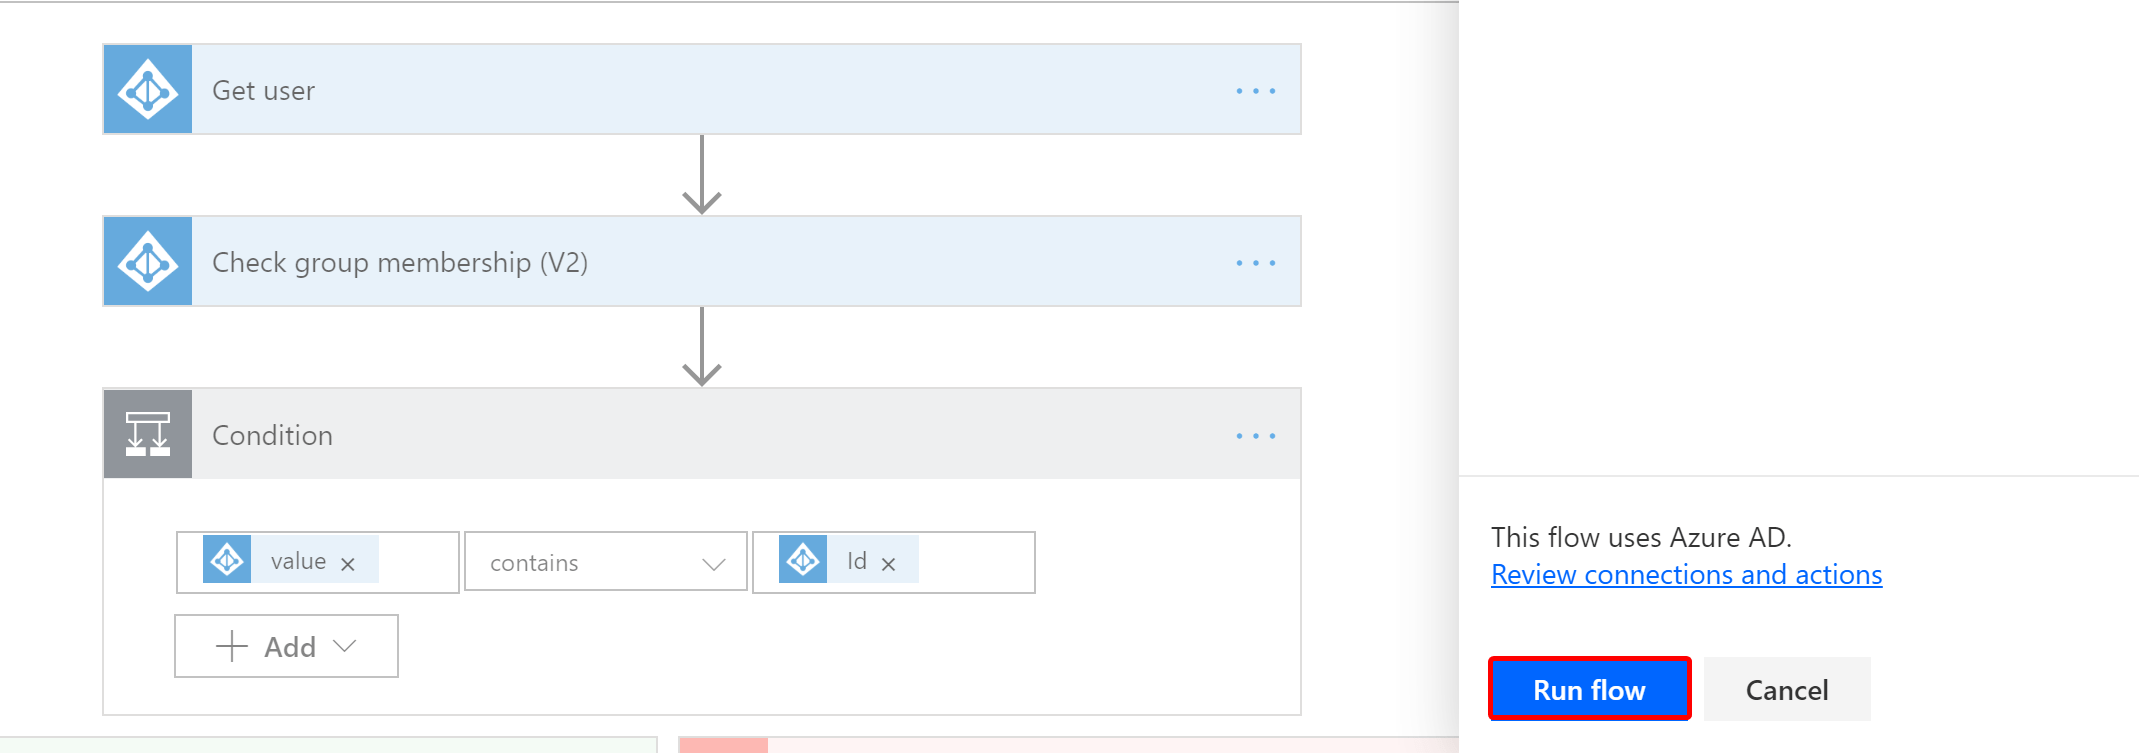
When the flow fails, you can check the errors to resolve them. If successful, you can see the output and go through the data.
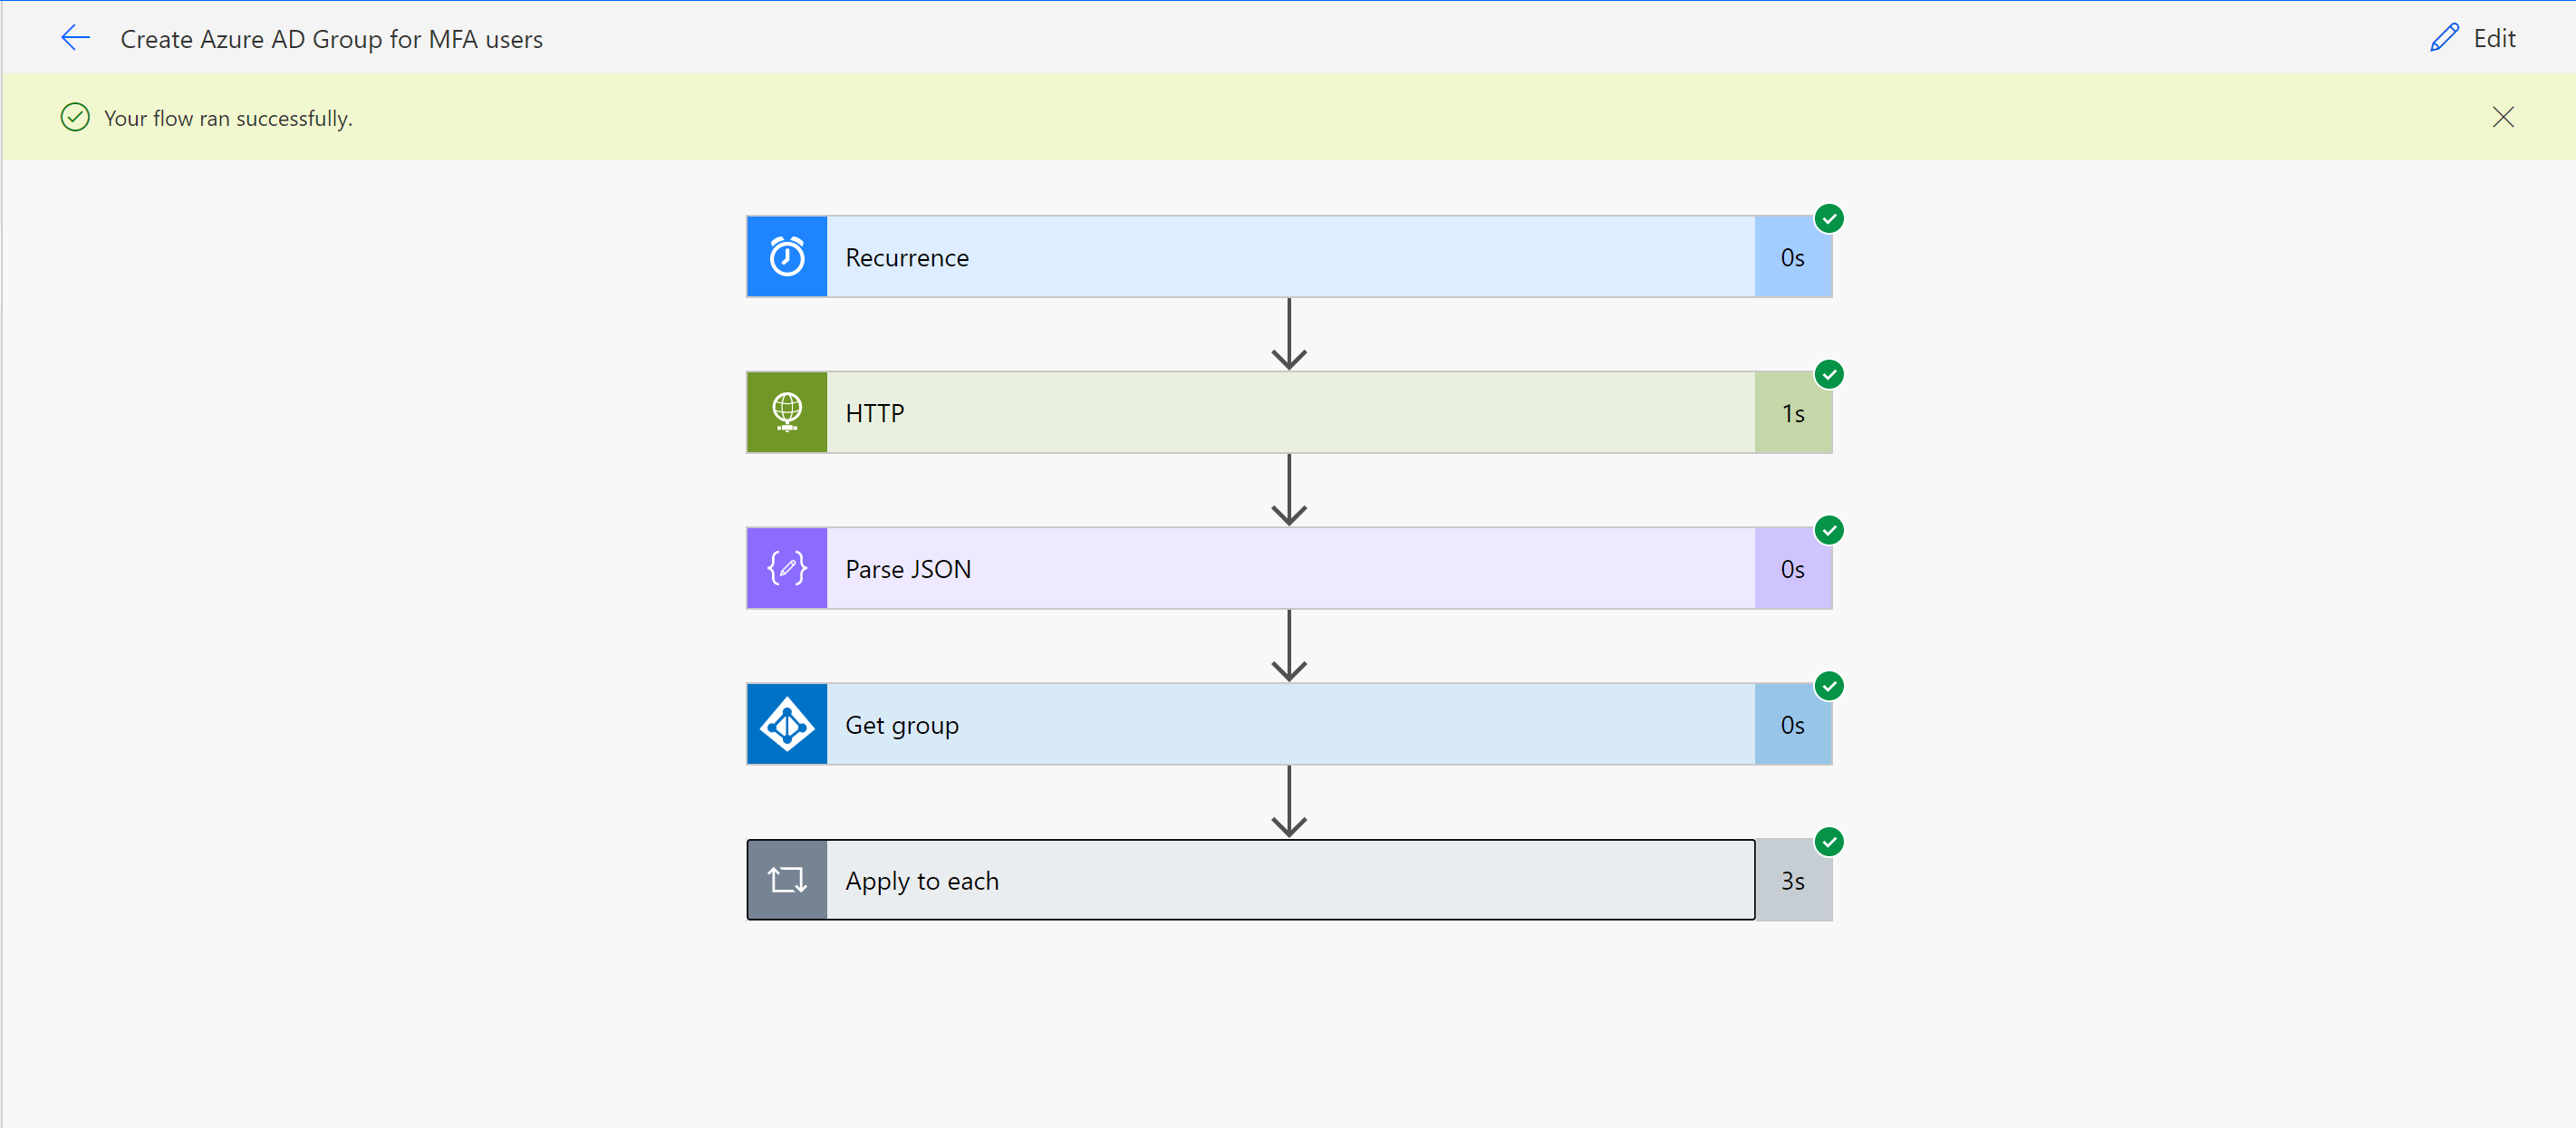
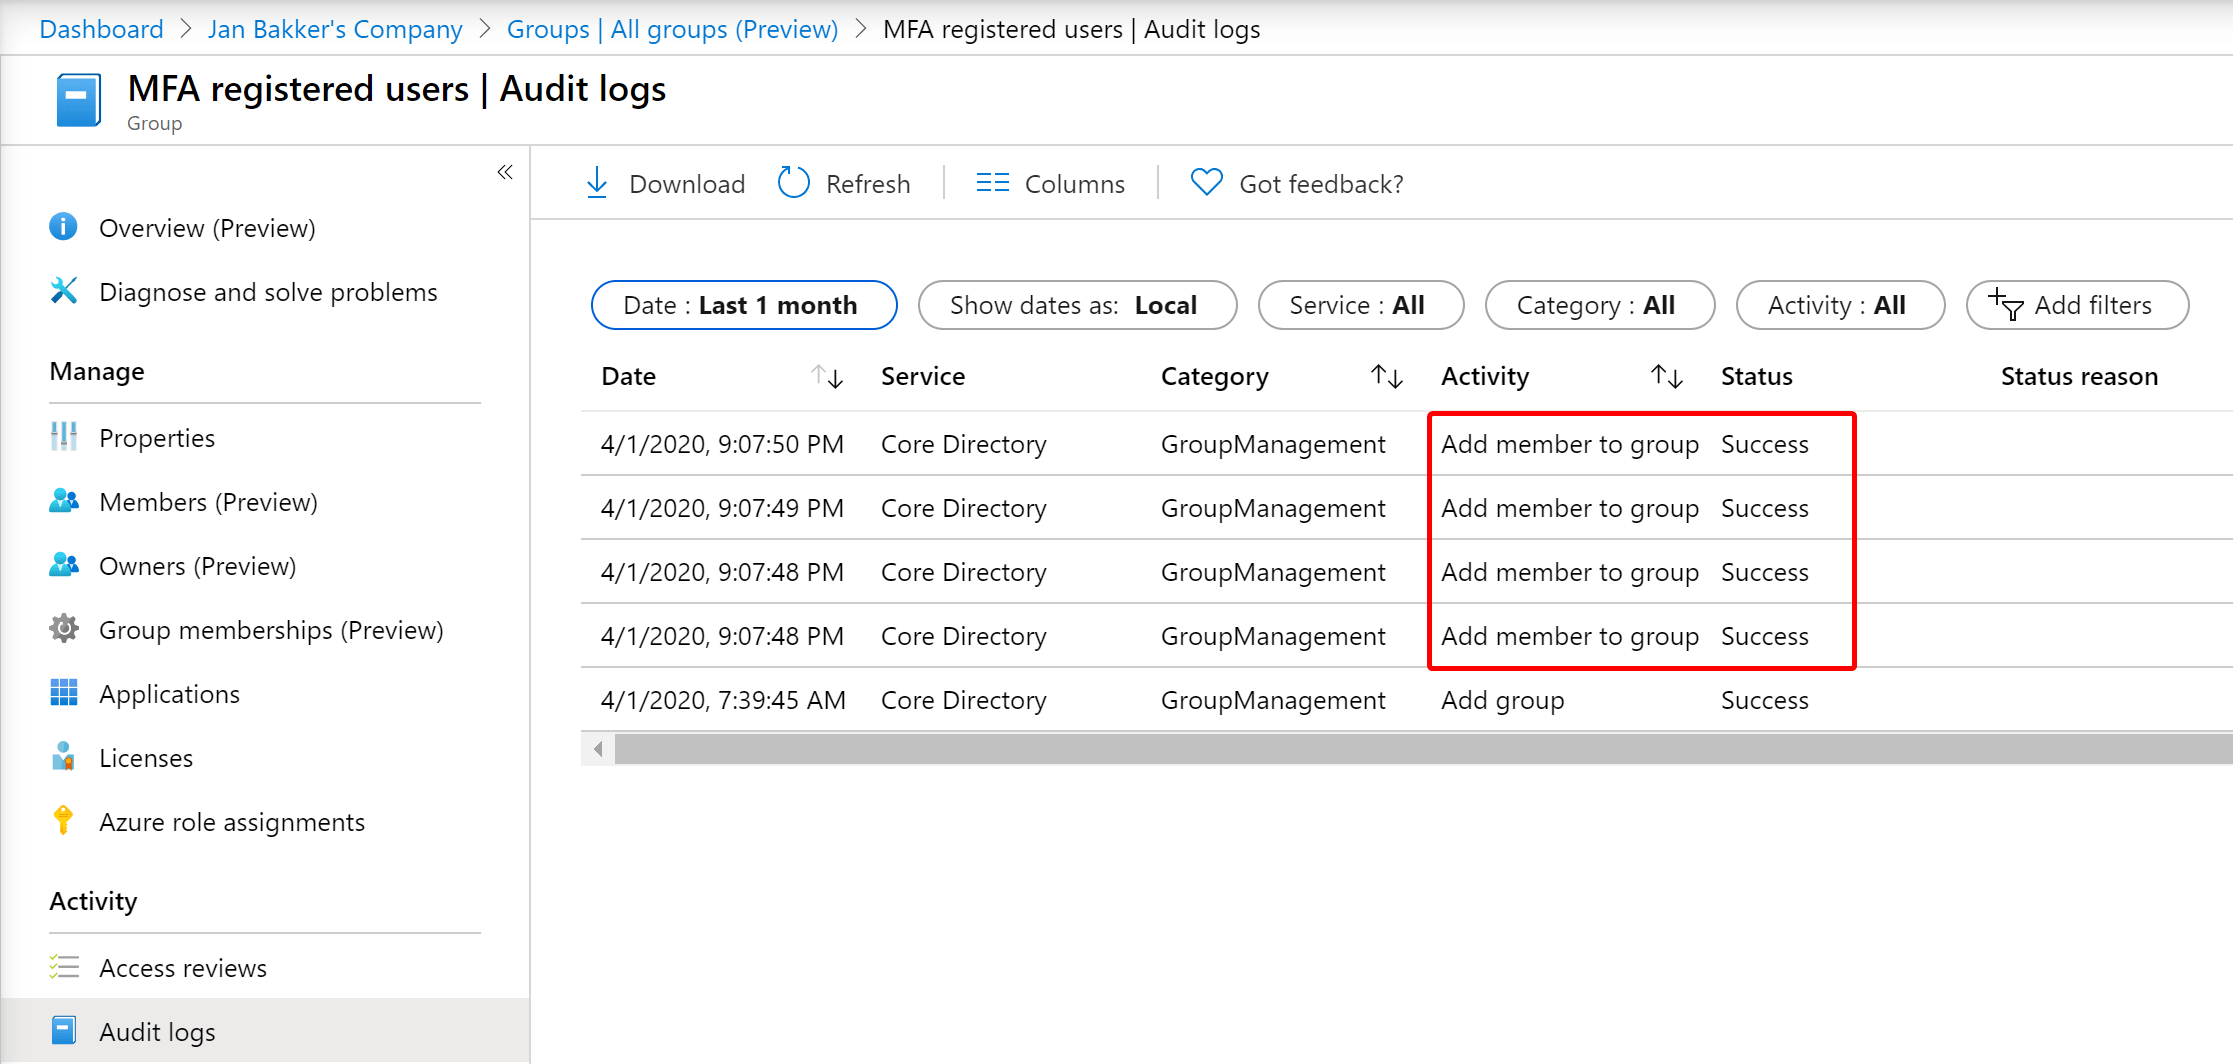
In Aure AD you can check if the members are added to the group.
Improvements#
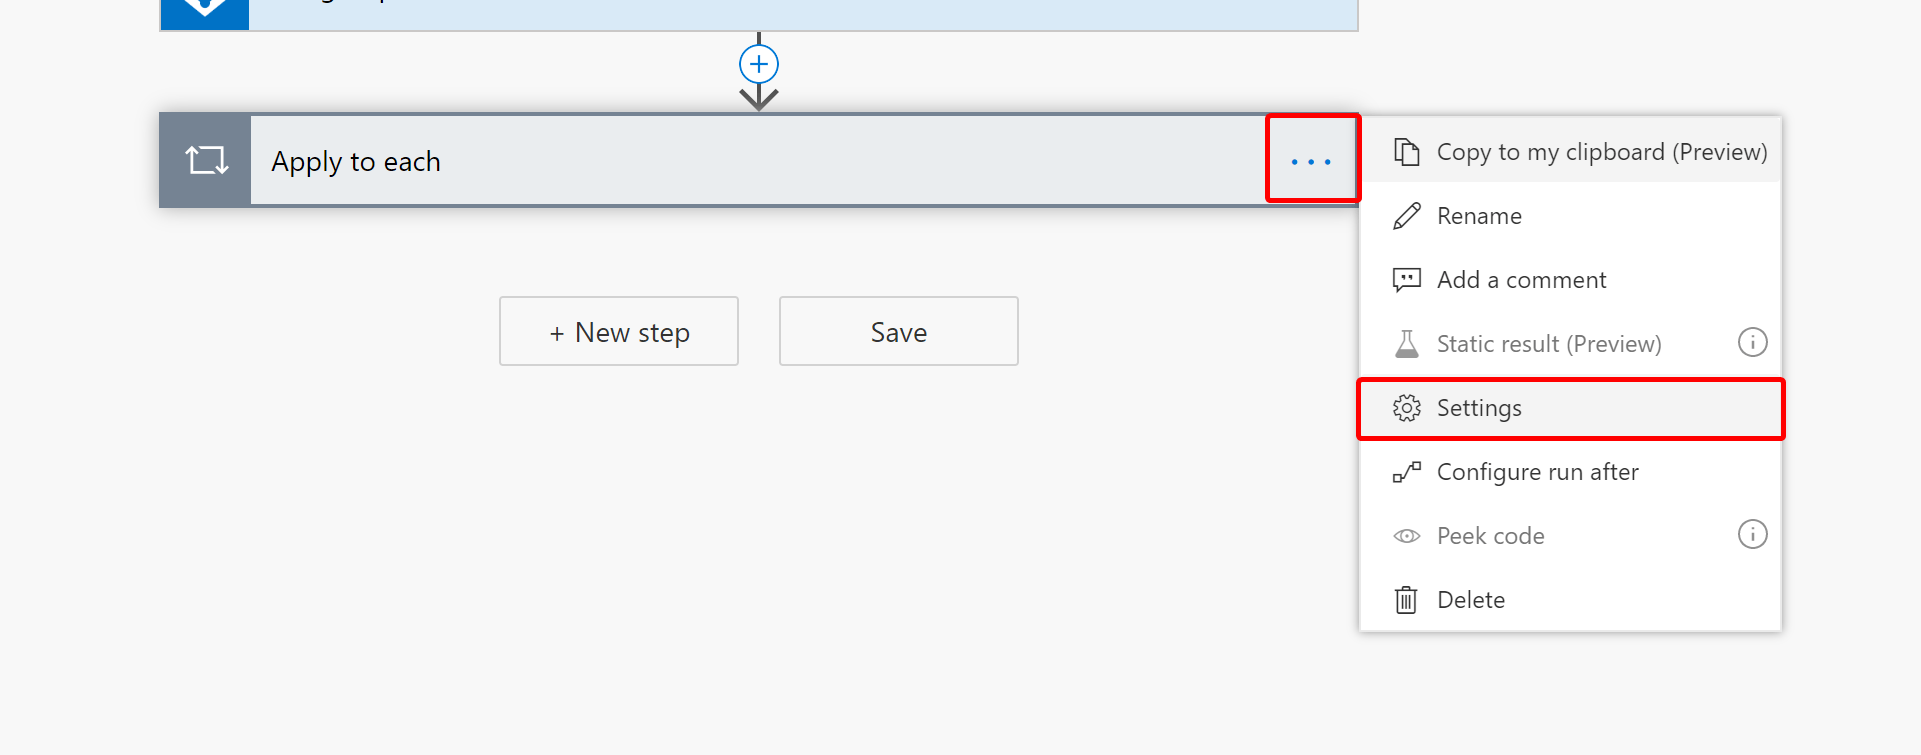
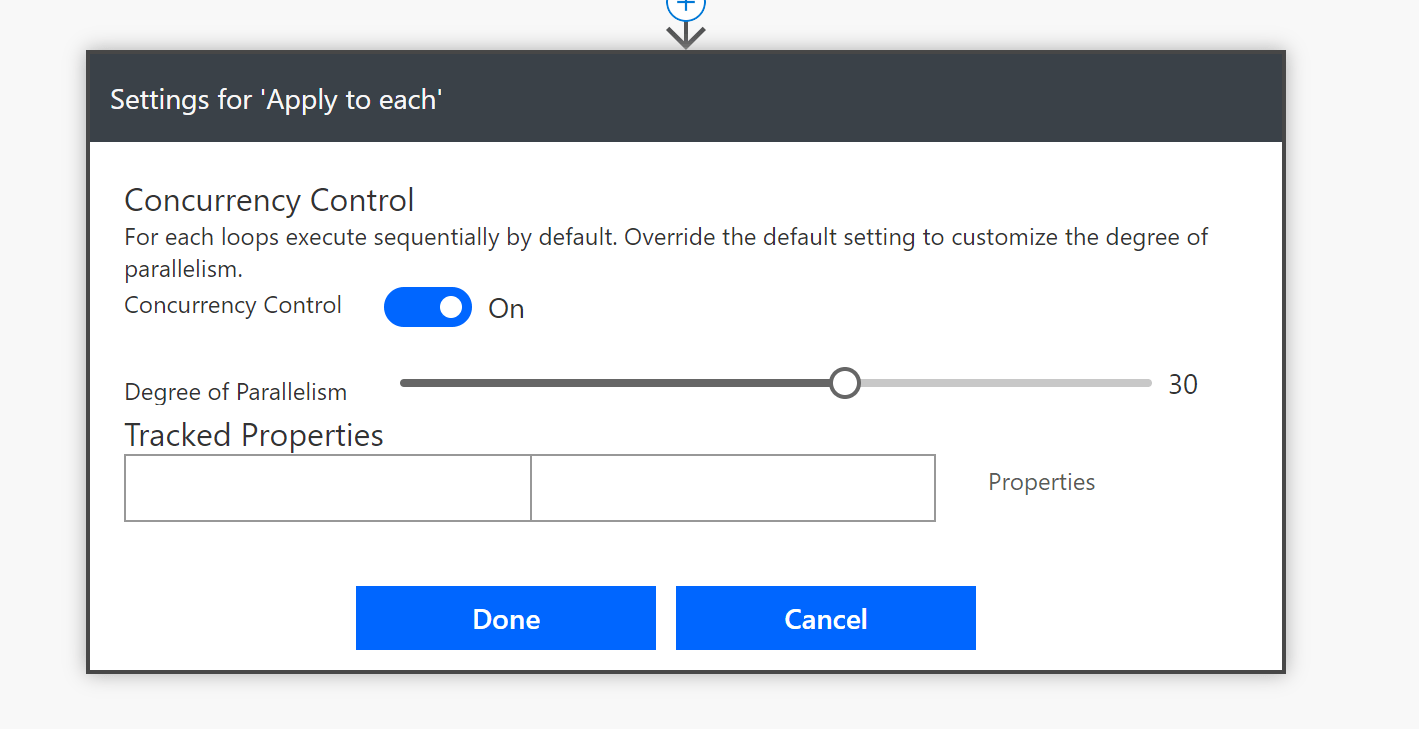
If you have a lot of users, you can enable Concurrency Control on the Apply to each action. You can adjust the value to your needs. You can lower the value if your flow keeps failing, or taking a long time to succeed.
Wrap things up#
Be aware that I used the BETA Graph API here, so you should be careful using this in production environments. Also, this gives you an idea of what you can do with Graph API and Power Automate. This was my first experience with Power Automate, so I guess there are some improvements to make here. Just let me know what I can do better, and I’ll update the article.
Comments
Comments load when you scroll here.