
Register Yubikeys on behalf of your users with YubiEnroll
In an earlier post, I showed several ways to (bulk) provision Yubikeys (or keys from other vendors) in Microsoft Entra using the provisioning APIs. In this post, we look at another gem from Yubico, YubiEnroll. This (CLI) tool is designed to delegate enrollment of Yubikeys to administrators or helpdesk staff. The good part is that it uses delegated permissions and respects Admin Units.
Although Yubico provided excellent documentation about the tool, I’d like to show you how to get this up and running.
Entra ID App registration#
First, we need to create a new app registration in Entra ID for authentication and authorization.
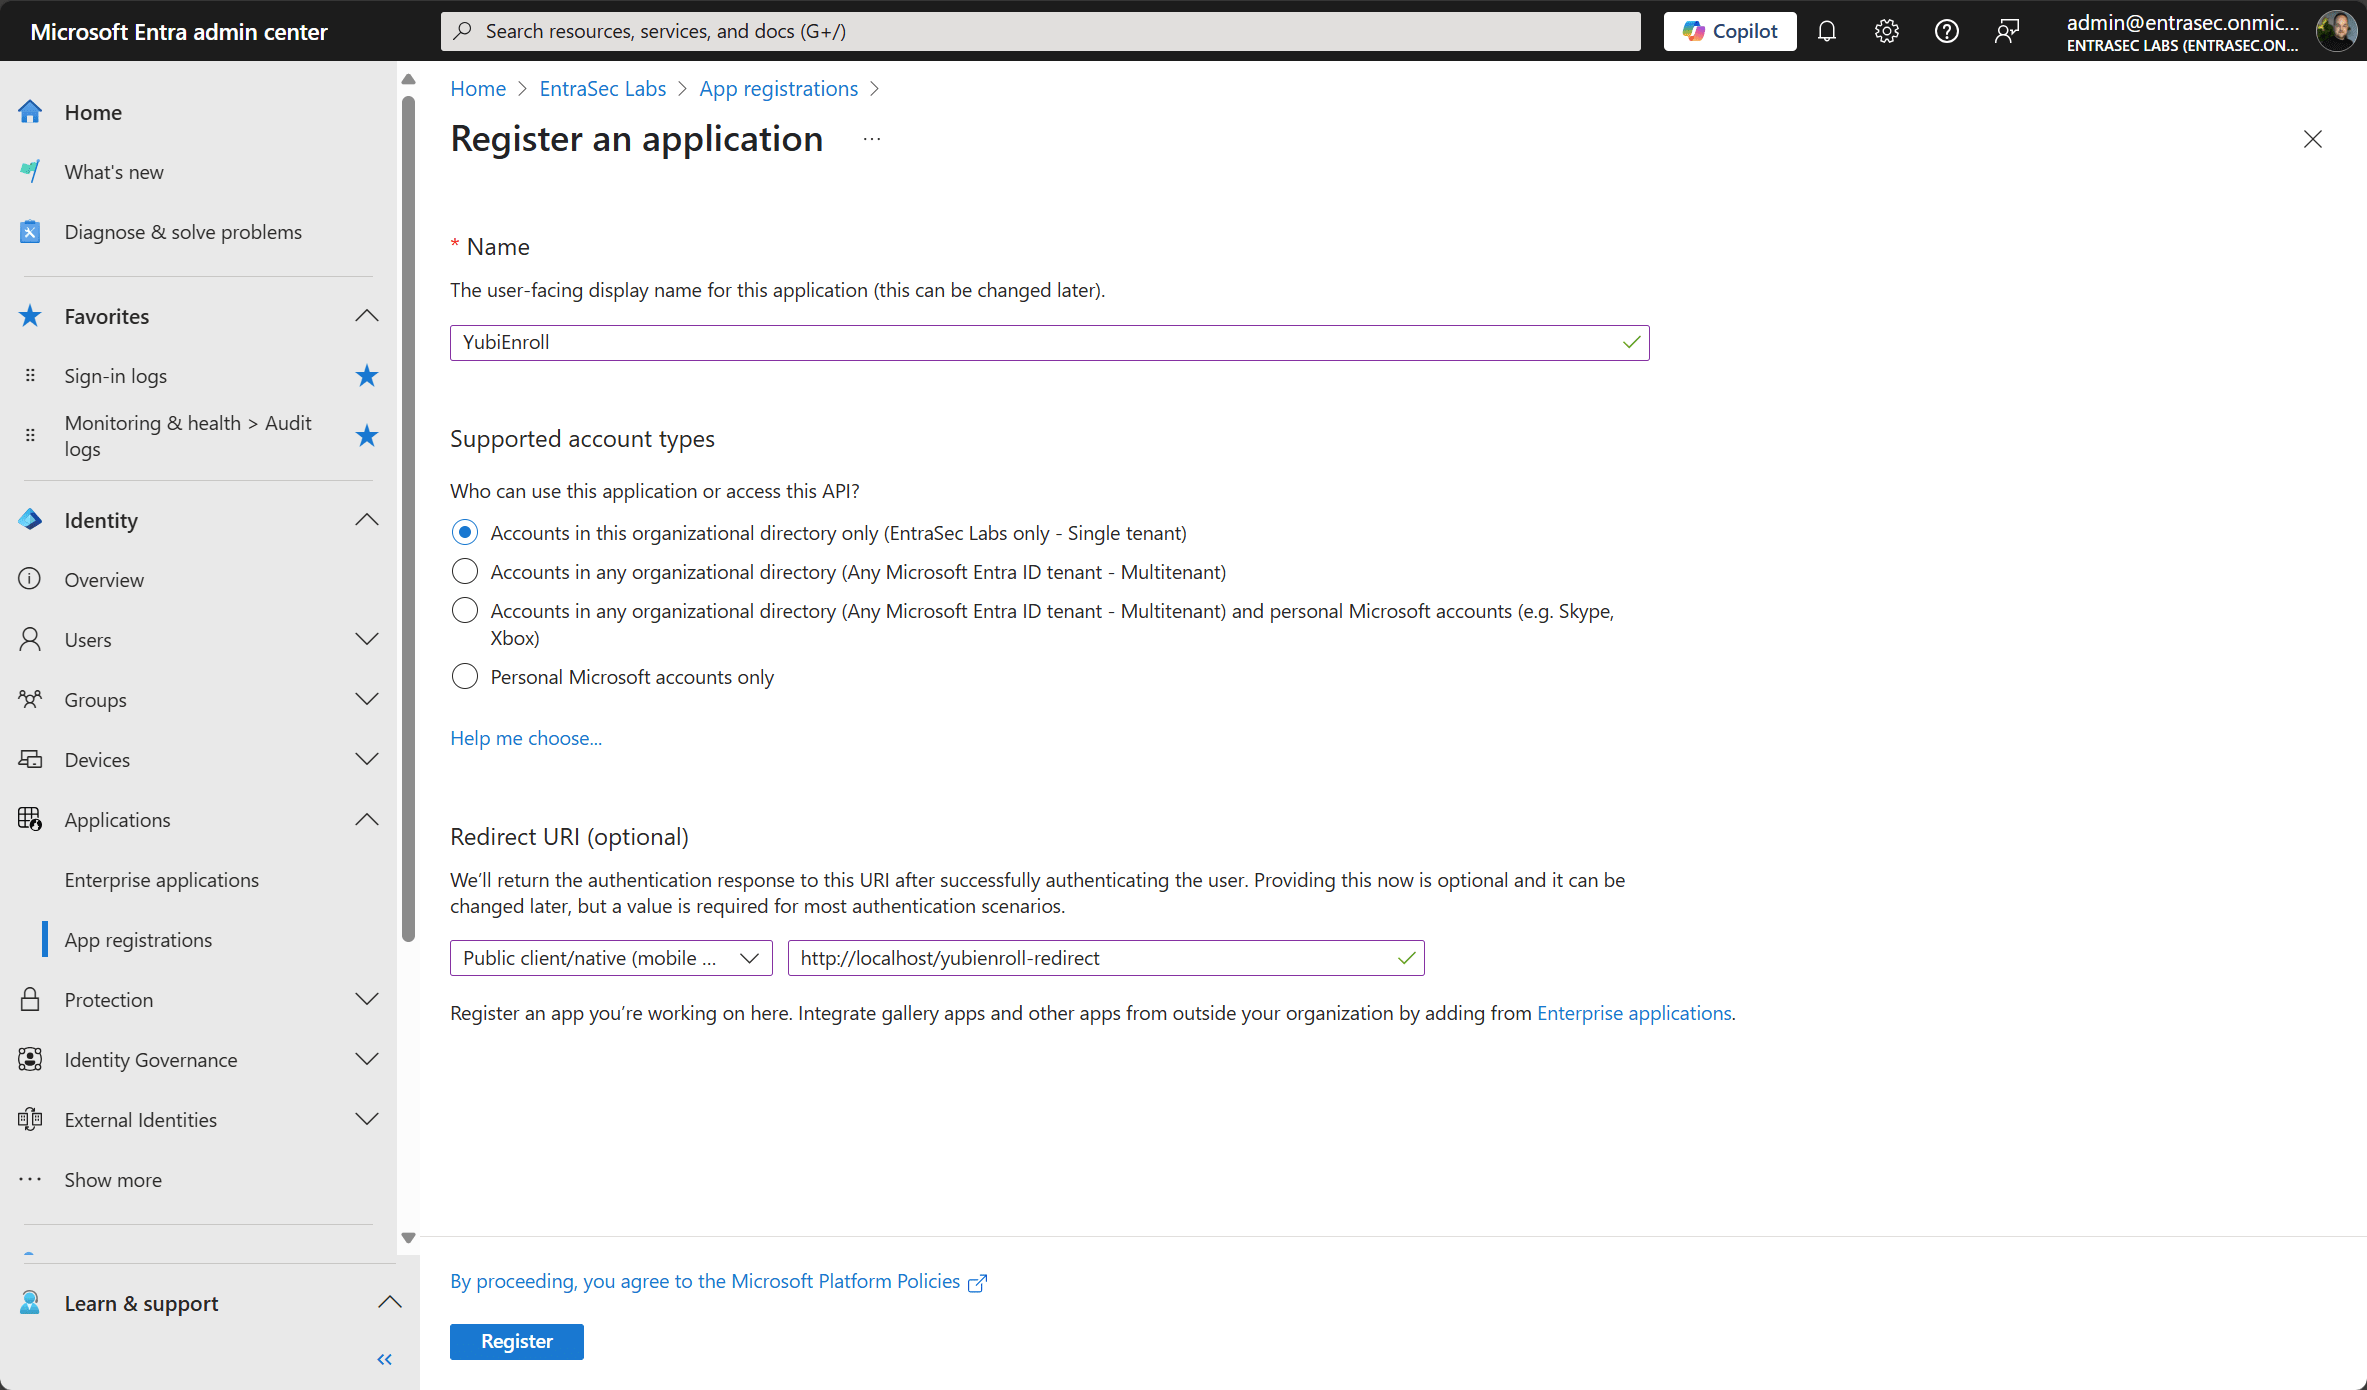
Make sure the redirect URI is of type Public client/native (mobile & desktop) and has http://localhost/yubienroll-redirect as the value.
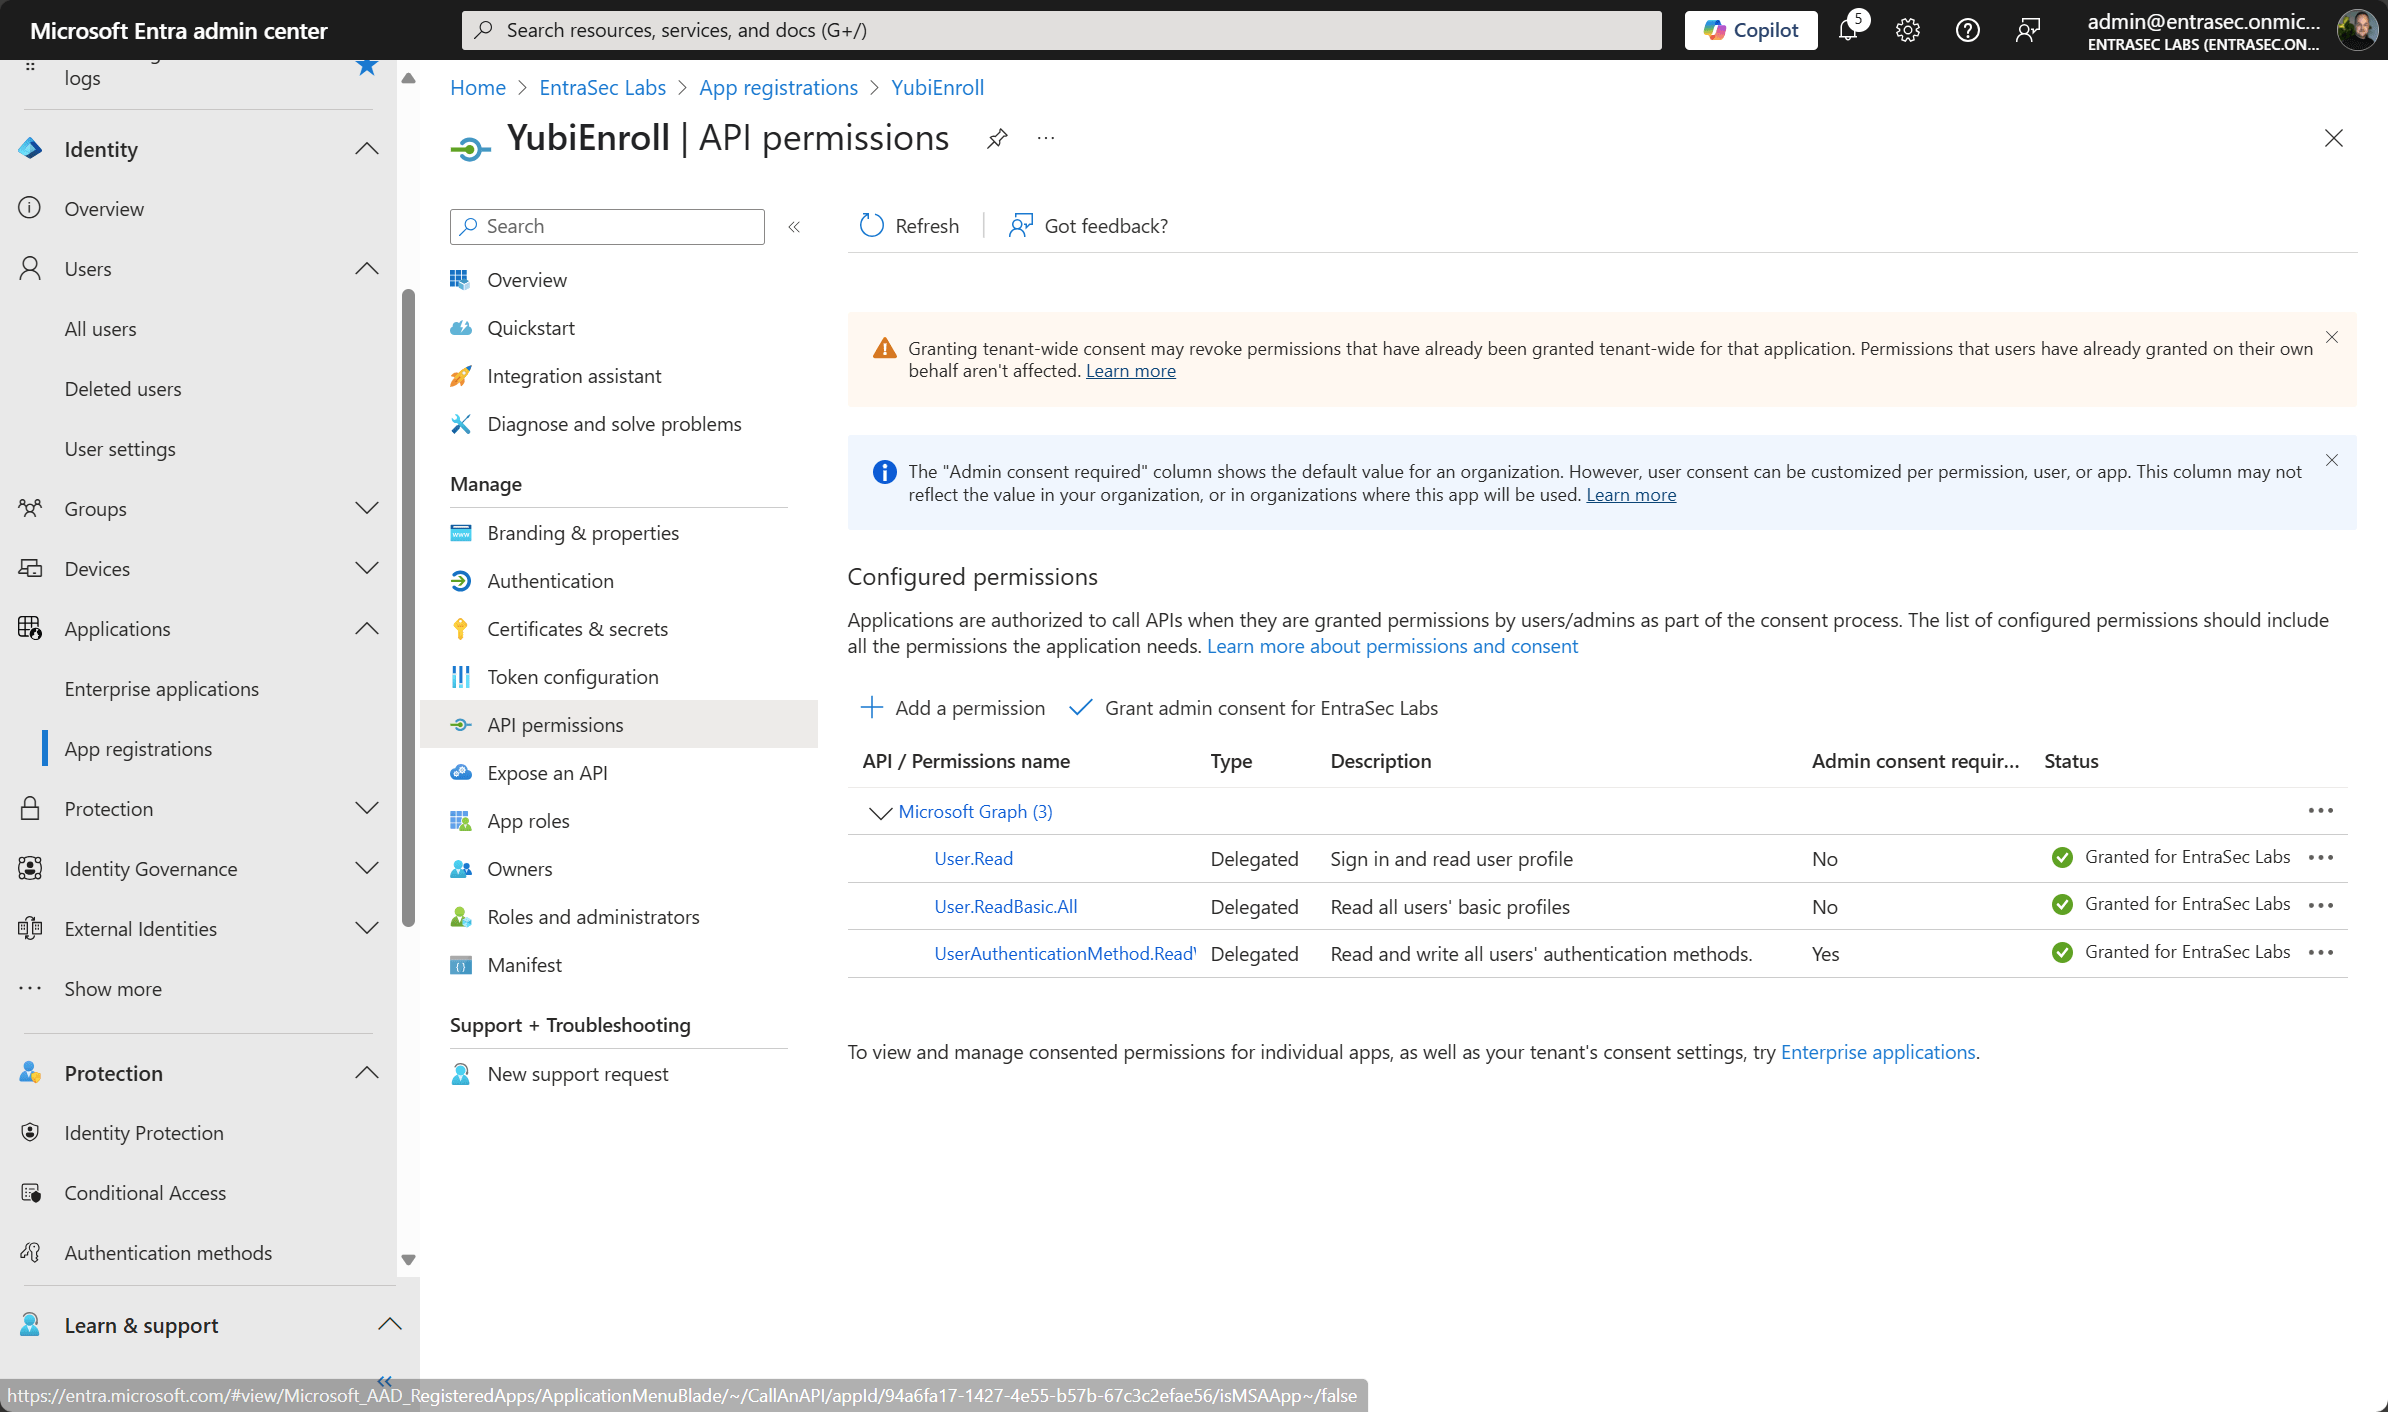
Next, assign delegated permissions to Graph API and grant admin consent for your tenant.
User.ReadBasic.All
AuthenticationMethod.ReadWrite.All
Download YubiEnroll#
Next, download the YubiEnroll MSI and install it on Windows. After installation, the app can be found in C:\Program Files\Yubico\YubiEnroll.
Configure the provider#
First, we need to configure the tool to talk to Entra ID.
Open the command promt and browse to C:\Program Files\Yubico\YubiEnroll and type:
yubienroll providers add entra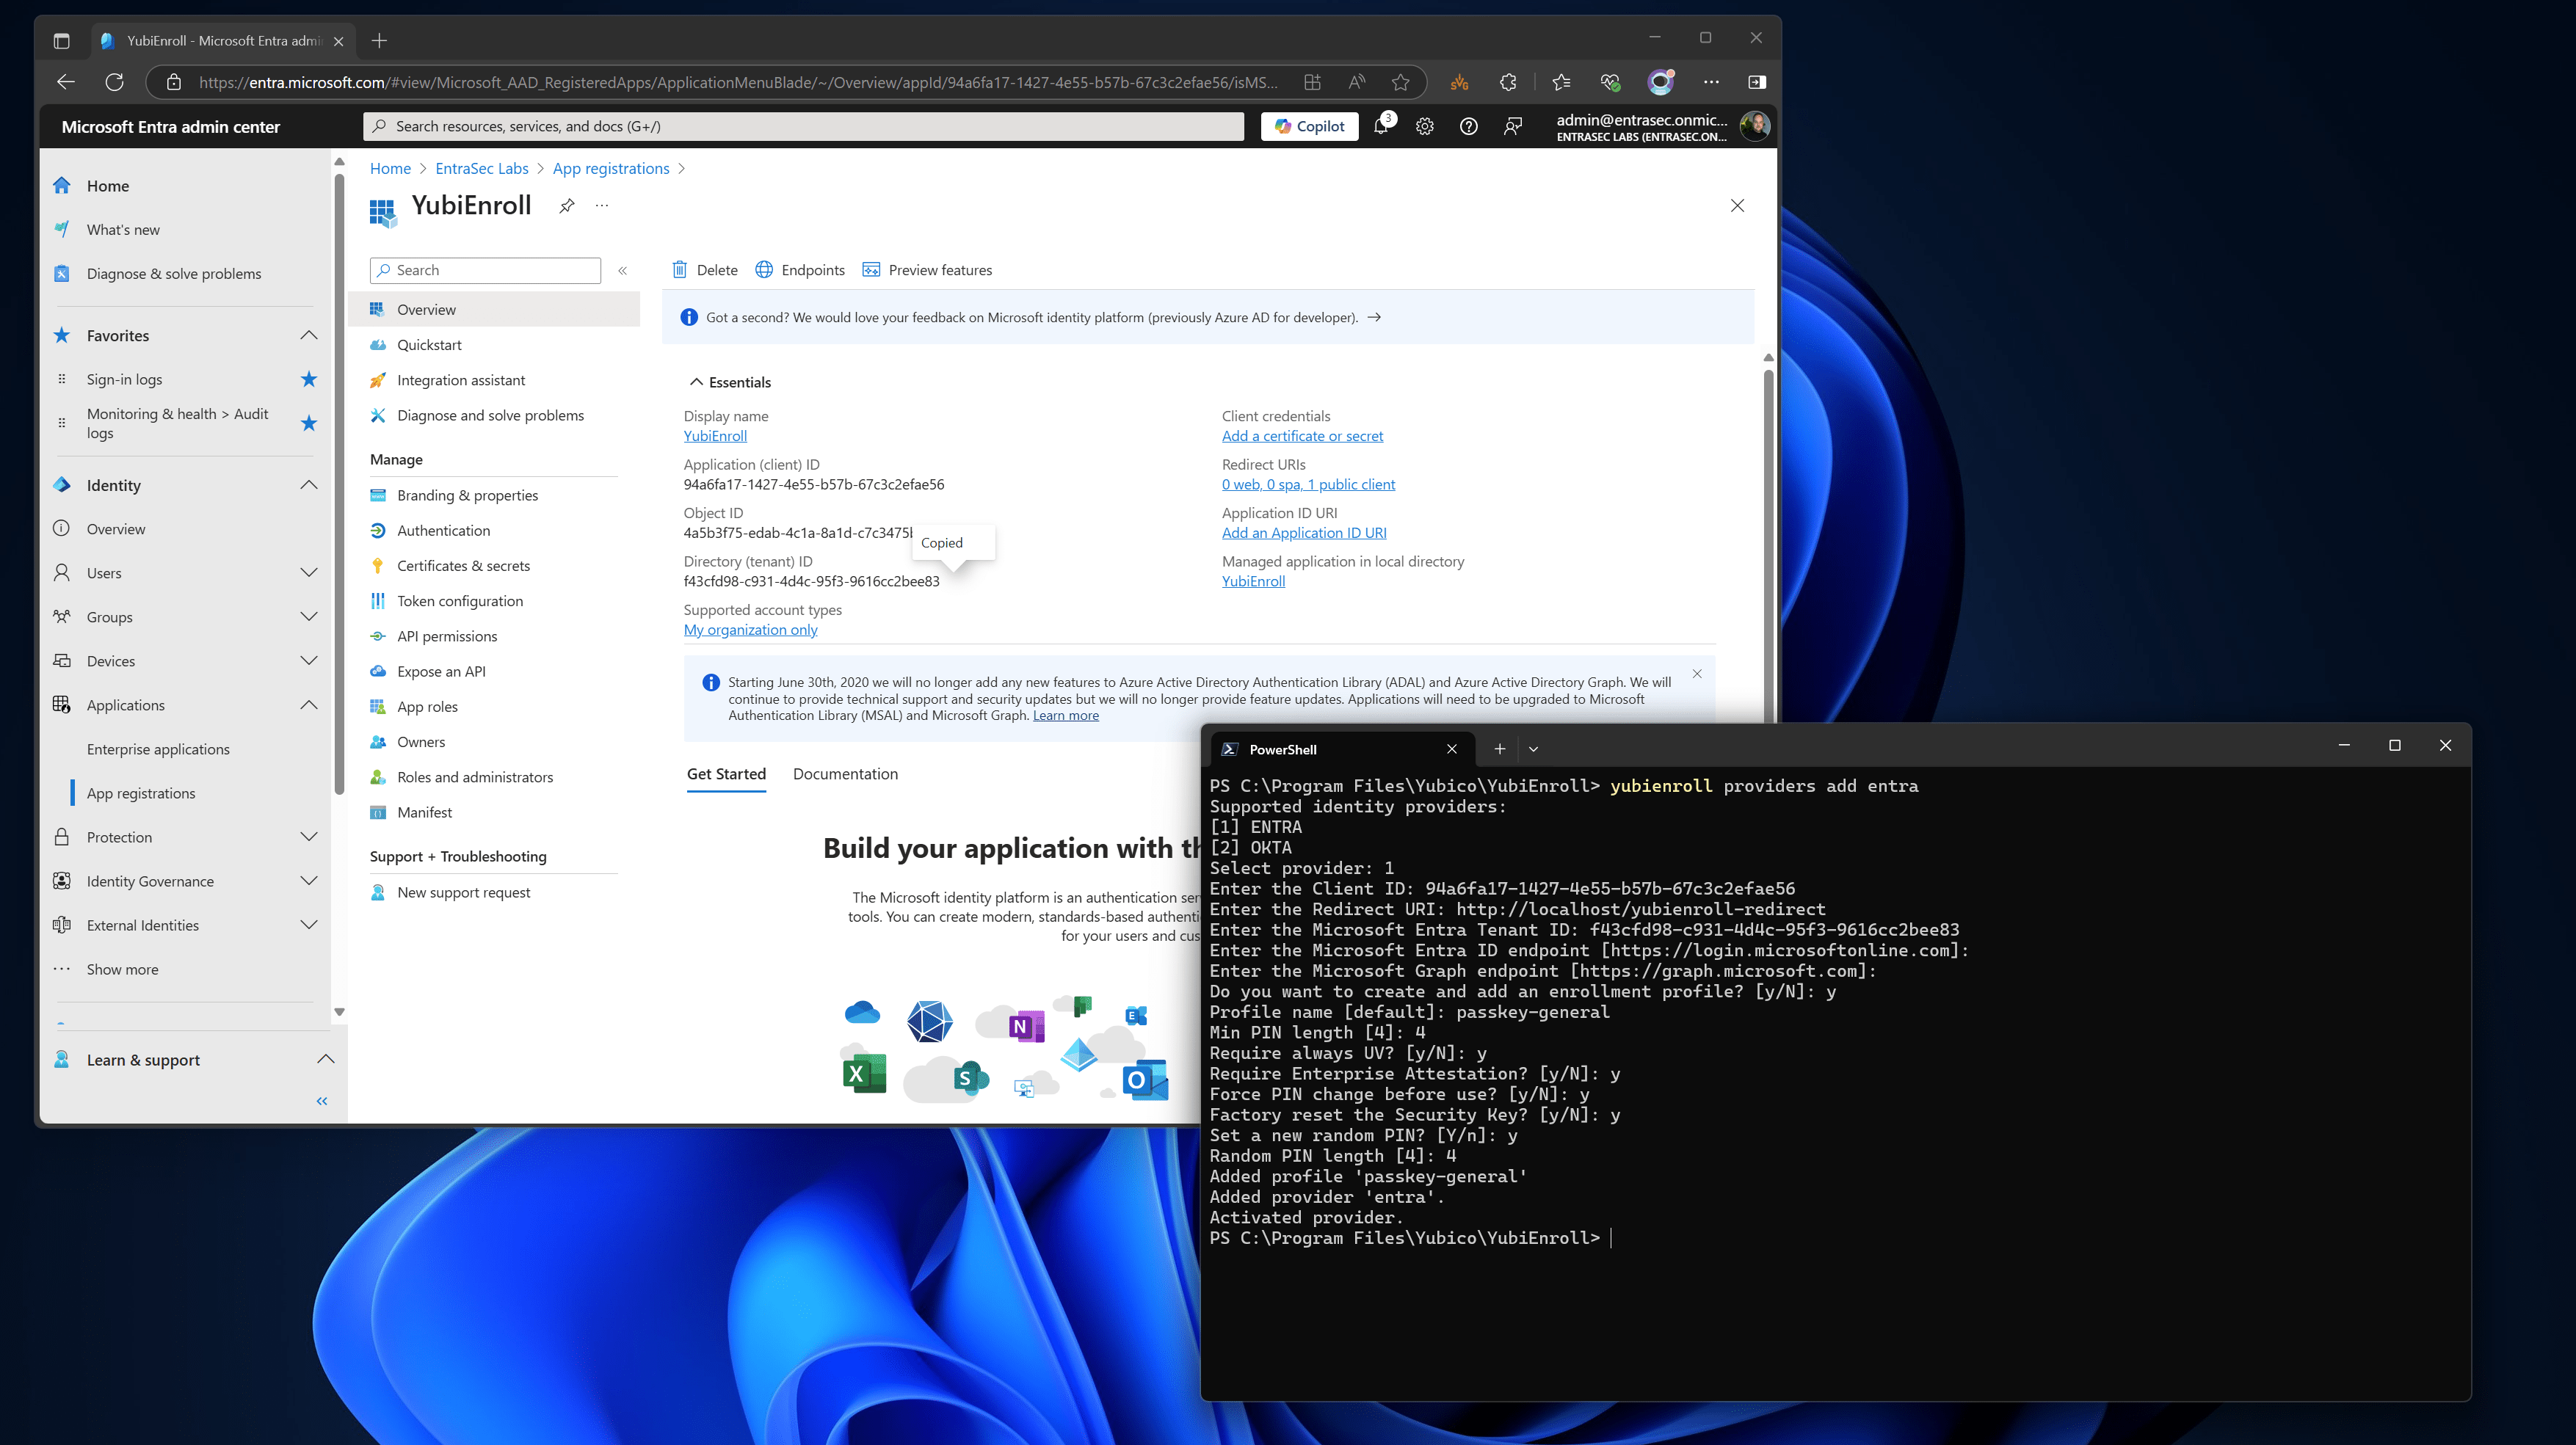
Follow the instructions and provide the information about the app registration and endpoints. Entra ID and Graph API URL’s can be set to default, unless you use national cloud deployments. These endpoints can be found here.
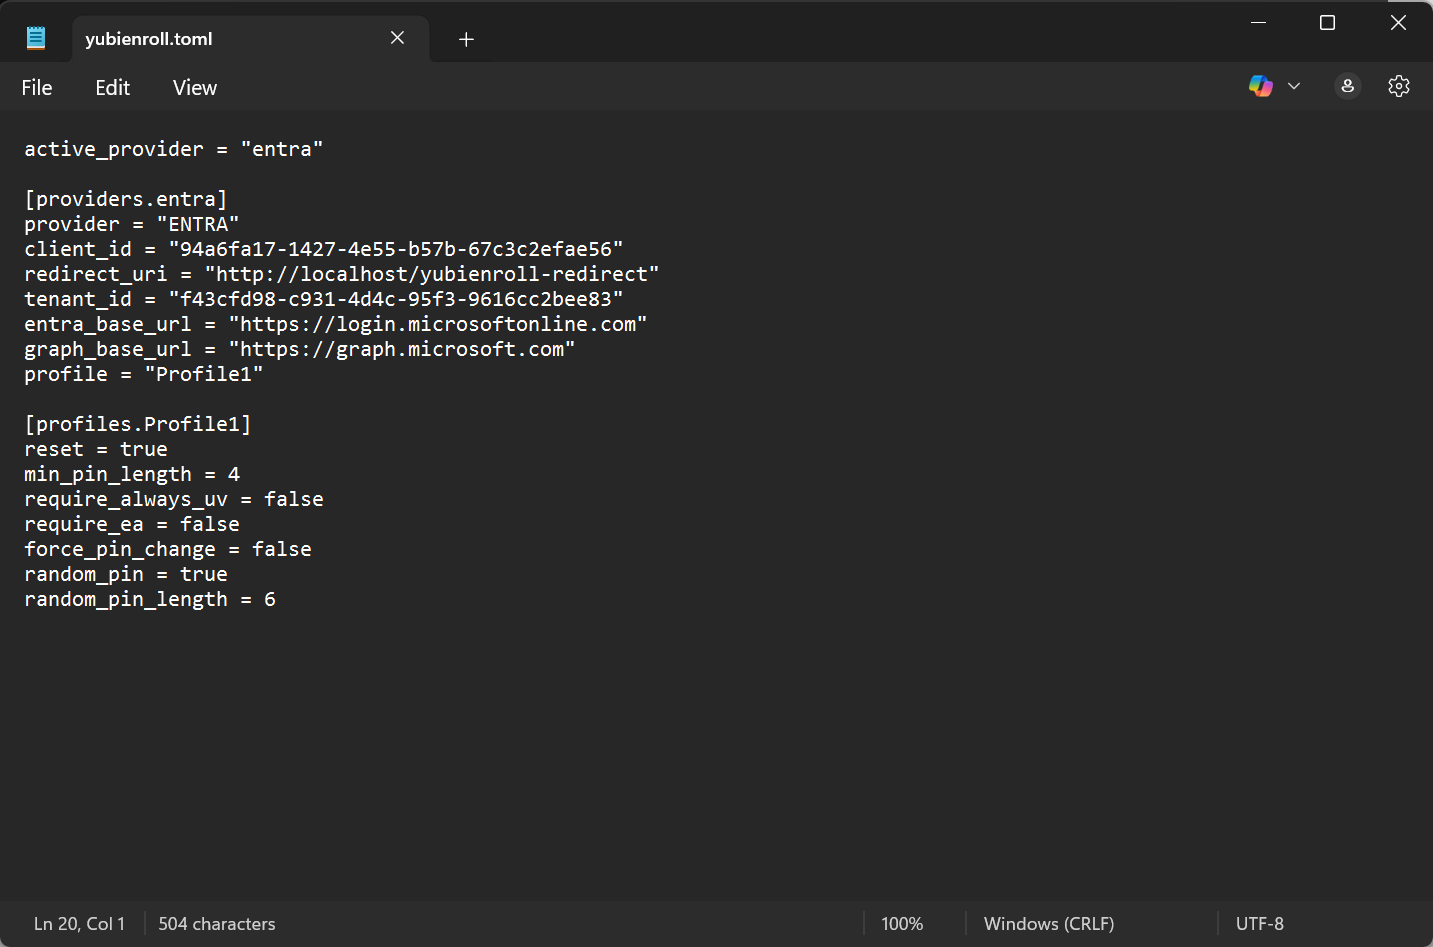
provider = "ENTRA"
client_id = "<YOUR CLIENT ID HERE>"
redirect_uri = "http://localhost/yubienroll-redirect"
tenant_id = "<YOUR TENANT ID HERE>"
entra_base_url = "https://login.microsoftonline.com"
graph_base_url = "https://graph.microsoft.com"
All provider configurations used by YubiEnroll are stored in a single yubienroll.toml file that can be manually edited. The file is located at %APPDATA%\yubico\yubienroll\yubienroll.toml
Using a tool like Intune, you can distribute the application and put the config file in place, so the tool is ready to use for your admins.
Create Enrollment Profile#
Once you have the provider in place, we can create your first enrollment profile for Yubikeys. These parameters will tell how your keys are provisioned. Not all features might be supported, as this depends on the type and firmware of your key. In my tests, I used an old(er) key (did not want to reset my Yubikey BIO), so it does not support provisional PIN and such.
yubienroll profiles add Profile1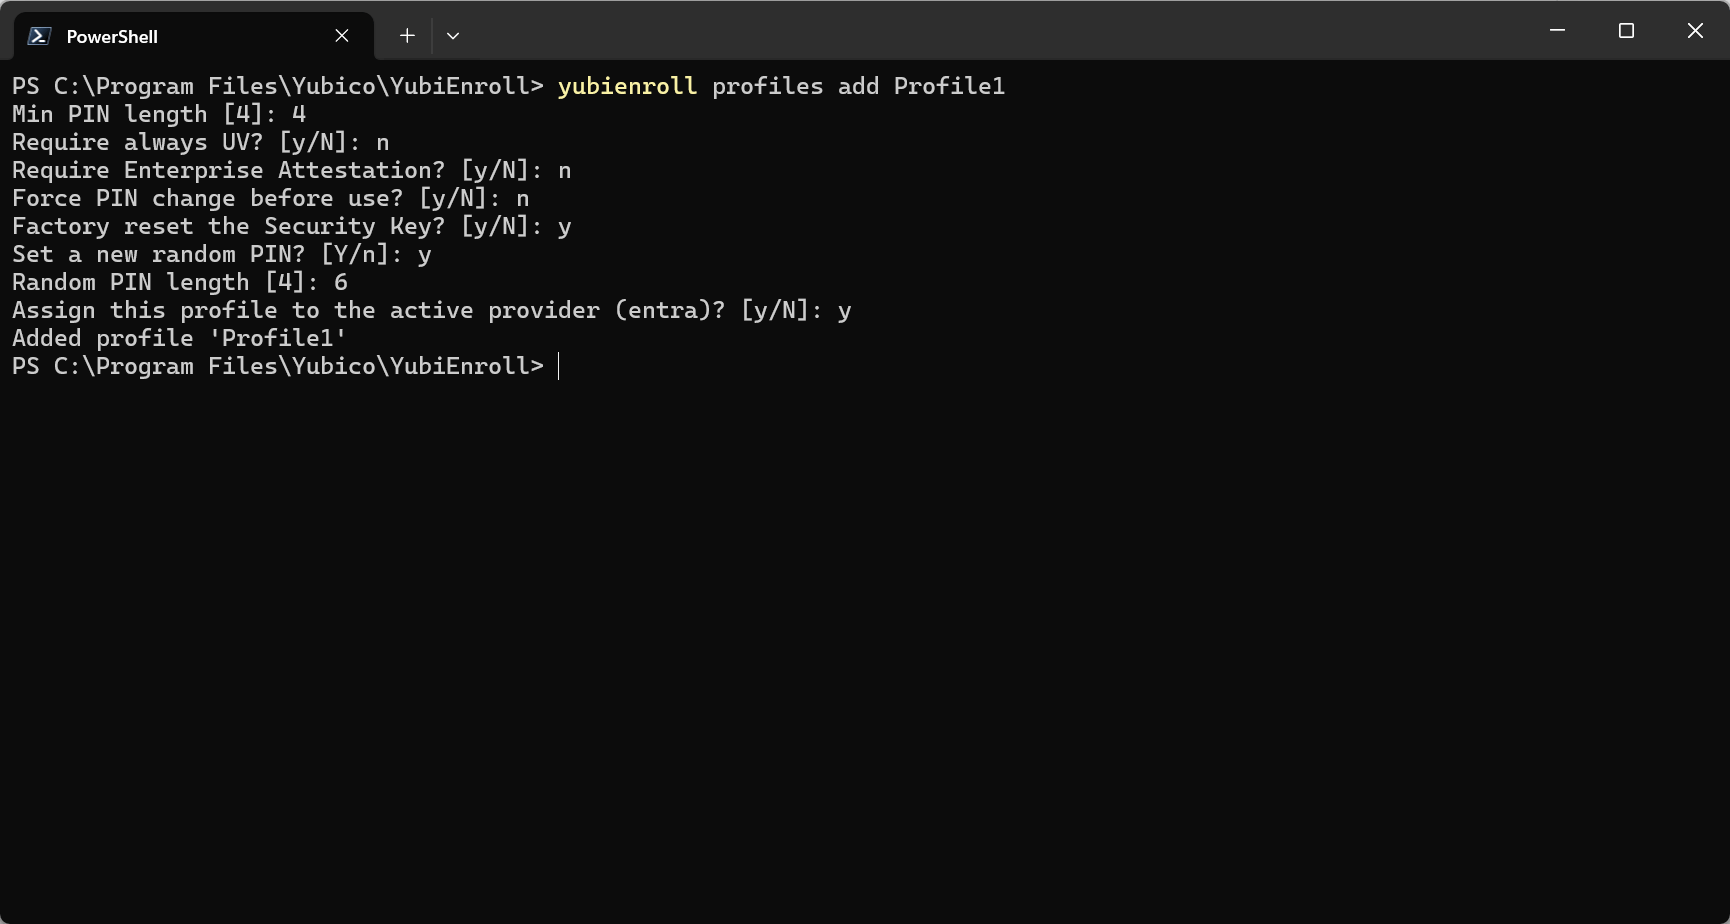
This profile will reset my Yubikey and set a random 6-digit PIN. The configuration options “Min PIN length,” “Require always UV,” and “Force PIN change before use” are only supported for YubiKeys with firmware version 5.5 and higher.
Your local toml-file will look (something) like this, and you are ready to enroll your first Yubikey!
Authenticate#
Now we need to sign in to Entra ID to get a token. The following cmdlet can do this:
yubienroll login --no-launch-browserCopy the string to your browser, and authenticate accordingly.
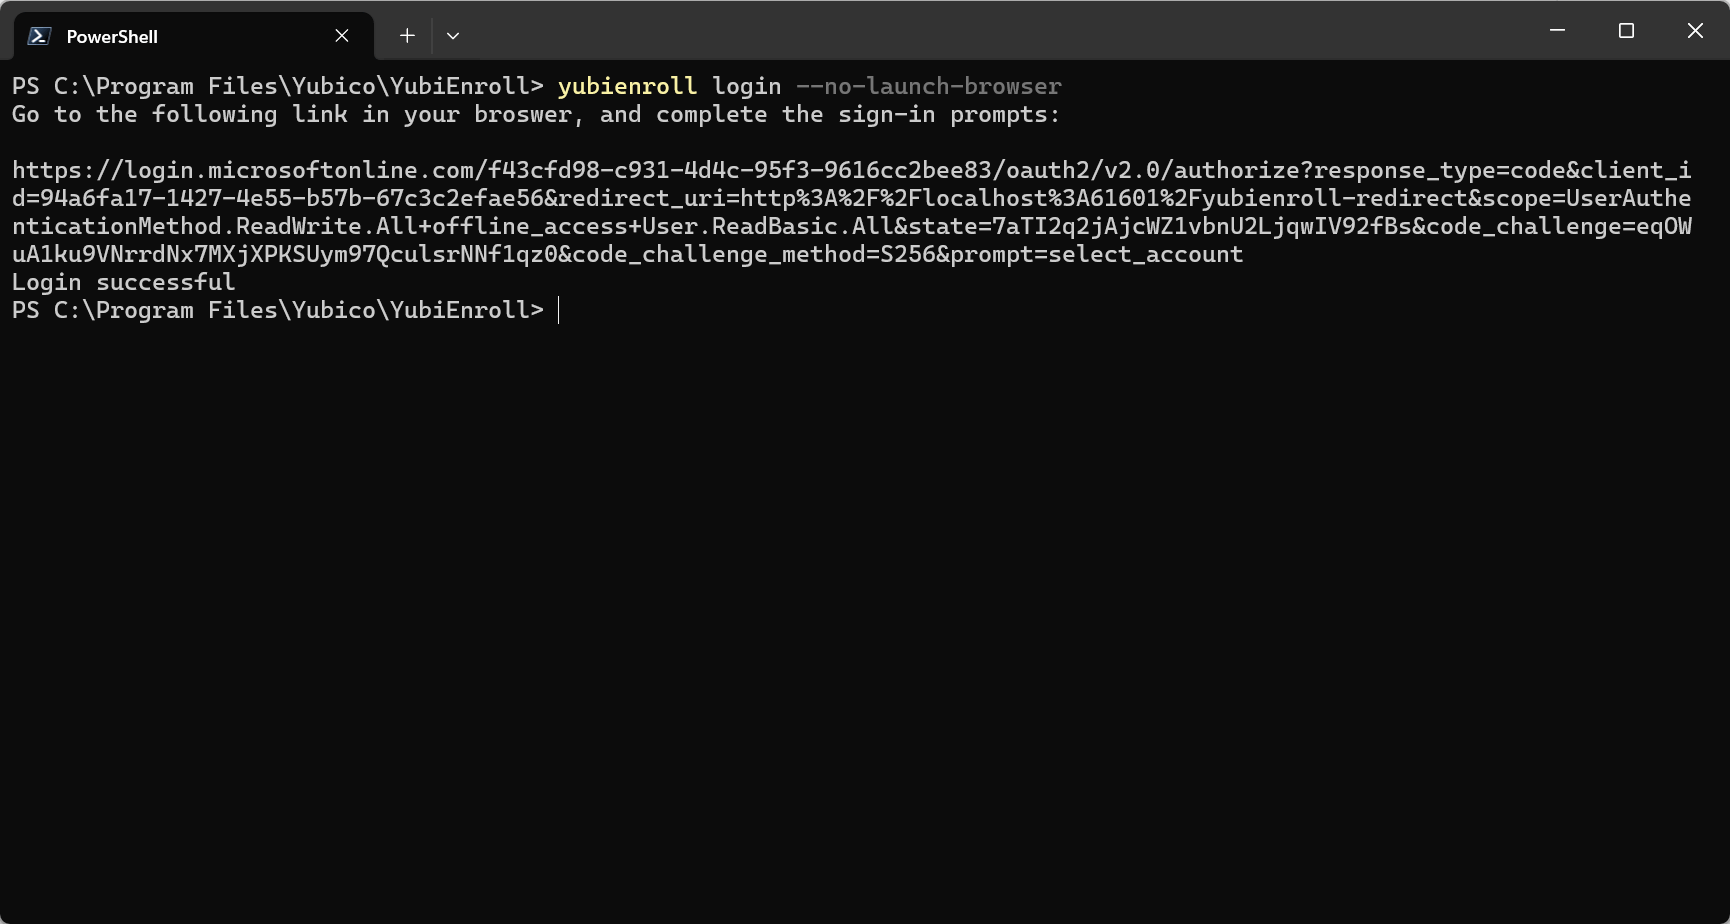
You can leave the –no-launch-browser parameter, but then it will launch in your last-used browser automatically.
Enroll the key#
Now we have everything in place to enroll a Yubikey. Let’s register a new Yubikey for Emma Brooks. All we need is the UserPrincipalName, Emma.Brooks@entrasec.onmicrosoft.com, in this case. Now run:
yubienroll credentials add Emma.Brooks@entrasec.onmicrosoft.com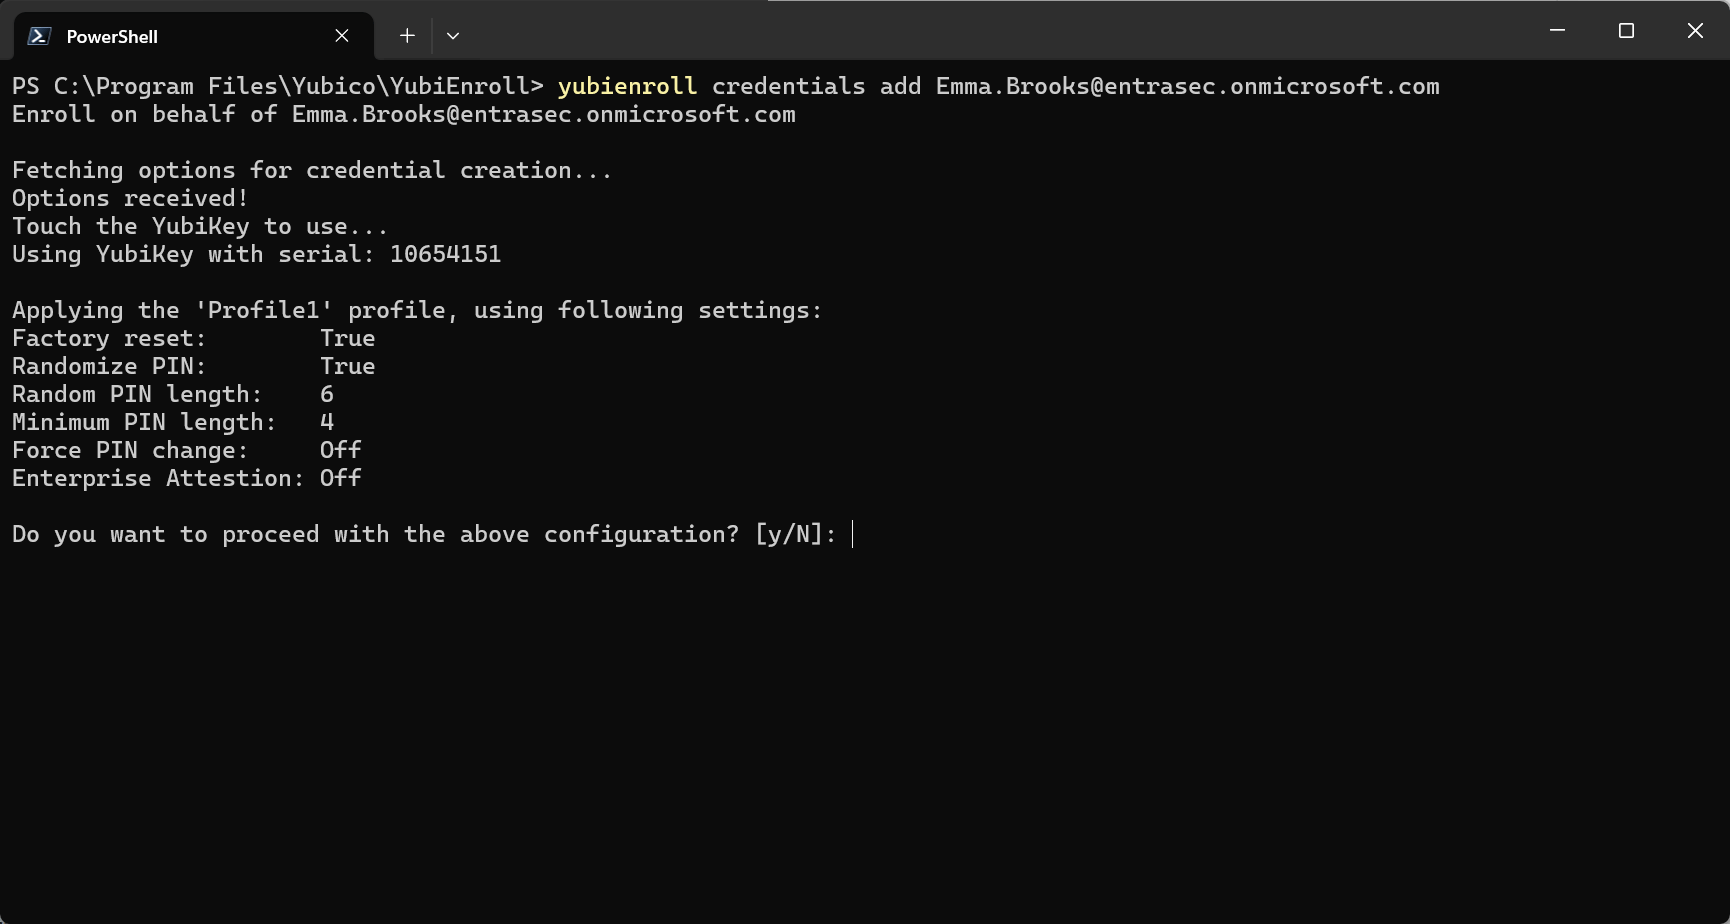
If you have multiple profiles, you can specify the profile by using this cmdlet:
yubienroll credentials add Emma.Brooks@entrasec.onmicrosoft.com --profile another-profileAfter confirmation, the key is reset, and the credential is written to the key and Entra ID.
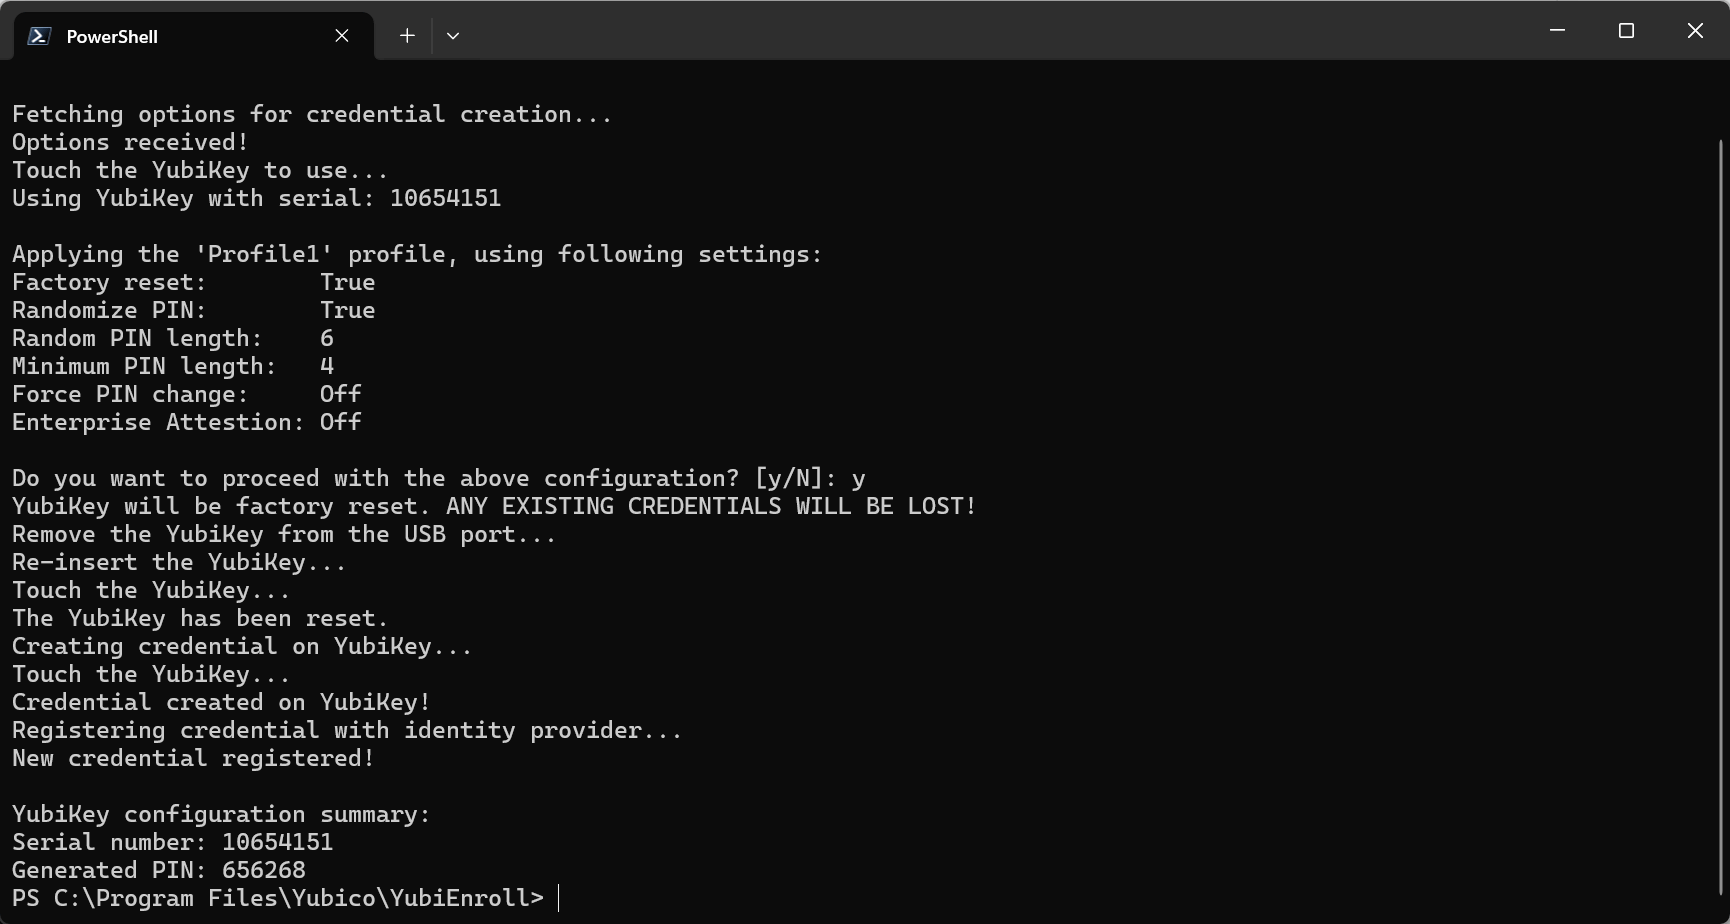
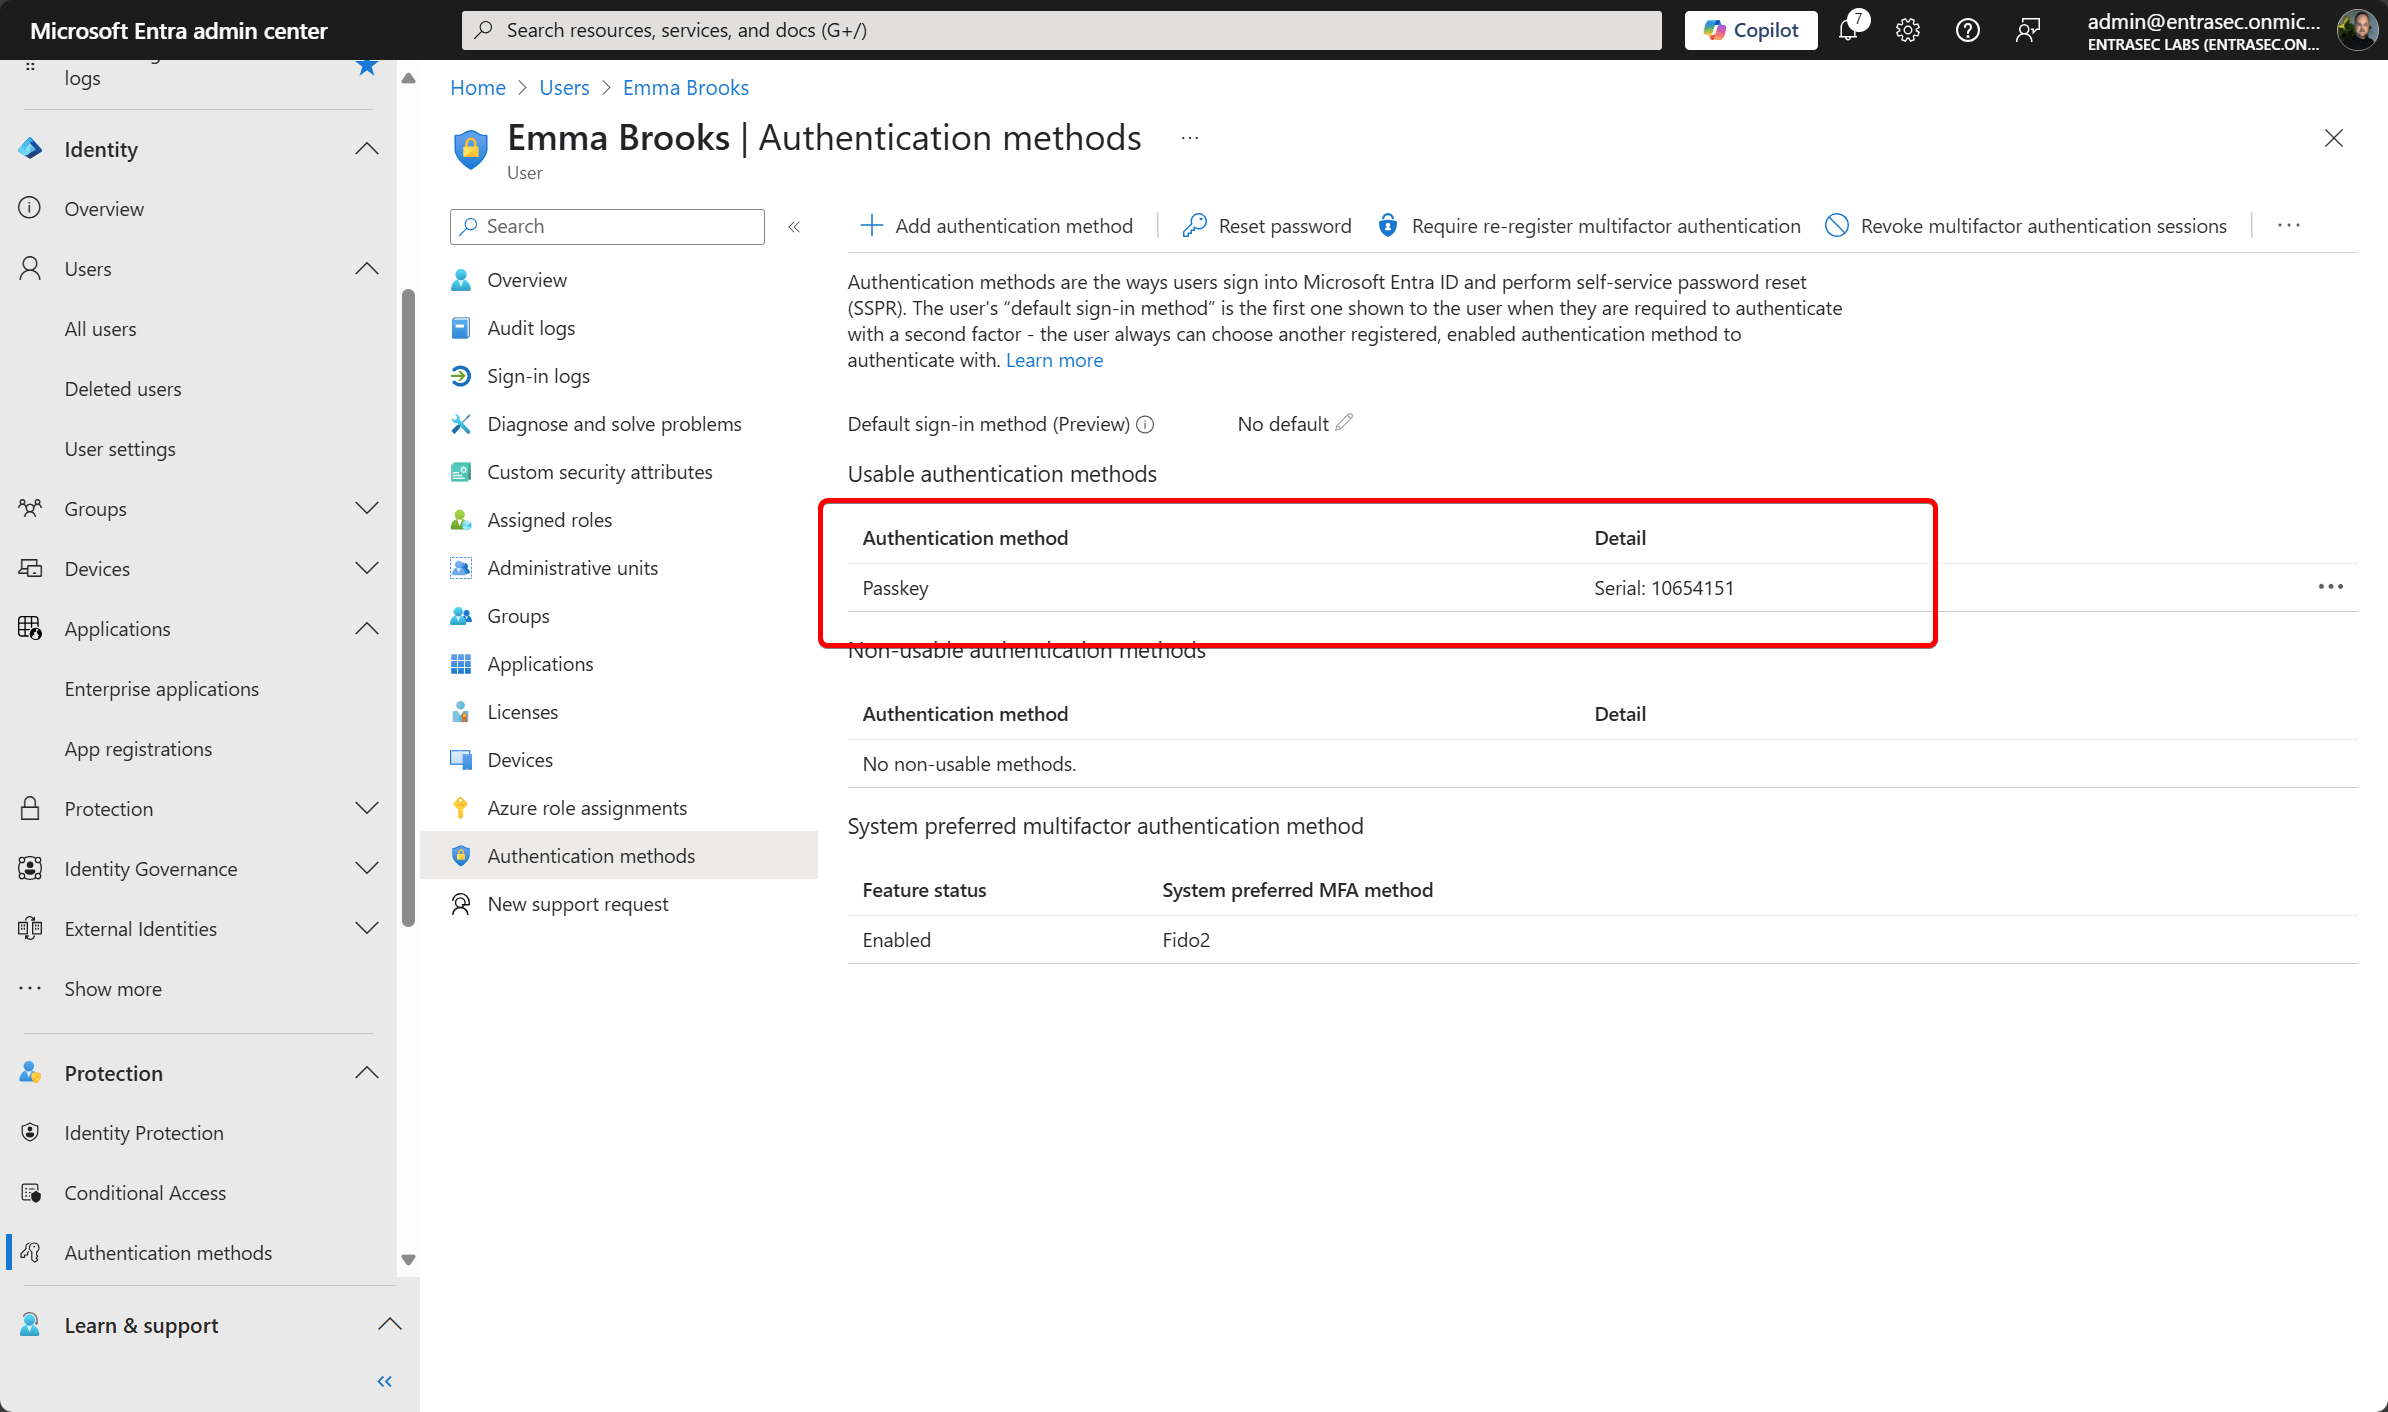
We can see the Yubikey is added to Emma’s account.
The tool is also capable of removing keys if needed.
yubienroll credentials delete Emma.Brooks@entrasec.onmicrosoft.comTo list the current keys:
yubienroll credentials list Emma.Brooks@entrasec.onmicrosoft.com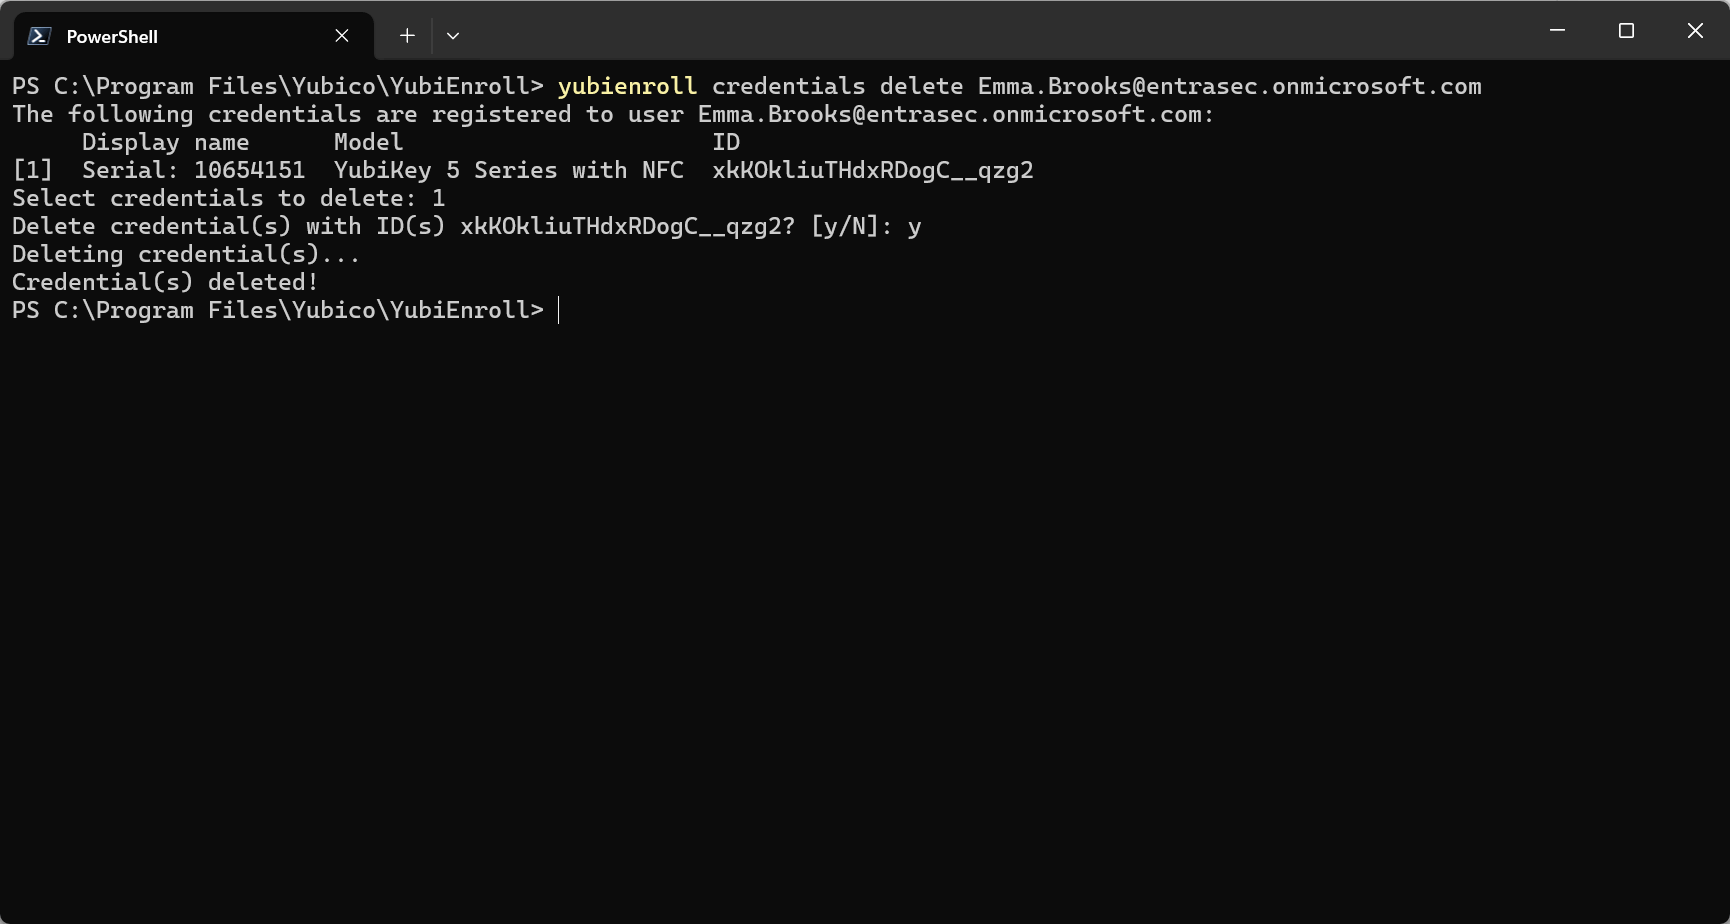
Admin Units#
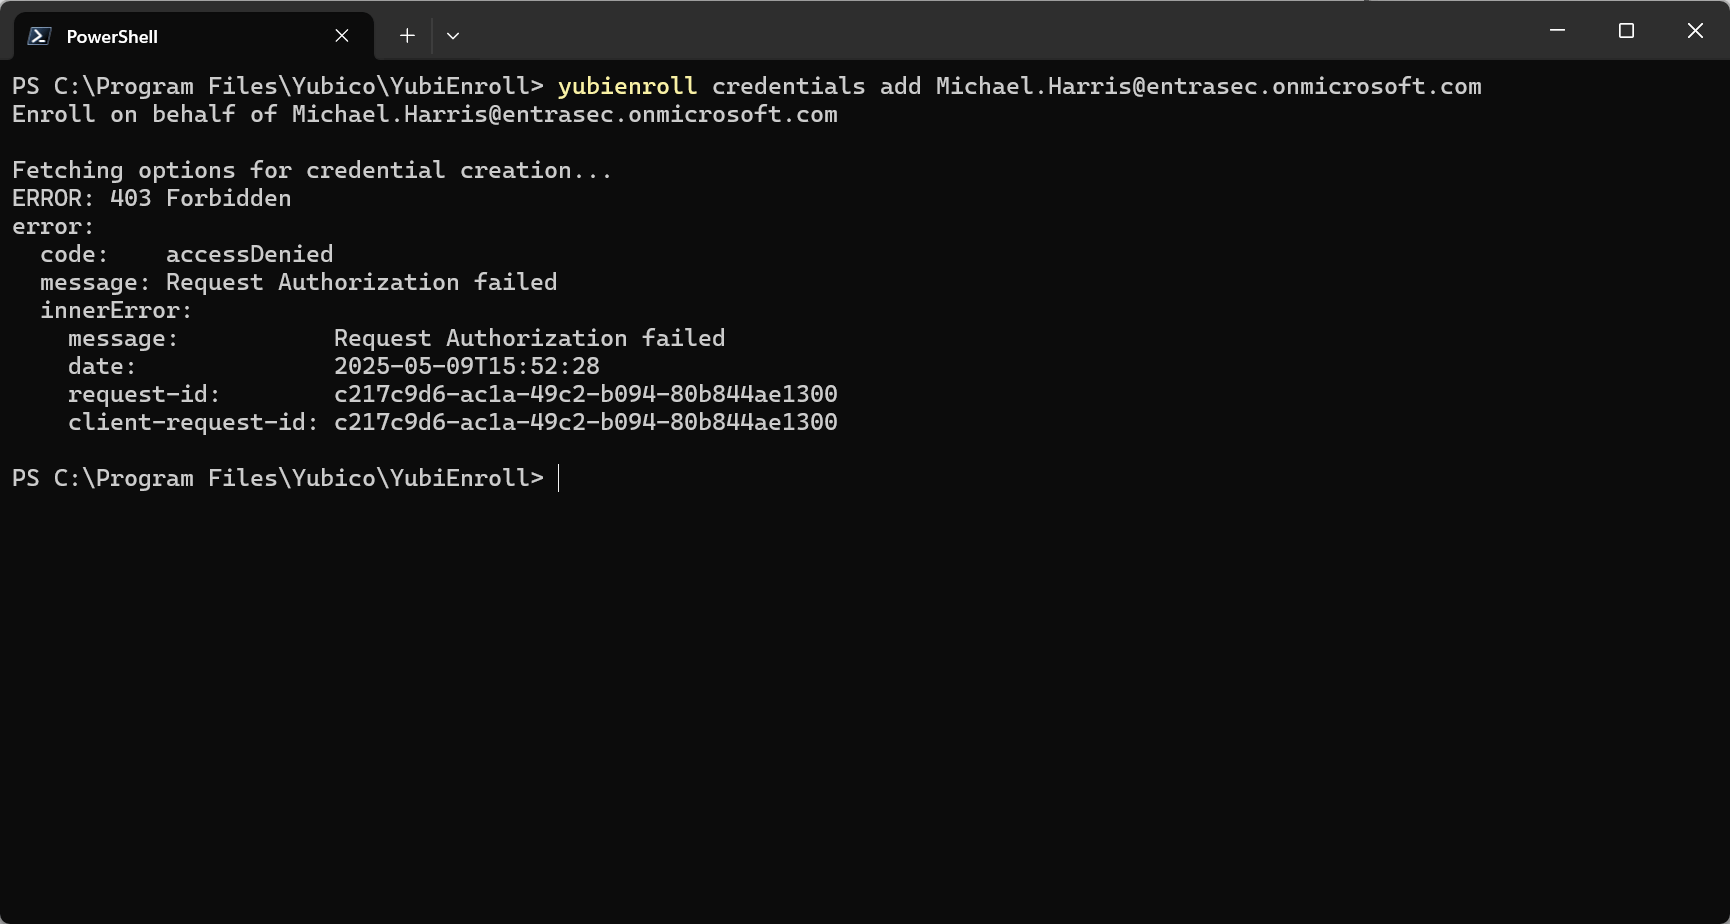
Since delegated permissions are used, Admin Units will be respected.
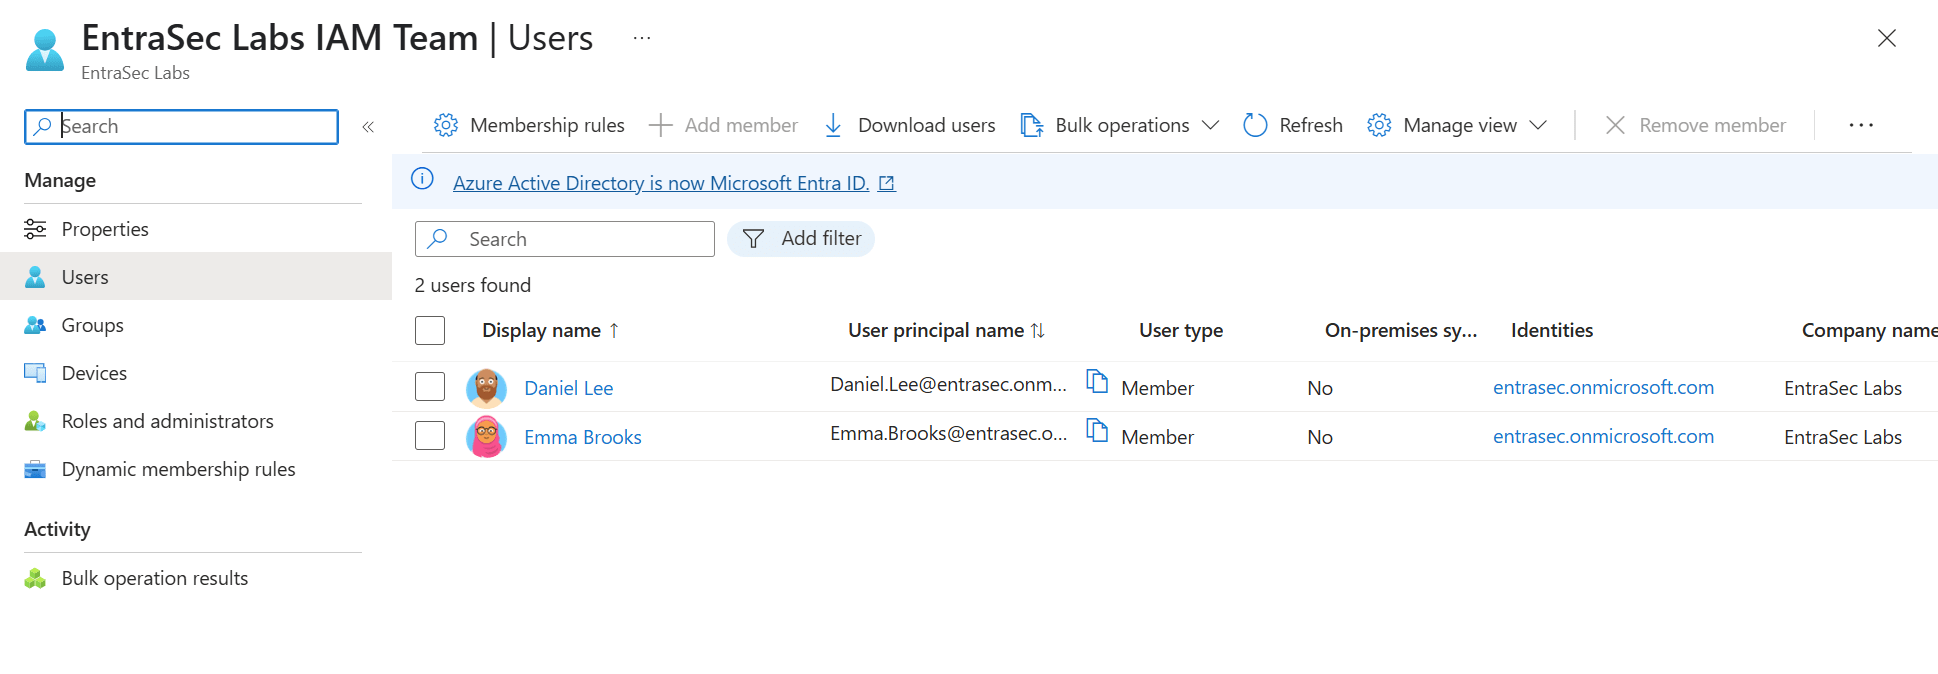
Alex Stone, part of the local IT helpdesk, can create Yubikeys for Daniel and Emma, but is blocked if he tries to make one for Michael.
Let’s wrap up#
Thanks to Danny for pointing me to this tool. I really like it for several reasons:
- MSI for easy installation.
- Ability to stage the config file with the tool, so admins do not have to set it up.
- Using delegated permissions, with respect to Admin Units.
- Perfect for operational support, such as onboarding and recovery.
- Multiple profiles can be used.
- Supports advanced FIDO features like provisional PIN and PIN complexity.
To name a few limitations:
- It can only be used with Yubikeys.
- No bulk enrollment ( Yubico has other tools for that)
- Logout for Entra does not work.
- No GUI at the moment. Admins need some guidance on the CLI prompts.
Resources#
As stated before, the docs on this tool are really good, so always check the latest here:
Introduction — YubiEnroll User Guide documentation
Learn by watching#
I also created a short video for folks who learn better by watching content.
Stay safe!
Comments
Comments load when you scroll here.