
Entra · Logic Apps · Power Platform · Security
Prepopulate phone methods using a Custom Connector in Power Automate
On this page
This blog post shows the custom connector that is built on top of the Microsoft Graph API. With this connector, you can do bulk actions on Azure AD and provision phone numbers for your users. They can be used for MFA and SSPR. To understand how the connector works, please also read the first part of the blog where I explain the API in detail. In the second part, I have added a step-step-guide on how to create the custom connector and use it in an automation flow.

Part 1 - Prepopulate phone methods for MFA and SSPR using Graph API - Understand the phoneAuthenticationMethod API that is being used to build the custom connector
Part 2 - Prepopulate phone methods using a Custom Connector in Power Automate - Populate phone numbers to Azure AD using Power Automate and a custom connector
Part 2 - Automation#
In the previous blog post of this series, I’ve shown you the use of the Graph API and how you could manually populate the phone methods for your users. Today, we are going to take it a step further. We’re going to add some automation with Power Automate by using a custom connector.
What are we building?#
Today we are going to add a phone method for all your users using Power Automate and a custom connector. The source file is an Excel file with a table containing the UPN of the users and the (mobile) phone number. The phone numbers are exported from a Human Resources application. We assume that all users start greenfield.
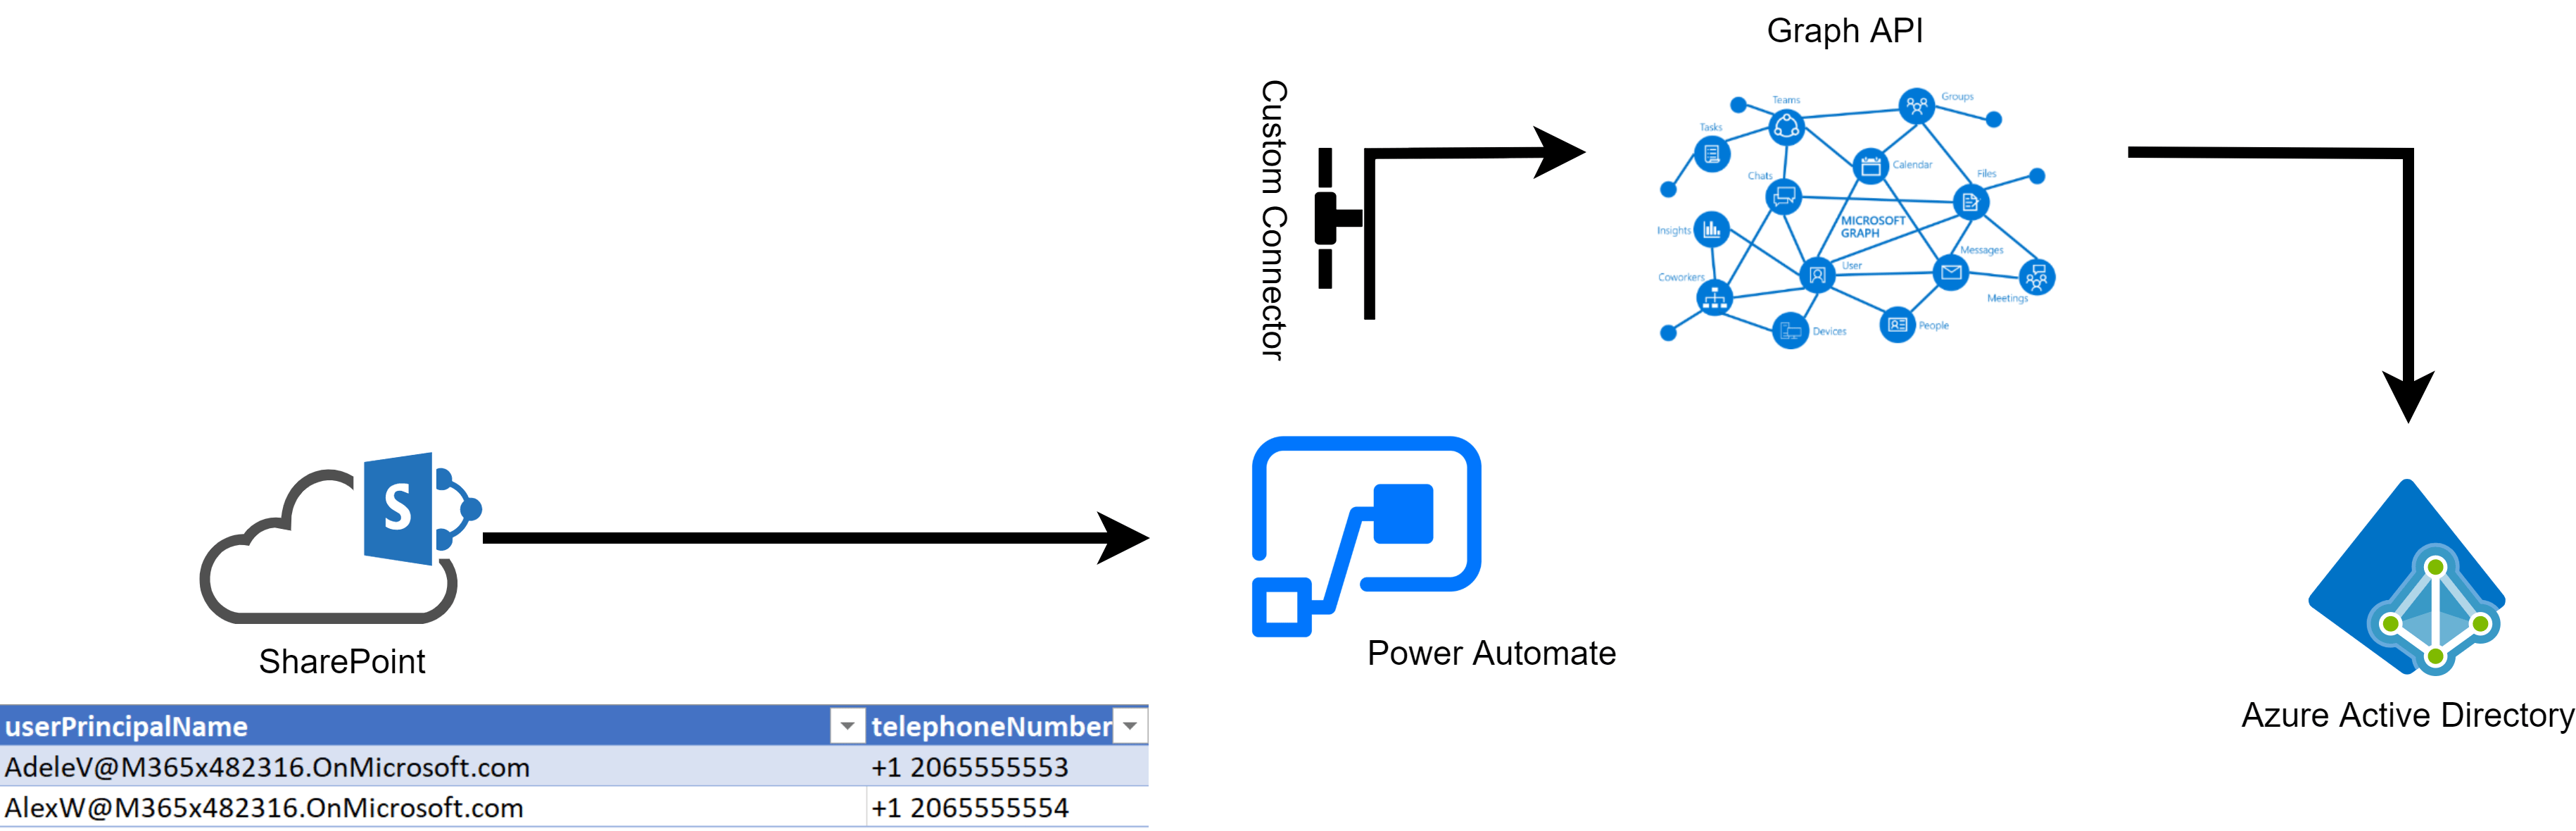
The flow we are building today is pretty straight forward, but you can expand the capabilities to your needs.
Create the app registration#
Before we can install the custom connector, we need a service principal for the authentication and security part.
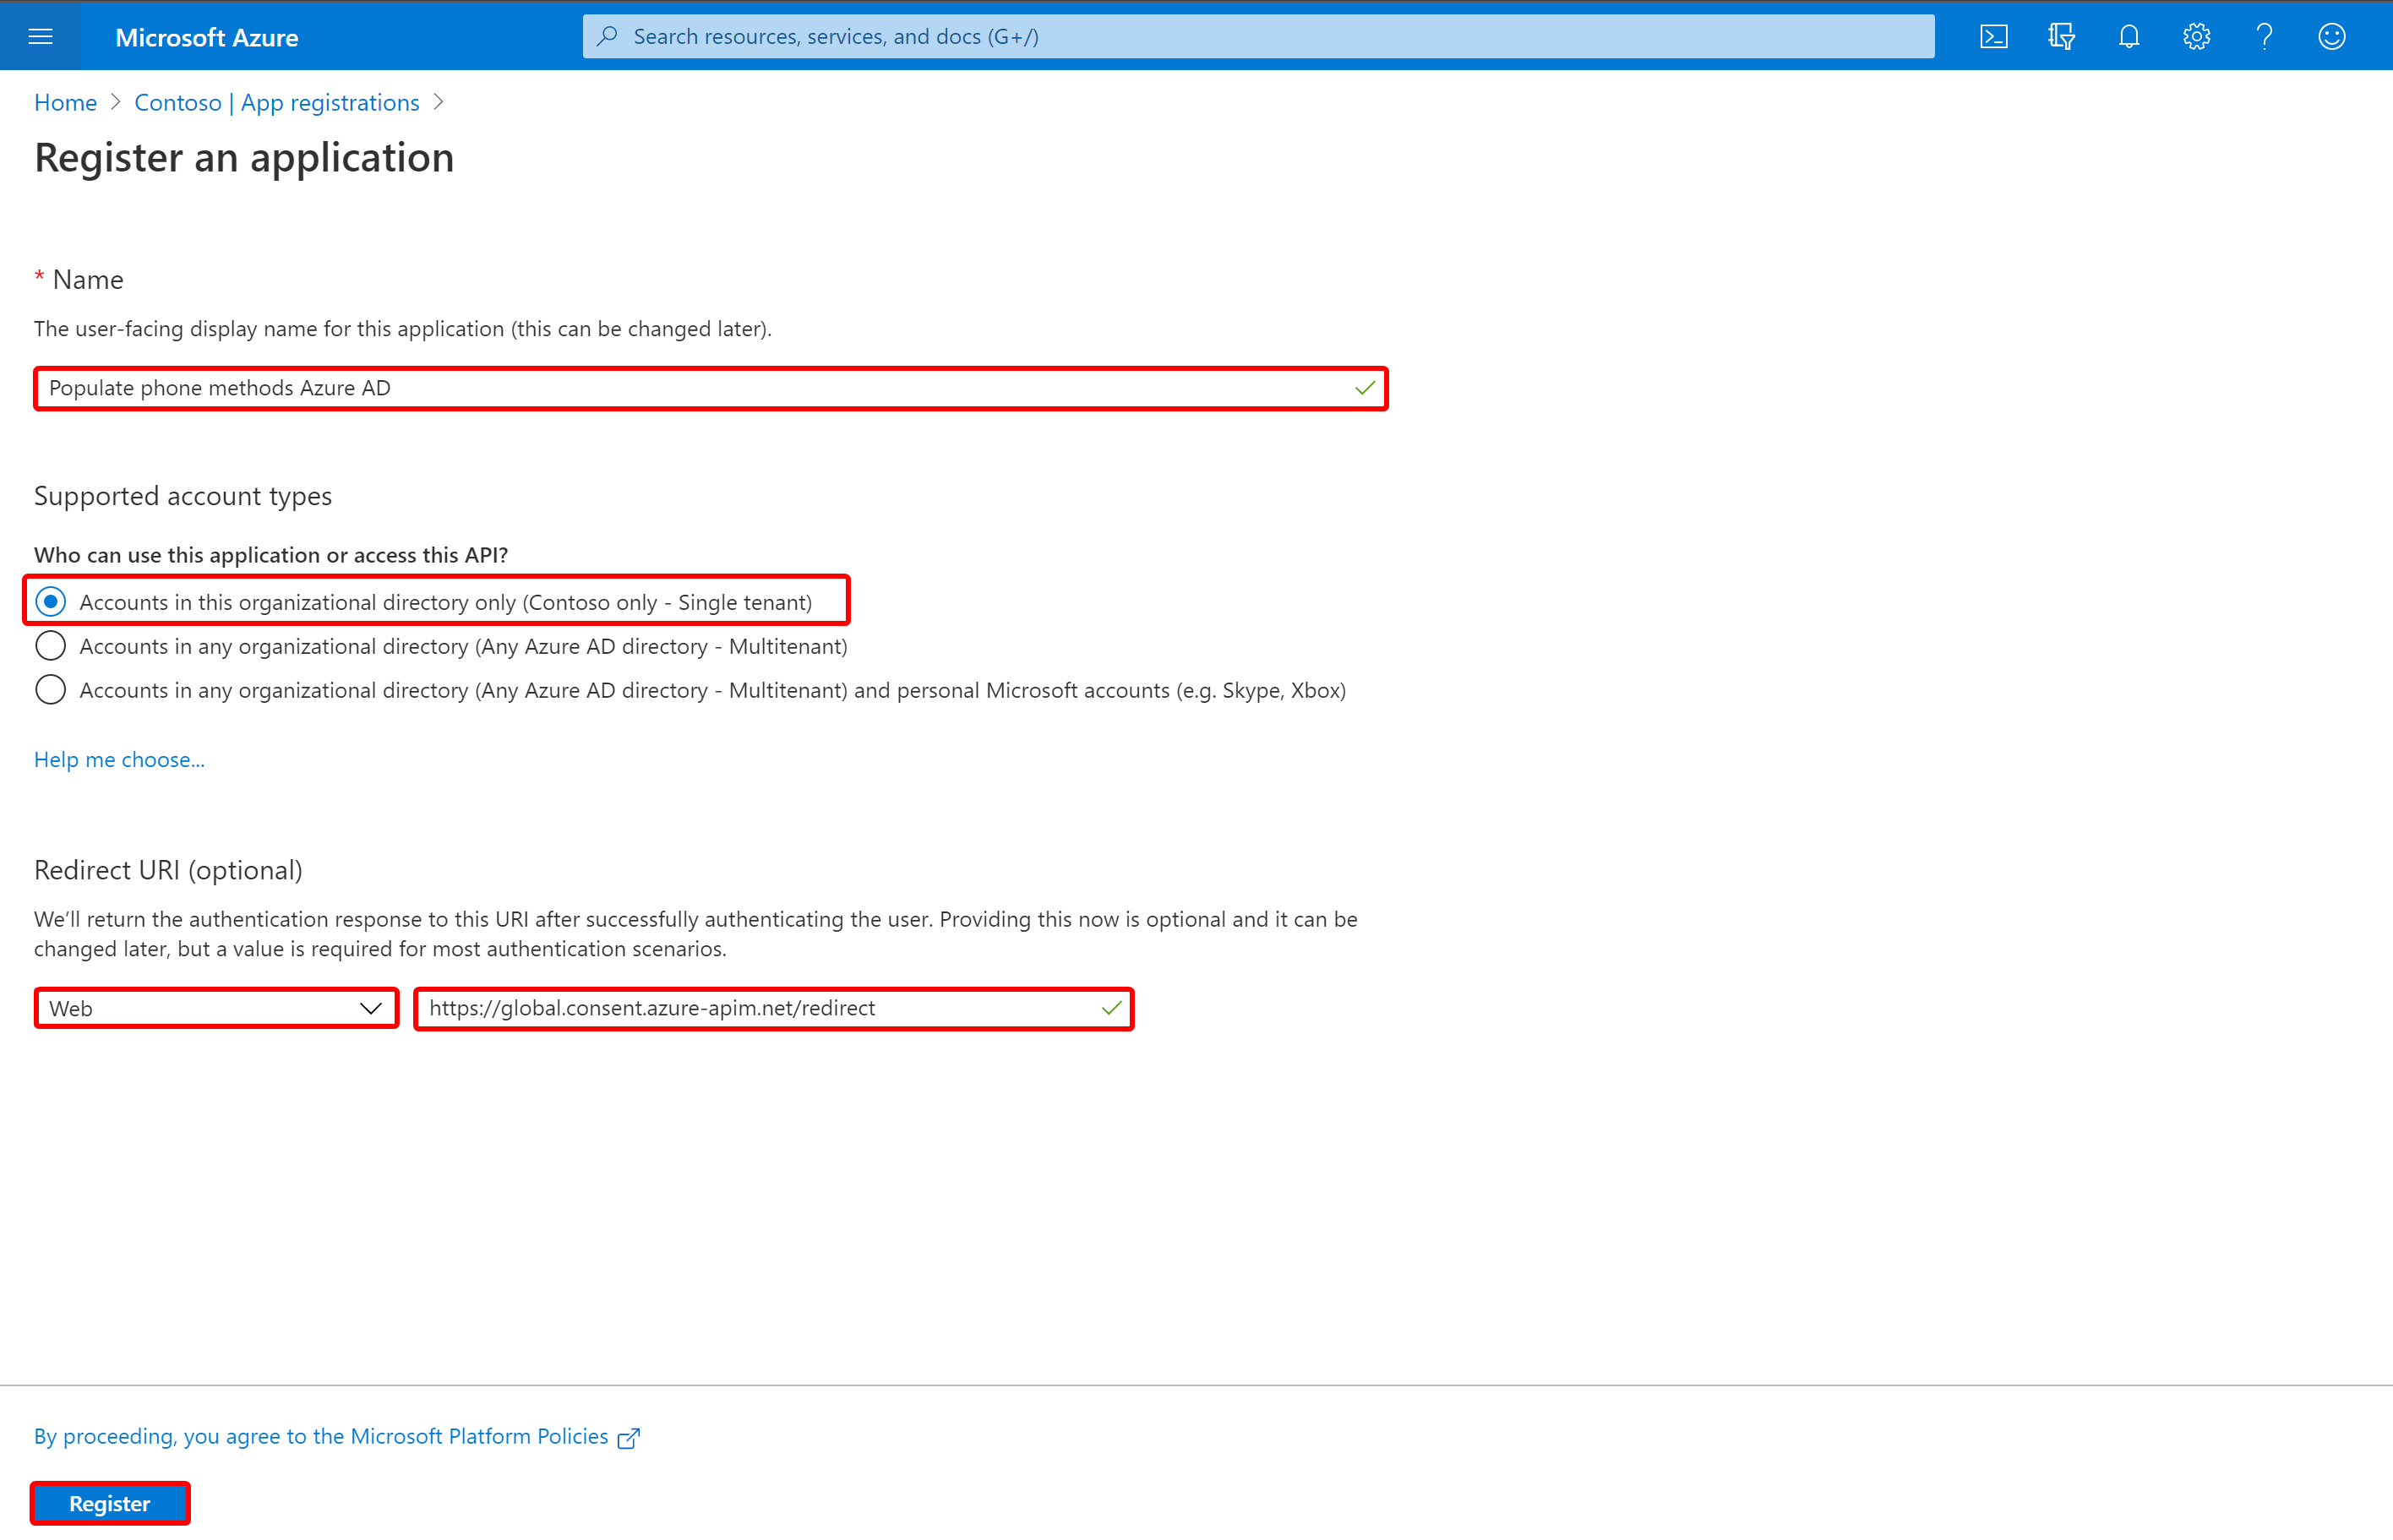
Create a new app registration from the Azure Active Directory Admin portal and make sure you add the redirect URL https://global.consent.azure-apim.net/redirect
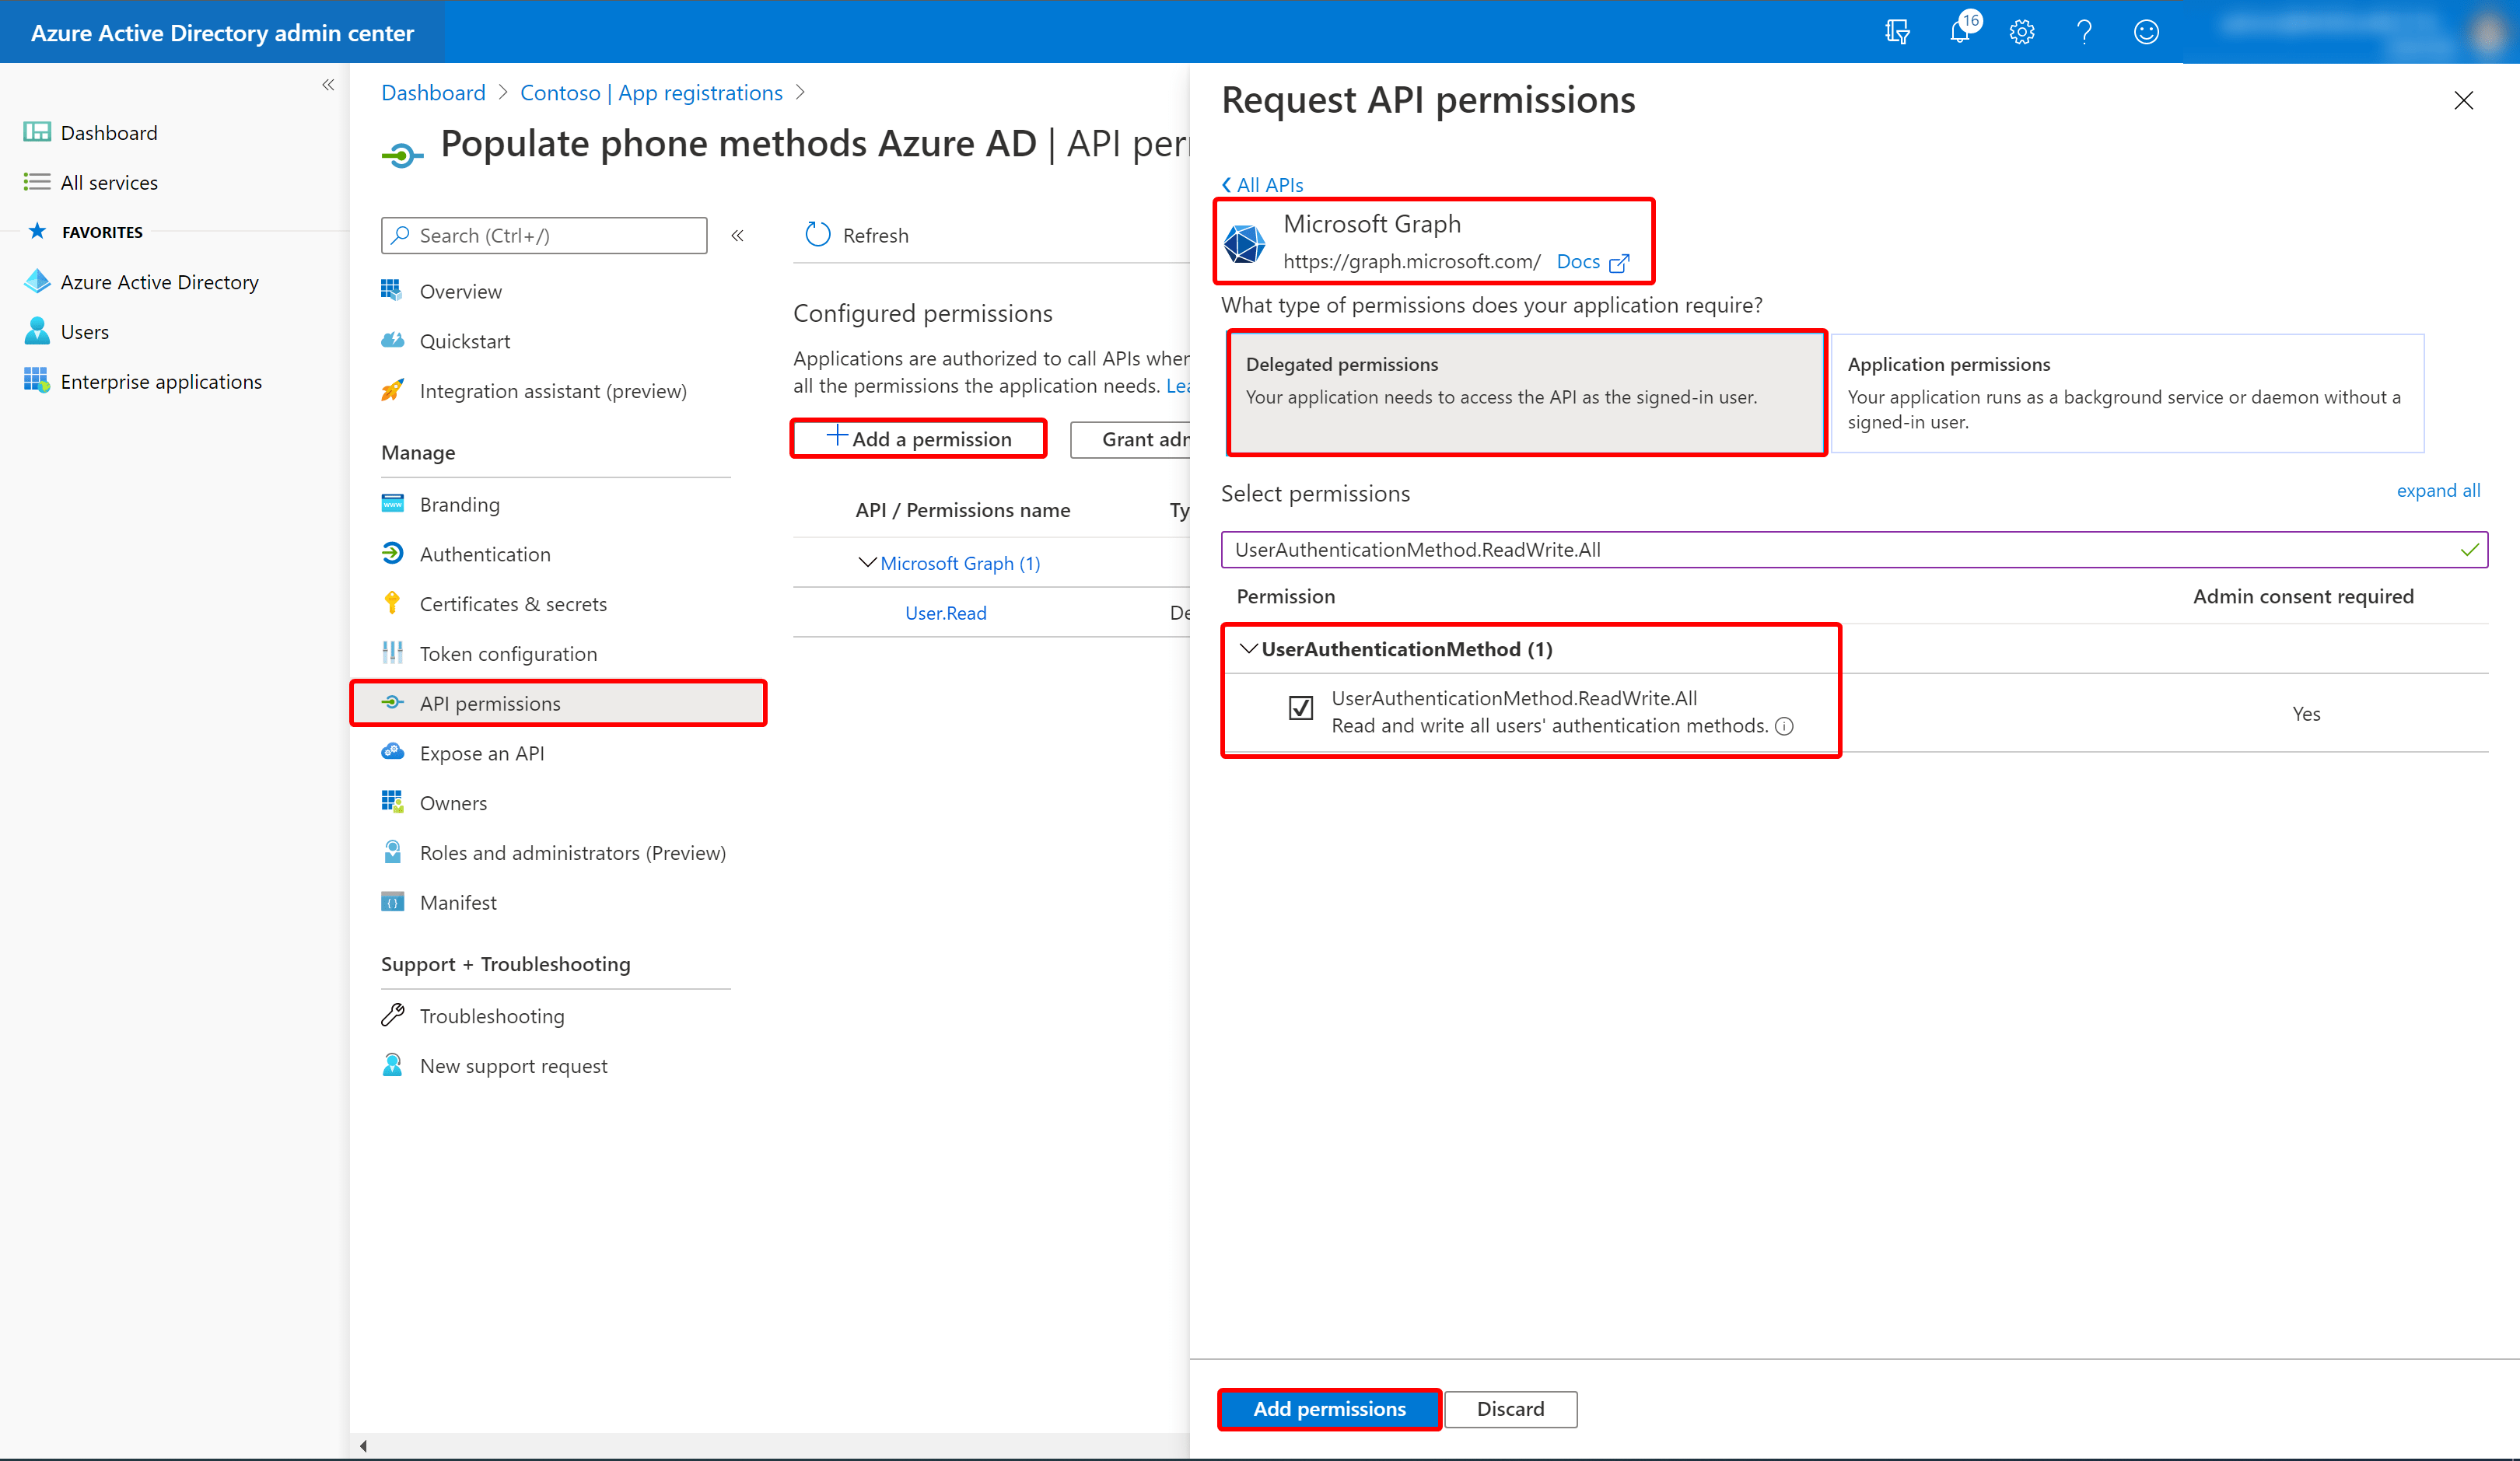
Next, we need to add the Graph API delegated permissions UserAuthenticationMethod.ReadWrite.All
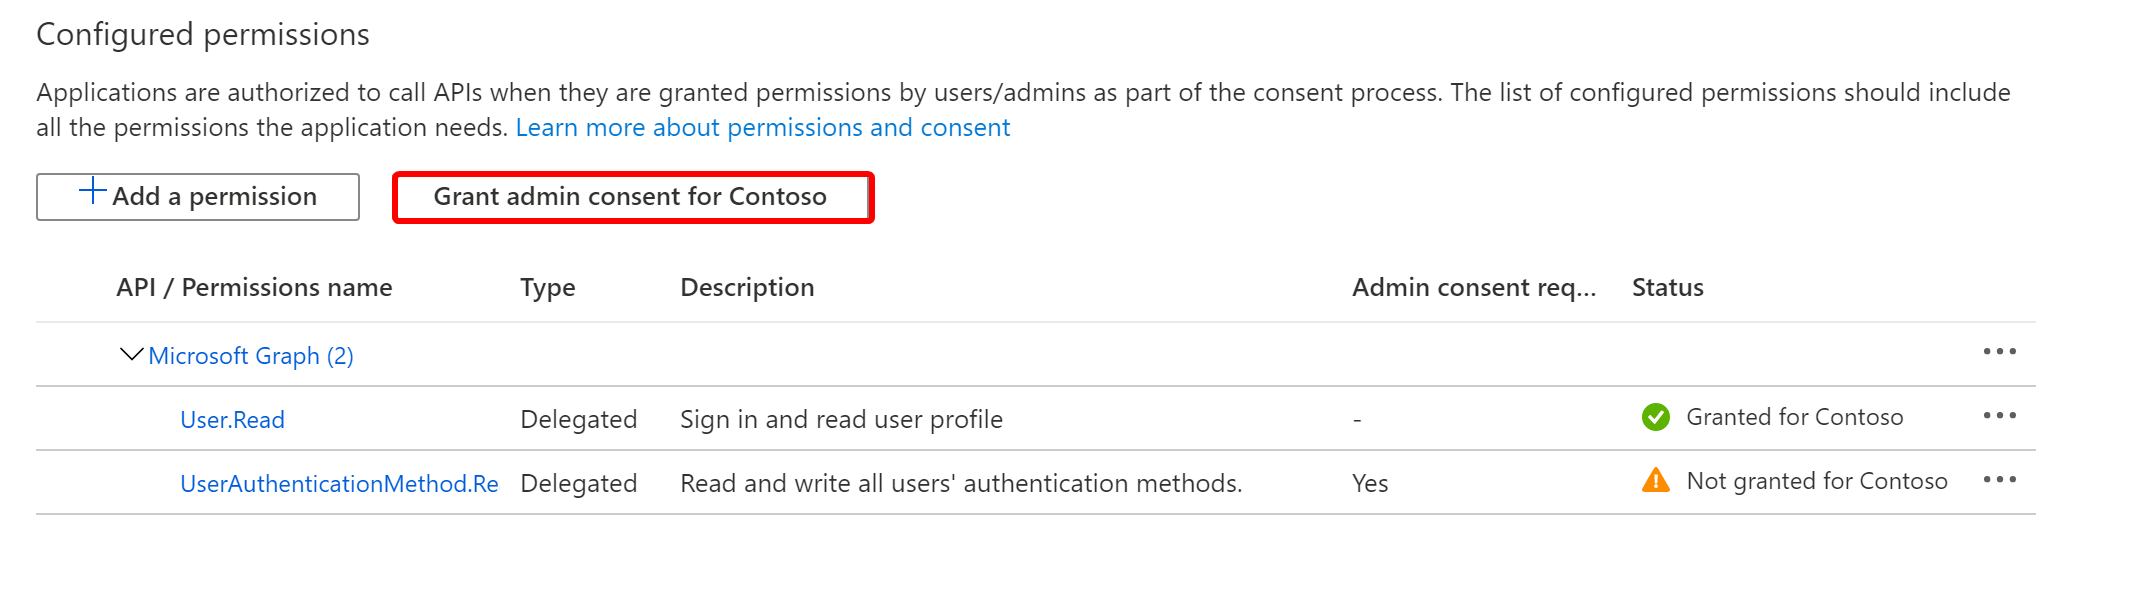
Don’t forget to grant admin consent to the permissions.
Create a client secret and make sure you store the secret for later use.
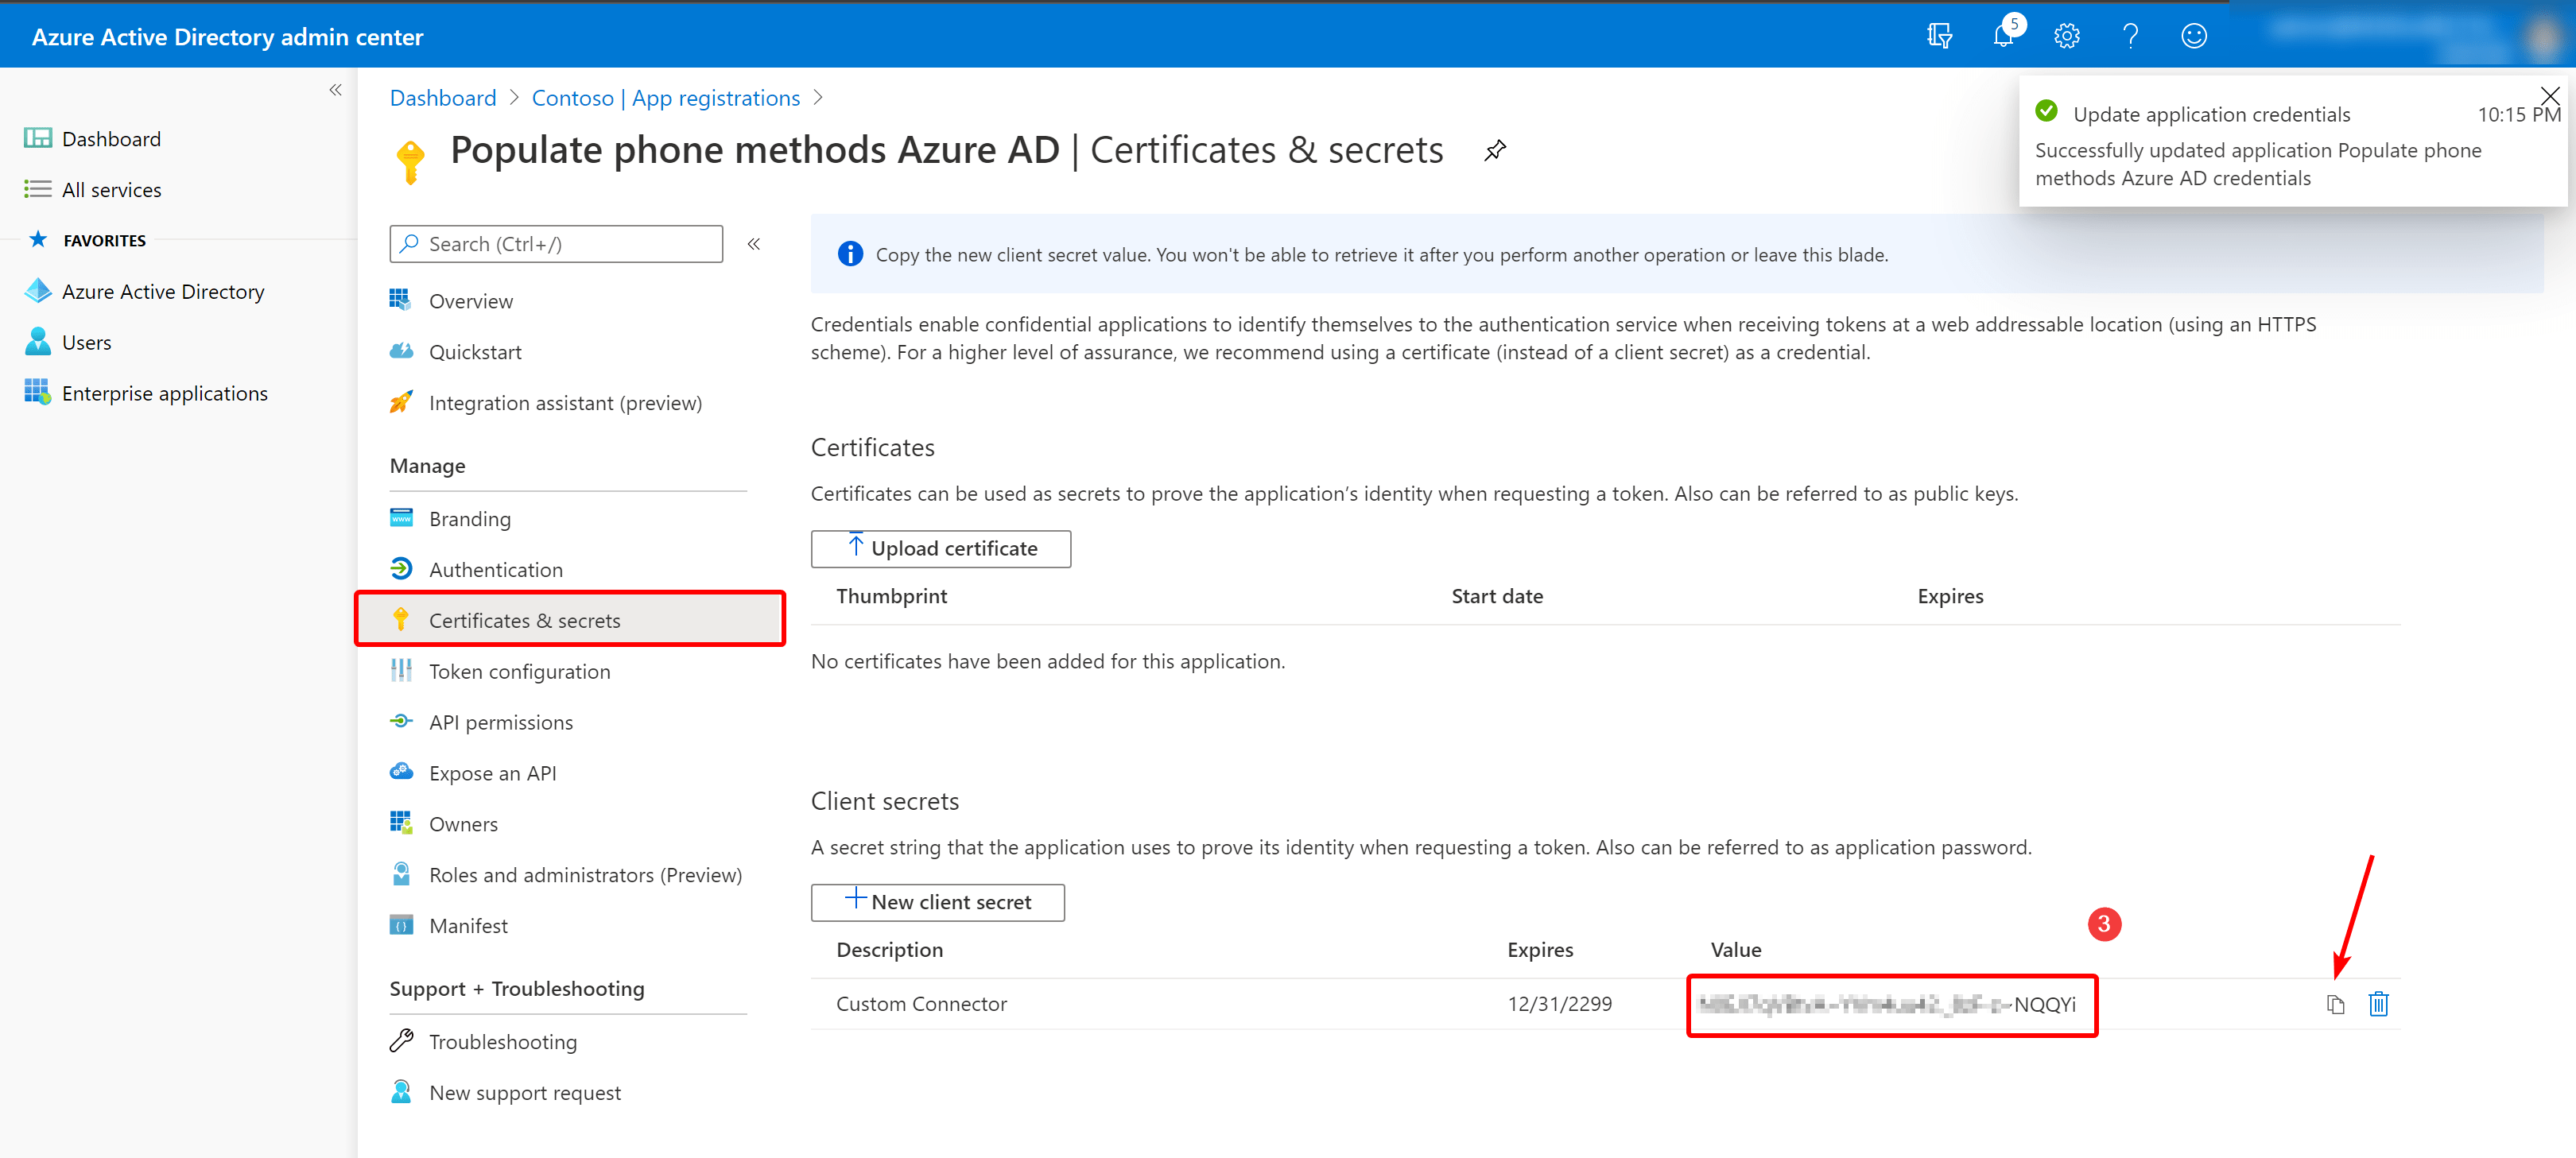
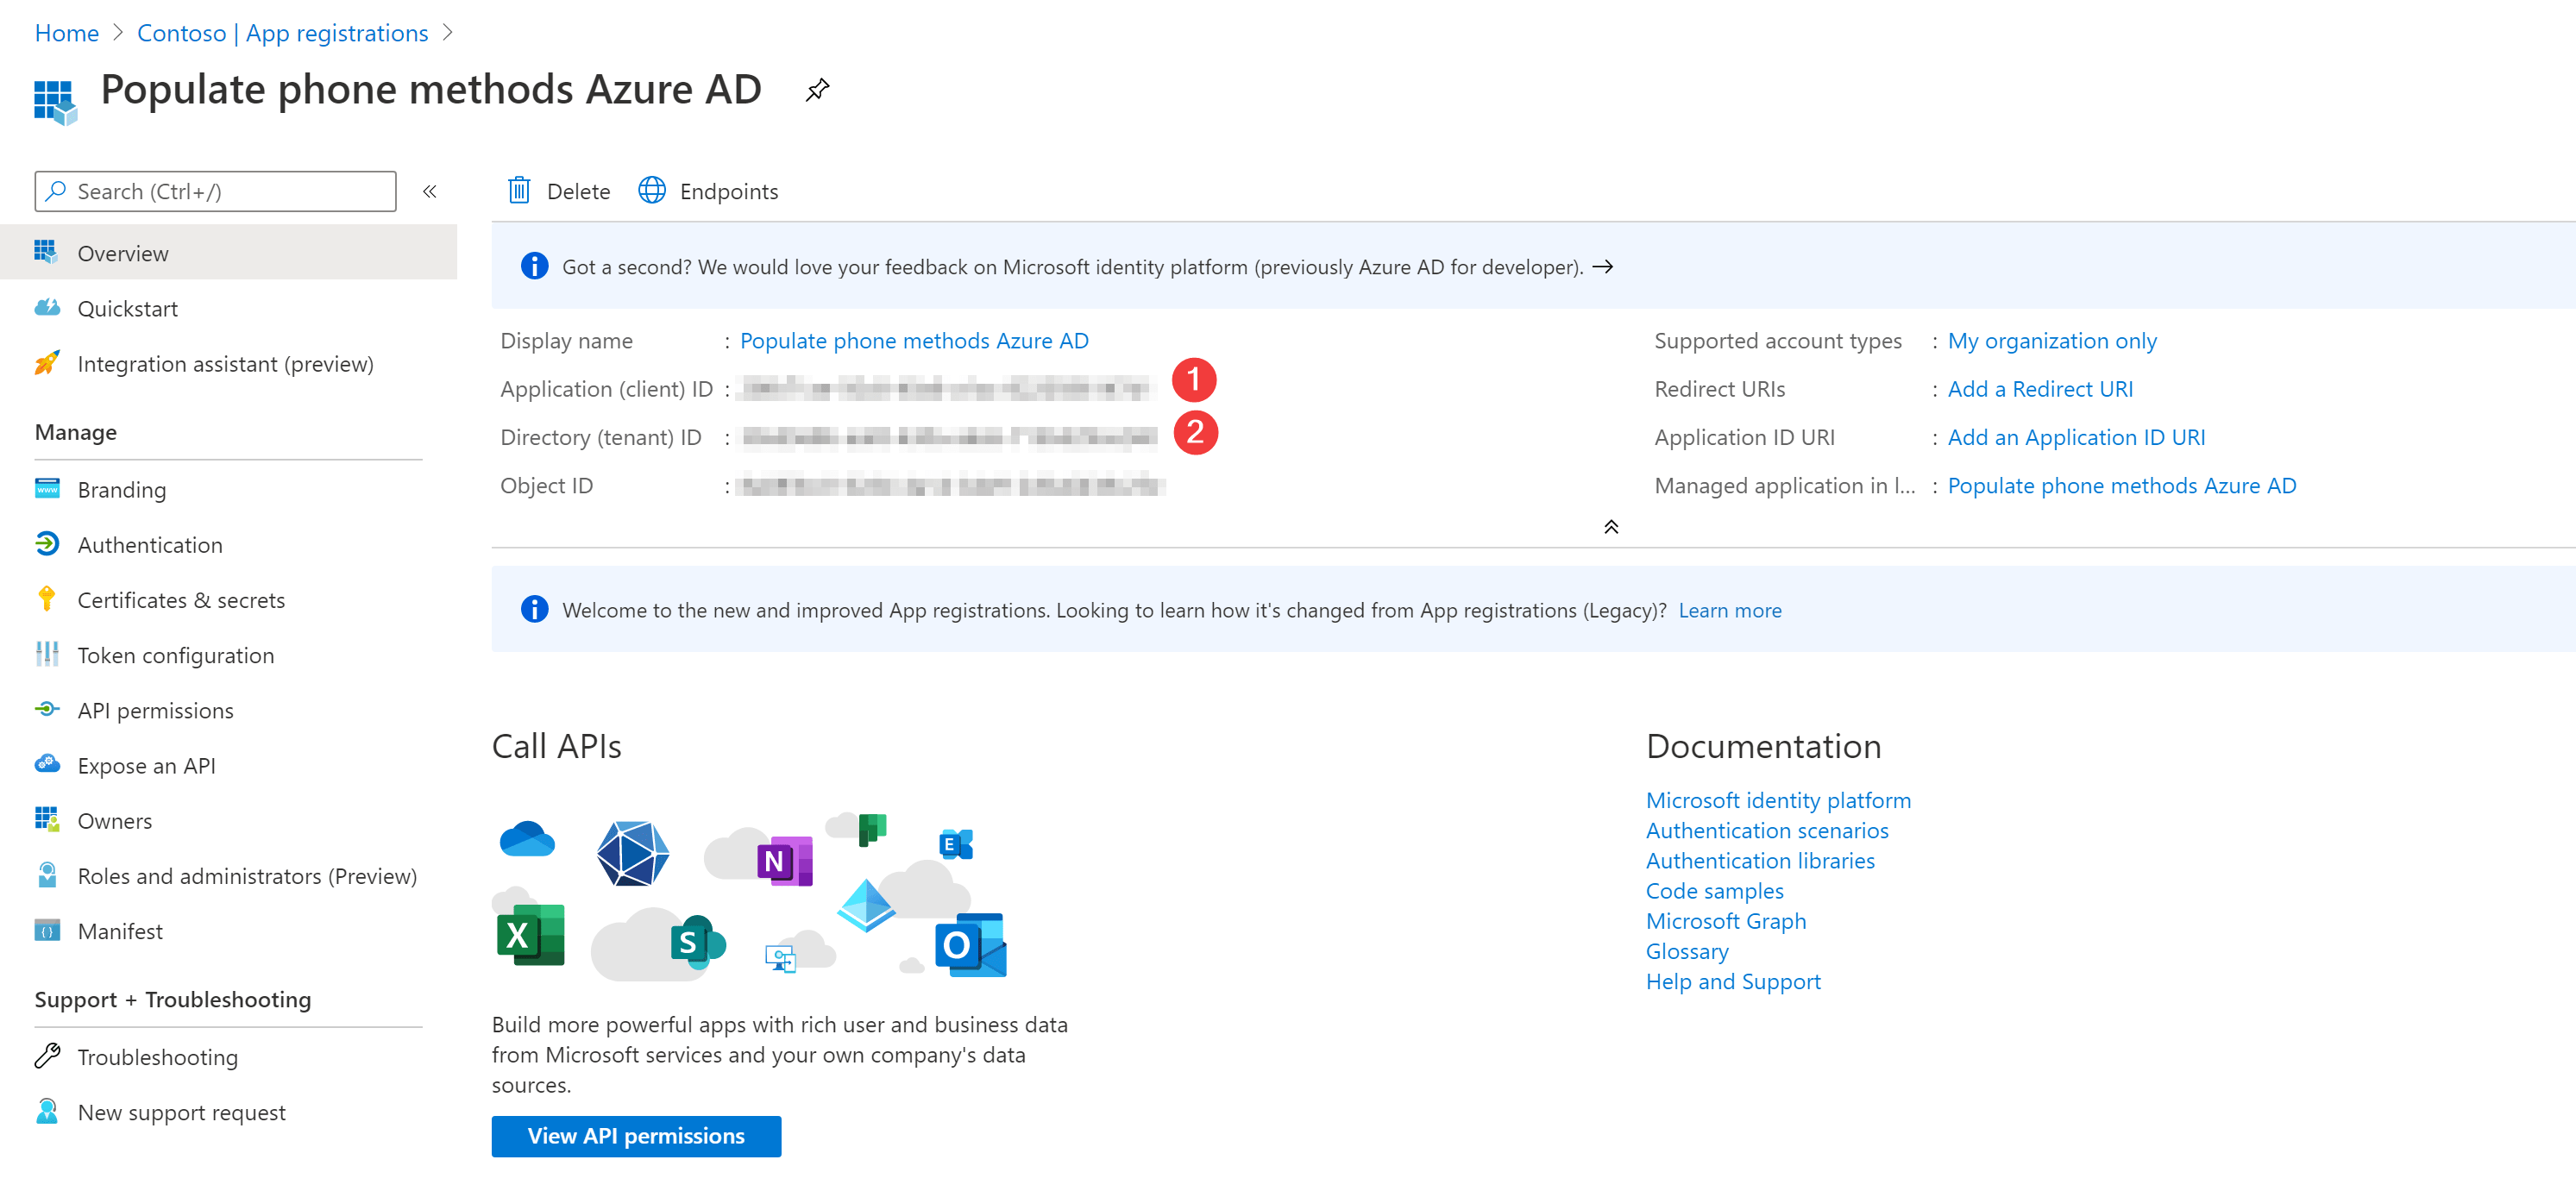
Make sure you captured the following information. You need this later on, to add to the custom connector security page.
- The Application (client) ID of the app registration (1)
- The Directory (tenant) ID (2)
- A client secret (3)
Update December 2020#
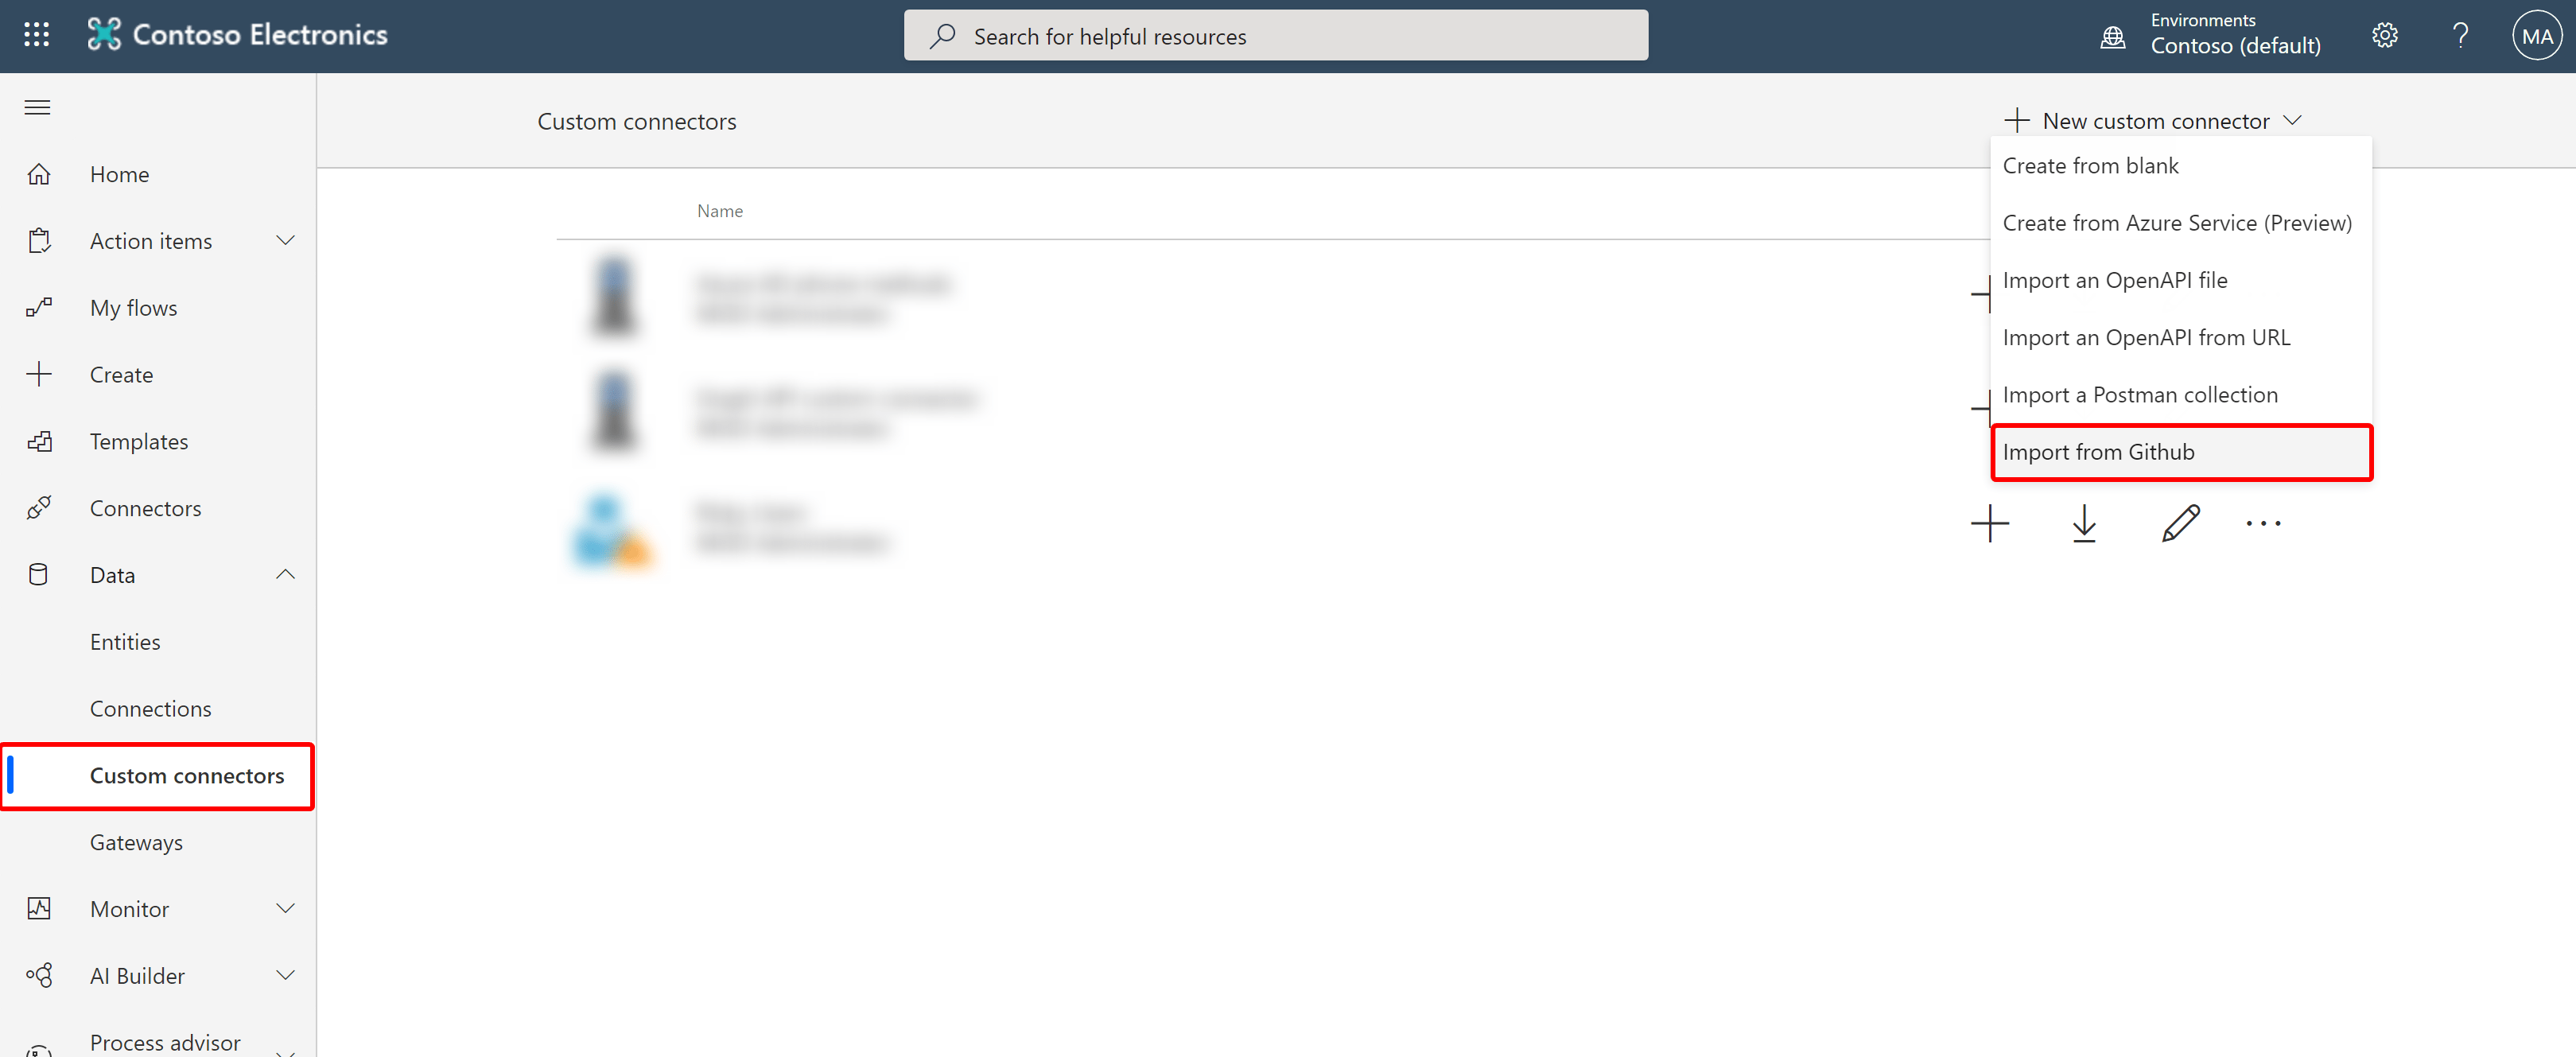
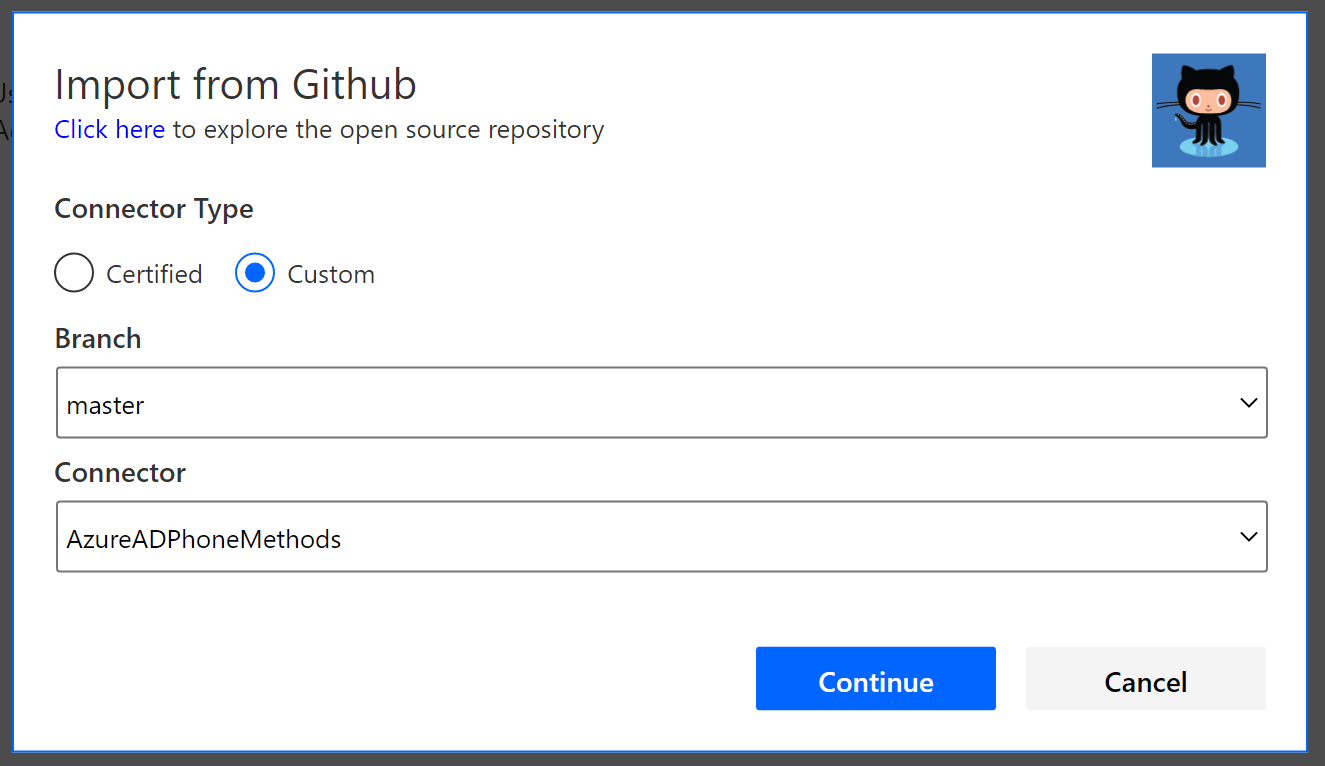
For the next step, there is actually much easier way to upload the custom connector to Power Automate or PowerApps. In the portal, just select “Import from Github”. This connects to the open source library where this connector is stored.
Download & create the custom connector#
There are multiple ways to install and configure the connector. If you have never worked with custom connectors before, it’s best to work with Power Automate portal to add the connector. If you have worked with customer connectors before and you have Python and paconn already installed to your machine, you can use that method.
Grab the latest source files from Github and store them in a temporary folder on your machine. You’ll need:
- apiProperties.json
- apiDefinition.swagger.json
- icon.png
Create custom connector using paconn#
Spin up your favorite terminal or command prompt and authenticate paconn. Type the command and follow the instructions to authenticate via the browser. (1)
paconn loginOnce you are authenticated, kick off the following command to create the connector. Add the secret from the app registration (service principal) When asked, pick the right environment. (3)
paconn create --api-prop C:\temp\cc\apiProperties.json --api-def C:\temp\cc\apiDefinition.swagger.json --icon C:\temp\cc\icon.png --secret xxx-xxx-xxx-xxx-xxx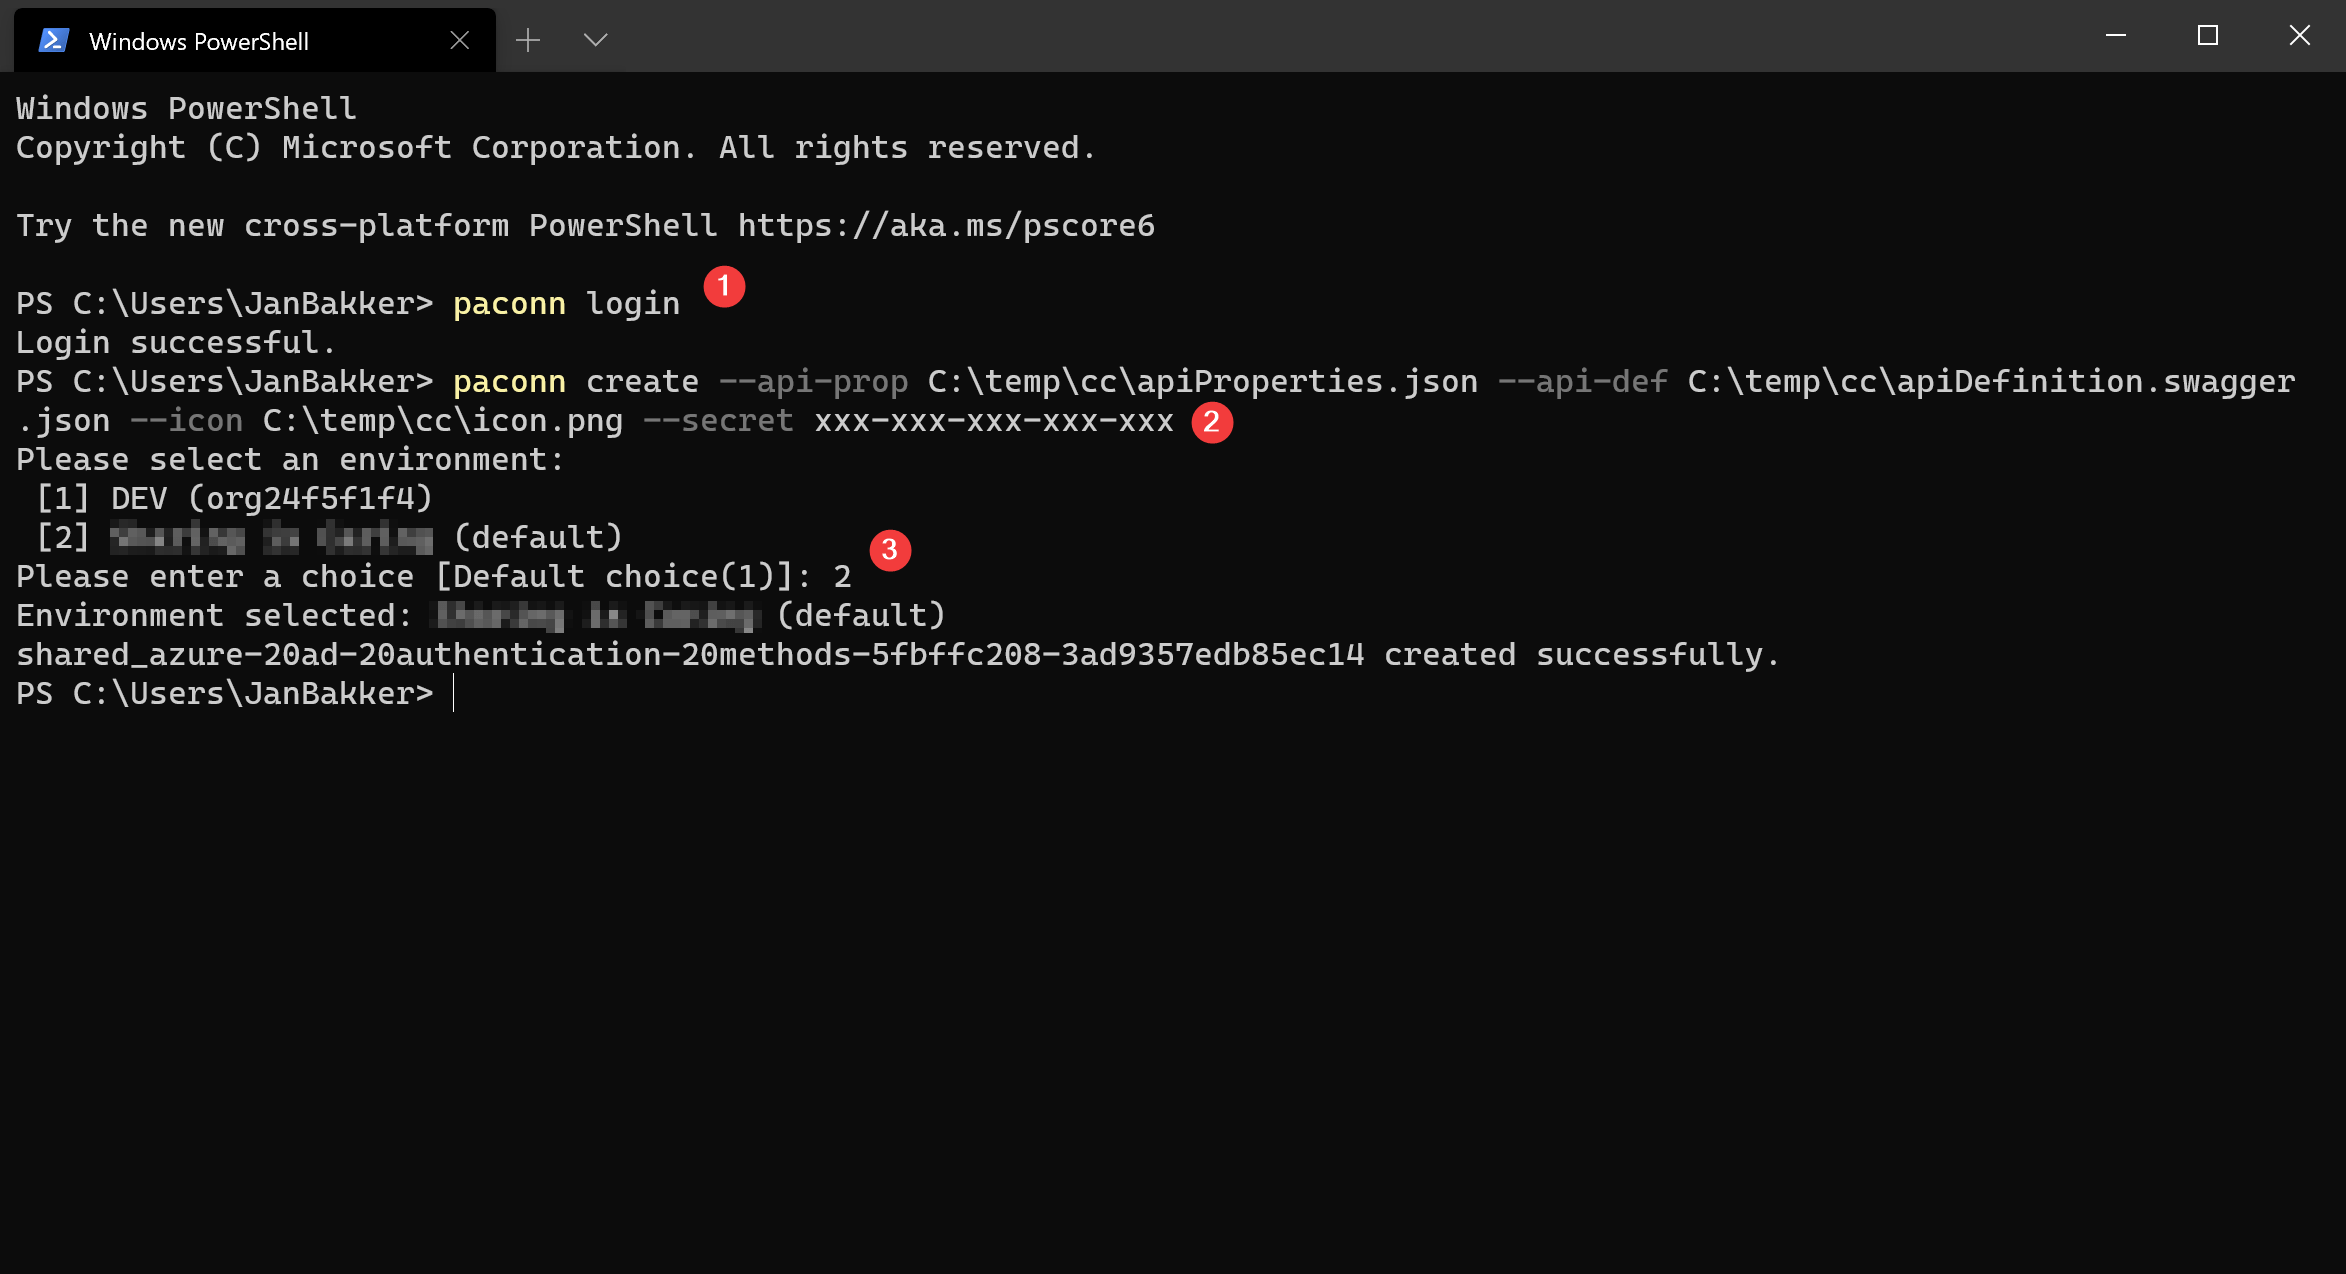
Next, head over to the Power Automate portal to configure the connector. Follow the steps from this point on.

Create custom connector using the portal#
When you are not familiar with paconn, no worries. Head over to the Power Automate portal and go to the custom connector page. Select + New custom connector and choose “Import an openAPI file”.
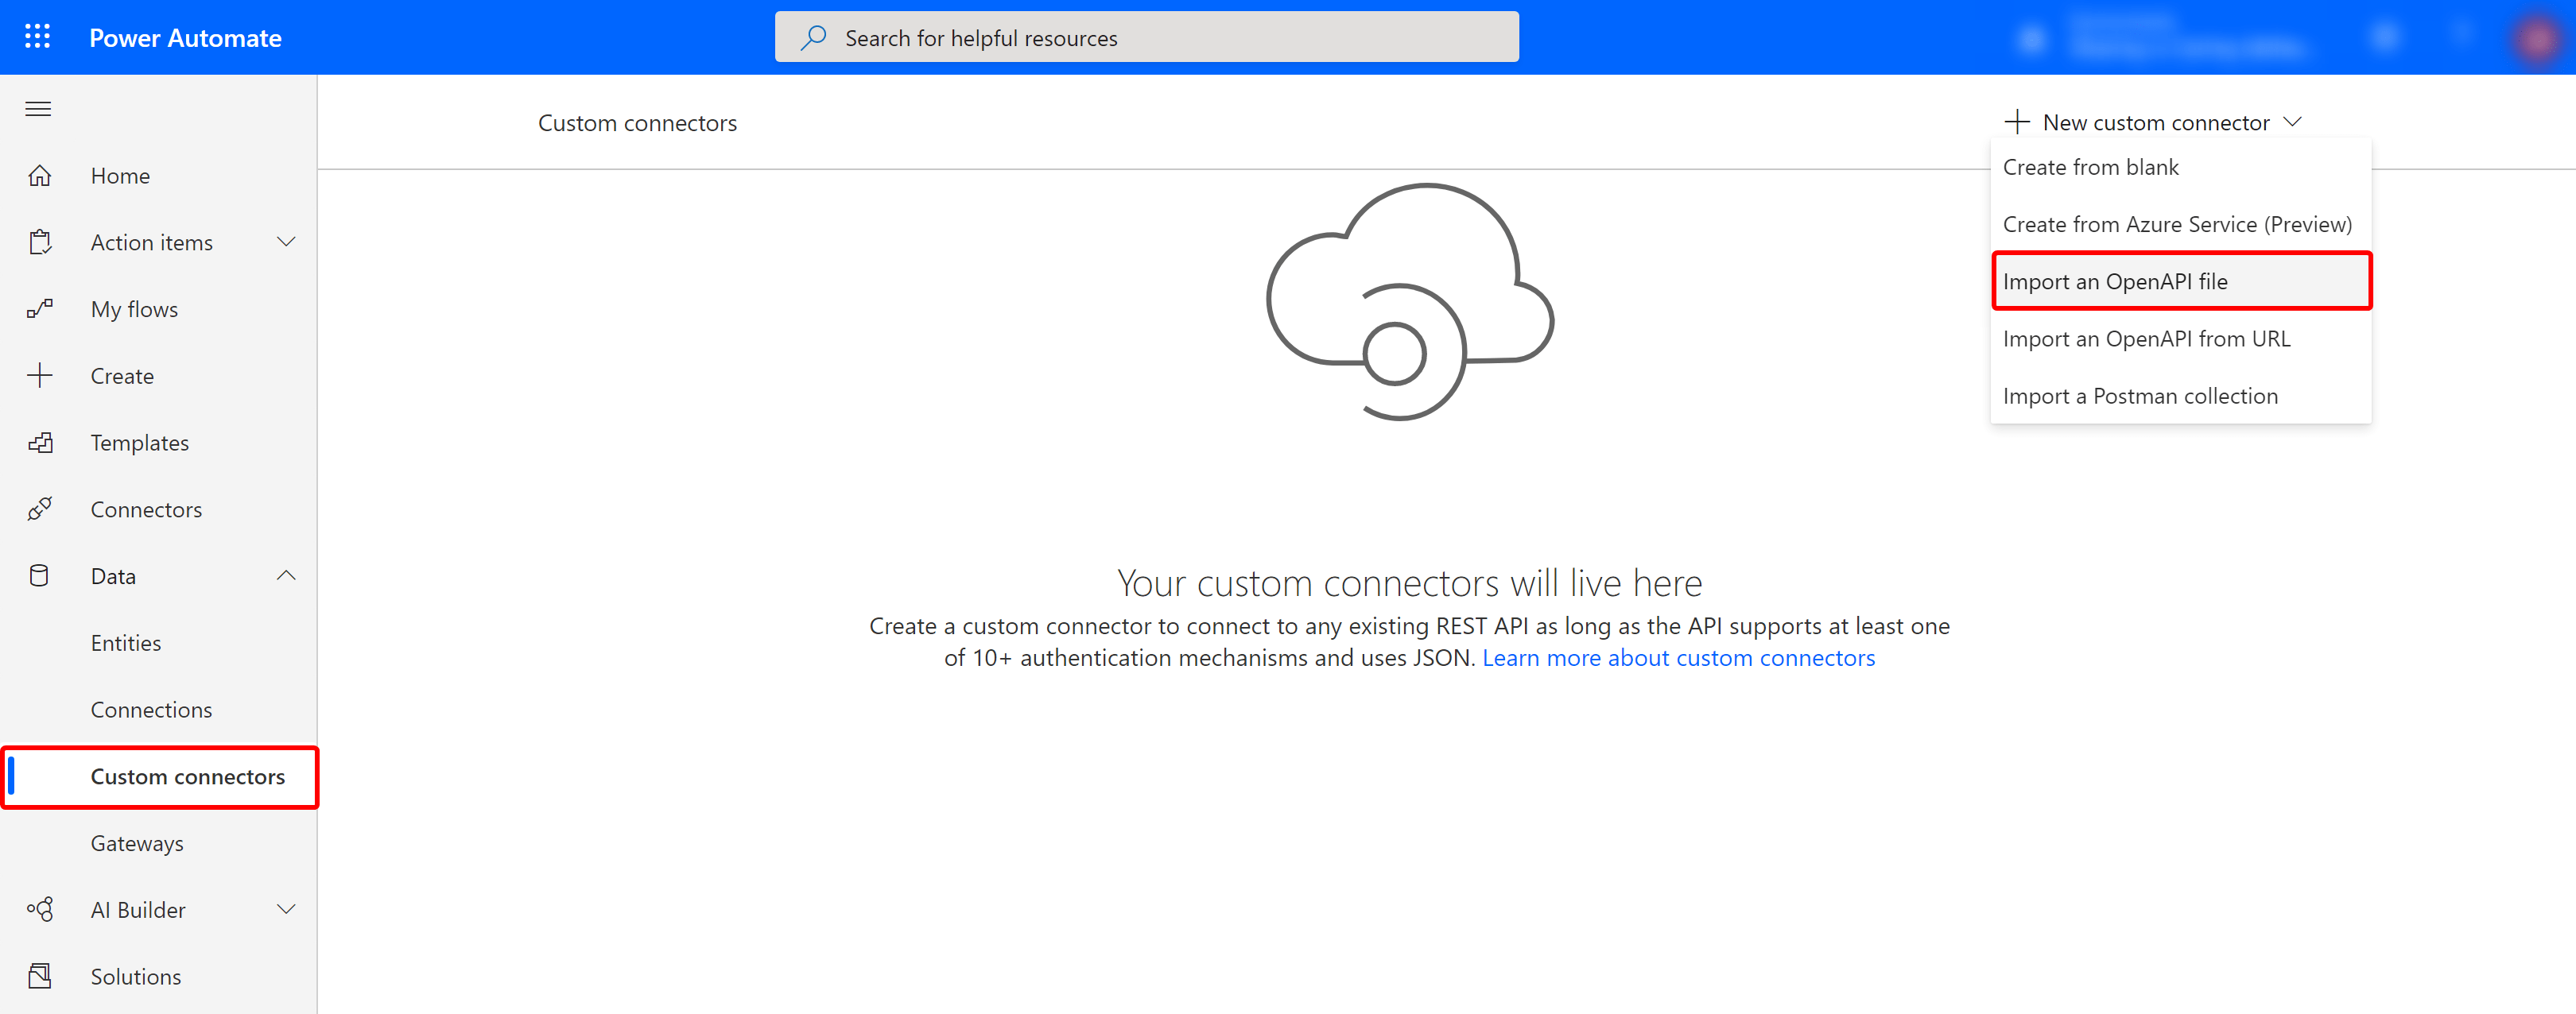
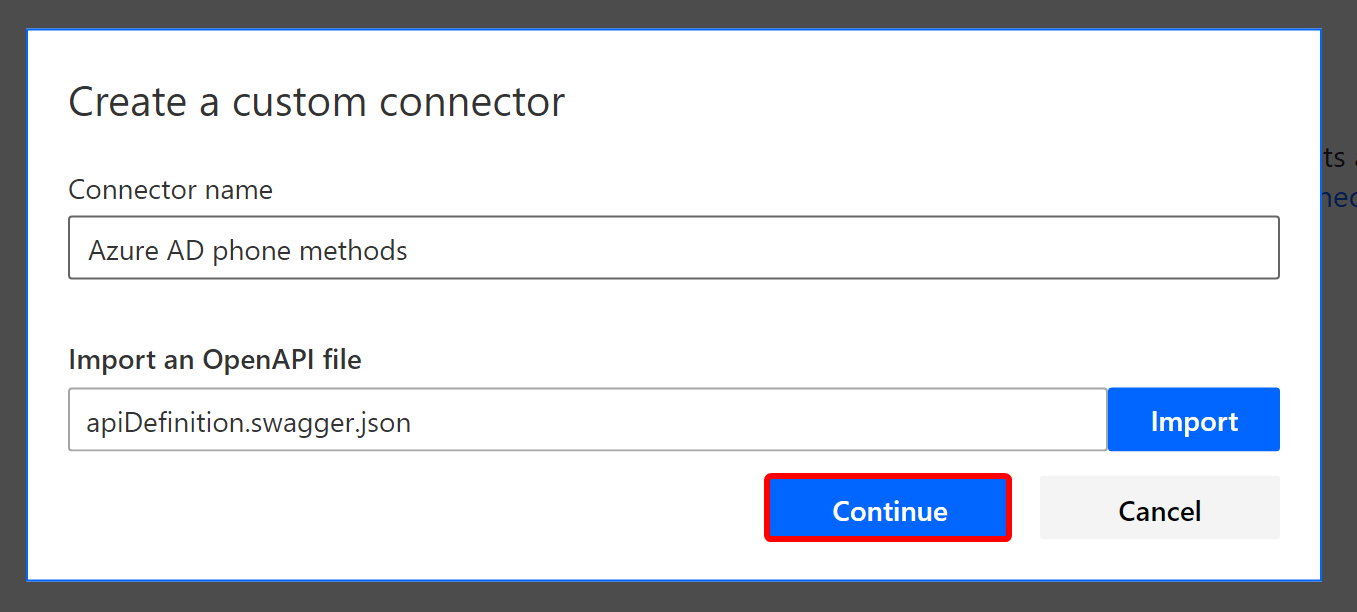
Browse for the apiDefinition.swagger.json file and click Continue to create the connector.
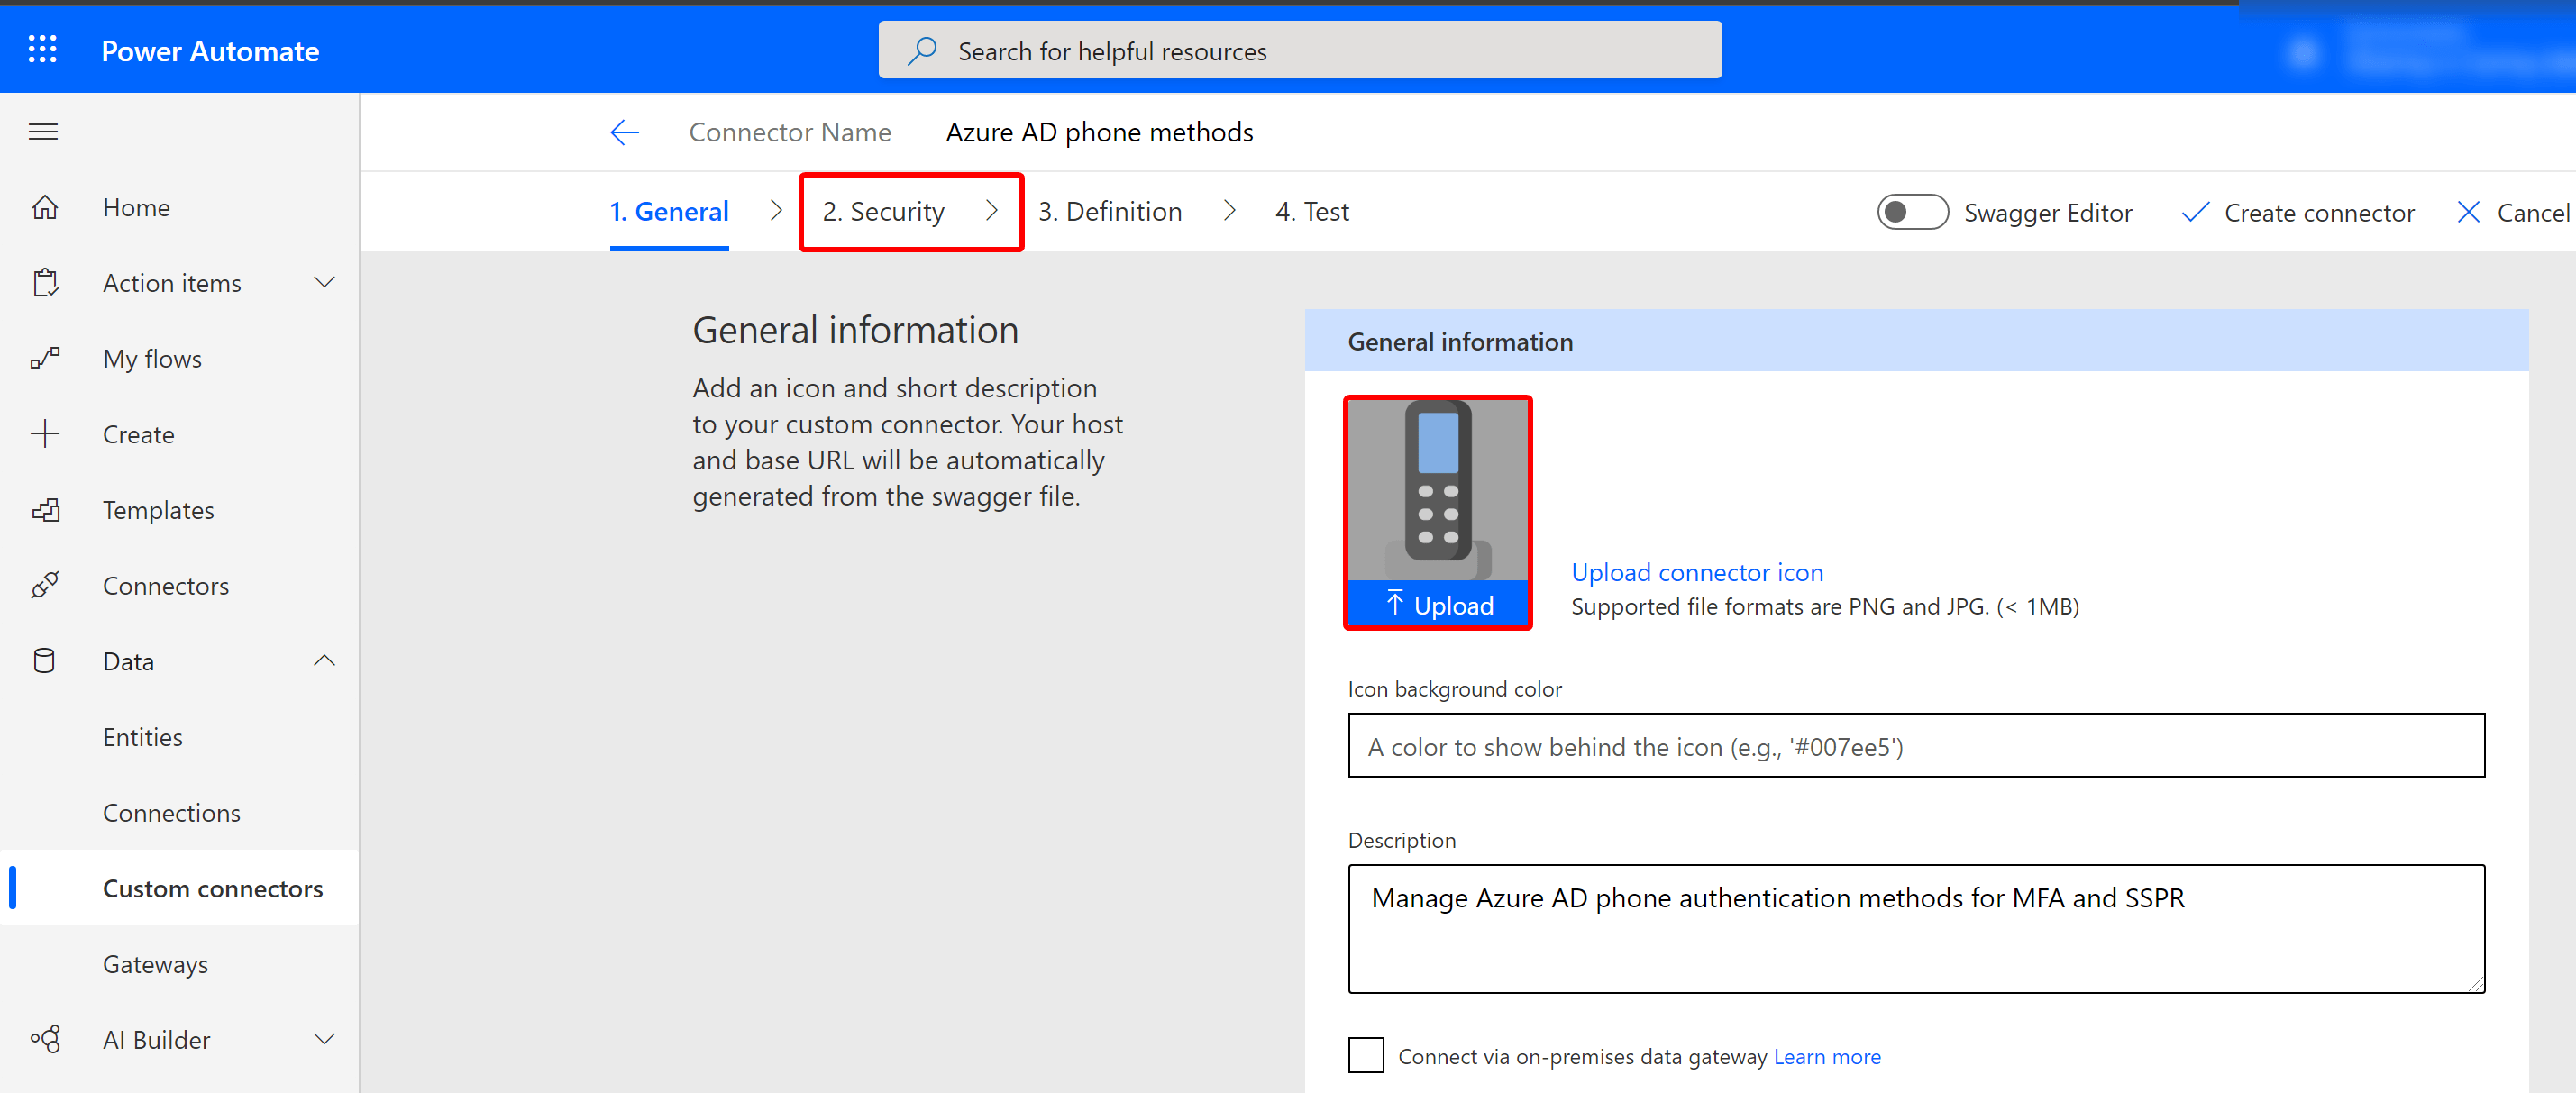
When the connector is created, upload the icon file and go the second page 2. Security
Security#
Configure the security page like the following example and hit ’Create connector’ when done
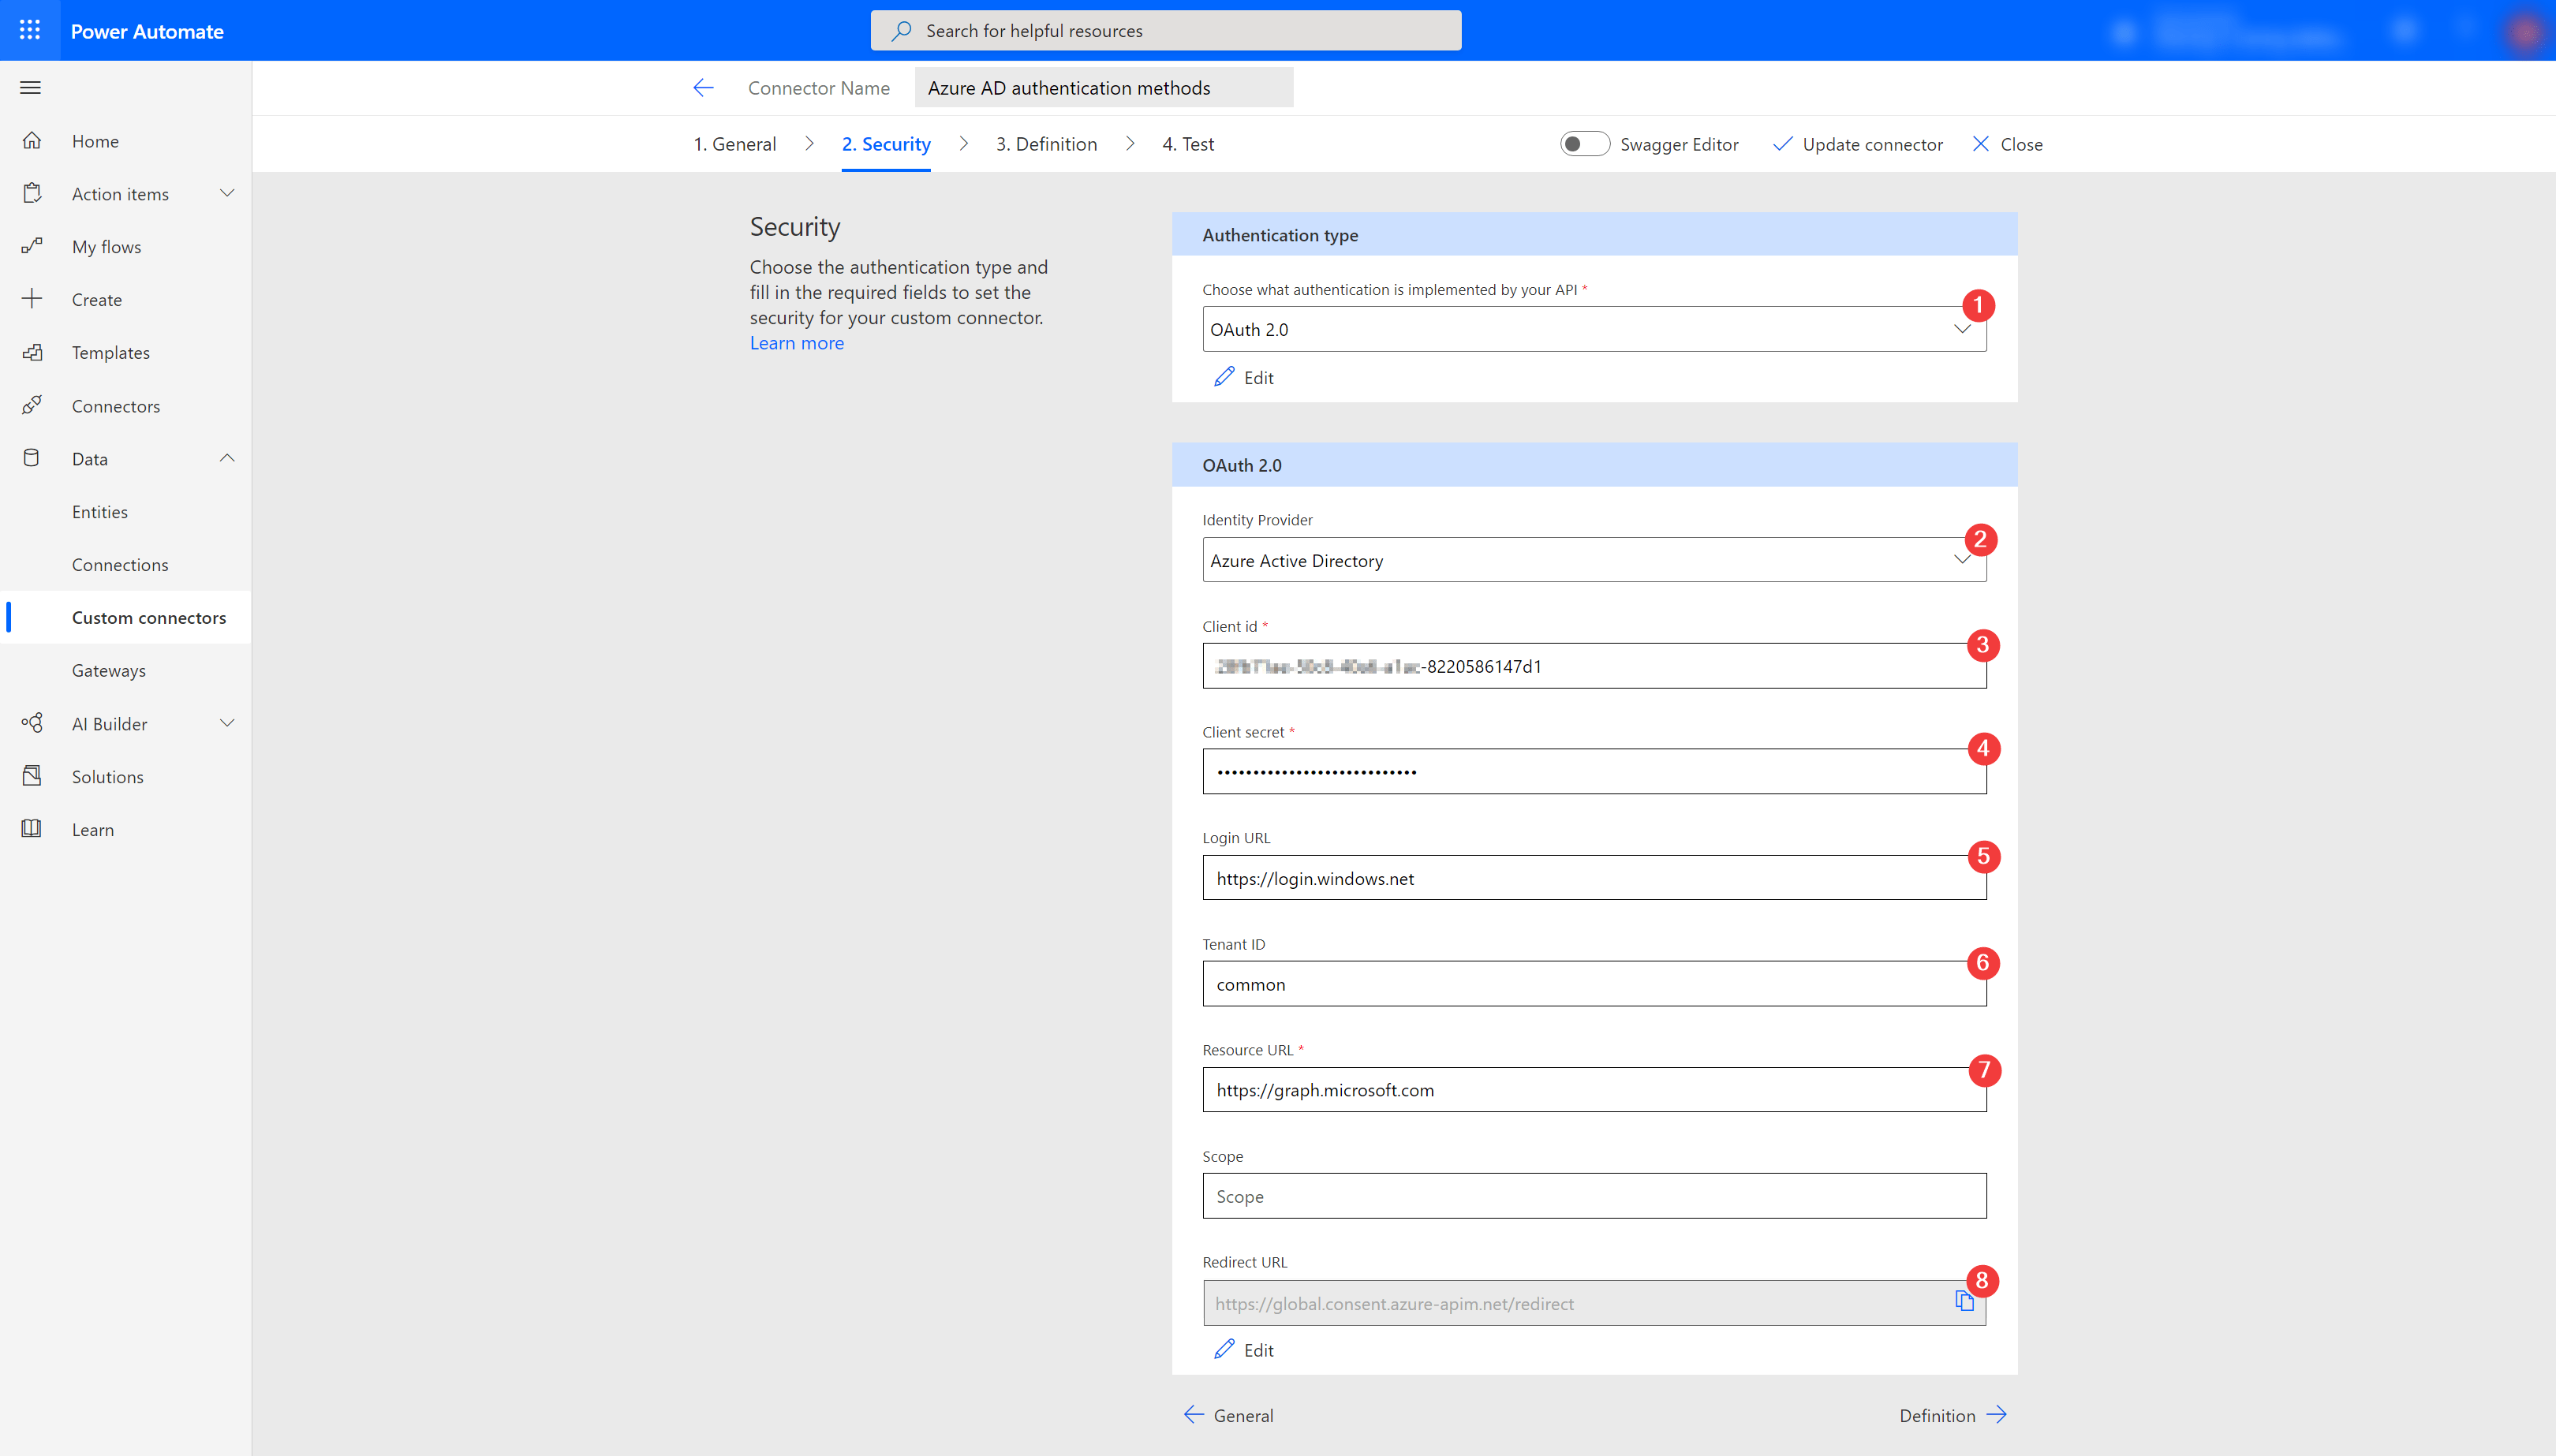
- Select OAth 2.0
- Select Azure Active Directory as our identity provider
- Enter your client ID (application ID) from your Azure AD app registration
- Enter your client secret from your Azure AD app registration
- Use the default URL https://login.windows.net
- Use common as your tenant ID
- User https://graph.microsoft.com as the resource URL
- Make sure this URL matches with the redirect URL from your app registration
Make sure to save the changes!
In the next page you can see all the actions that are available in the connector.
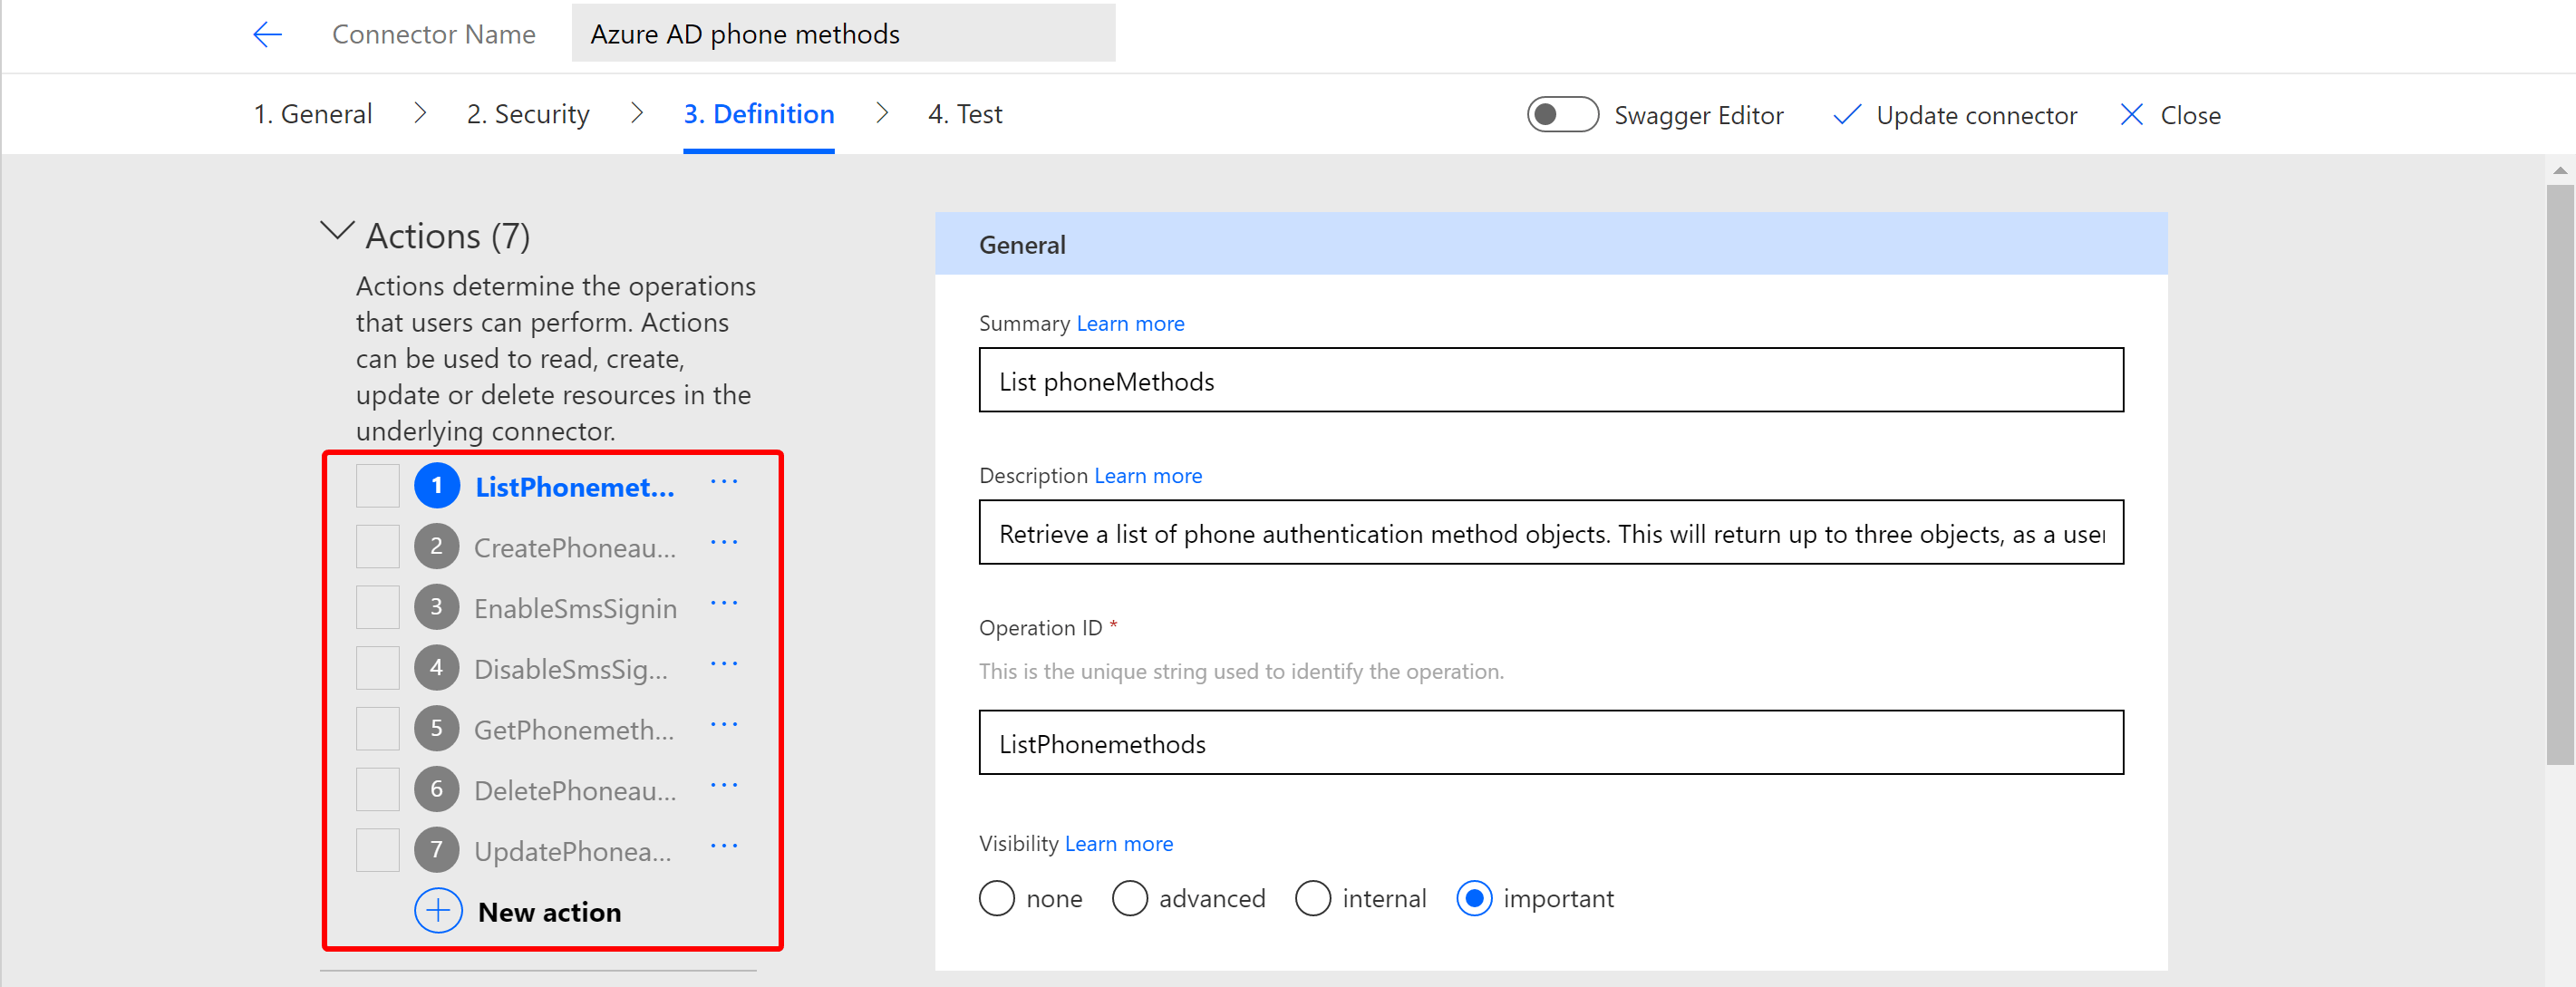
Test the connector#
On the last page (4. Test) you can run some tests to see everything is set up correctly. Start with adding a new connection.
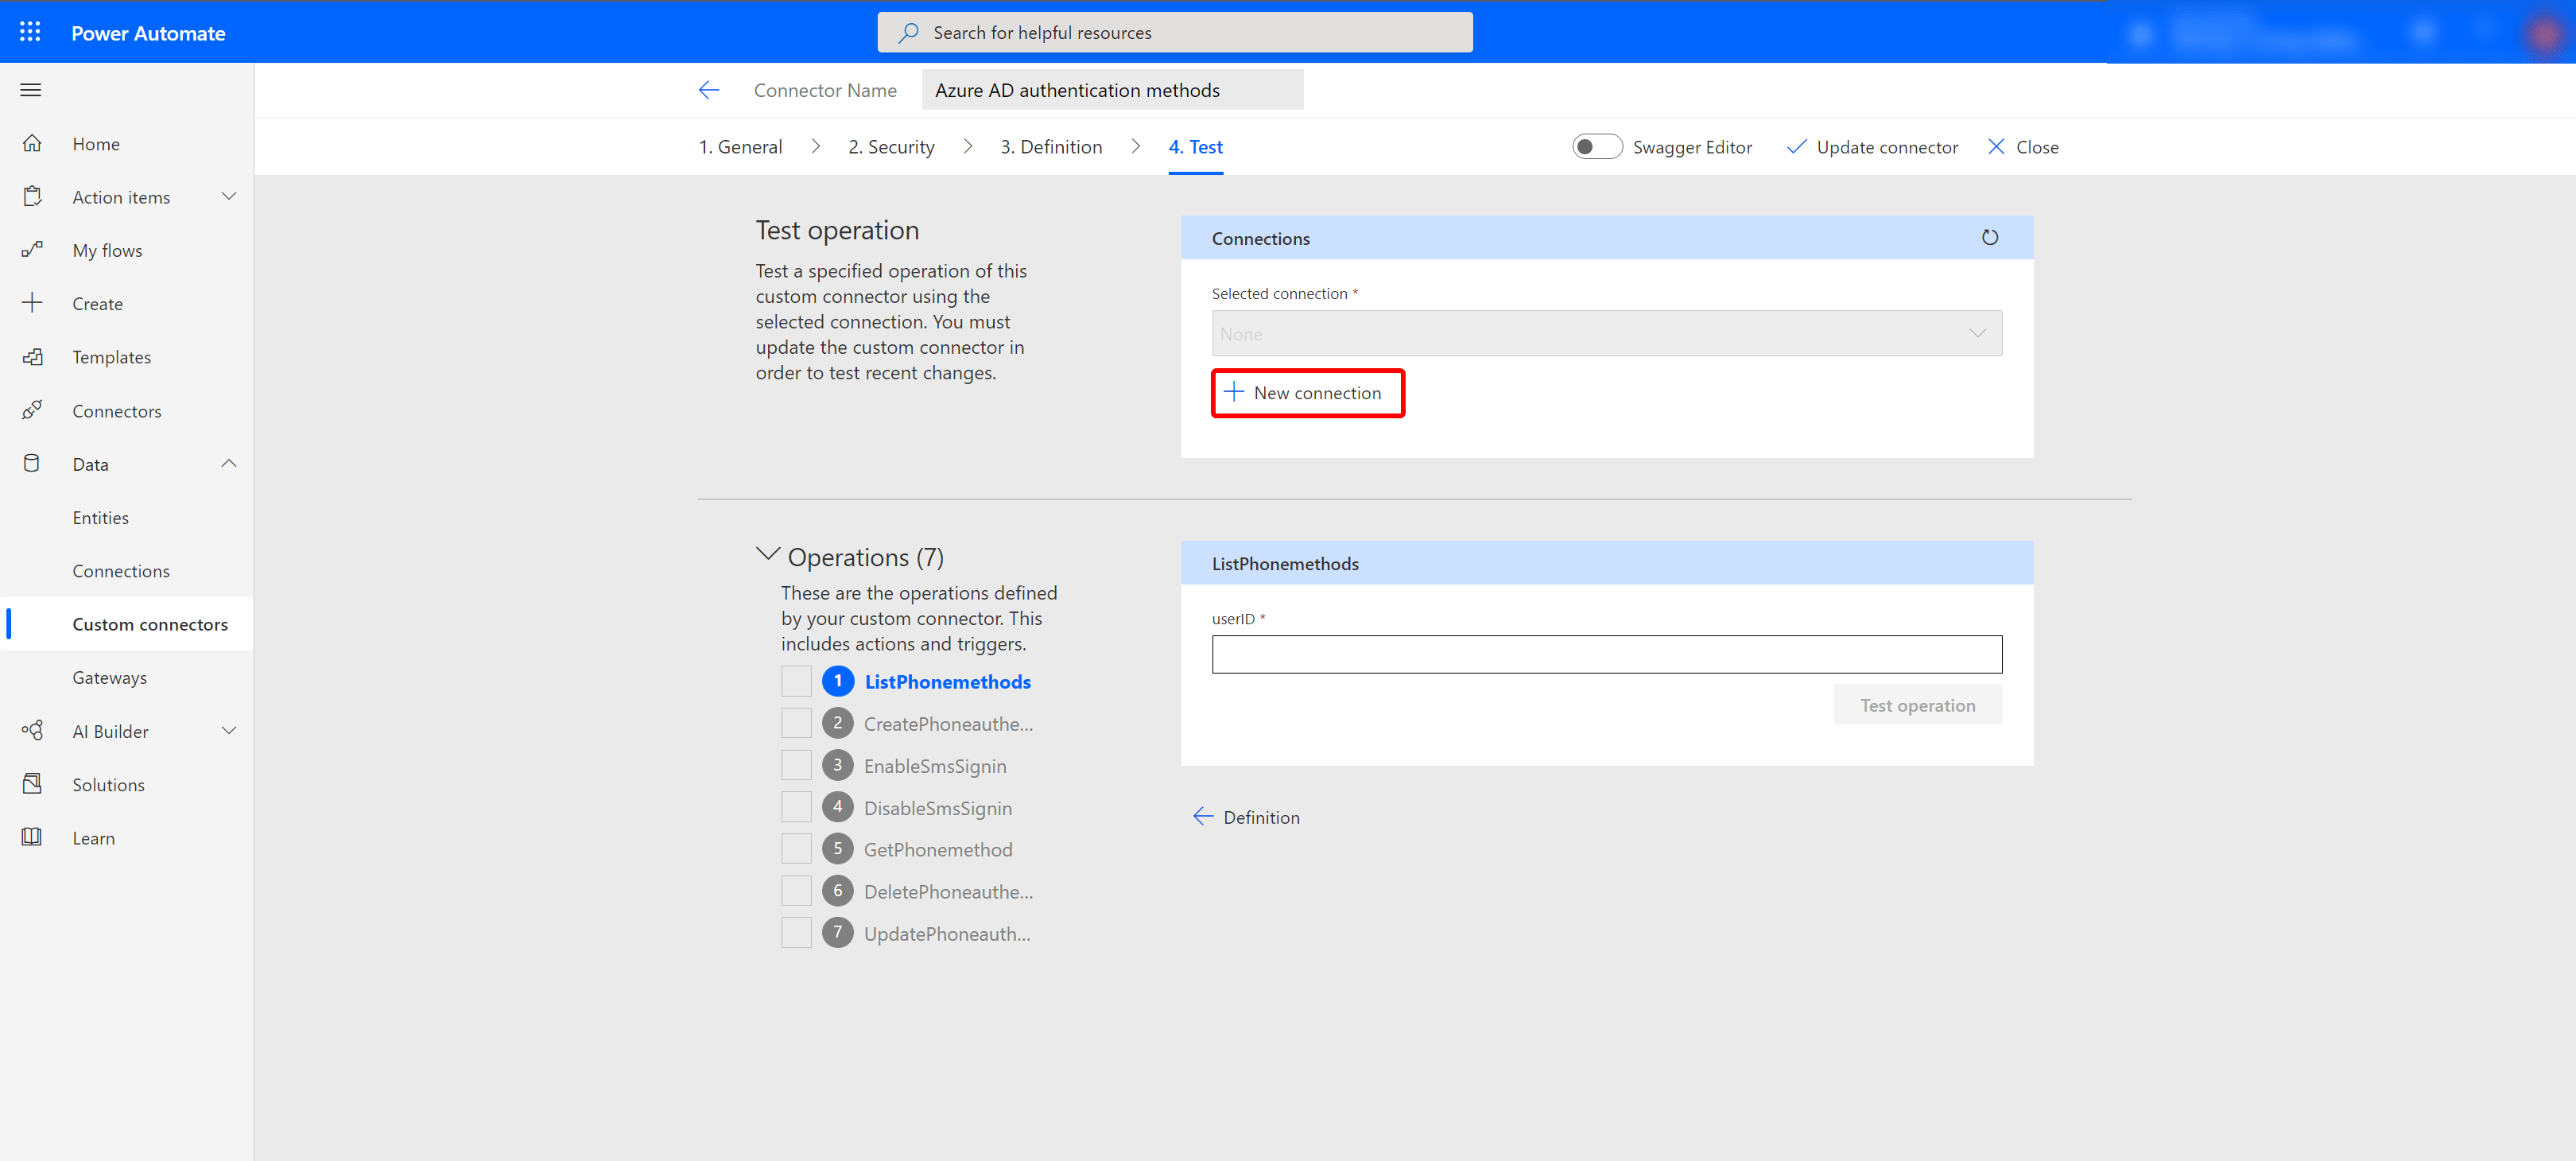
Once you added the connection, you can test the connector to see if the connector works properly.
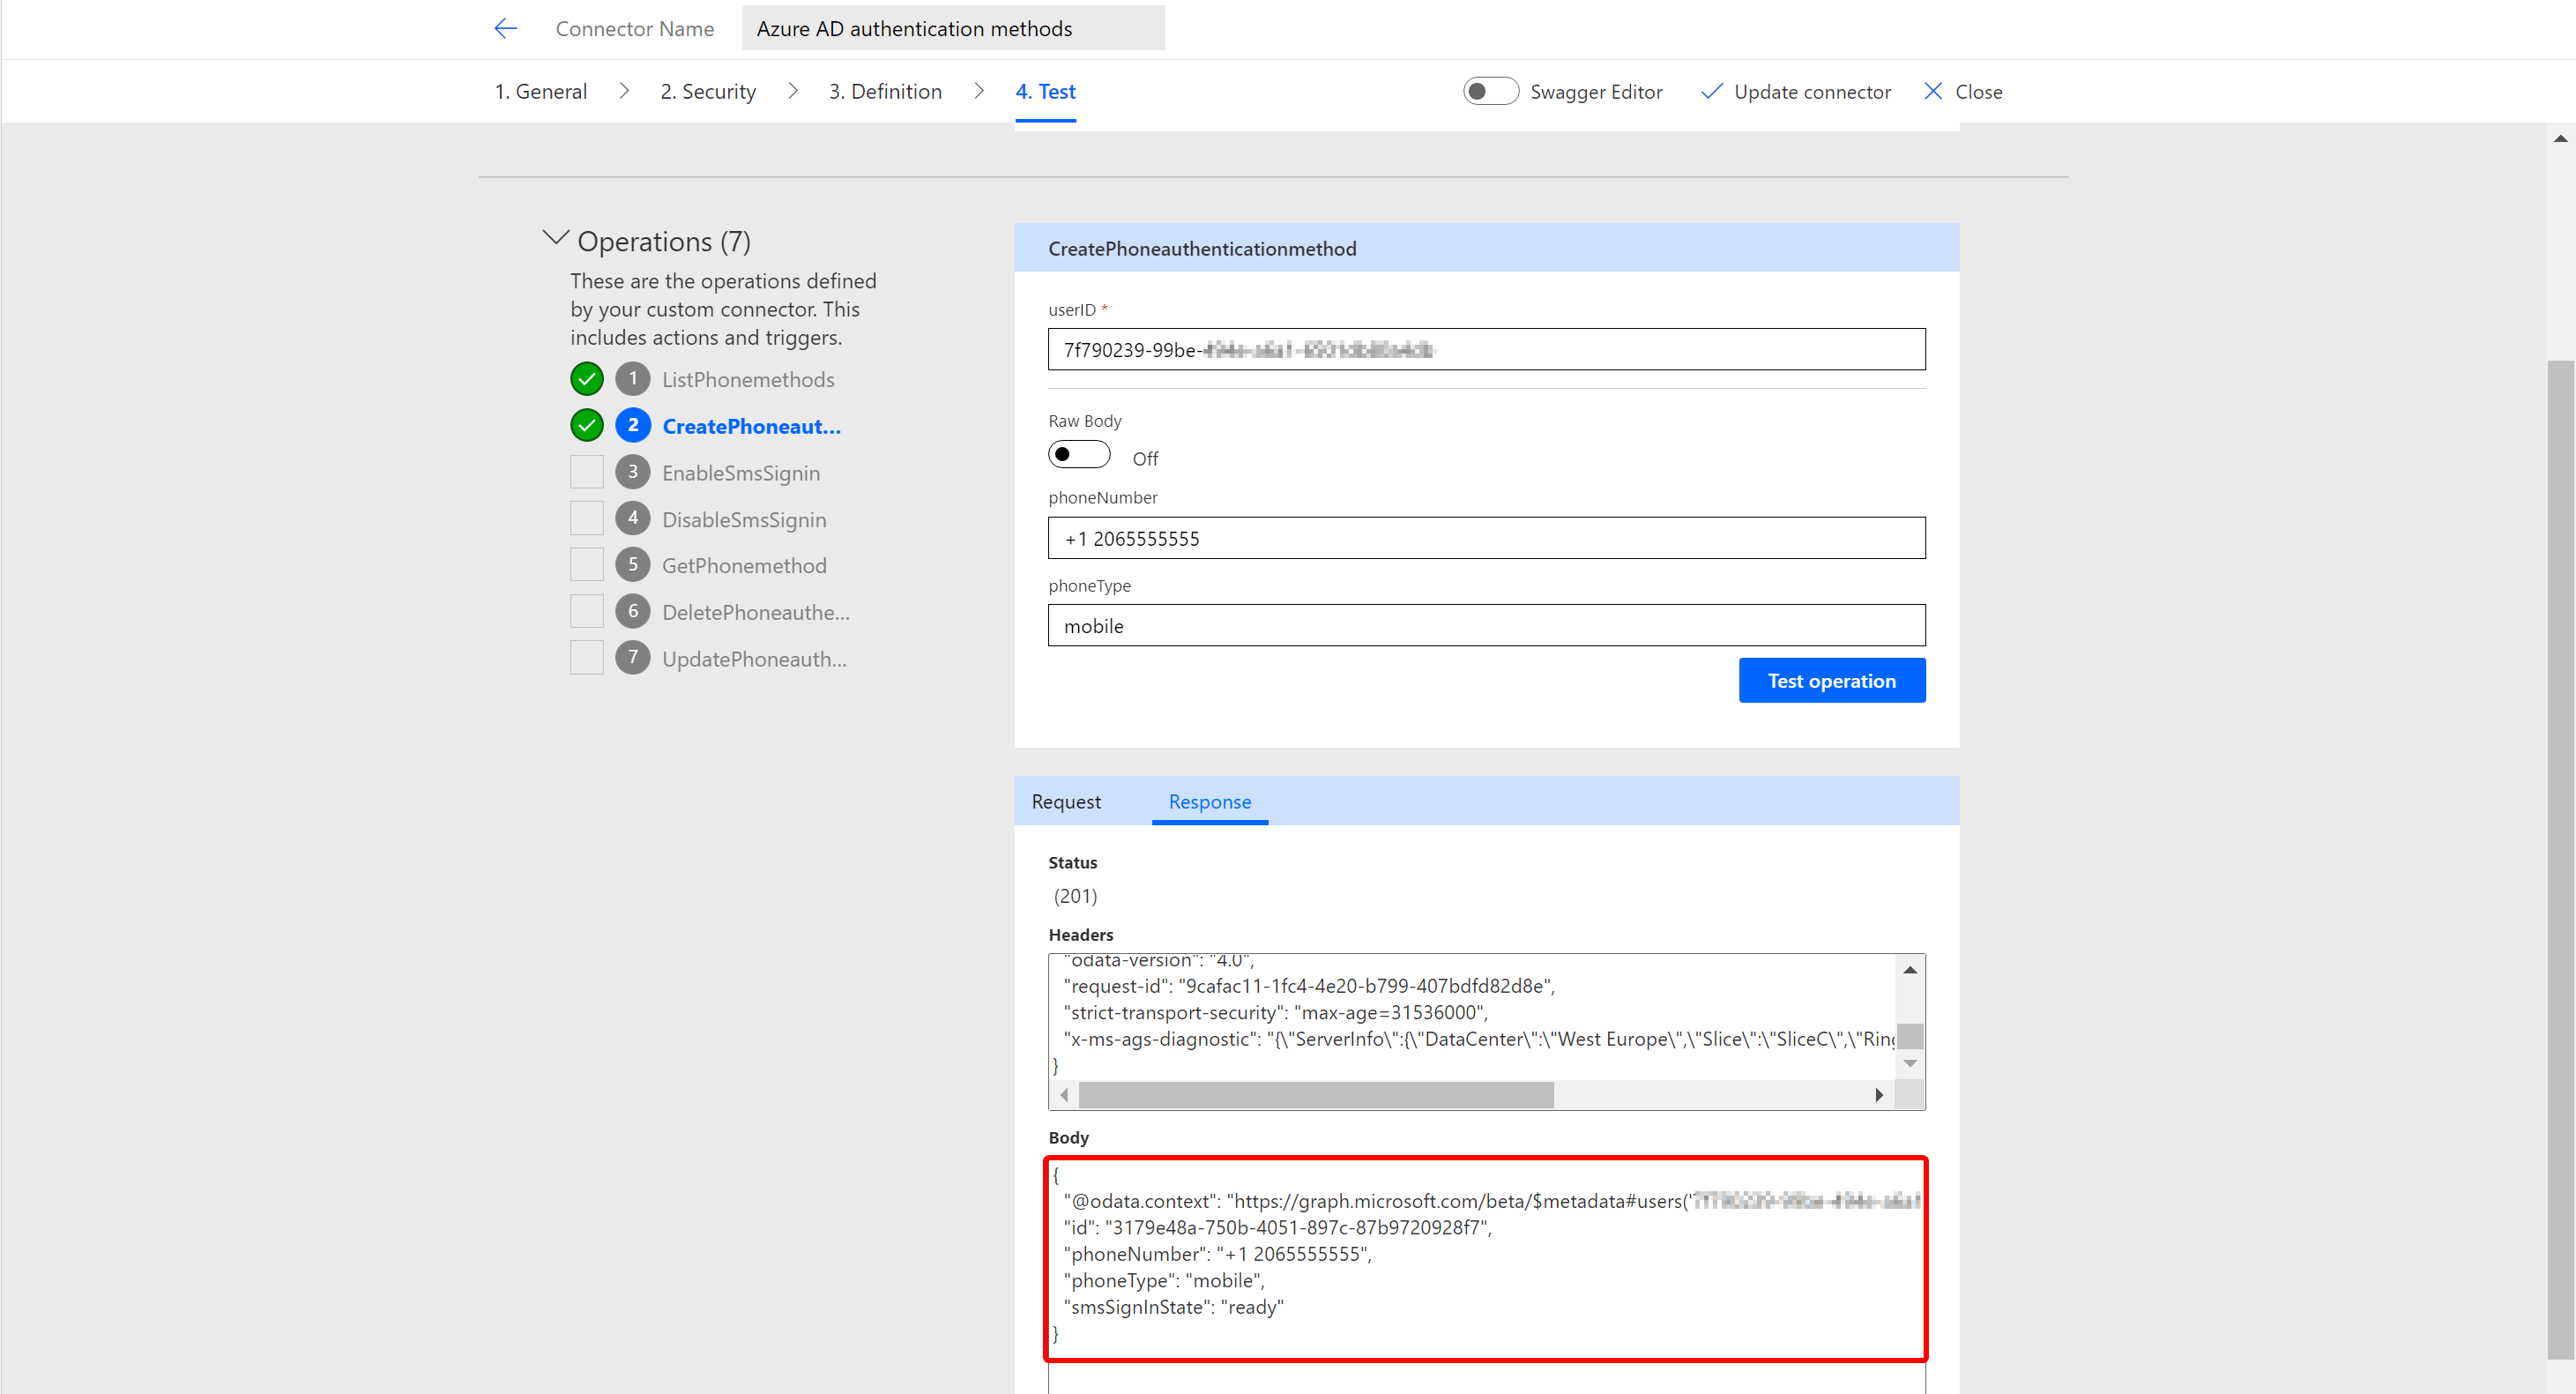
Now let the magic begin……..
Prepare the source file#
Now that we successfully created the custom connector, it’s time to create the Excel source file with the table. Create a new file on SharePoint or Onedrive for Business and make a table with 2 columns. Give the columns a proper name, userPrincipalName, and telephoneNumber for example. Add your users and phone numbers to the table. Make sure that the format of the phone number is right. You can read about the format in part 1 of this series.
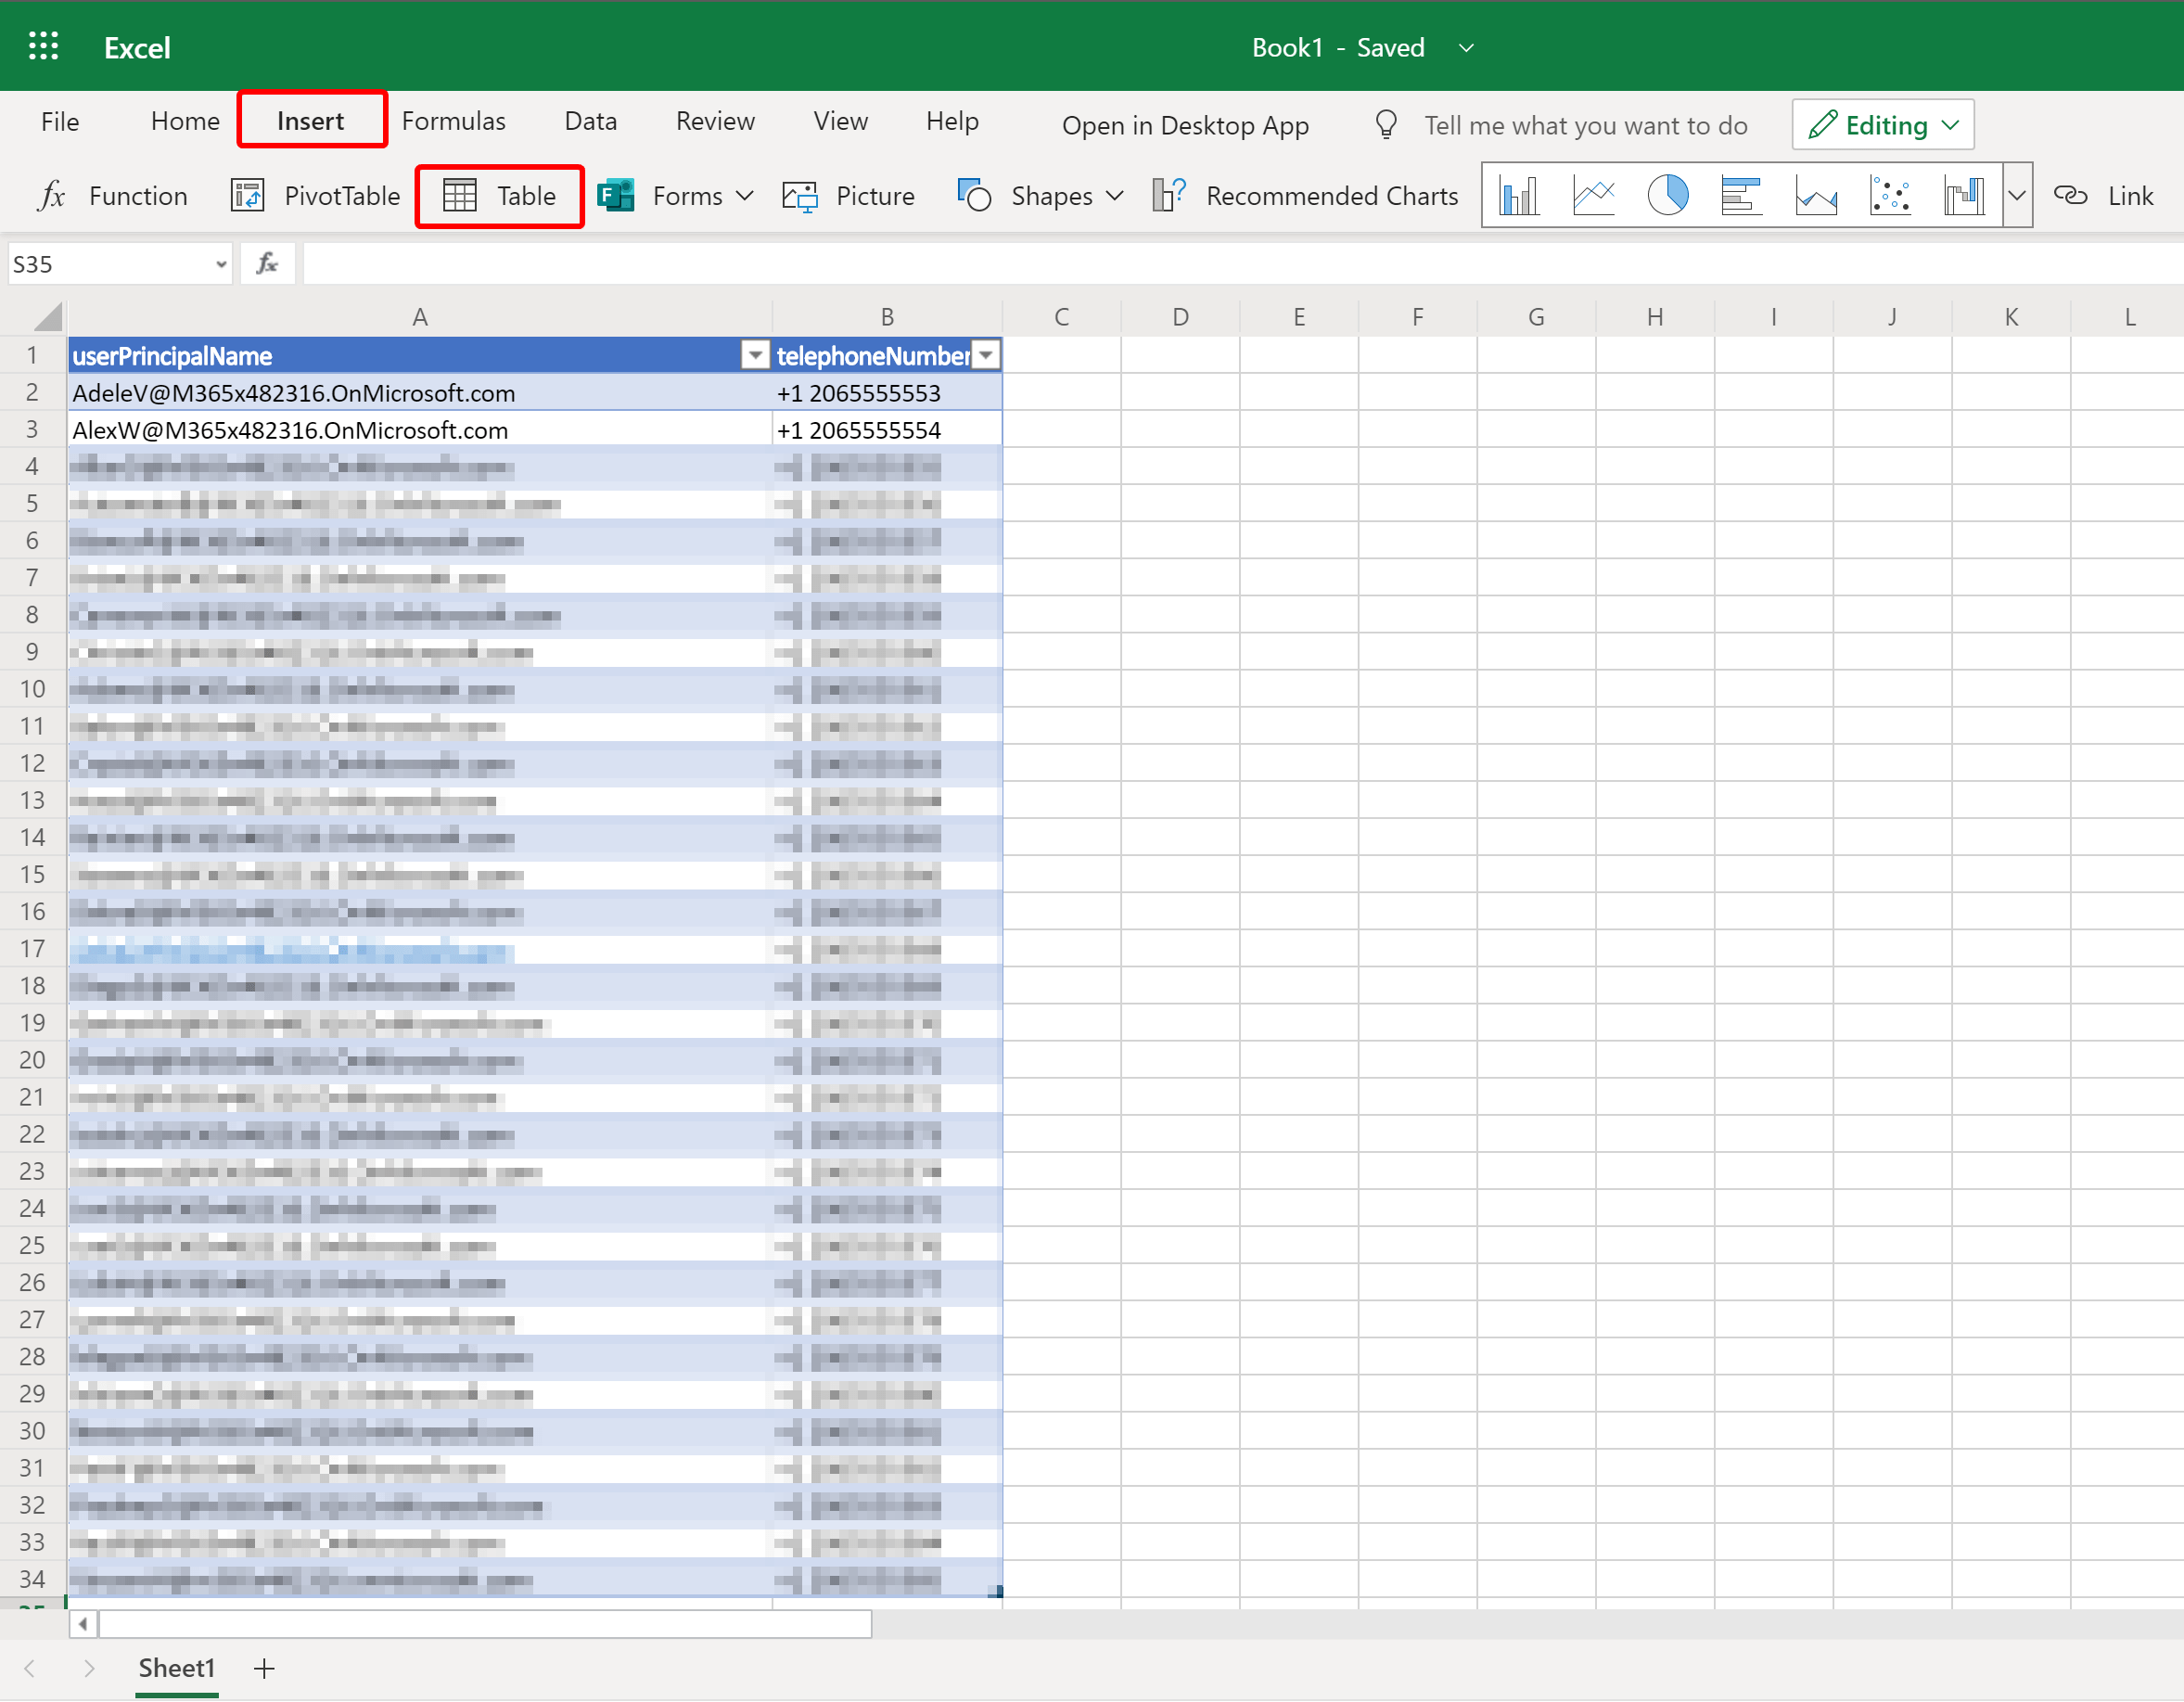
You might to want start off with just a couple accounts here. Don’t add all your accounts before you thoroughly tested the flow!!
Create the flow#
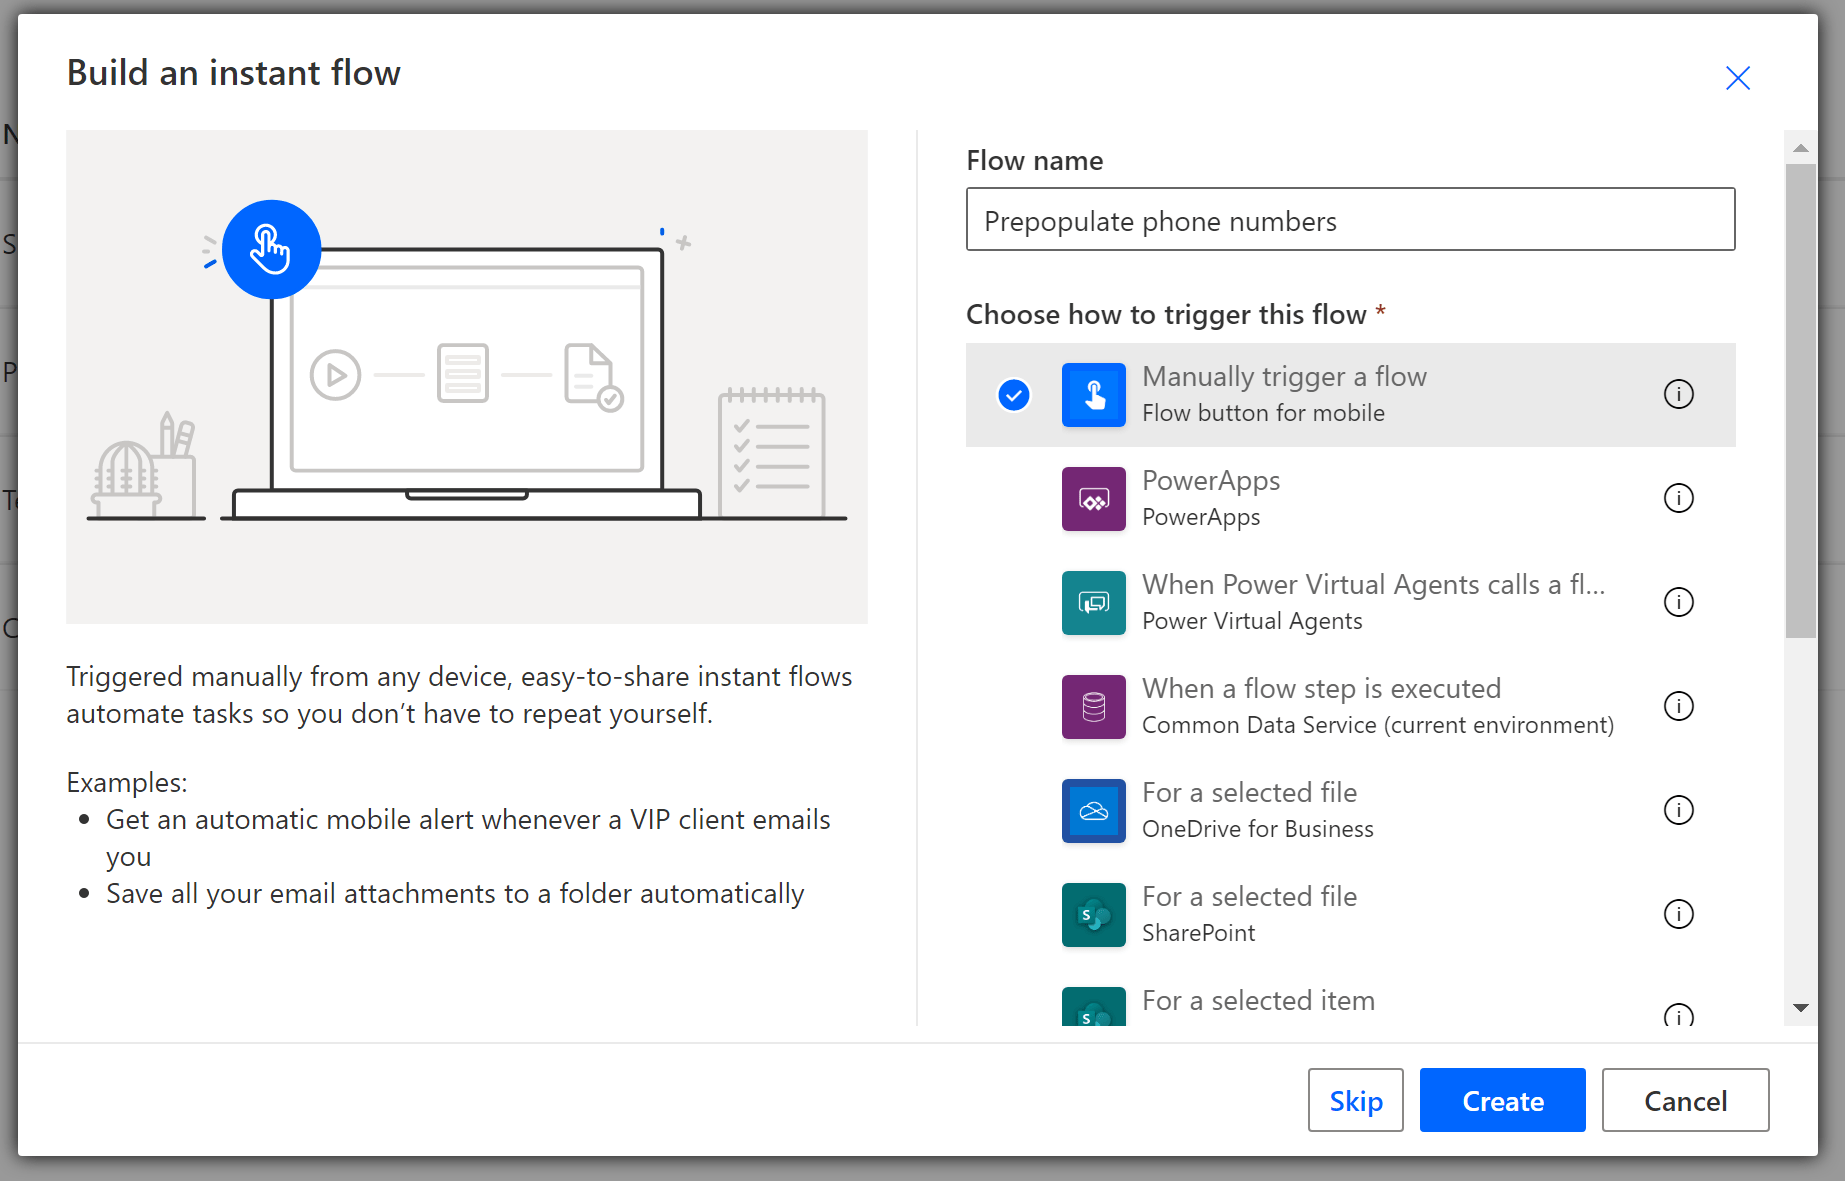
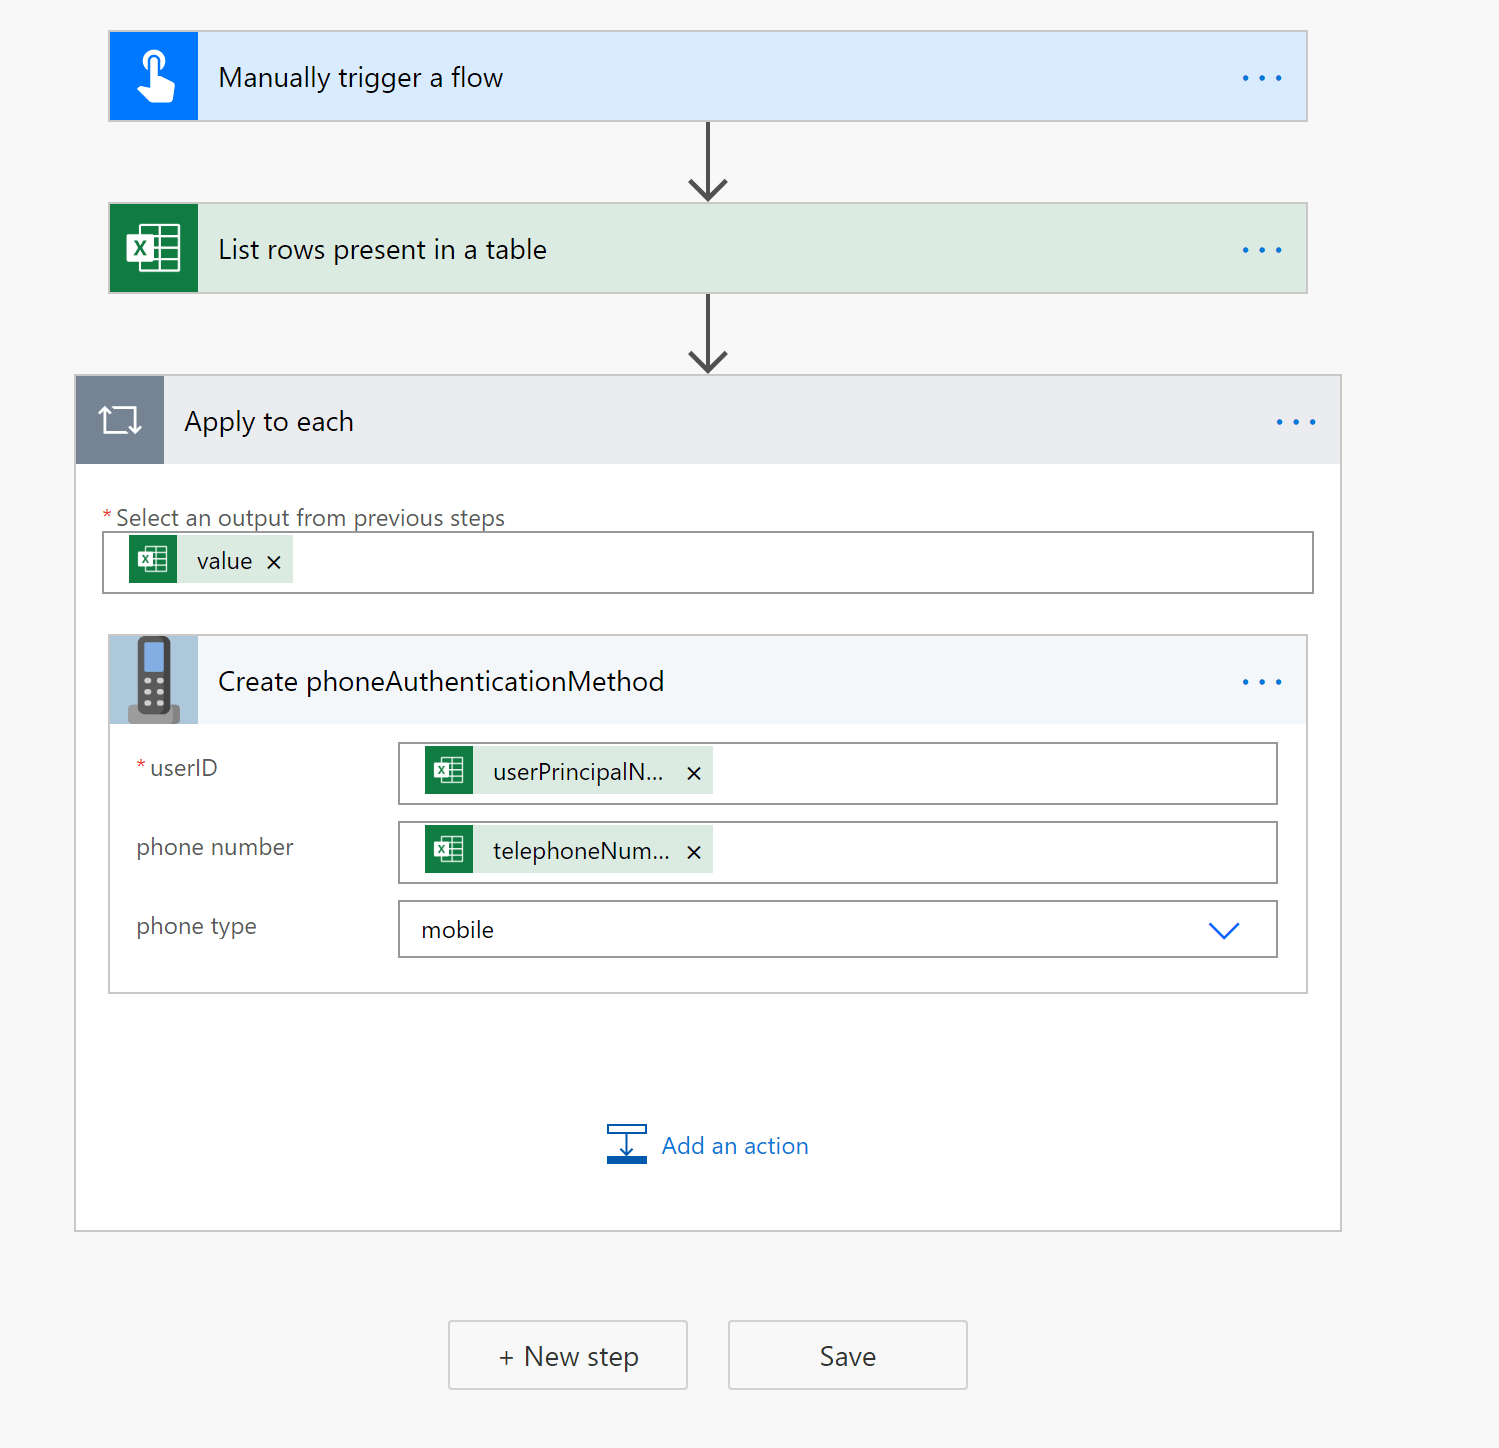
Now that we have prepared all the needed steps, we can start building our flow. Start off with a blank instant flow and give it a name.
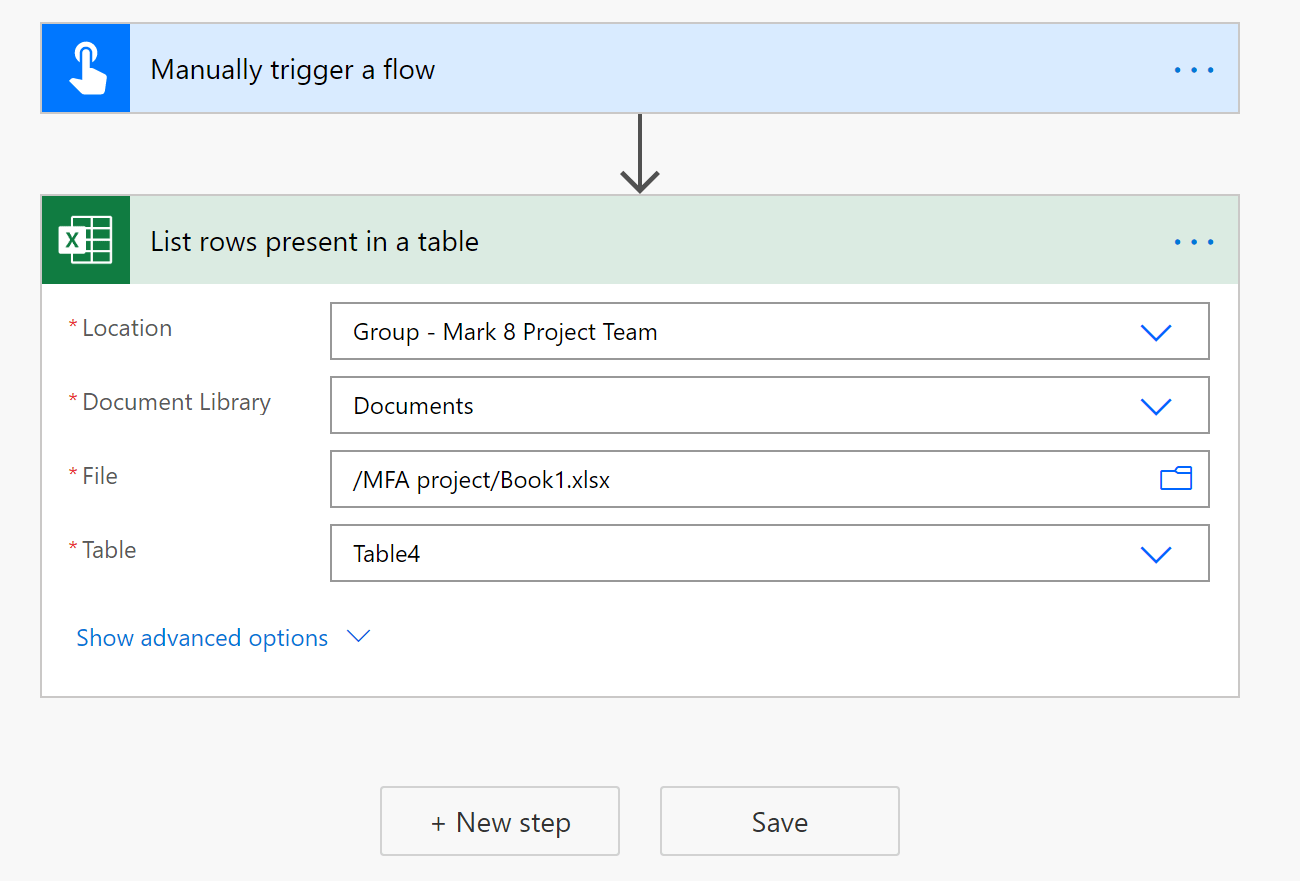
Add a new step and look for ‘List rows present in a table’ . Enter the location and select the file and table that you created before.
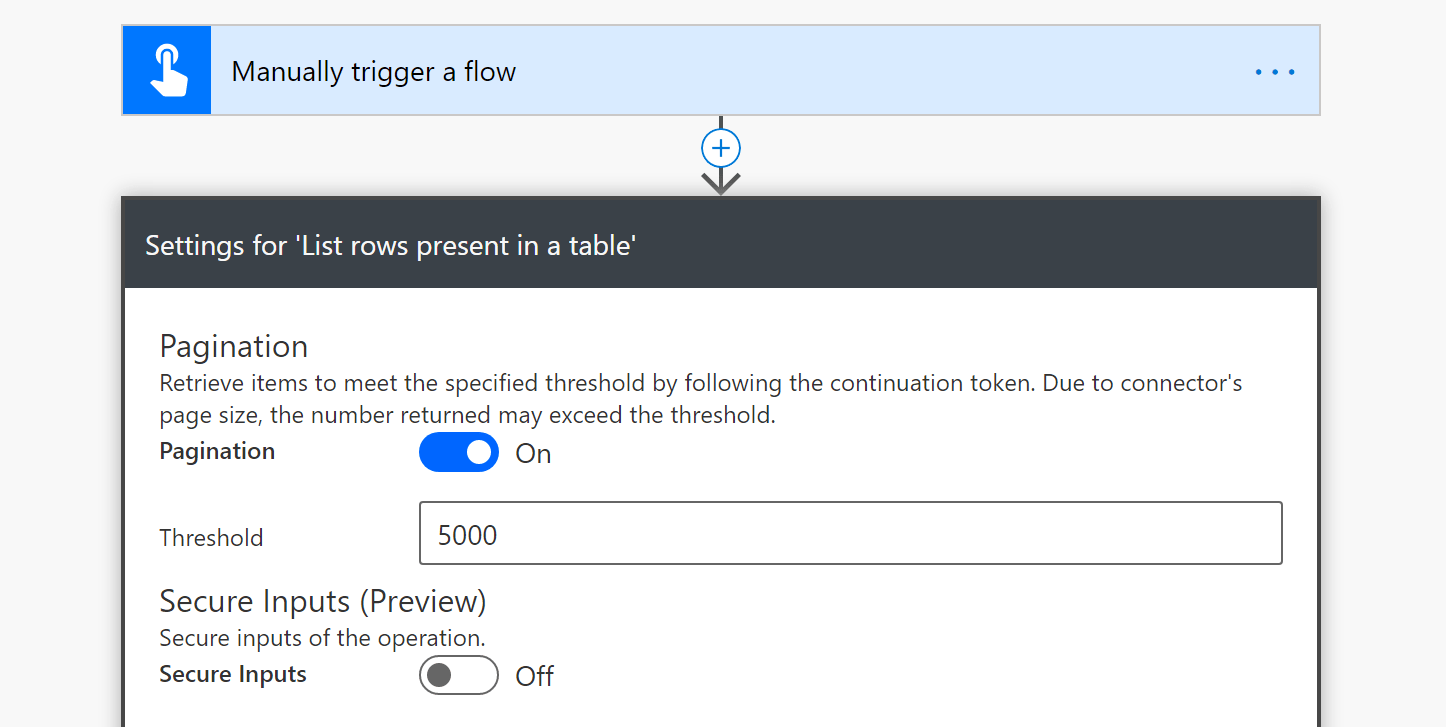
By default, only 256 items are listed. Turn on Pagination when you got more than 256 records.
In our next step, we use the custom connector to populate the phone numbers for all our users. Click + New step and look for your custom connector. Pick the Create phoneAuthenticationMethod action. Use the UserPrincipalName and telephoneNumber from the Excel table as input for the userID and phone number. Select the phone type mobile from the dropdown list. The ‘apply to each’ control is automatically added.
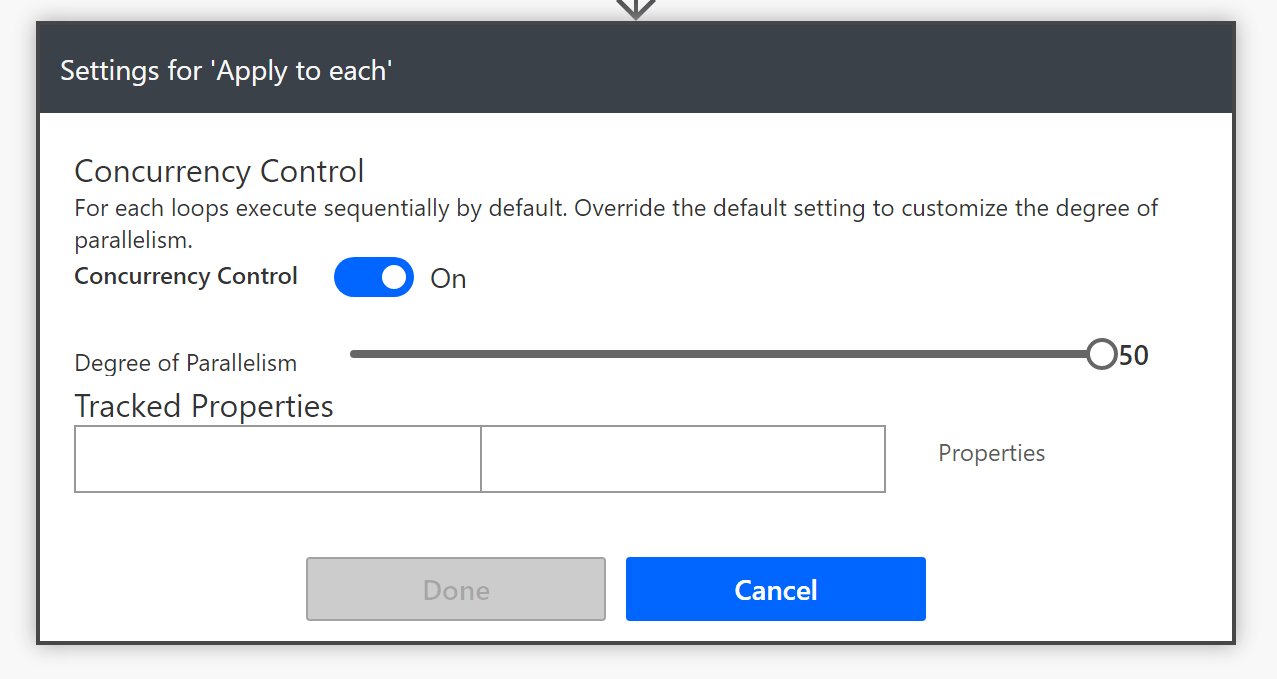
Optionally, you can turn on Concurrency Control for the ‘Apply to each’ action.
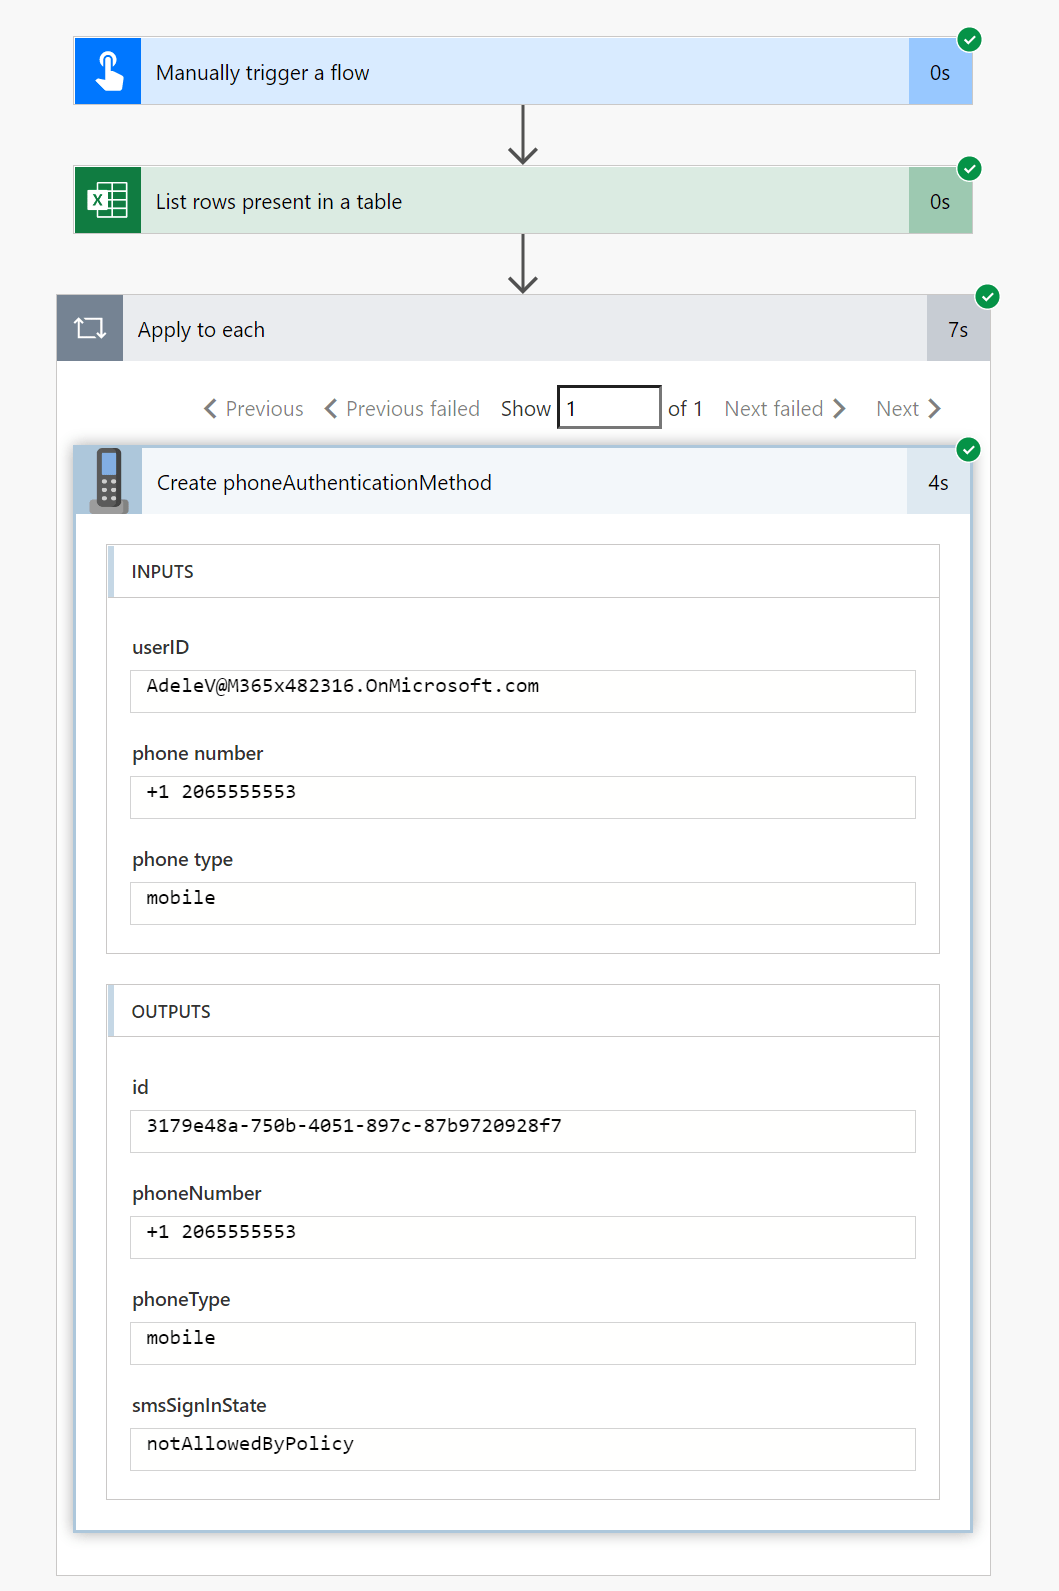
Test the flow to see if everything works. When the user does not have any mobile number registered, the flow should run correctly and the phone numbers are added.
Other actions explained#
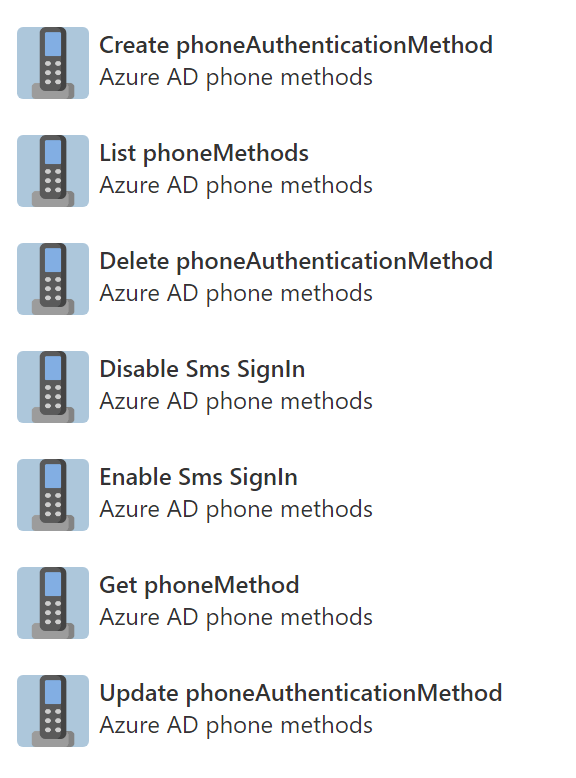
This was just an example of how to use one single action, but you can use the other actions in the custom connector to build your specific flow.
List phoneMethods: Retrieve a list of phone authentication method objects. This will return up to three objects, as a user can have up to three phones usable for authentication.Create phoneAuthenticationMethod: Add a new phone authentication method. A user may only have one phone of each type, captured in the phoneType property. This means, for example, adding a mobile phone to a user with a preexisting mobile phone will fail. Additionally, a user must always have a mobile phone before adding an alternateMobile phone. Adding a phone number makes it available for use in both Azure multi-factor authentication (MFA) and self-service password reset (SSPR), if enabled. Additionally, if a user is enabled by policy to use SMS sign-in and a mobile number is added, the system will attempt to register the number for use in that system.Enable Sms SignIn: Enable SMS sign-in for an existing mobile phone number. To be successfully enabled: The phone must have “phoneType”: “mobile”. The phone must be unique in the SMS sign-in system (no one else can also be using that number). The user must be enabled for SMS sign-in in the authentication methods policy.Disable Sms SignIn: Disable SMS sign-in for an existing mobile phone number. Note: The number will no longer be available for SMS sign-in, which can prevent your user from signing in.Get phoneMethod: Retrieve a single phoneAuthenticationMethod object. You’ll need to add the global PhonemethodID (see terminology chapter)Delete phoneAuthenticationMethod: Delete a user’s phone authentication method. Note: This removes the phone number from the user and they will no longer be able to use the number for authentication, whether via SMS or voice calls. Remember that a user cannot have an alternateMobile number without a mobile number. If you want to remove a mobile number from a user that also has an alternateMobile number, first update the mobile number to the new number, then delete the alternateMobile number. If the phone number is the user’s default Azure multi-factor authentication (MFA) authentication method, it cannot be deleted. Have the user change their default authentication method, and then delete the number.Update phoneAuthenticationMethod: Update the phone number associated with a phone authentication method. You can’t change a phone’s type. To change a phone’s type, add a new number of the desired type and then delete the object with the original type. If a user is enabled by policy to use SMS to sign in and the mobile number is changed, the system will attempt to register the number for use in that system.
Terminology#
- UserID : the ID or UPN of the Azure AD user
- PhoneType: the type of phone number.
mobile,AlternateMobile, oroffice PhonemethodID: this is the global ID for the different methods:- 3179e48a-750b-4051-897c-87b9720928f7 (mobile)
- b6332ec1-7057-4abe-9331-3d72feddfe41 (alternate mobile)
- e37fc753-ff3b-4958-9484-eaa9425c82bc (office)
Performance#
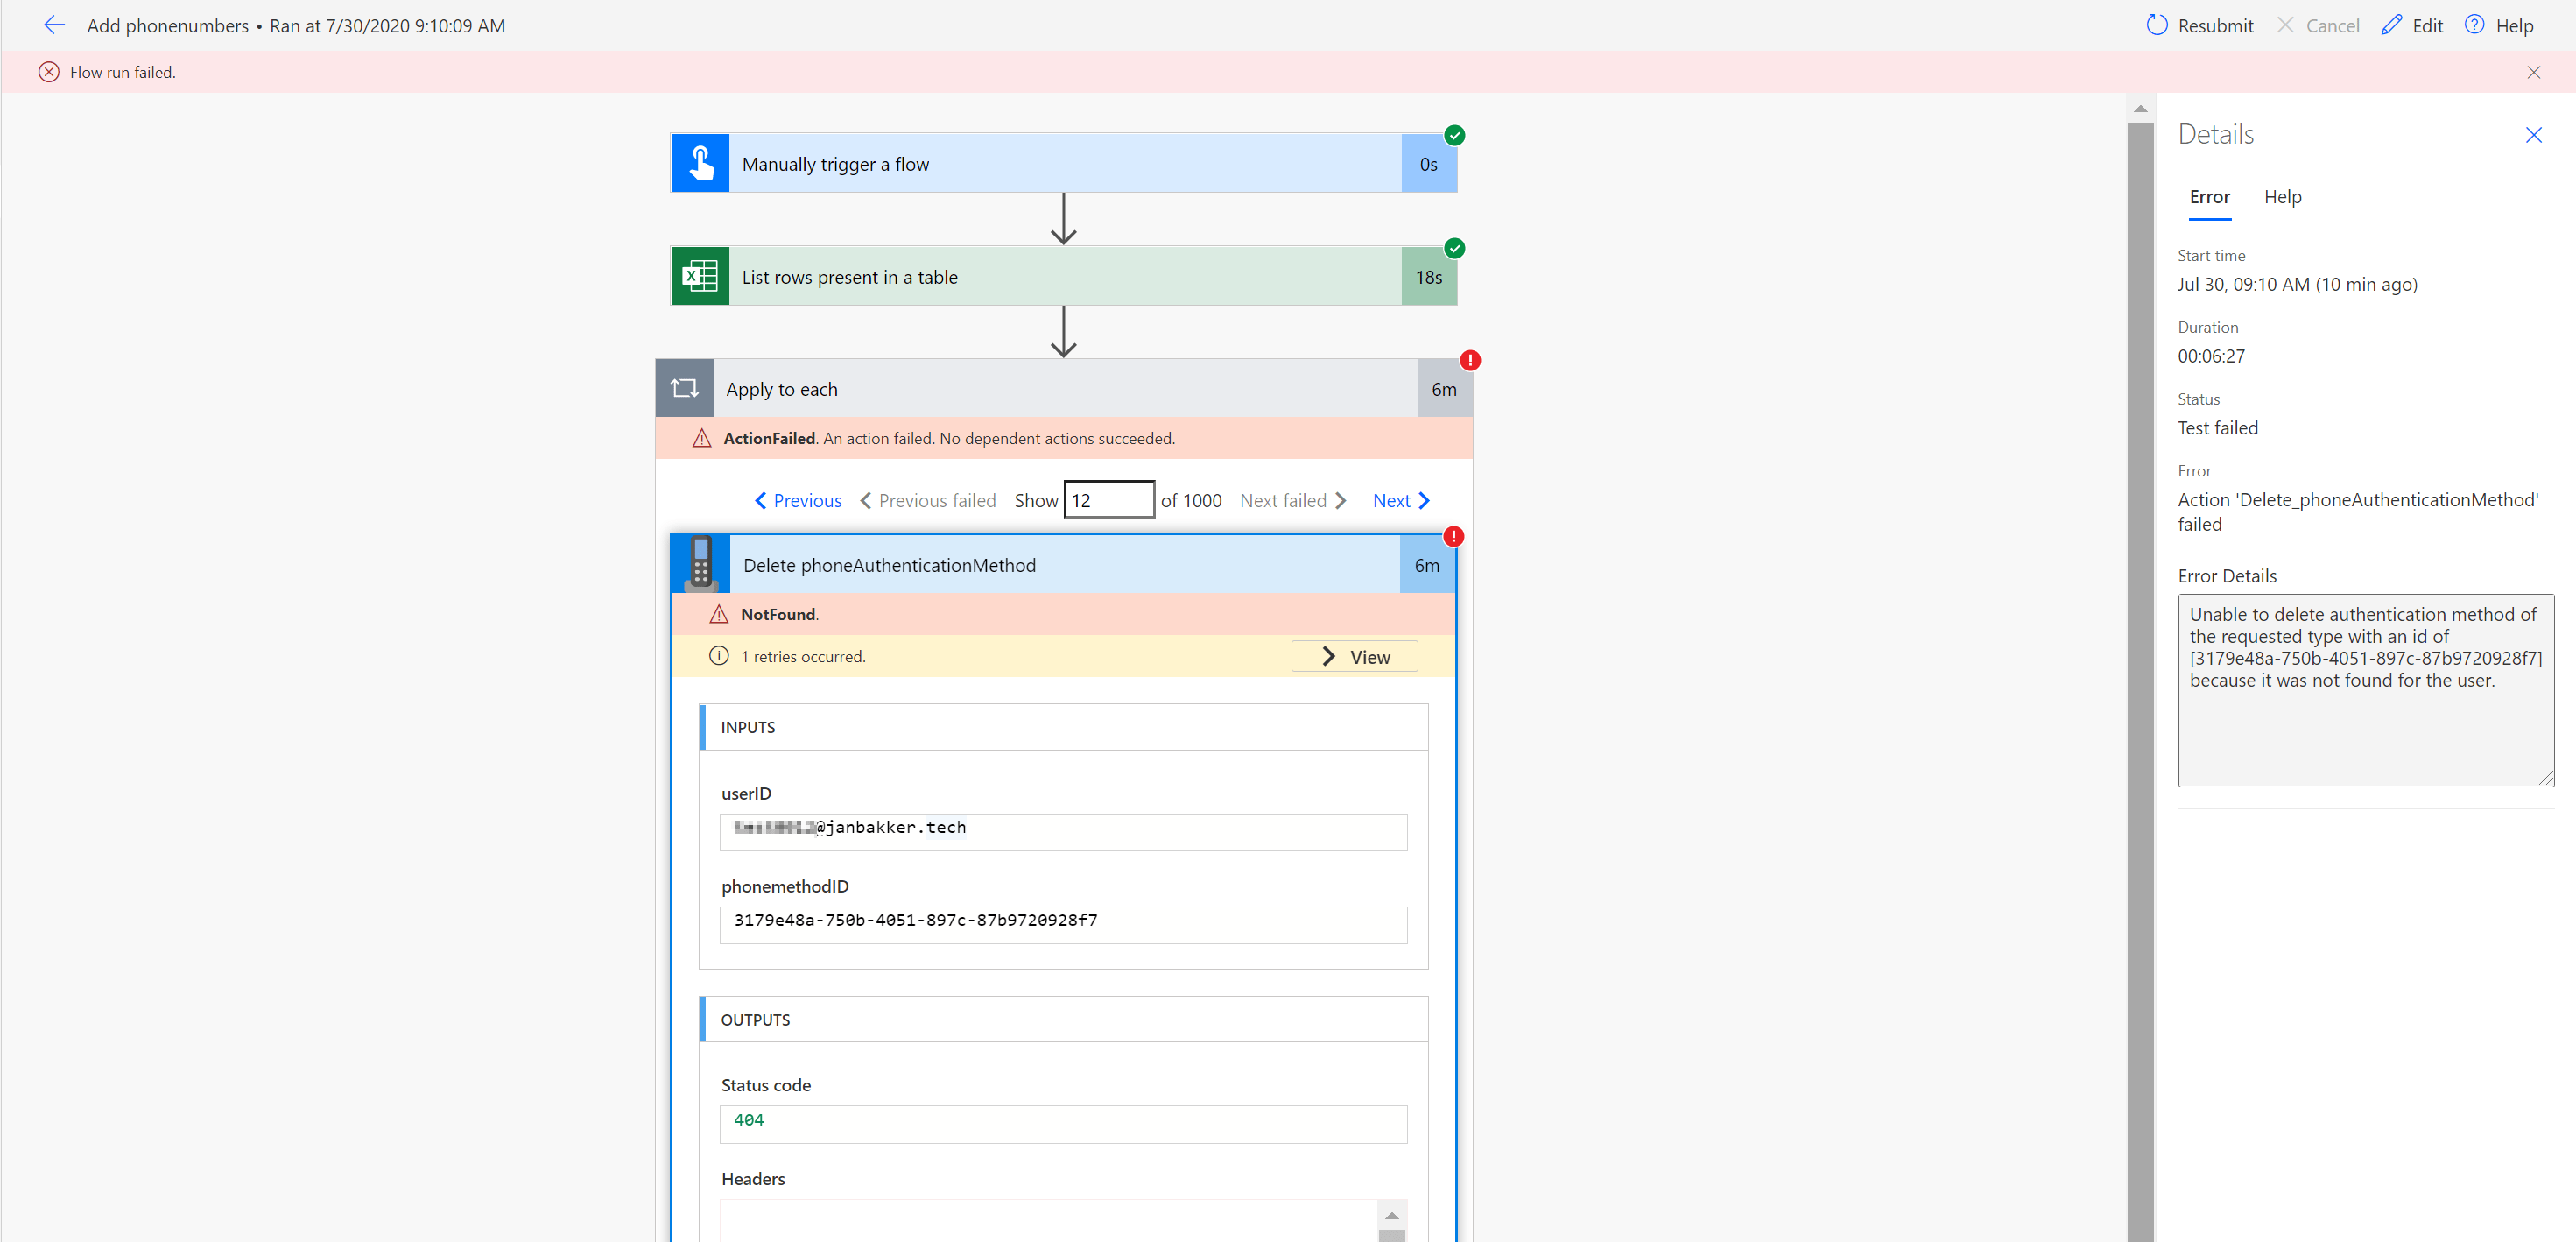
I ran some performance tests with 1000 users. During these tests, the currency control of the ‘apply to each’ action was set to 50. All tests completed in 6 minutes.
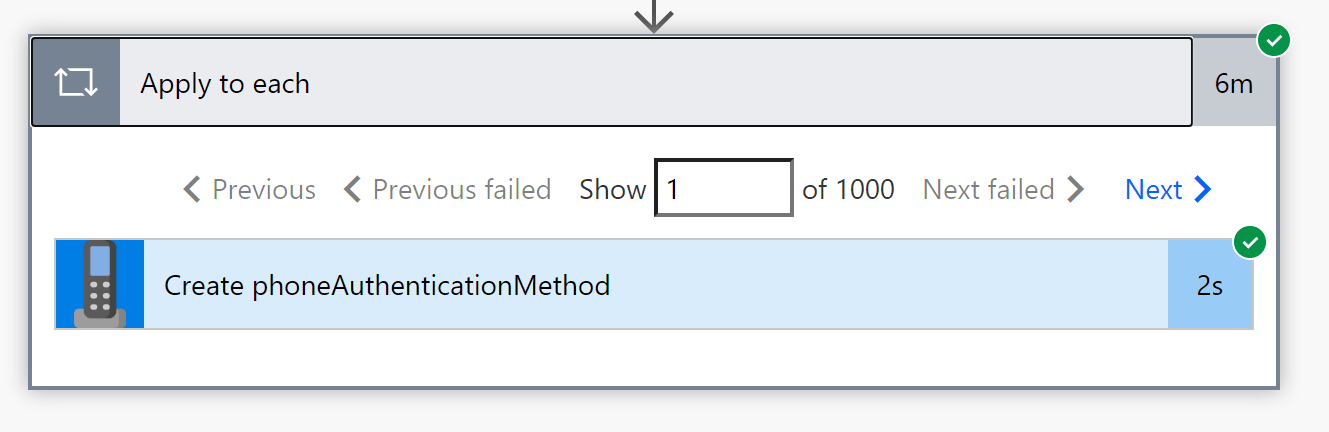
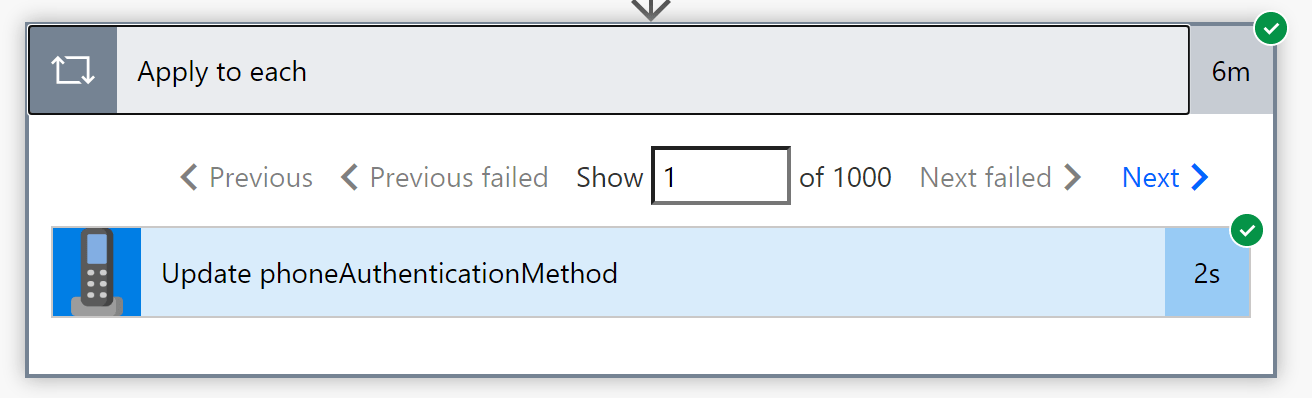
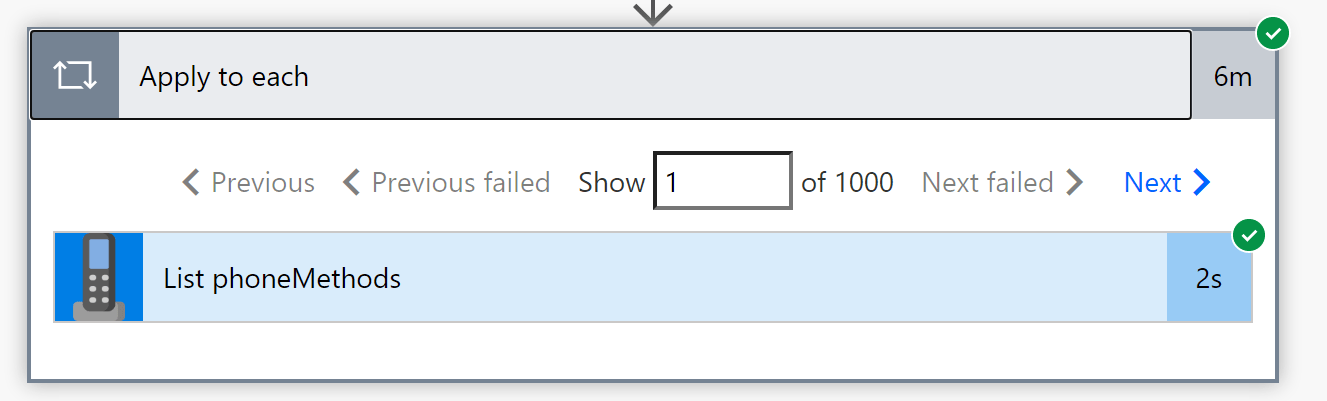
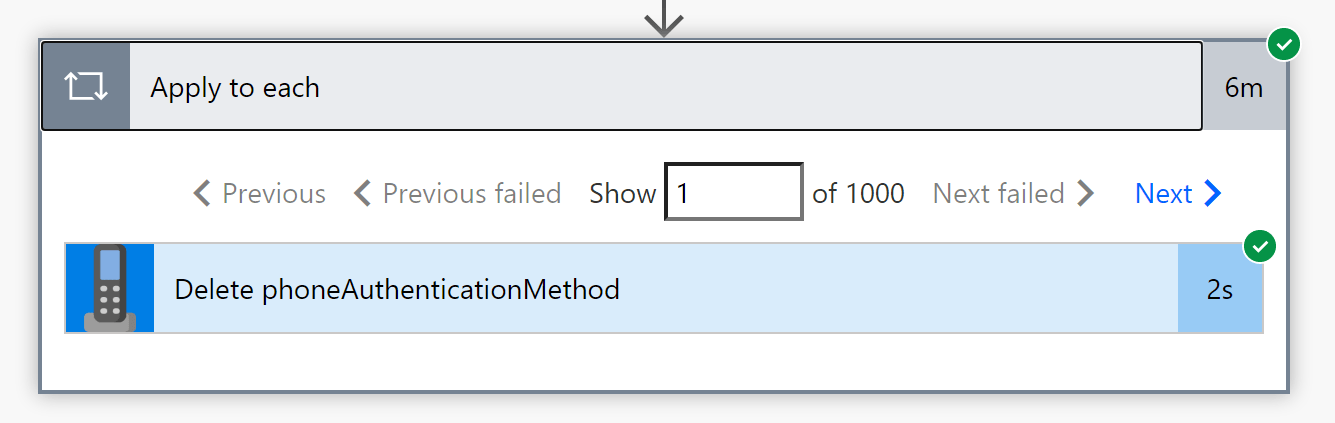
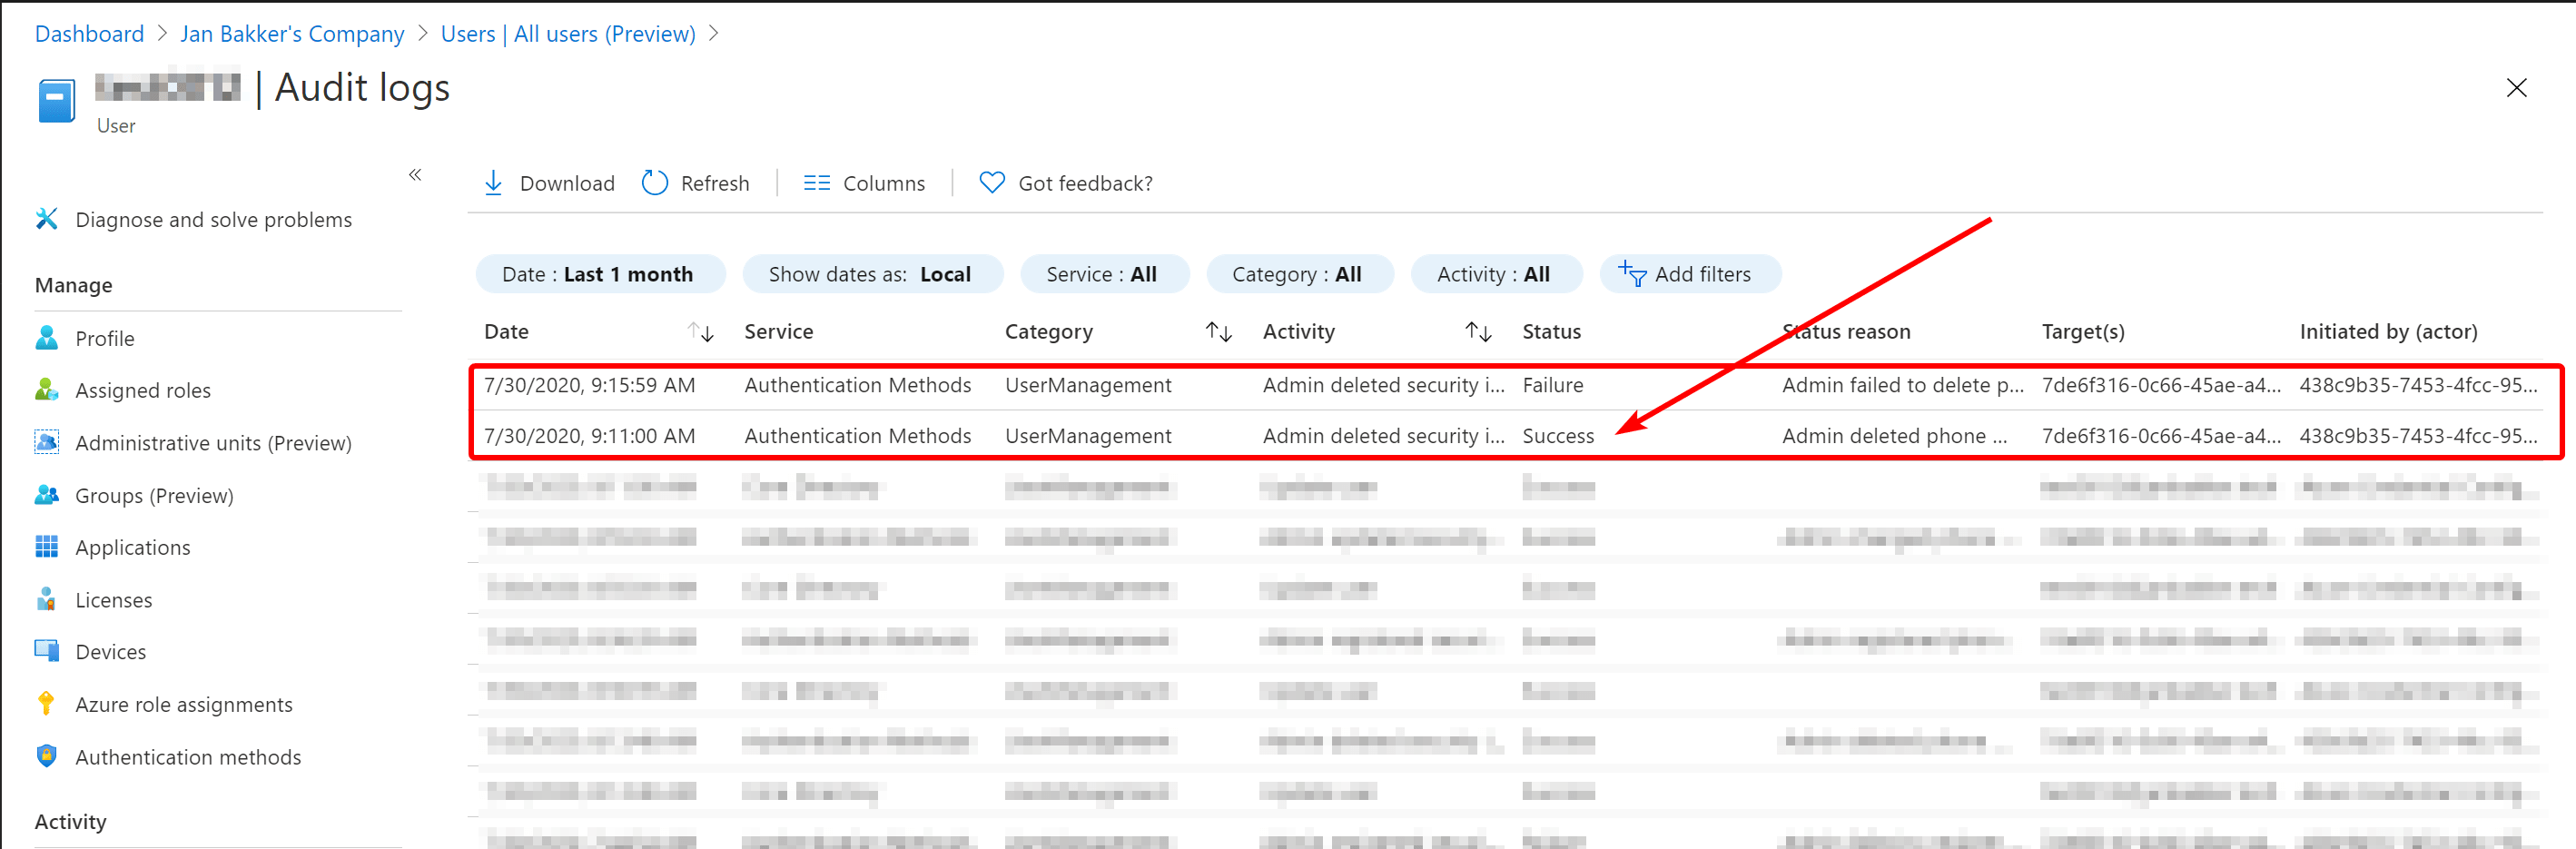
1 caveat: during the tests, 1 of the 1000 accounts reported as failed when I tried to delete the phone numbers. When I checked in Azure AD it seemed that the number was deleted successfully. So keep this in mind.
Wrap up#
We live in a world where everything is connected. And what’s not connected yet, is easy to build. Even when you have no experience at all. Before this blog post, I have never build a custom connector before, so it was quite a learning experience for me. If you have any questions or suggestions, please let me know in the comments, or ping me at one of my social media accounts. I would love to hear your feedback.
If you want to get started with building your own custom connector, please check this blog post I wrote on the Power Platform community website.
Stay safe!
Comments
Comments load when you scroll here.