
Manage Teams custom backgrounds using Intune
Update! I got some feedback on this blog. Seems that if your users are not members of the local administrator group, install will faill with error: 0x80070001. I’ve updated the article to solve this problem. I replaced the cmd files for Powershell scripts and did some minor changes to the detection and uninstall scripts. This should now work for users without admin permissions.
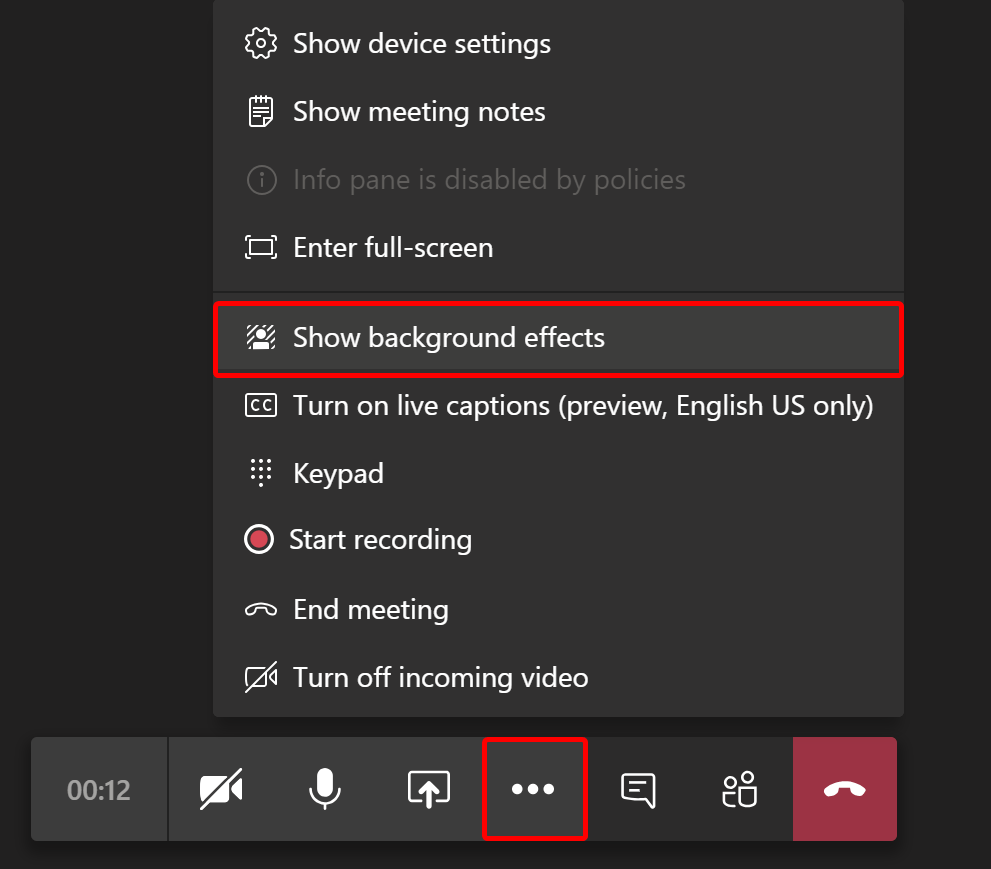
Microsoft introduced background effects in Teams. All of a sudden you see people having their custom backgrounds. You might wonder how this trick is done because there is no button to upload your own image (yet).
When you start using the default backgrounds during meetings, a folder is created in %AppData%\Microsoft\Teams called Backgrounds. Within that folder, you’ll find another folder called Uploads. When you drop an image into that folder, you can pick that image and use it as your custom background image during your Teams meeting.
For an avarage user, this is not convenient to do. You might want to do it for them. In this blogpost I’ll show you how to push a custom background image to your Windows 10 devices using Intune. I’ll use a Win32 application.
Update 04-06-2020: Teams now has an upload button, so it’s easier for users to upload their own images.
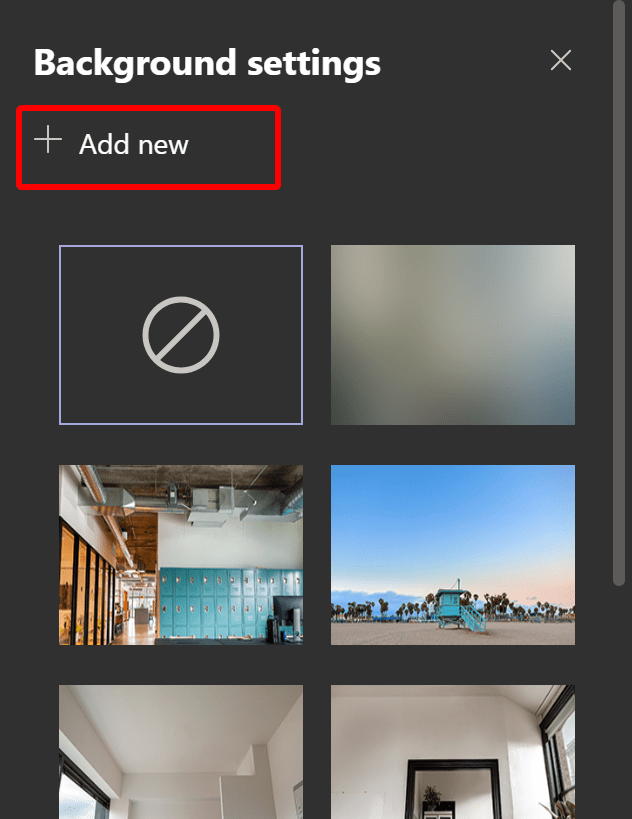
A warning up front. This might no be the best way to do this. This is just a way to do it.
What do we need?#
- A custom background image file
- Few lines PowerShell to install the files
- Powershell script for custom detection script (optional)
- The Microsoft Win32 Content Prep Tool
Background image file#
Pick a nice image (JPEG or PNG) that you want your users to use. In my demo, I use a free stock image with my “company logo”. The default images in Teams are 1920 x 1080 pixels, so I’ll stick to that. Optional, you can use https://tinypng.com/ to shrink them to a proper size. This is my source image:

Install and uninstall script#
Next, we are going to create the install file for the Win32 app. Open up your favorite PowerShell editor and copy-paste the following code. Adjust the filename of the image to match yours.
#set upload folder
$UploadFolder="$env:APPDATA\Microsoft\Teams\Backgrounds\Uploads"

## create folder if not exists
if(!(Test-Path -path $UploadFolder))
{
 New-Item -ItemType directory -Path $UploadFolder
 Write-Host "Folder has been created successfully"
 }
else
{
Write-Host "The folder already exists";
}

#copy all (image) files to the upload folder
Copy-Item -path '.\images' -Filter *.* -Destination $UploadFolder -Recurse -Container:$false
For the uninstall script, we simply use this line:
#set upload folder
$UploadFolder="$env:APPDATA\Microsoft\Teams\Backgrounds\Uploads"
#delete JPG
Remove-Item -Path $UploadFolder*.jpg -Force
Note: the uninstall script will delete all JPG files from the upload folder. You can add specific files or filetypes to be deleted.
Save both files as .ps1 files and put them into a folder on your local hard drive. Also, make an empty folder for your output file. Create a new folder ‘images’ and drop your background files in the folder. The script will copy all the files from that folder into the Teams upload folder.

The Microsoft Win32 Content Prep Tool#
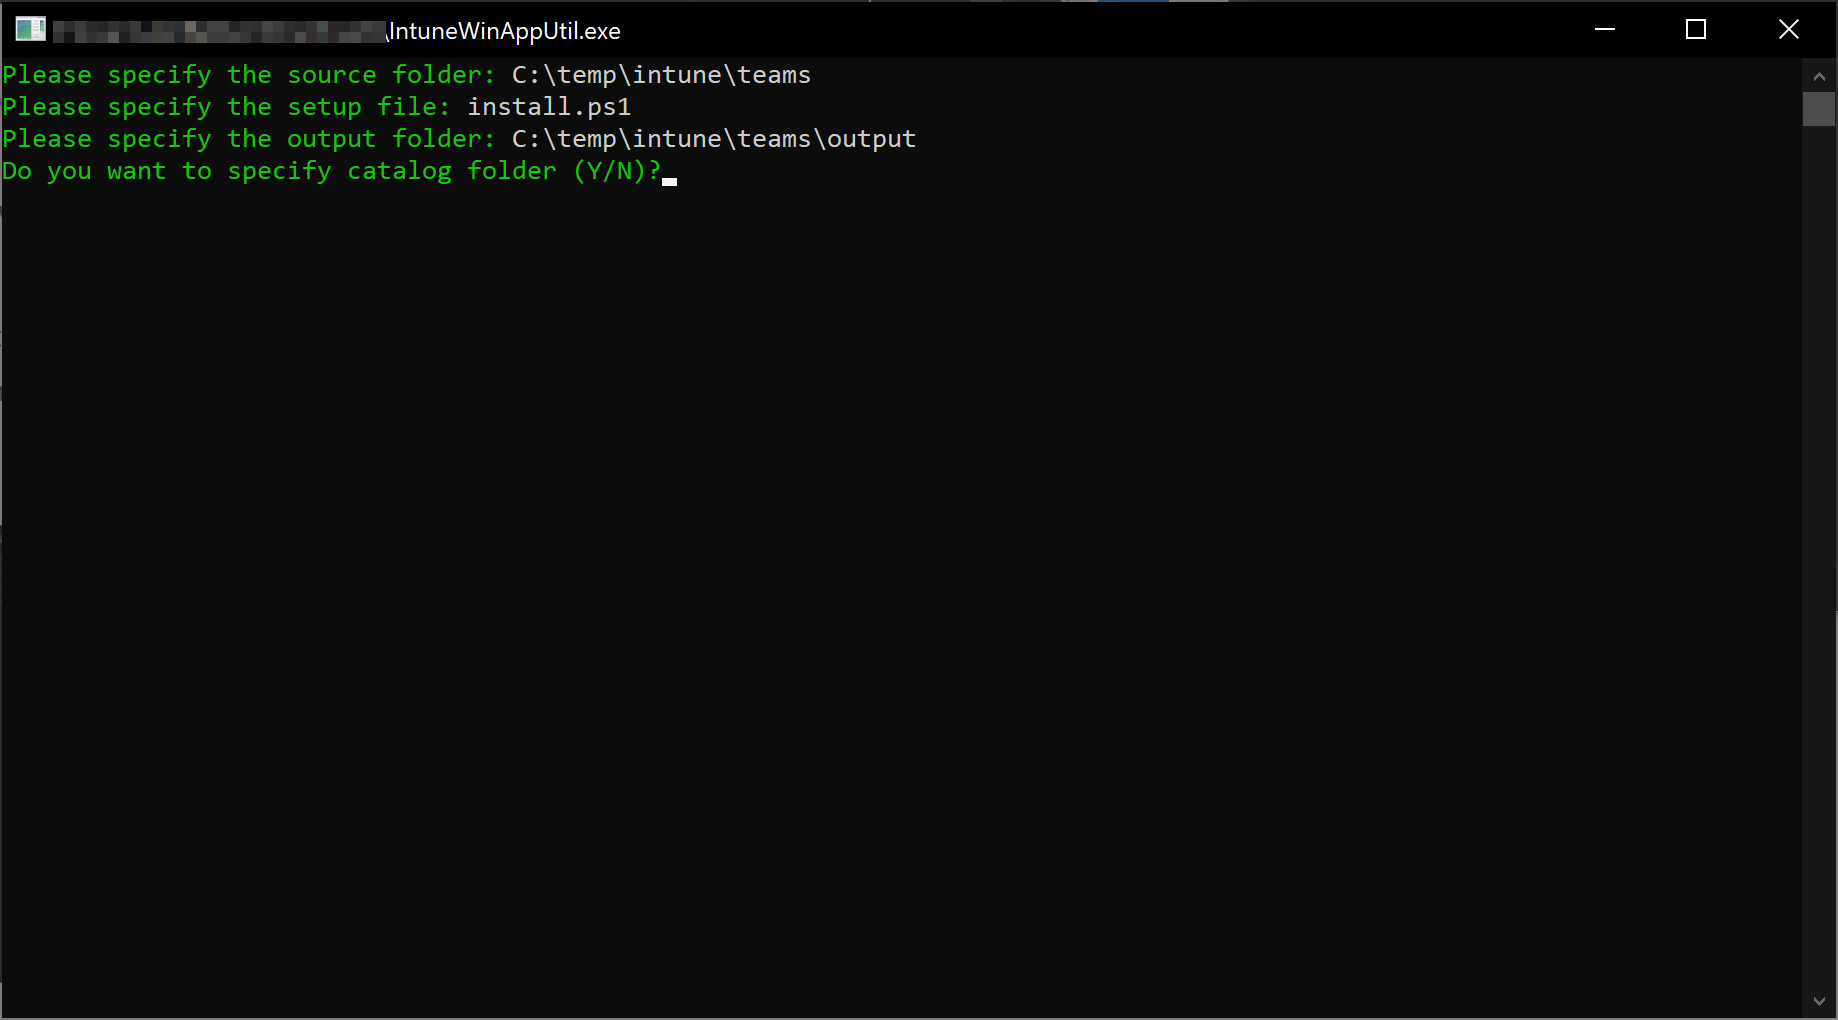
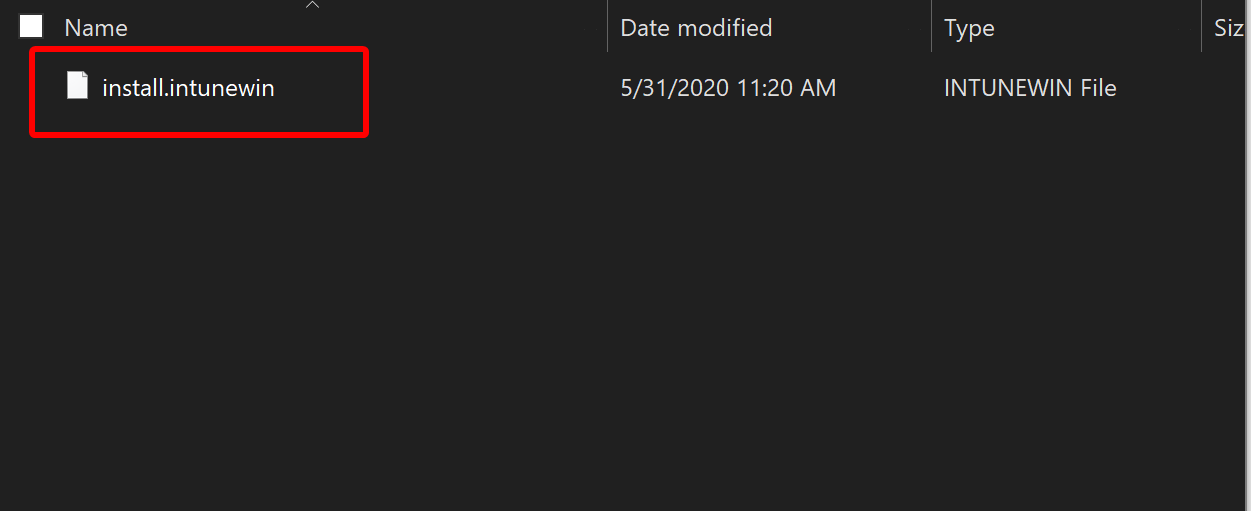
Grab the Microsoft Win32 Content Prep Tool from Github and start the tool. Enter the source folder, the setup file, and the output folder. When ready, you find the Intunewin file in the output folder. We need this file for our next step.
Detection script#
I created a simple detection script. We need this in the next step. Create a .ps1 file with the follwing content:
if (Test-Path "$env:APPDATA\Microsoft\Teams\Backgrounds\Uploads*.jpg") {
    Write-Host "File detected"
}
Note: if you use other extensions, make sure you replace the \*.jpg with your extension.
Win32 app#
Next, we are going to create the Win32 app in Intune. Go to the Microsoft Endpoint Manager Admin Center and create a new Win32 app.
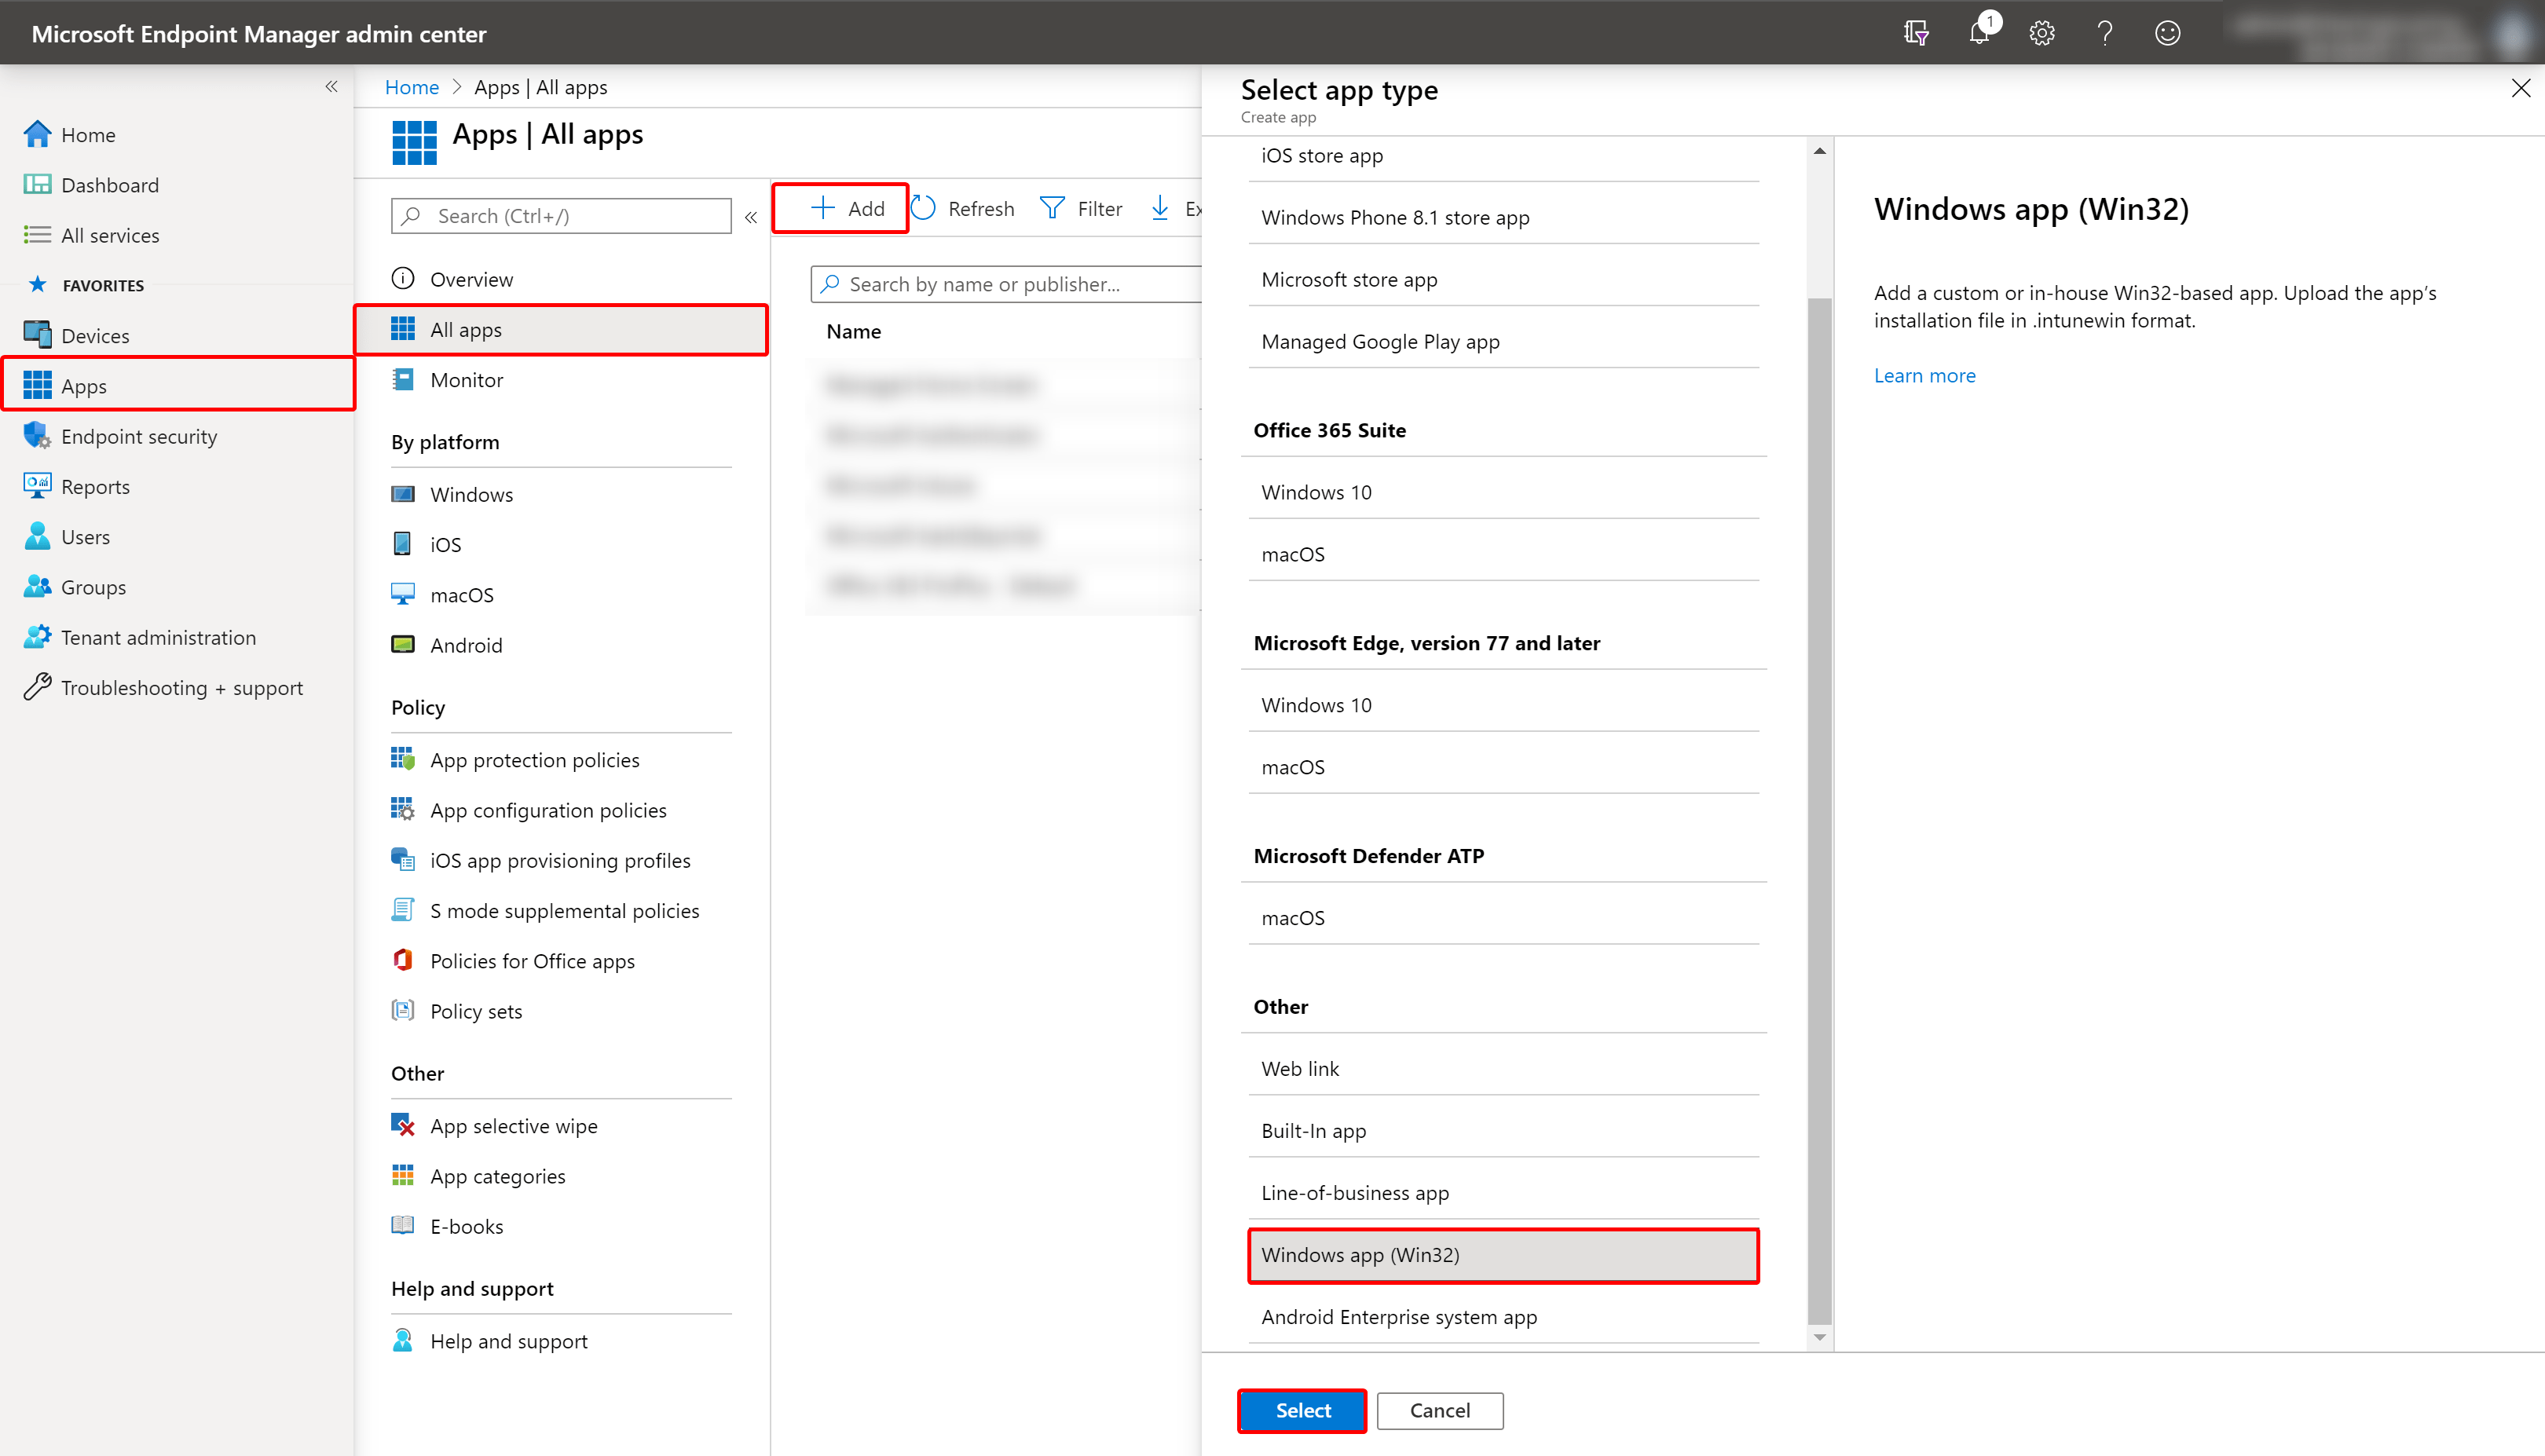
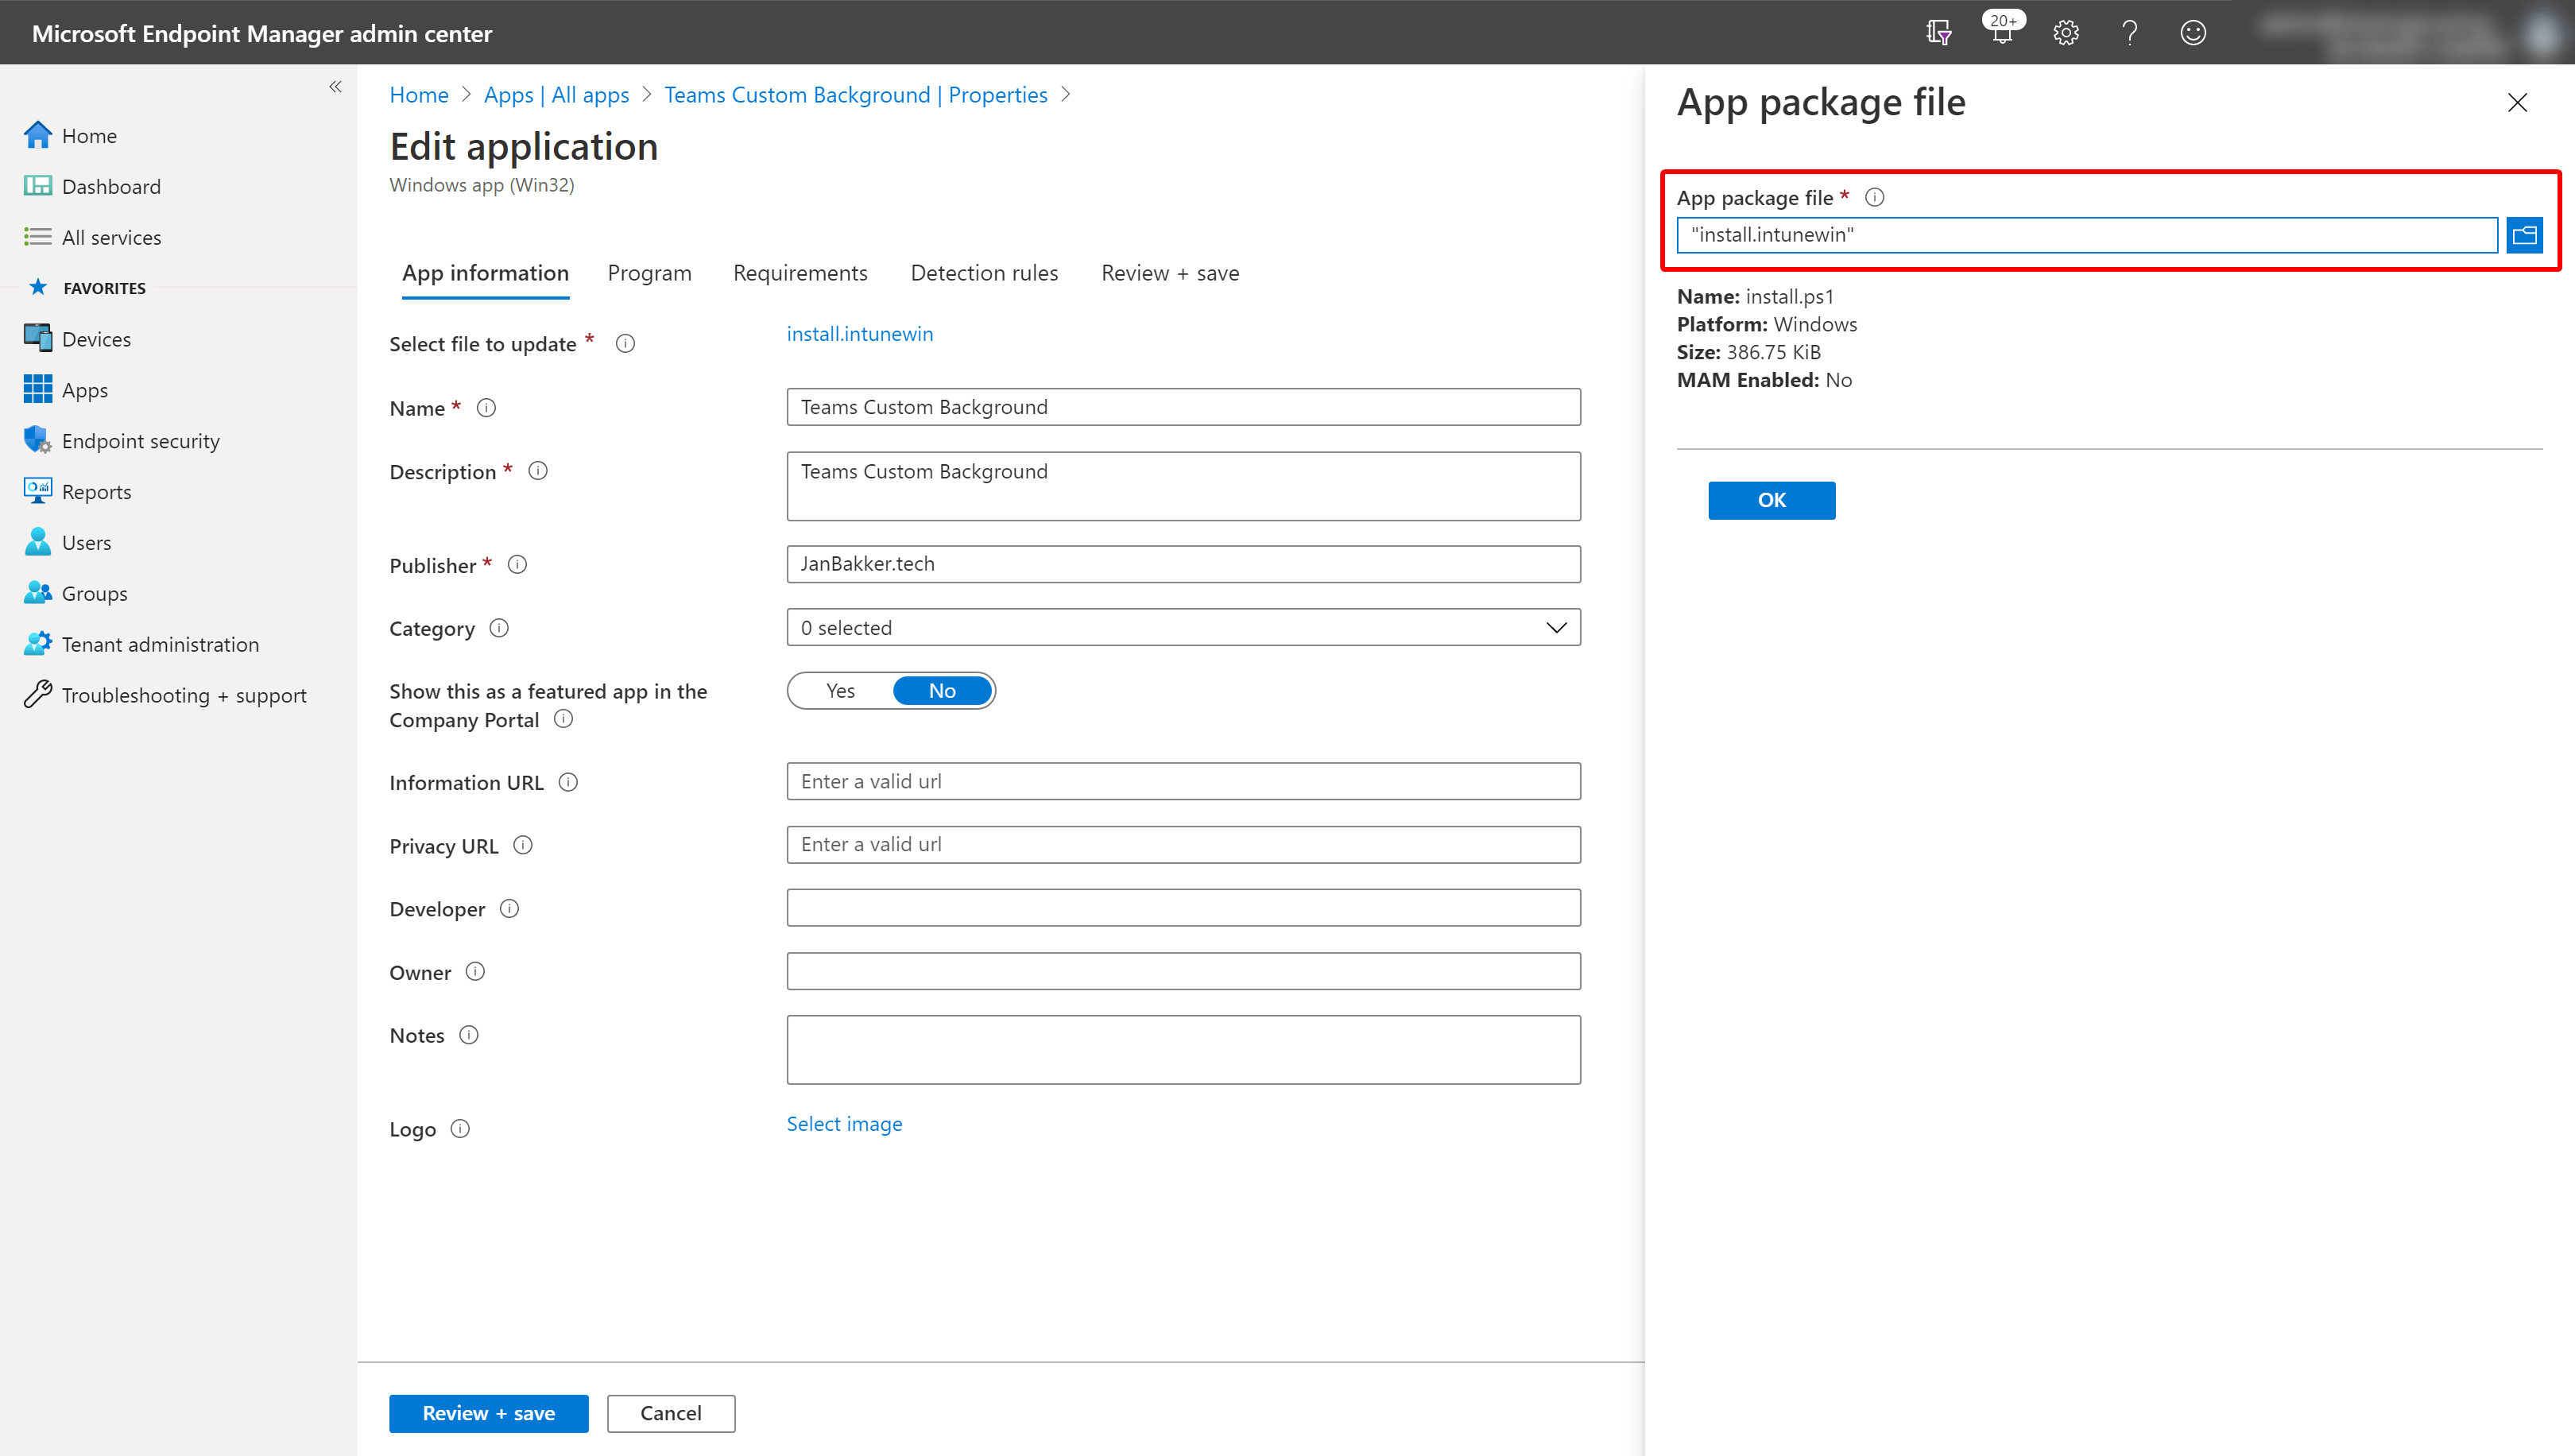
*Select the app package file (intunewin)*
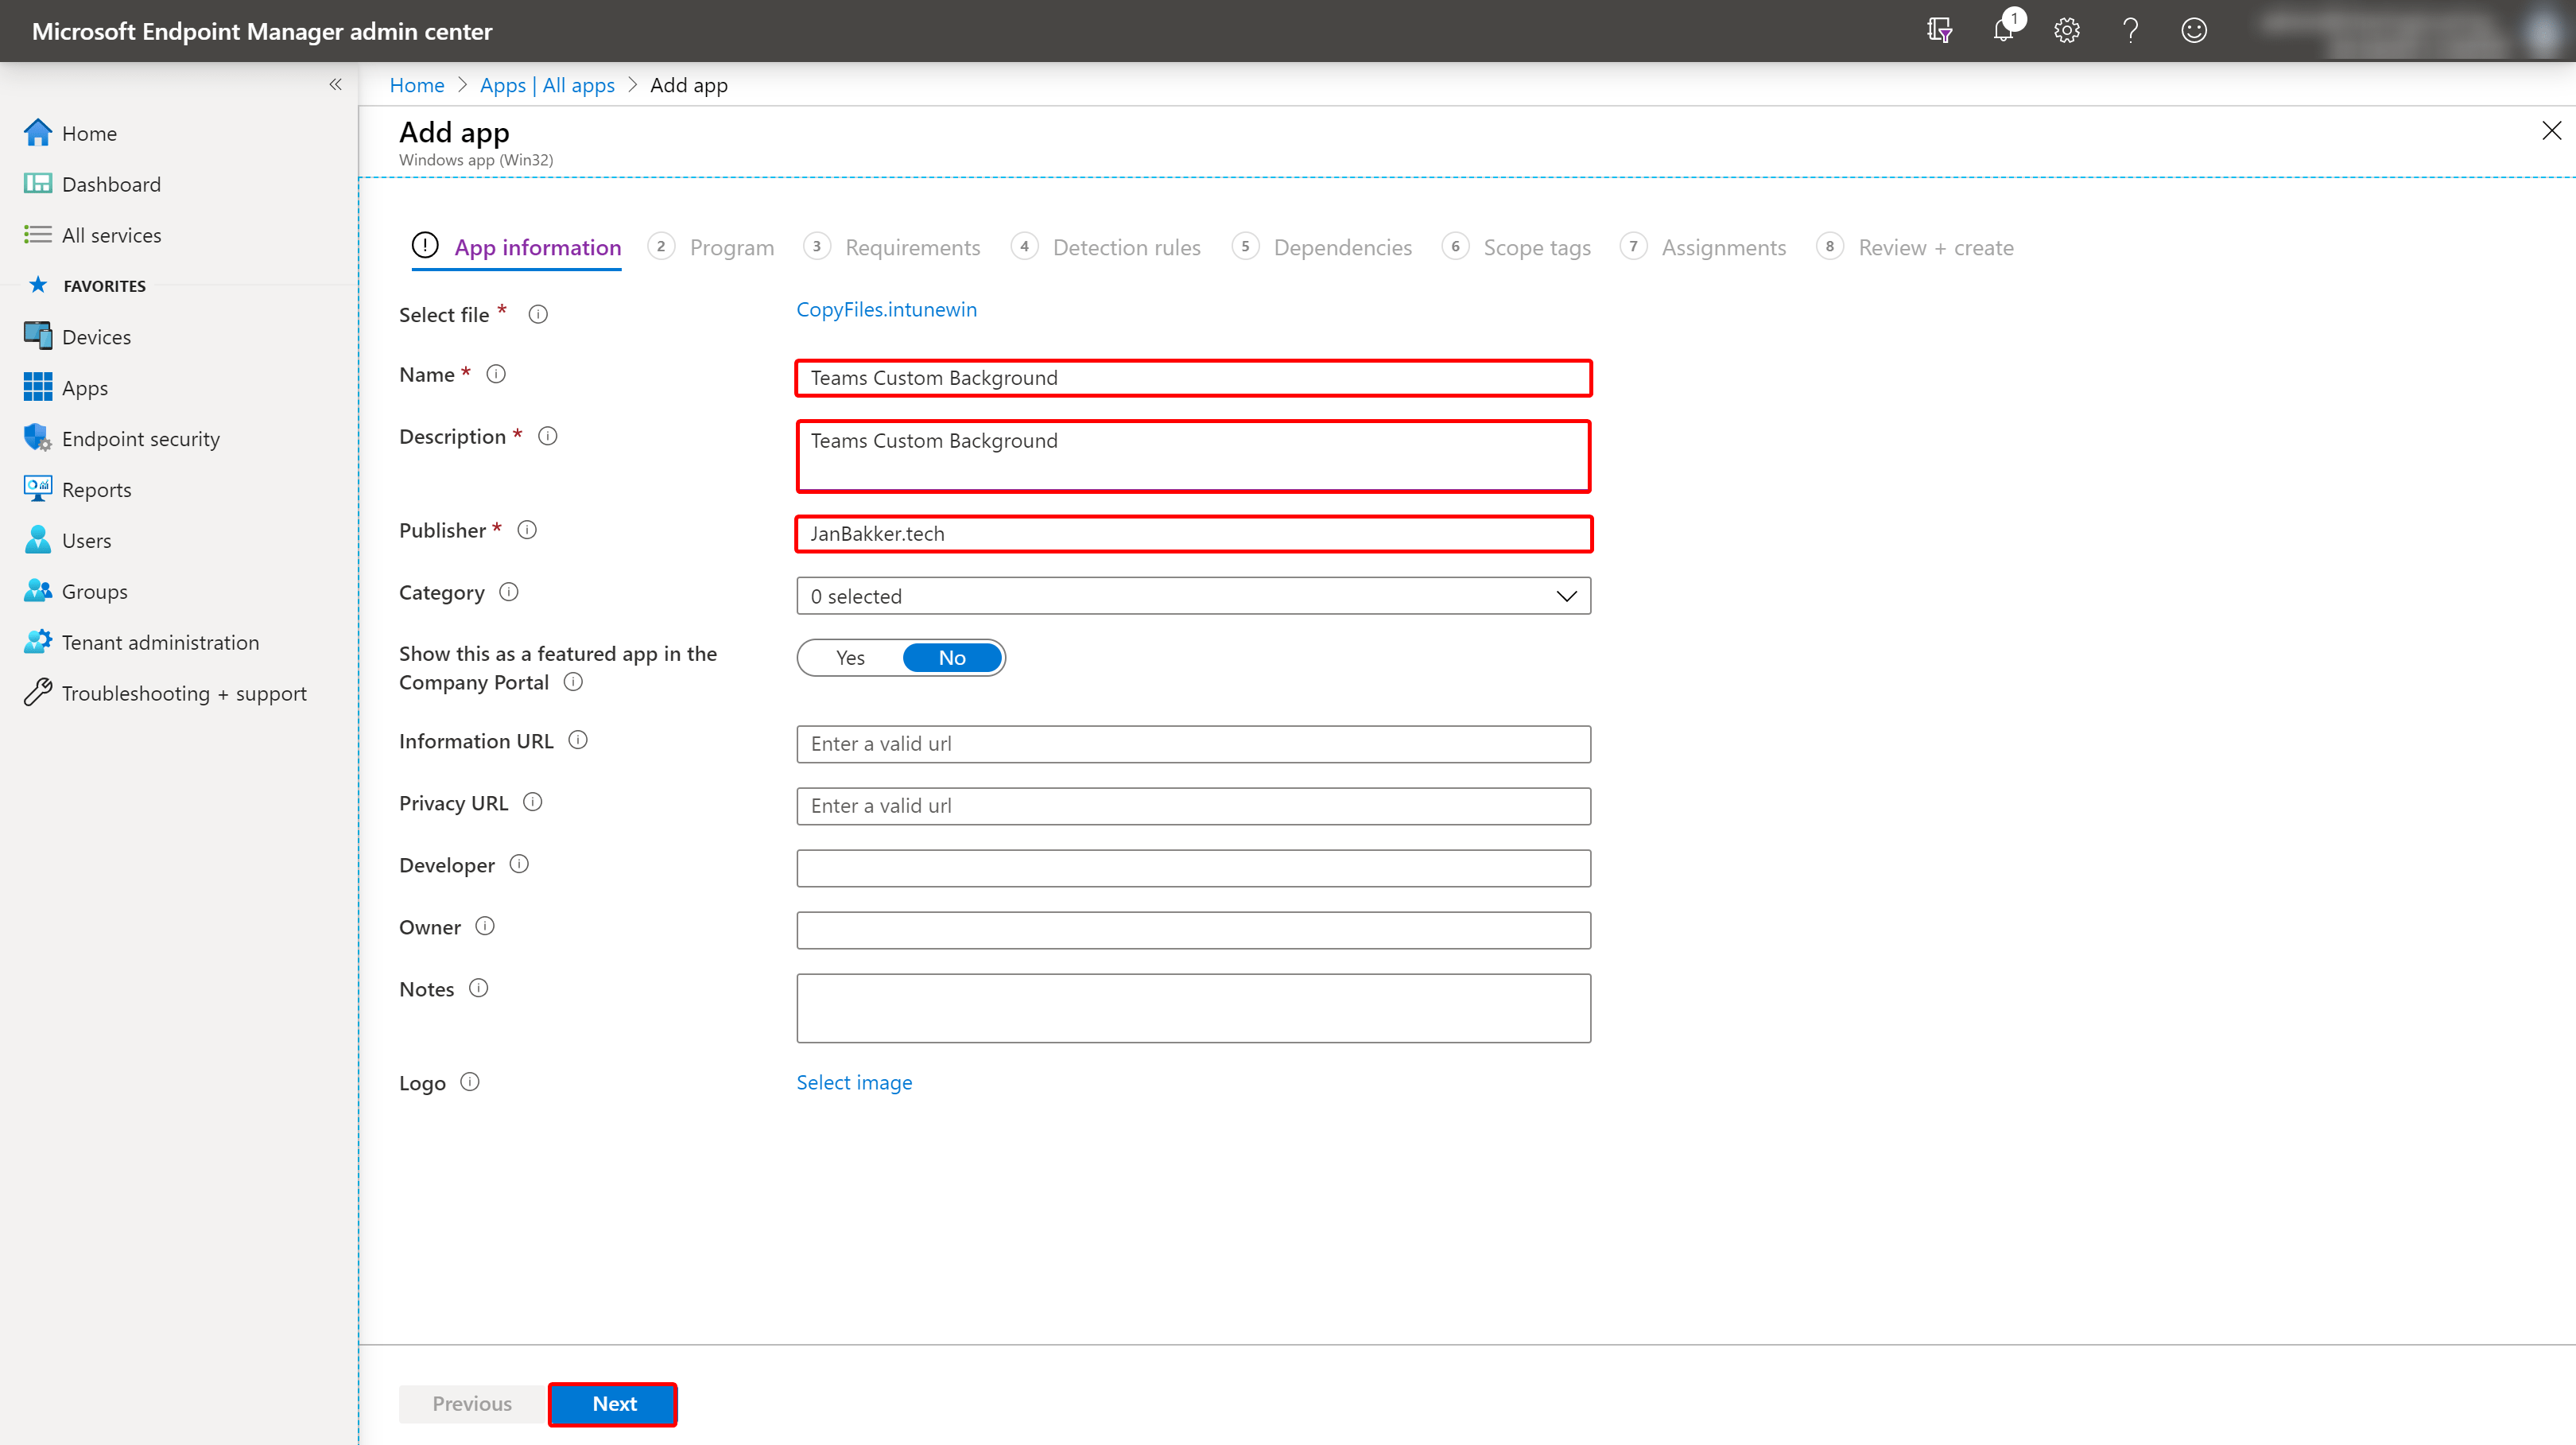
*Fill in the name, description and publisher*
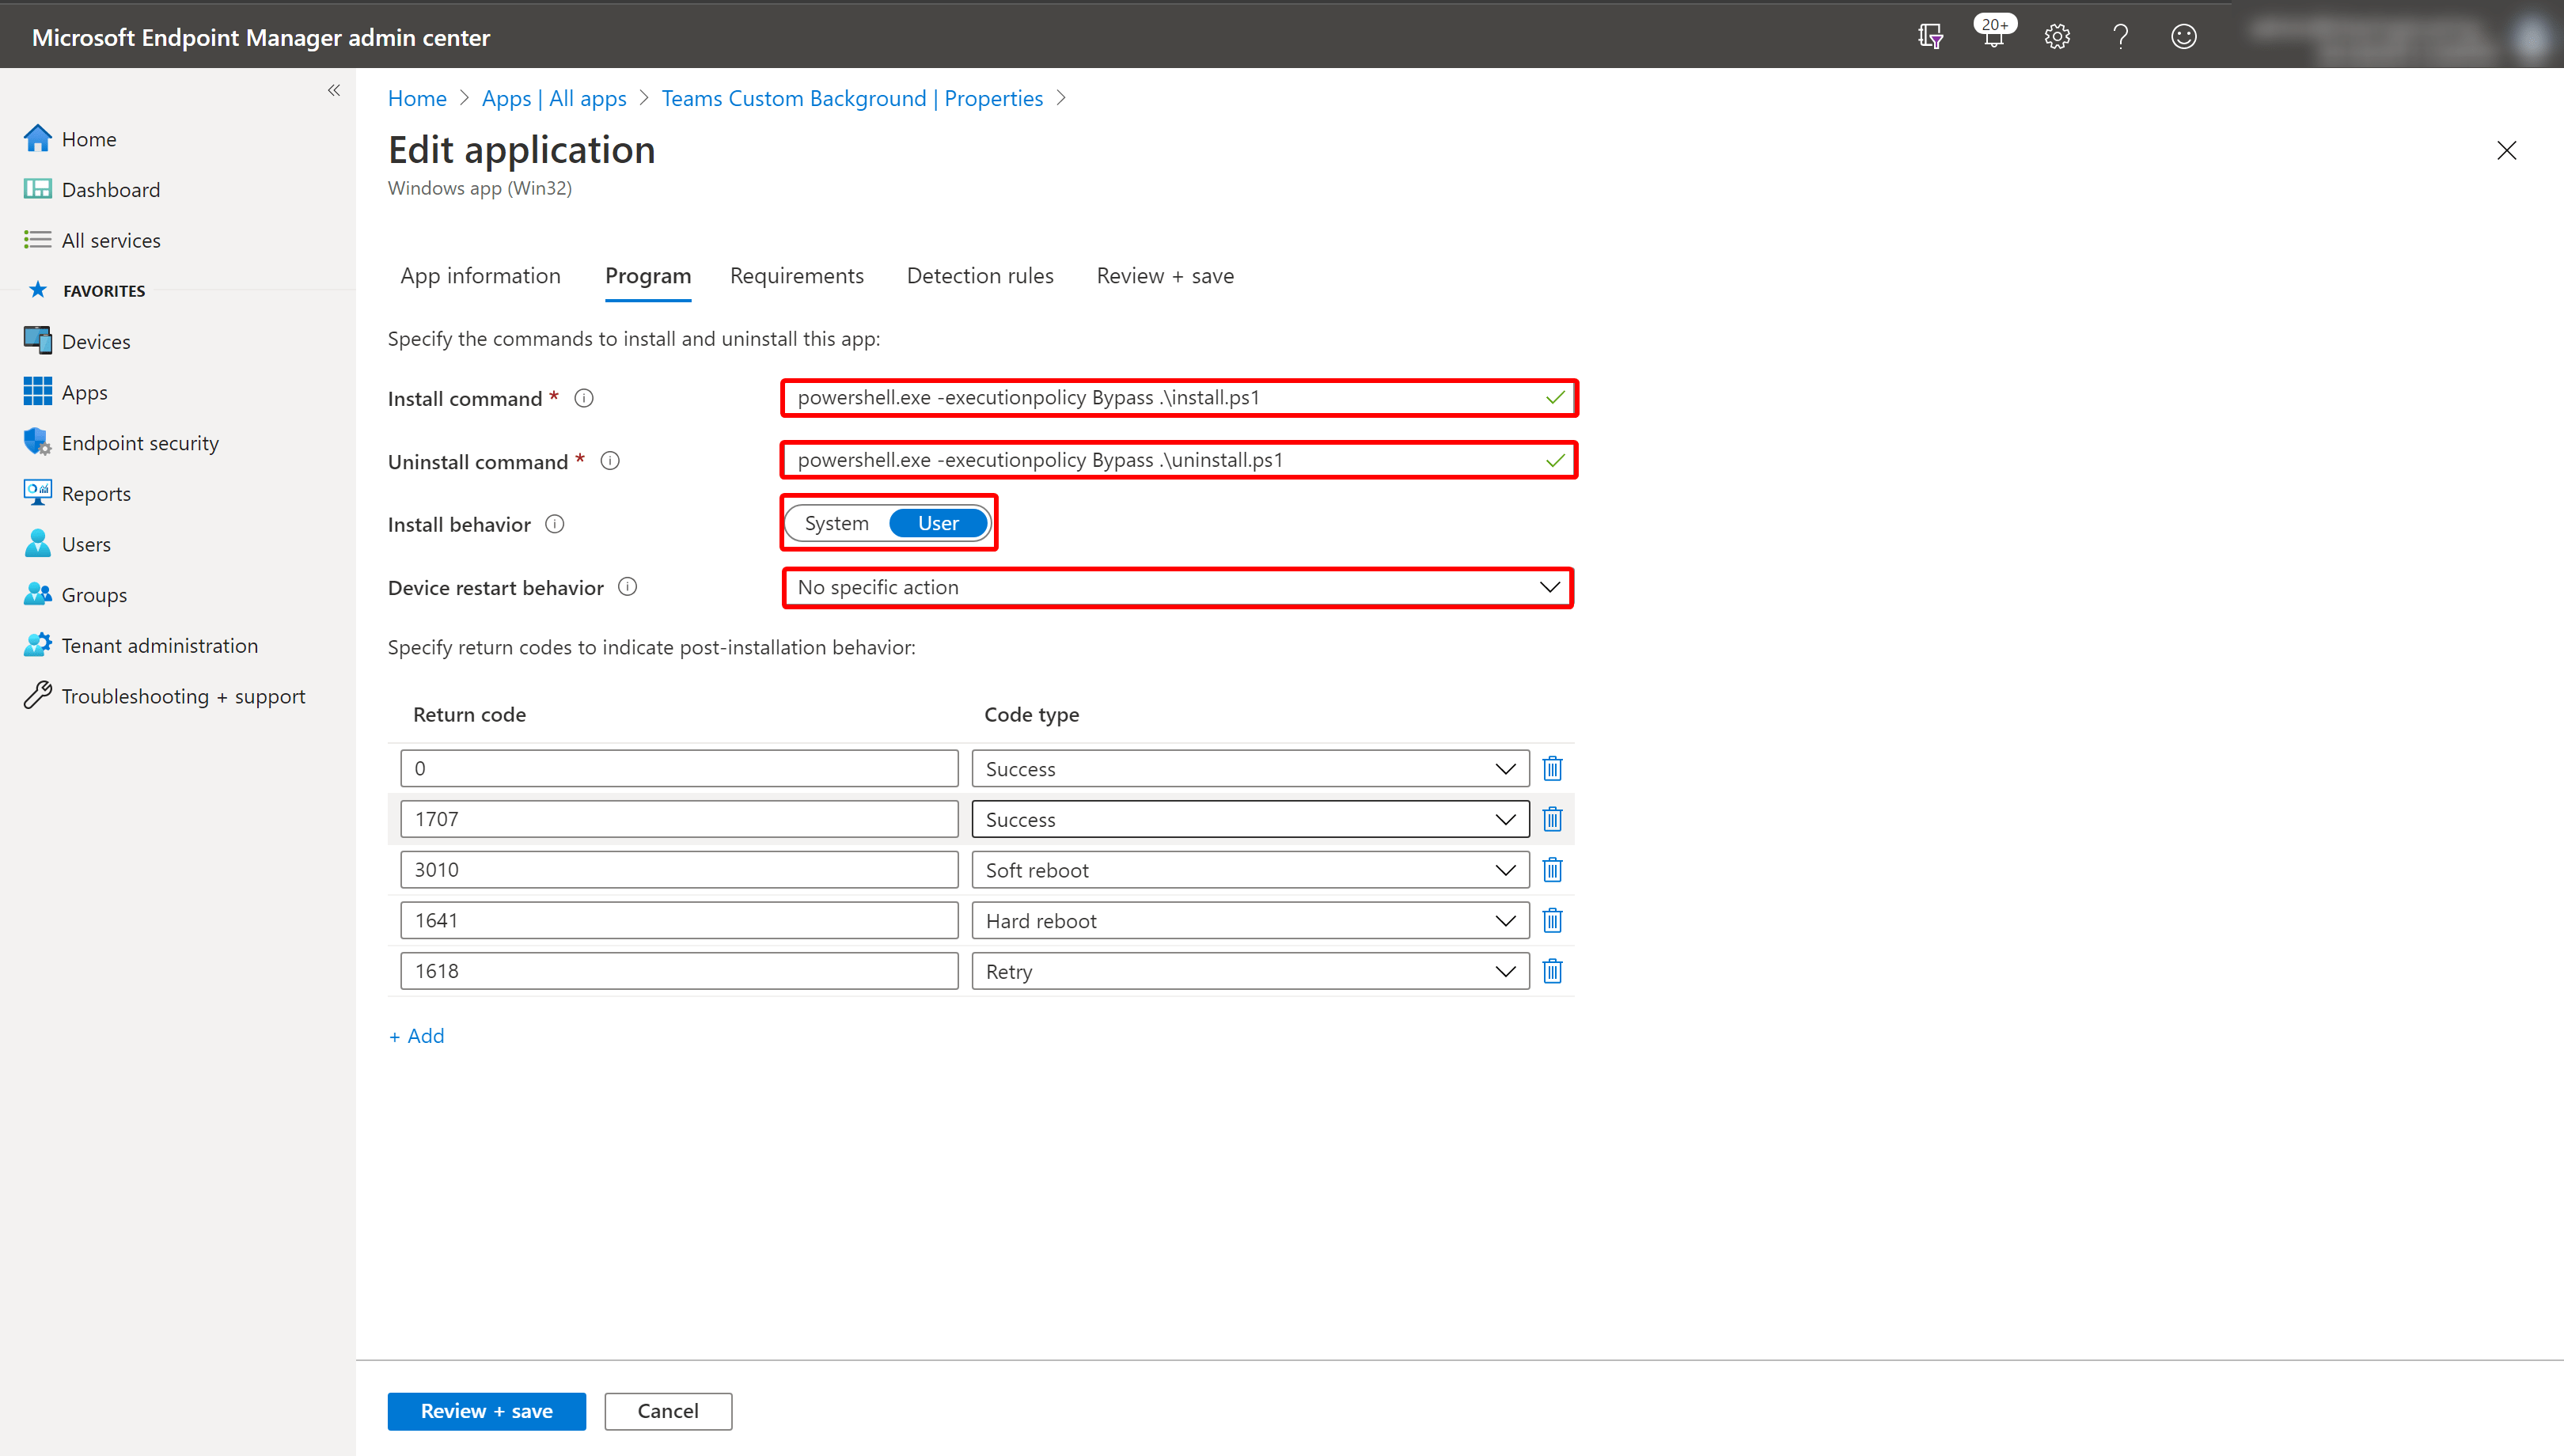
*Fill in the install and uninstall command. Next, pick the user and restart behaviour Install command: powershell.exe -executionpolicy Bypass .\install.ps1 Uninstall command: powershell.exe -executionpolicy Bypass .\uninstall.ps1*
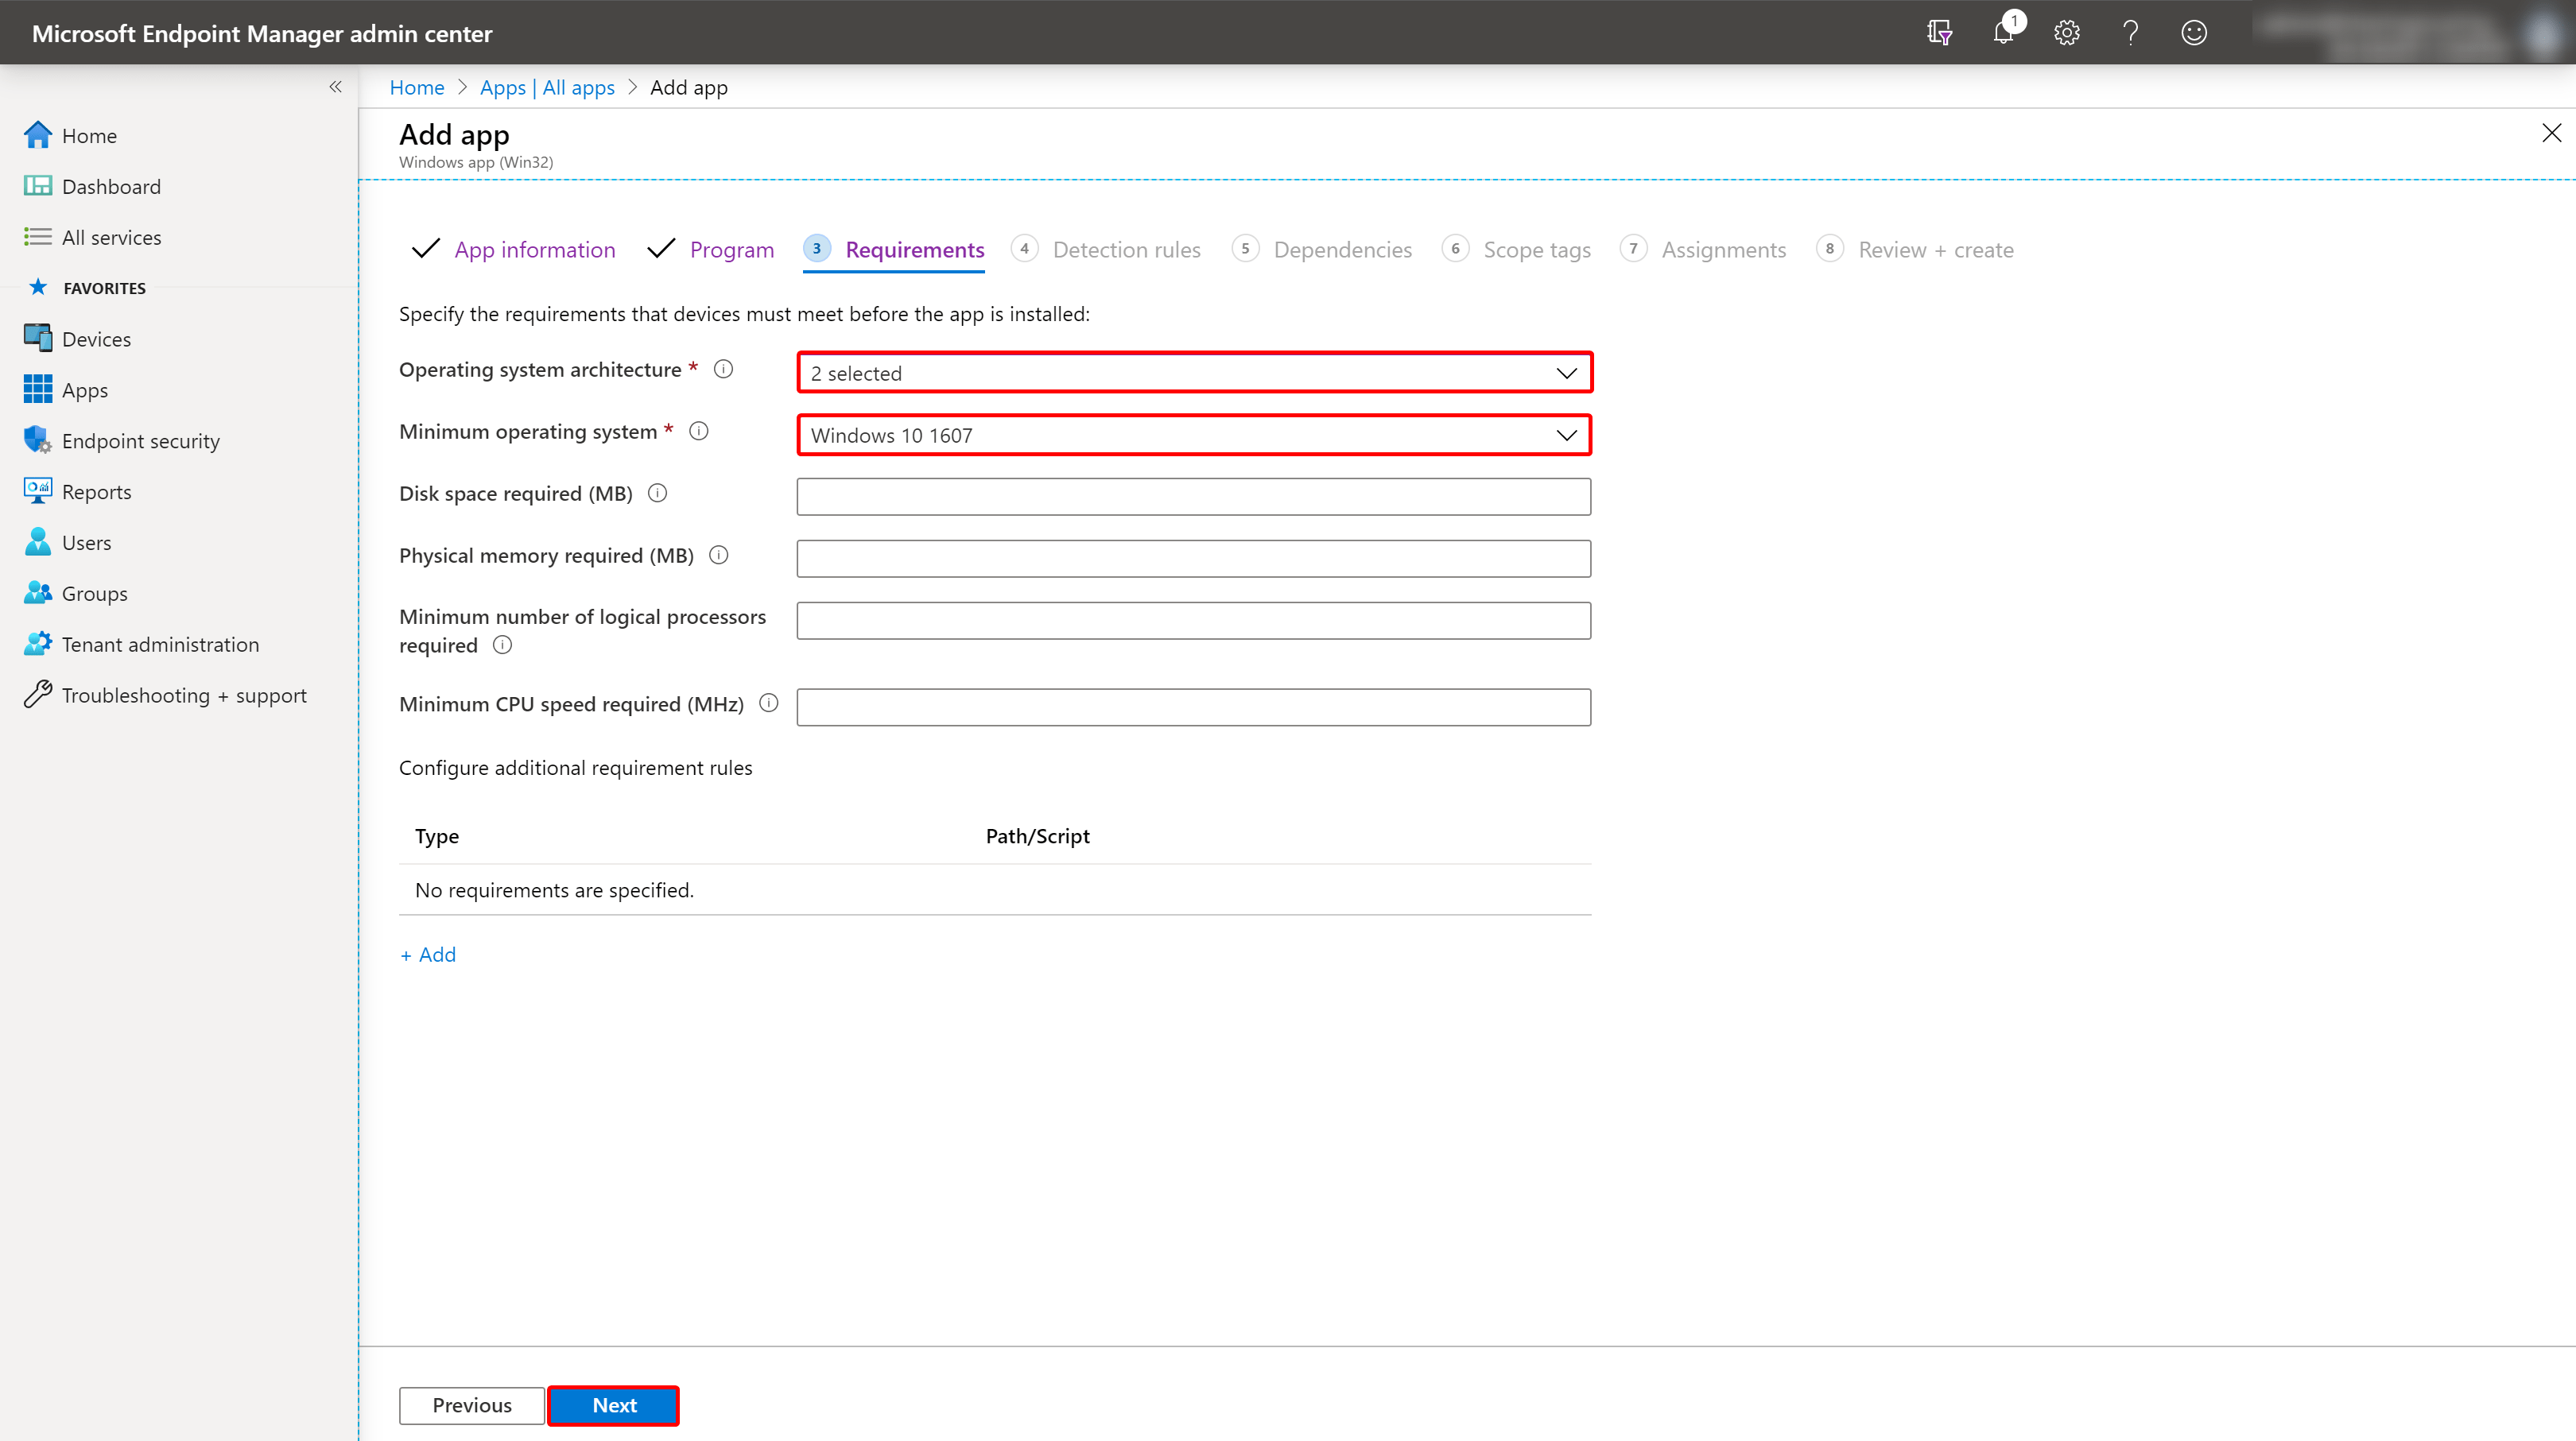
*Select the requirements*
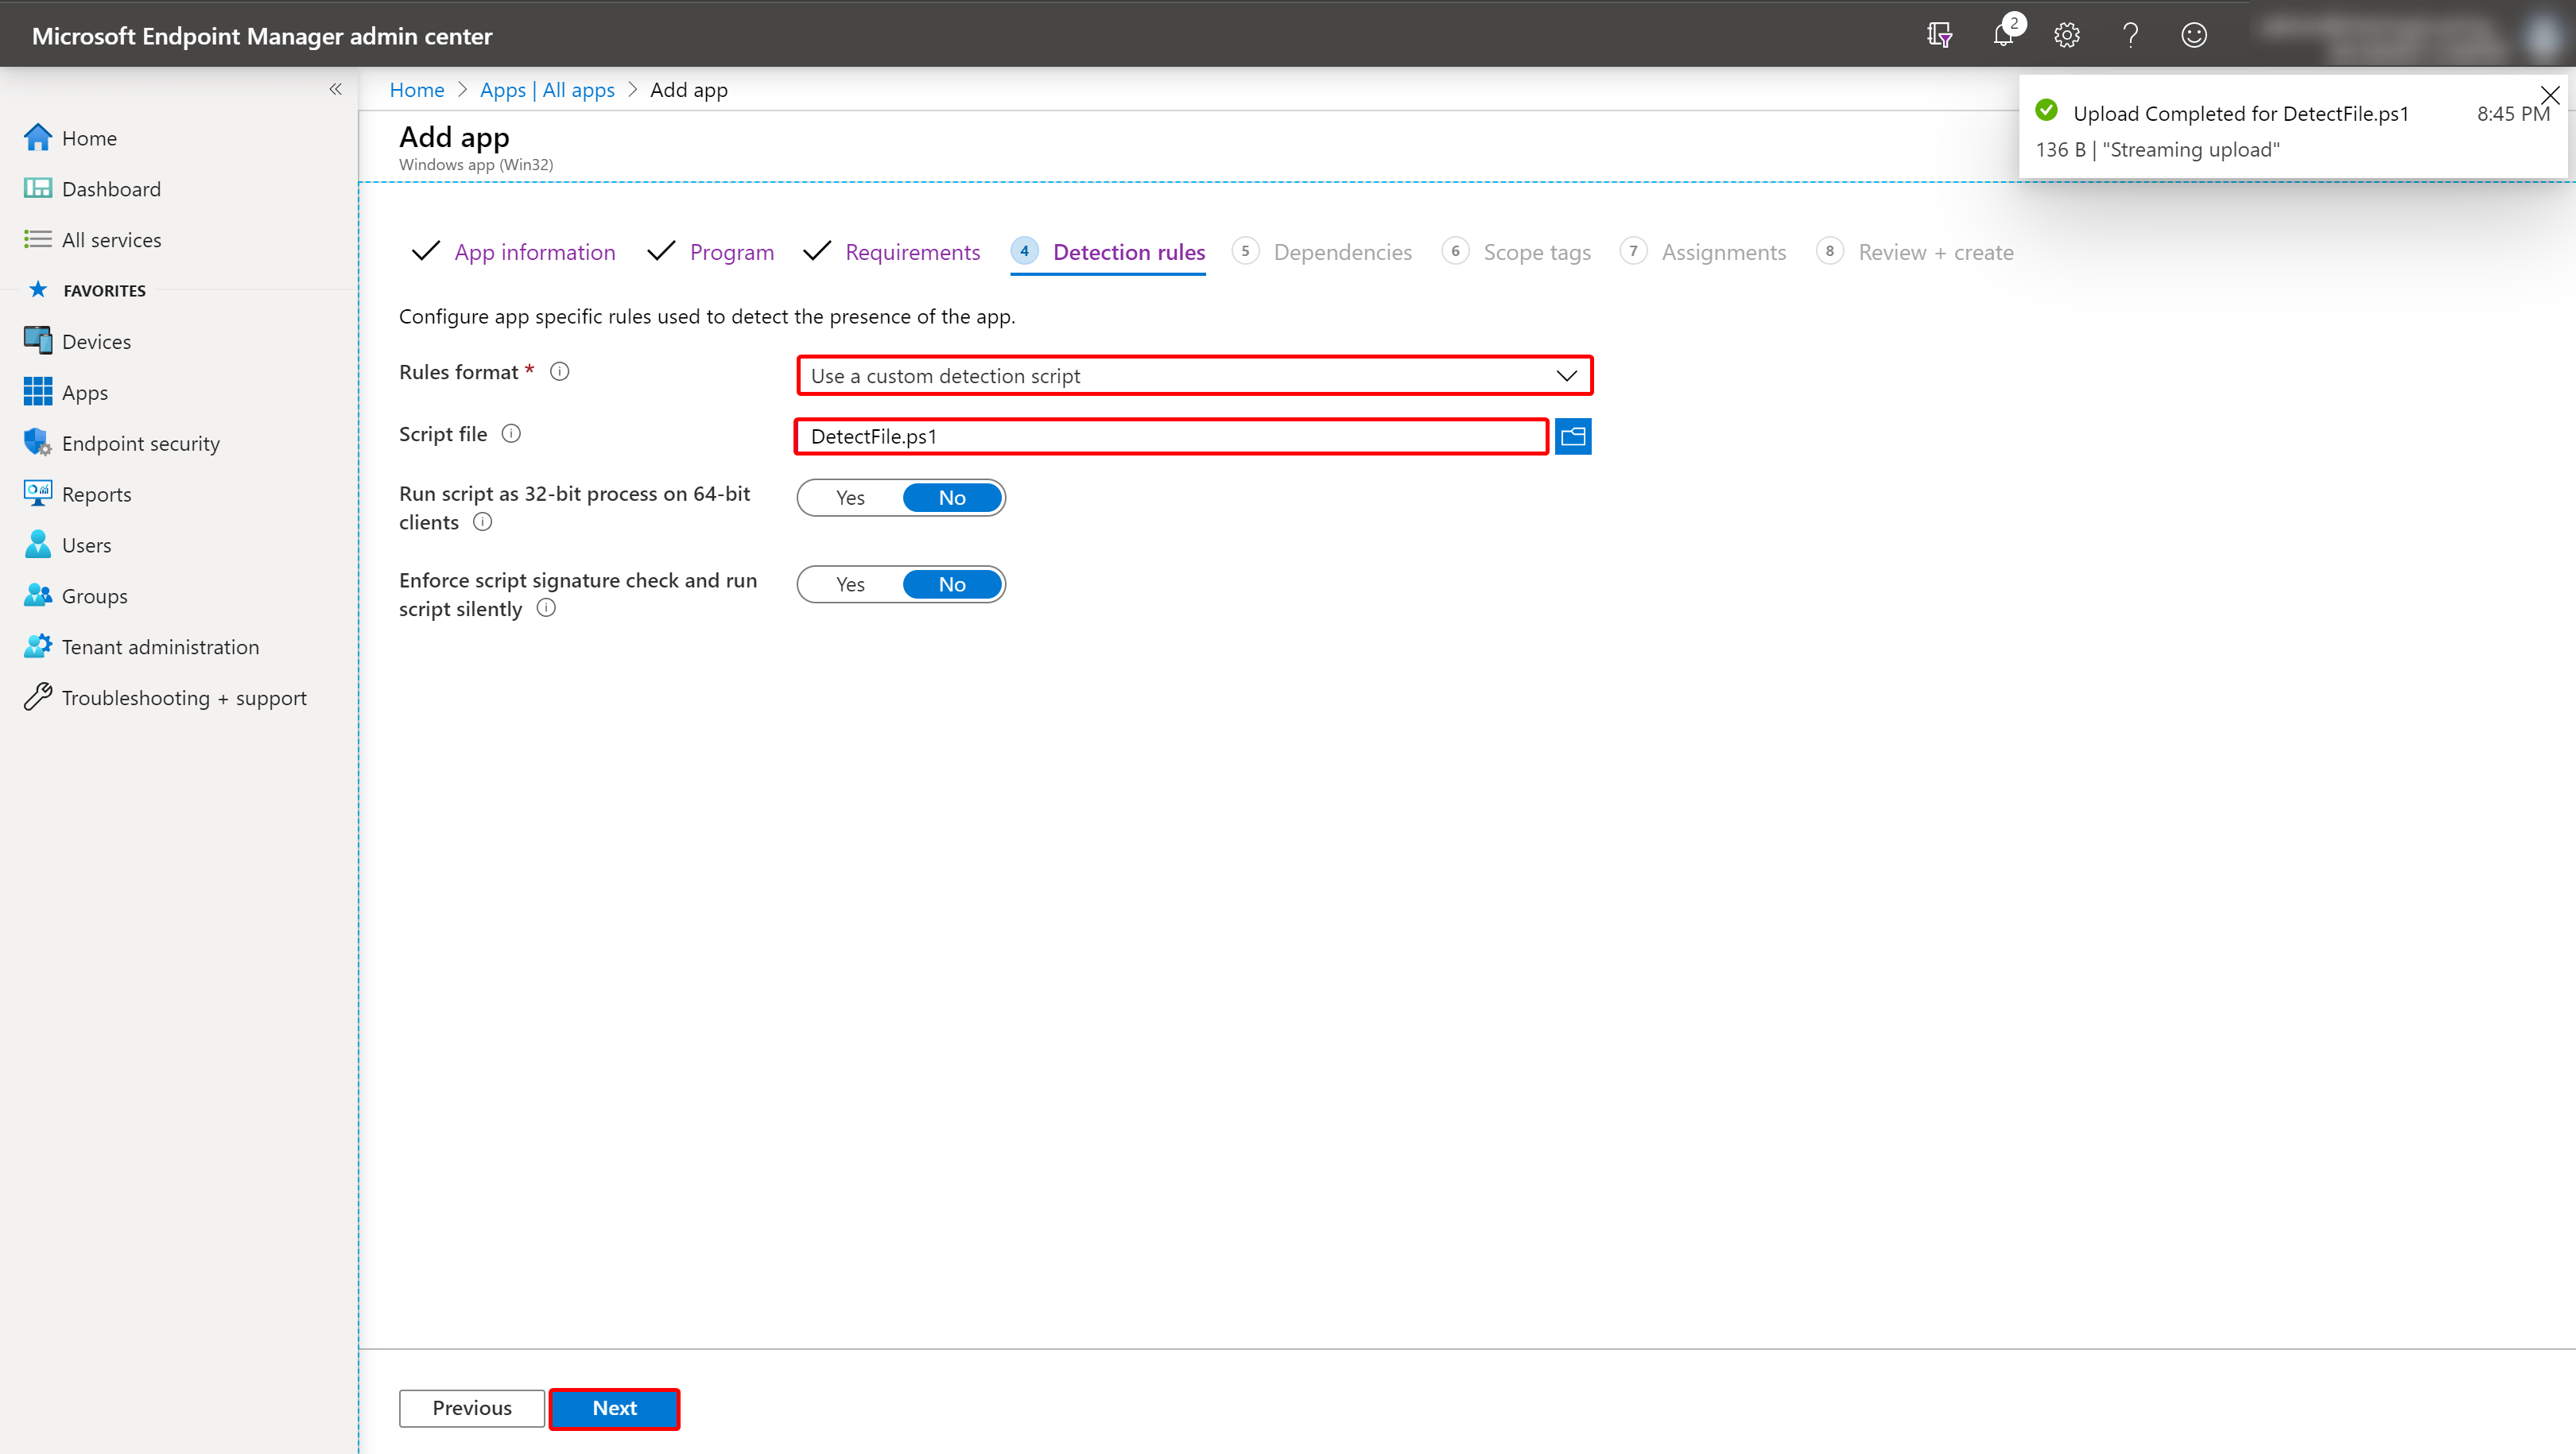
*Upload your custom powershell detection script that you created earlier*
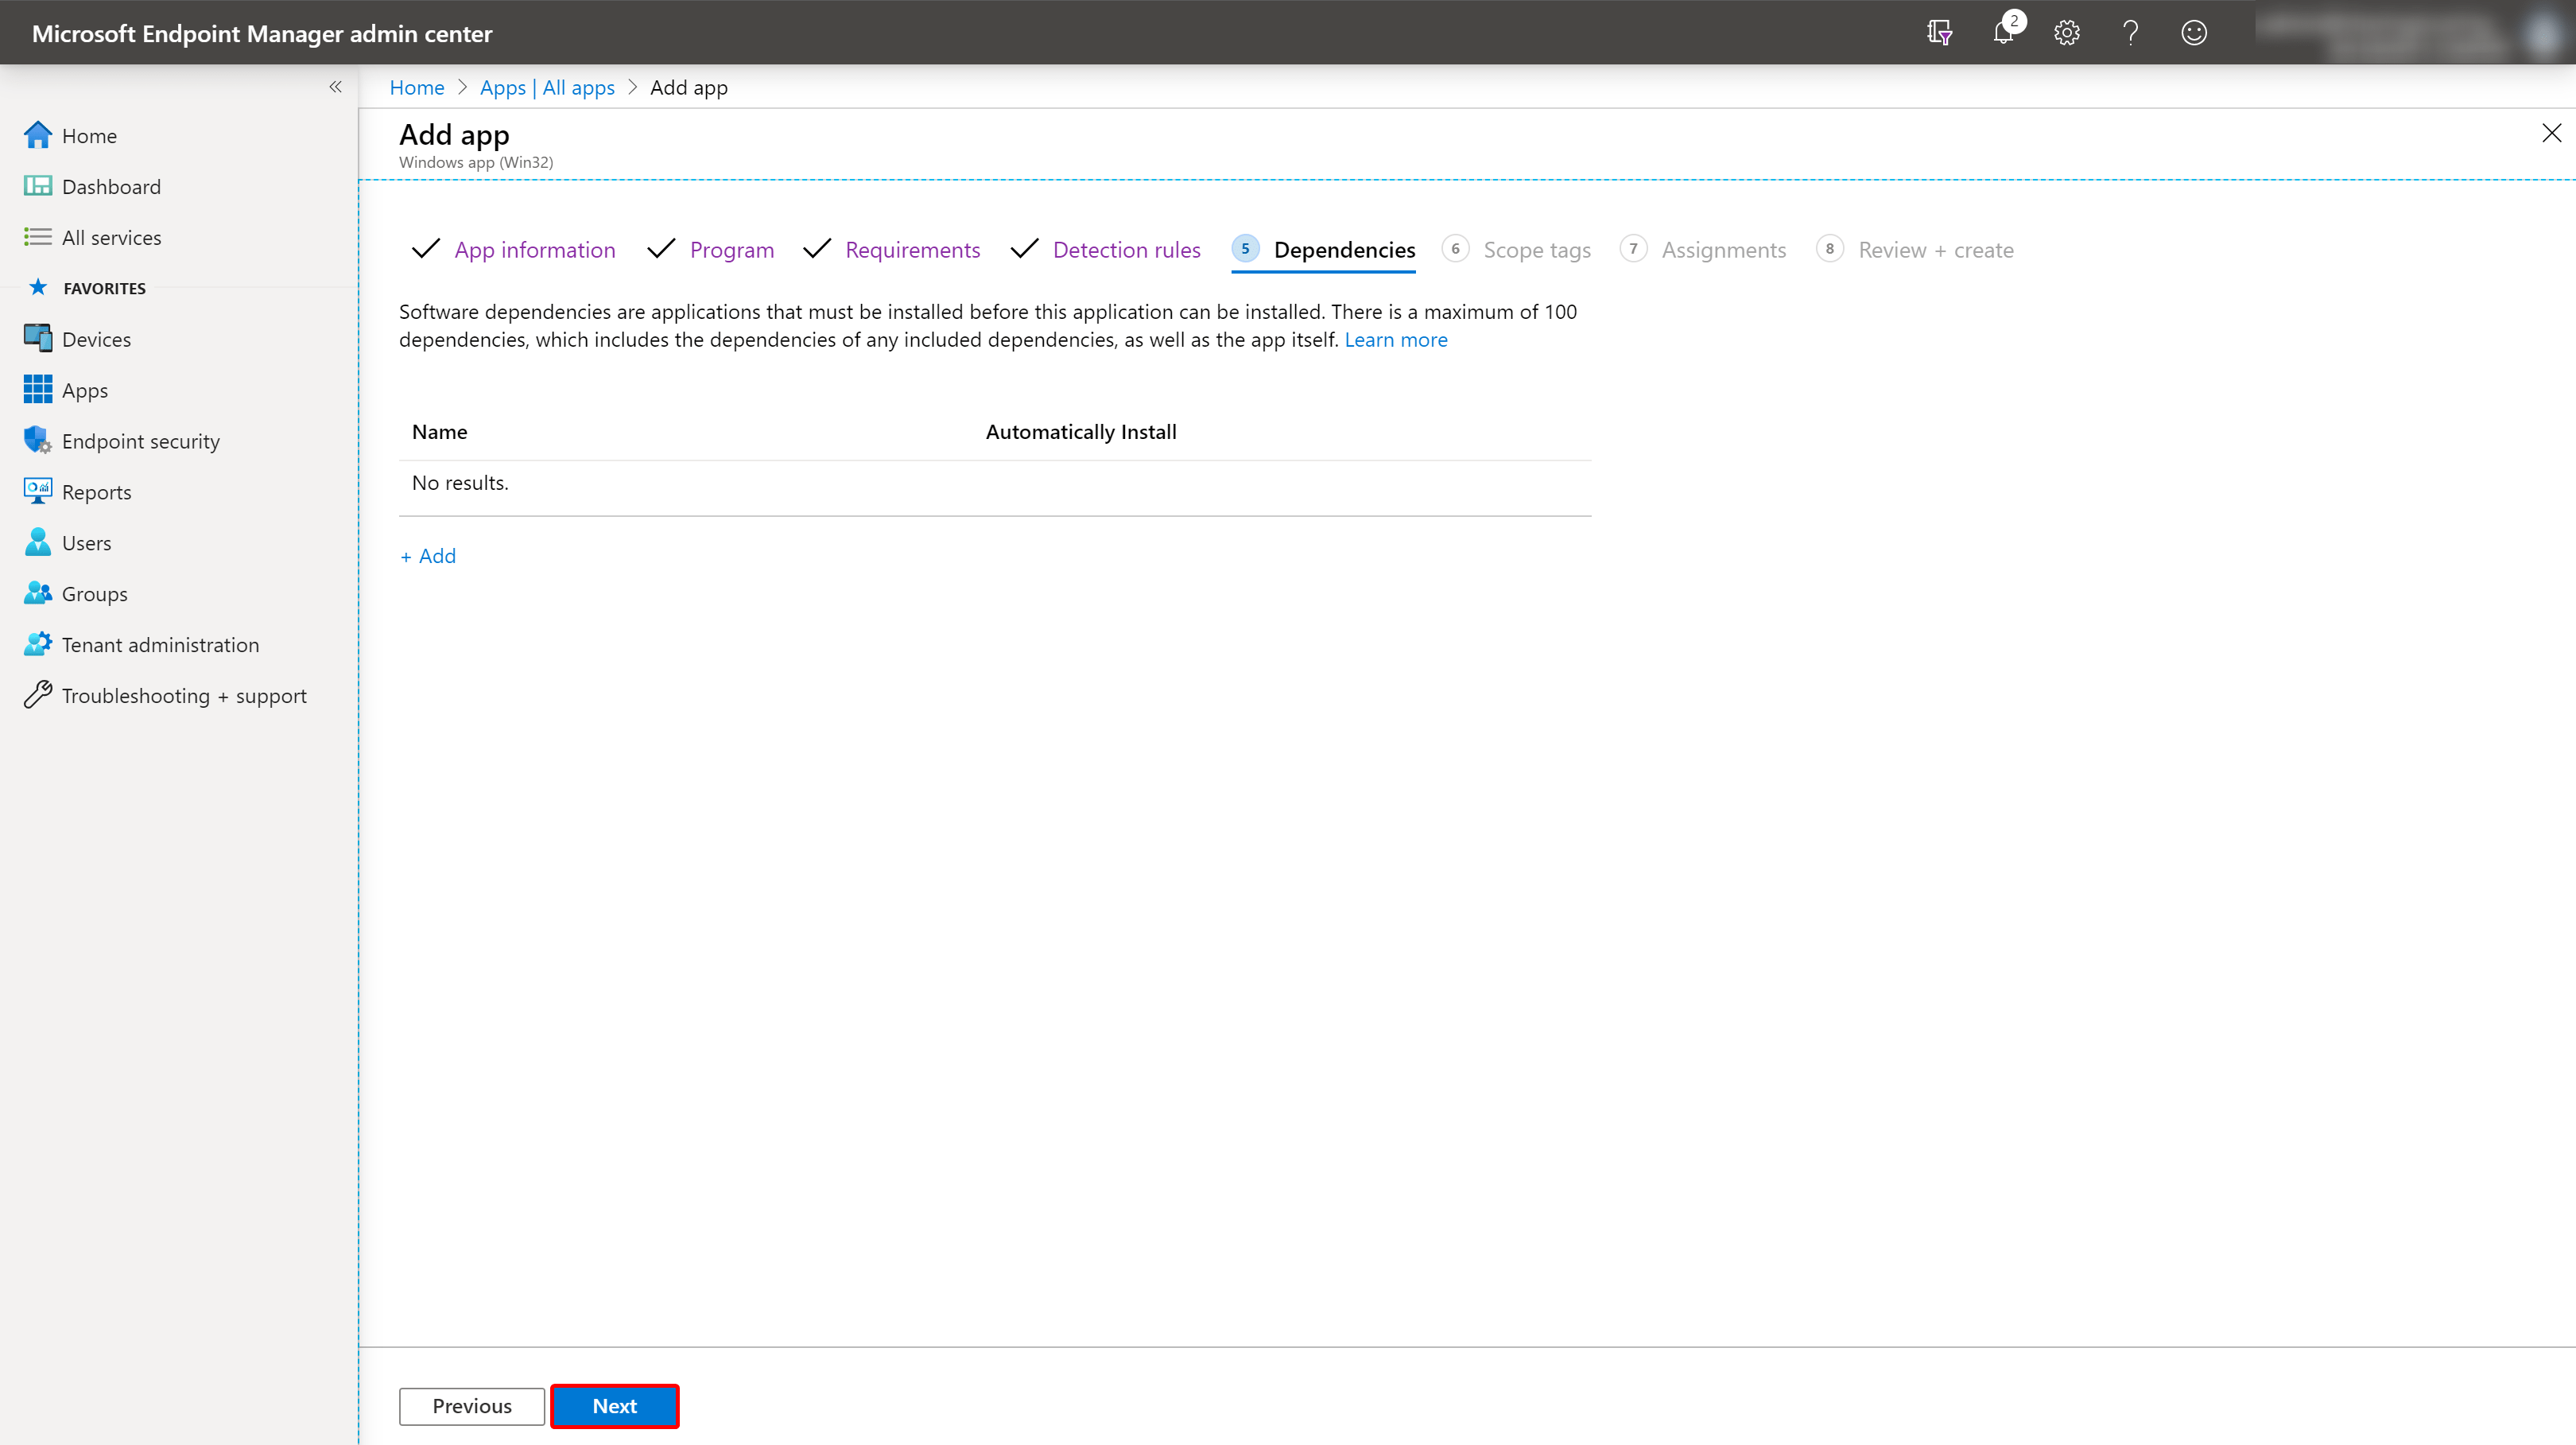
*Add dependencies if needed. Otherwise click Next*
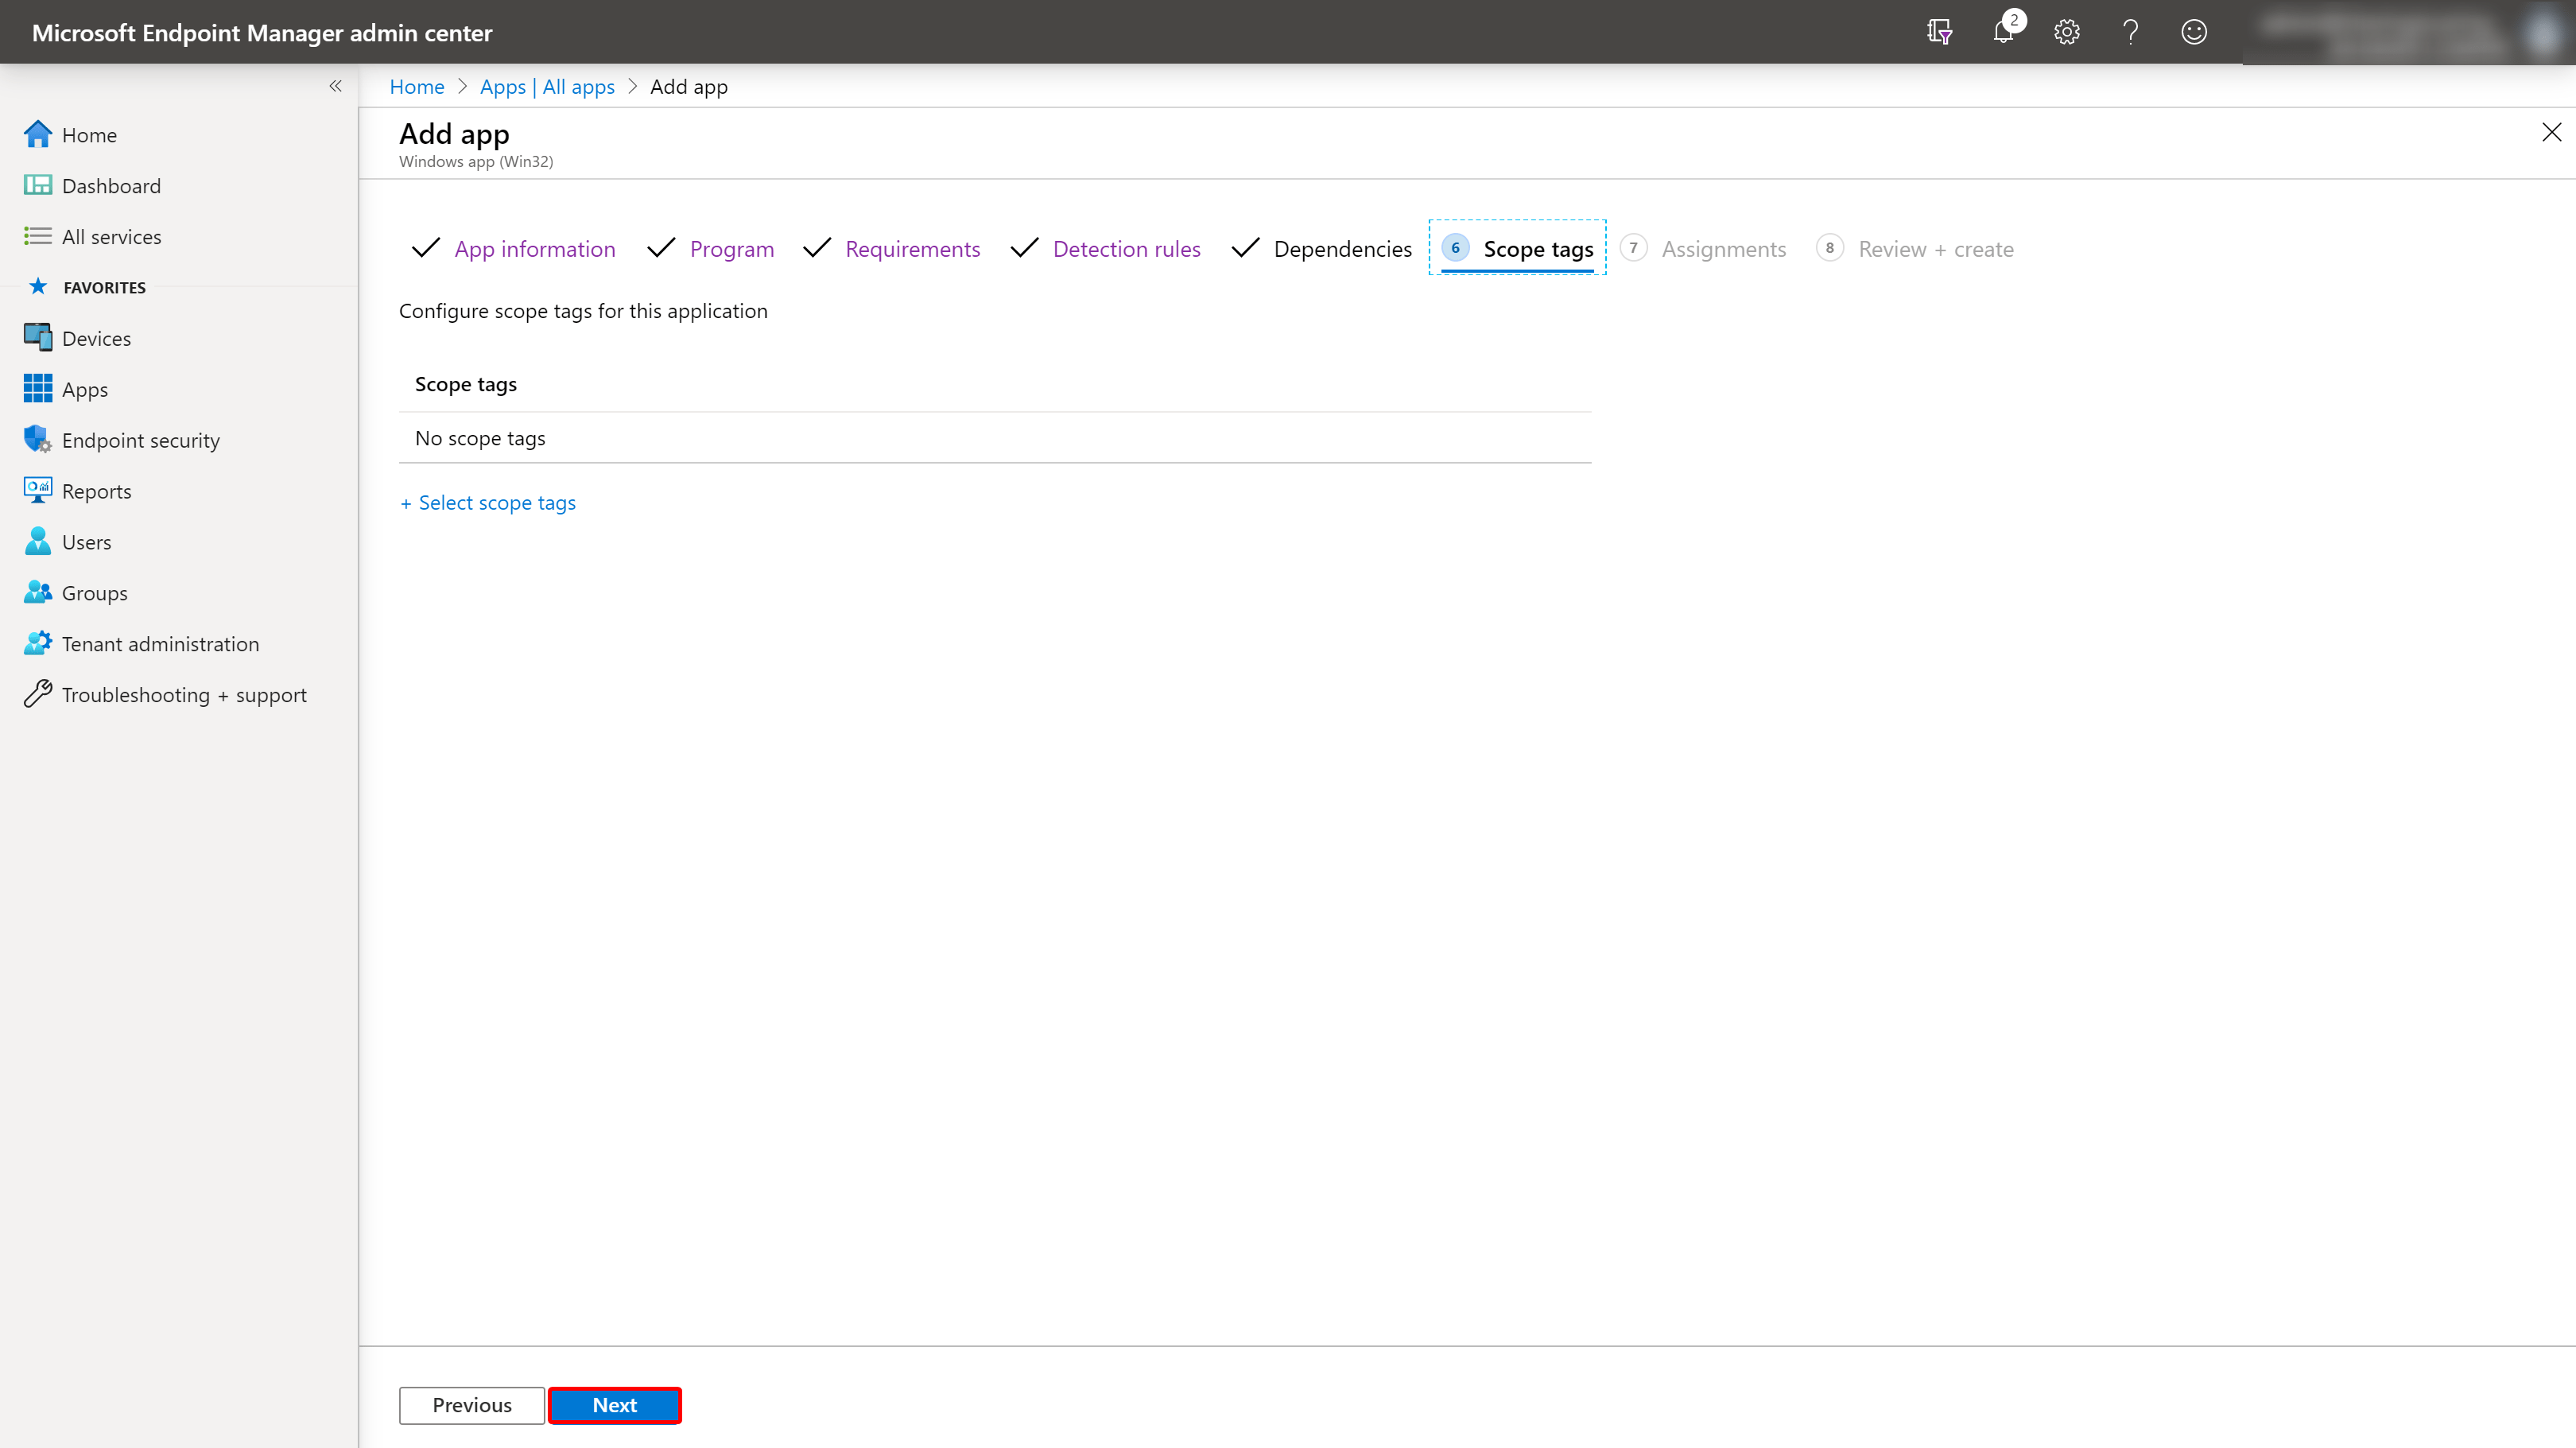
*Add scope tags if needed. Otherwise click Next*
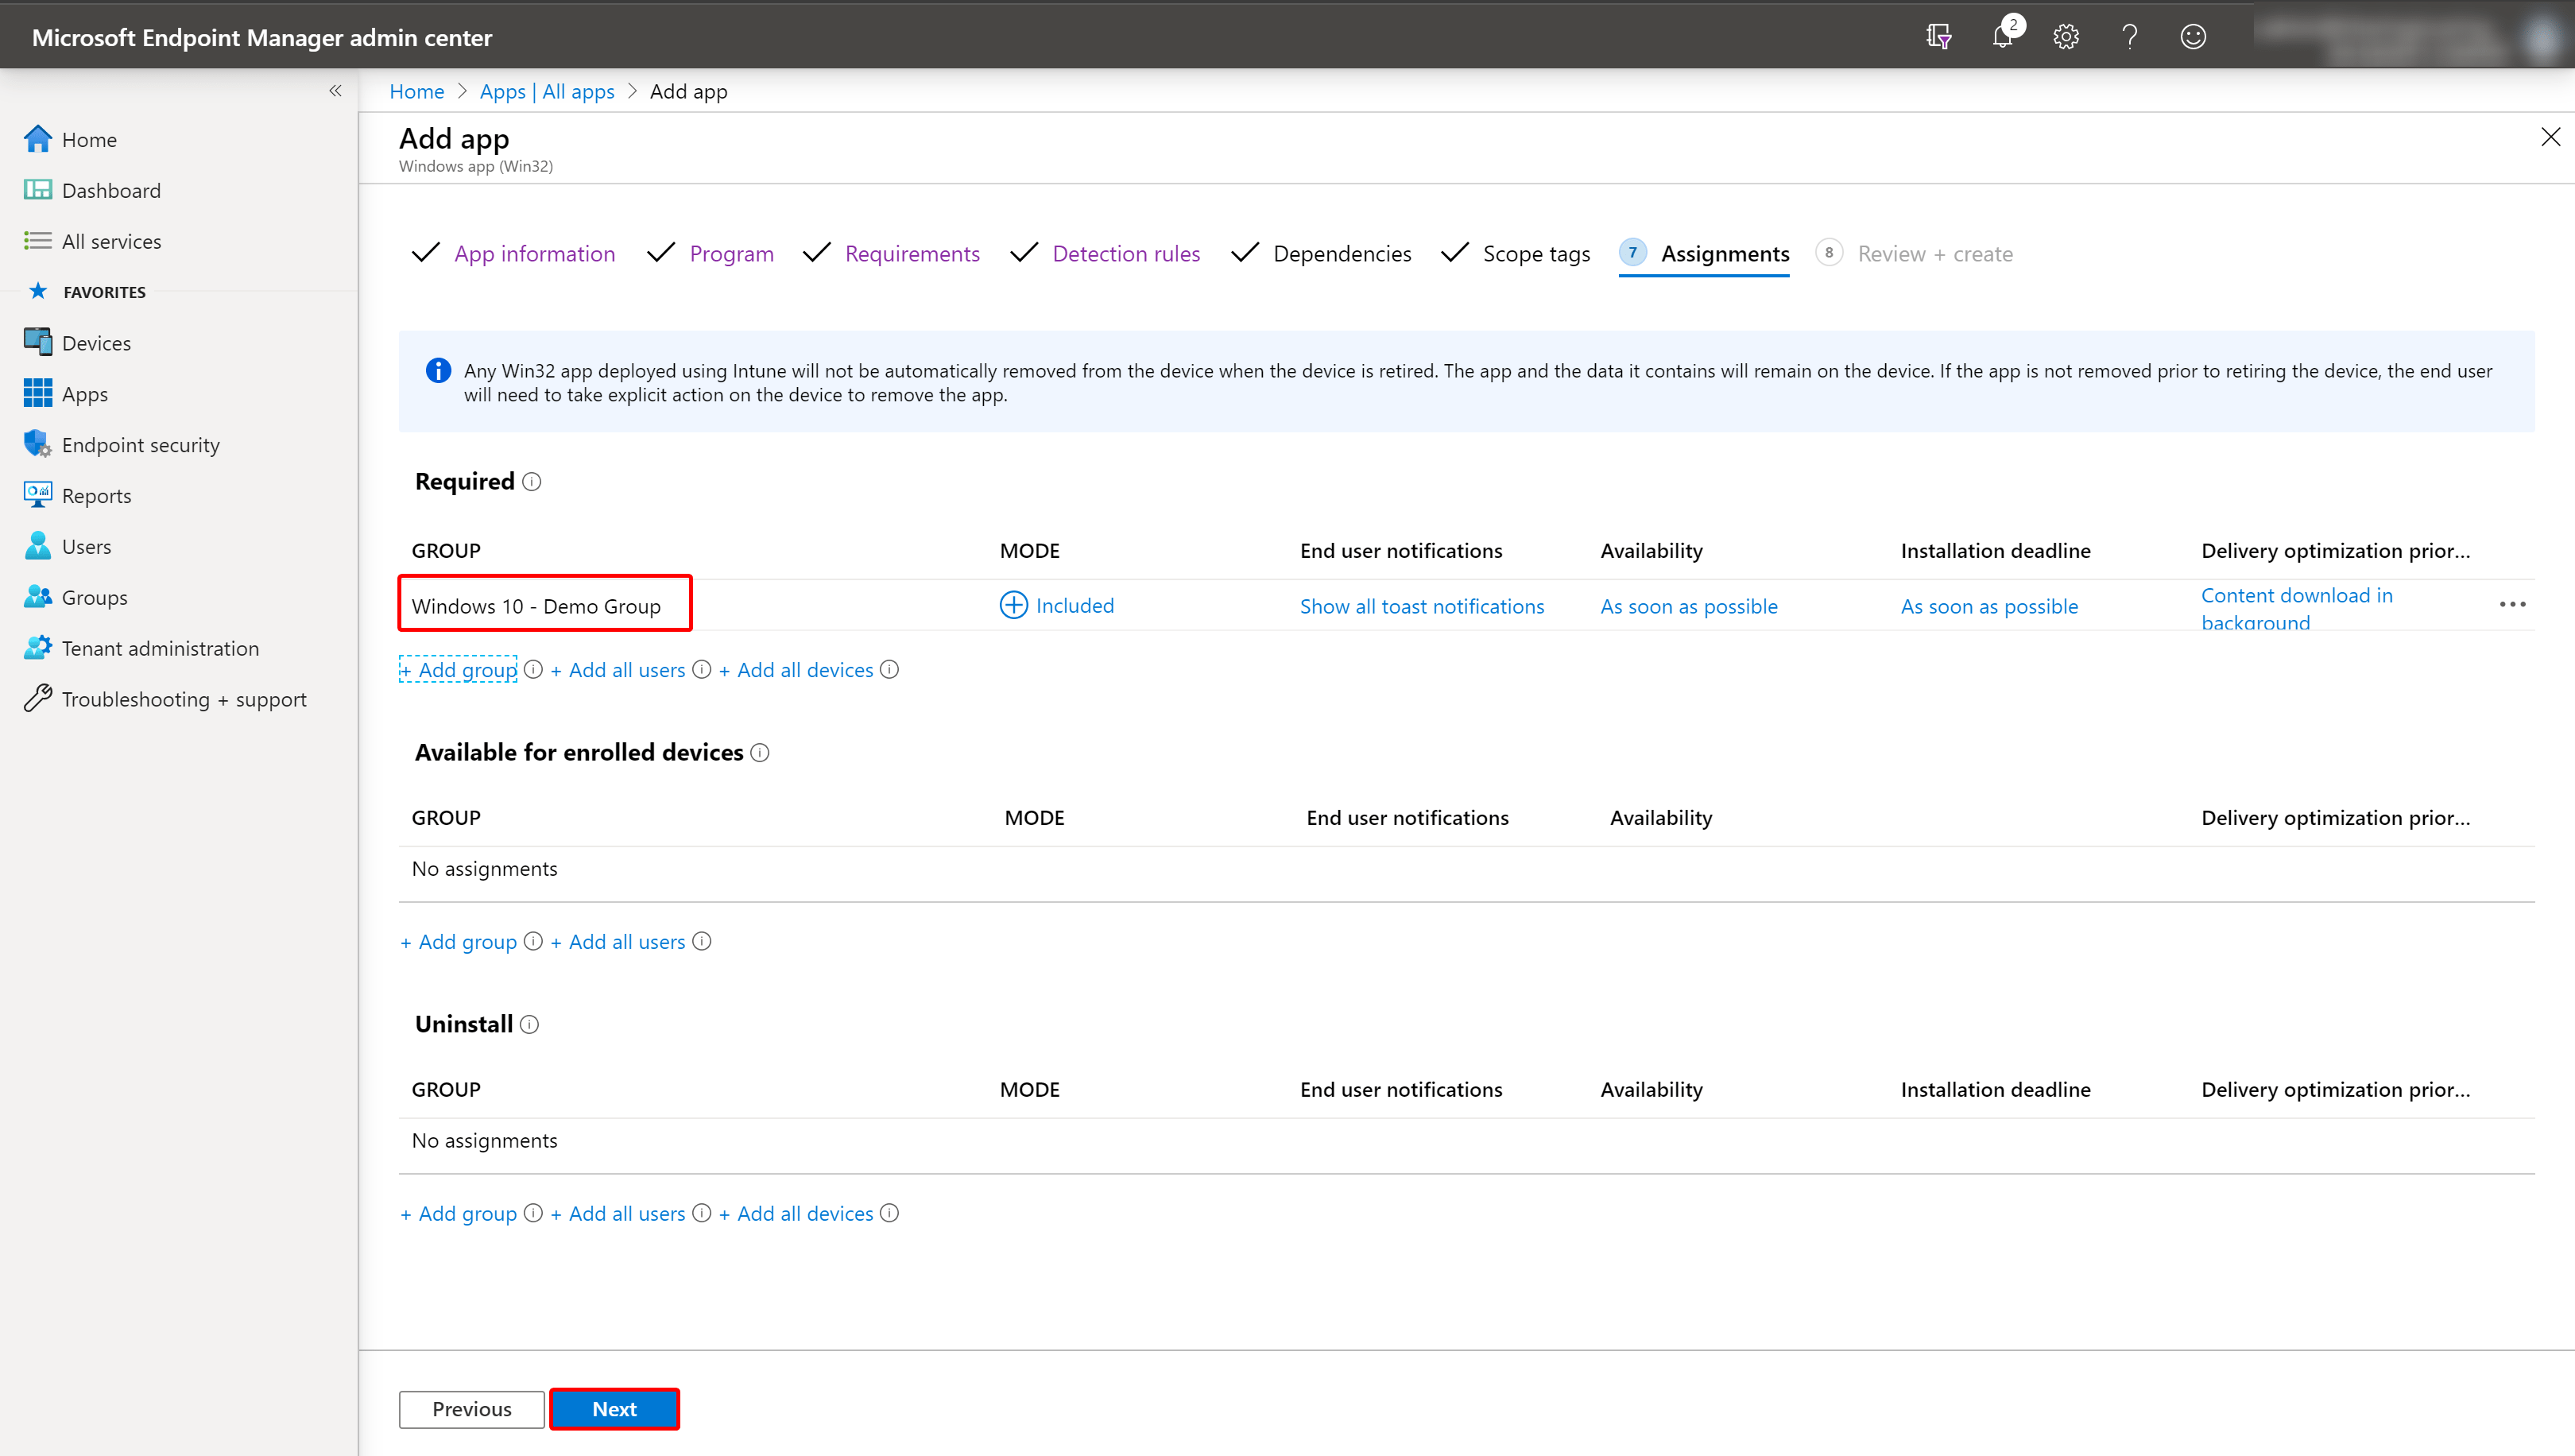
*Pick the user or device group*
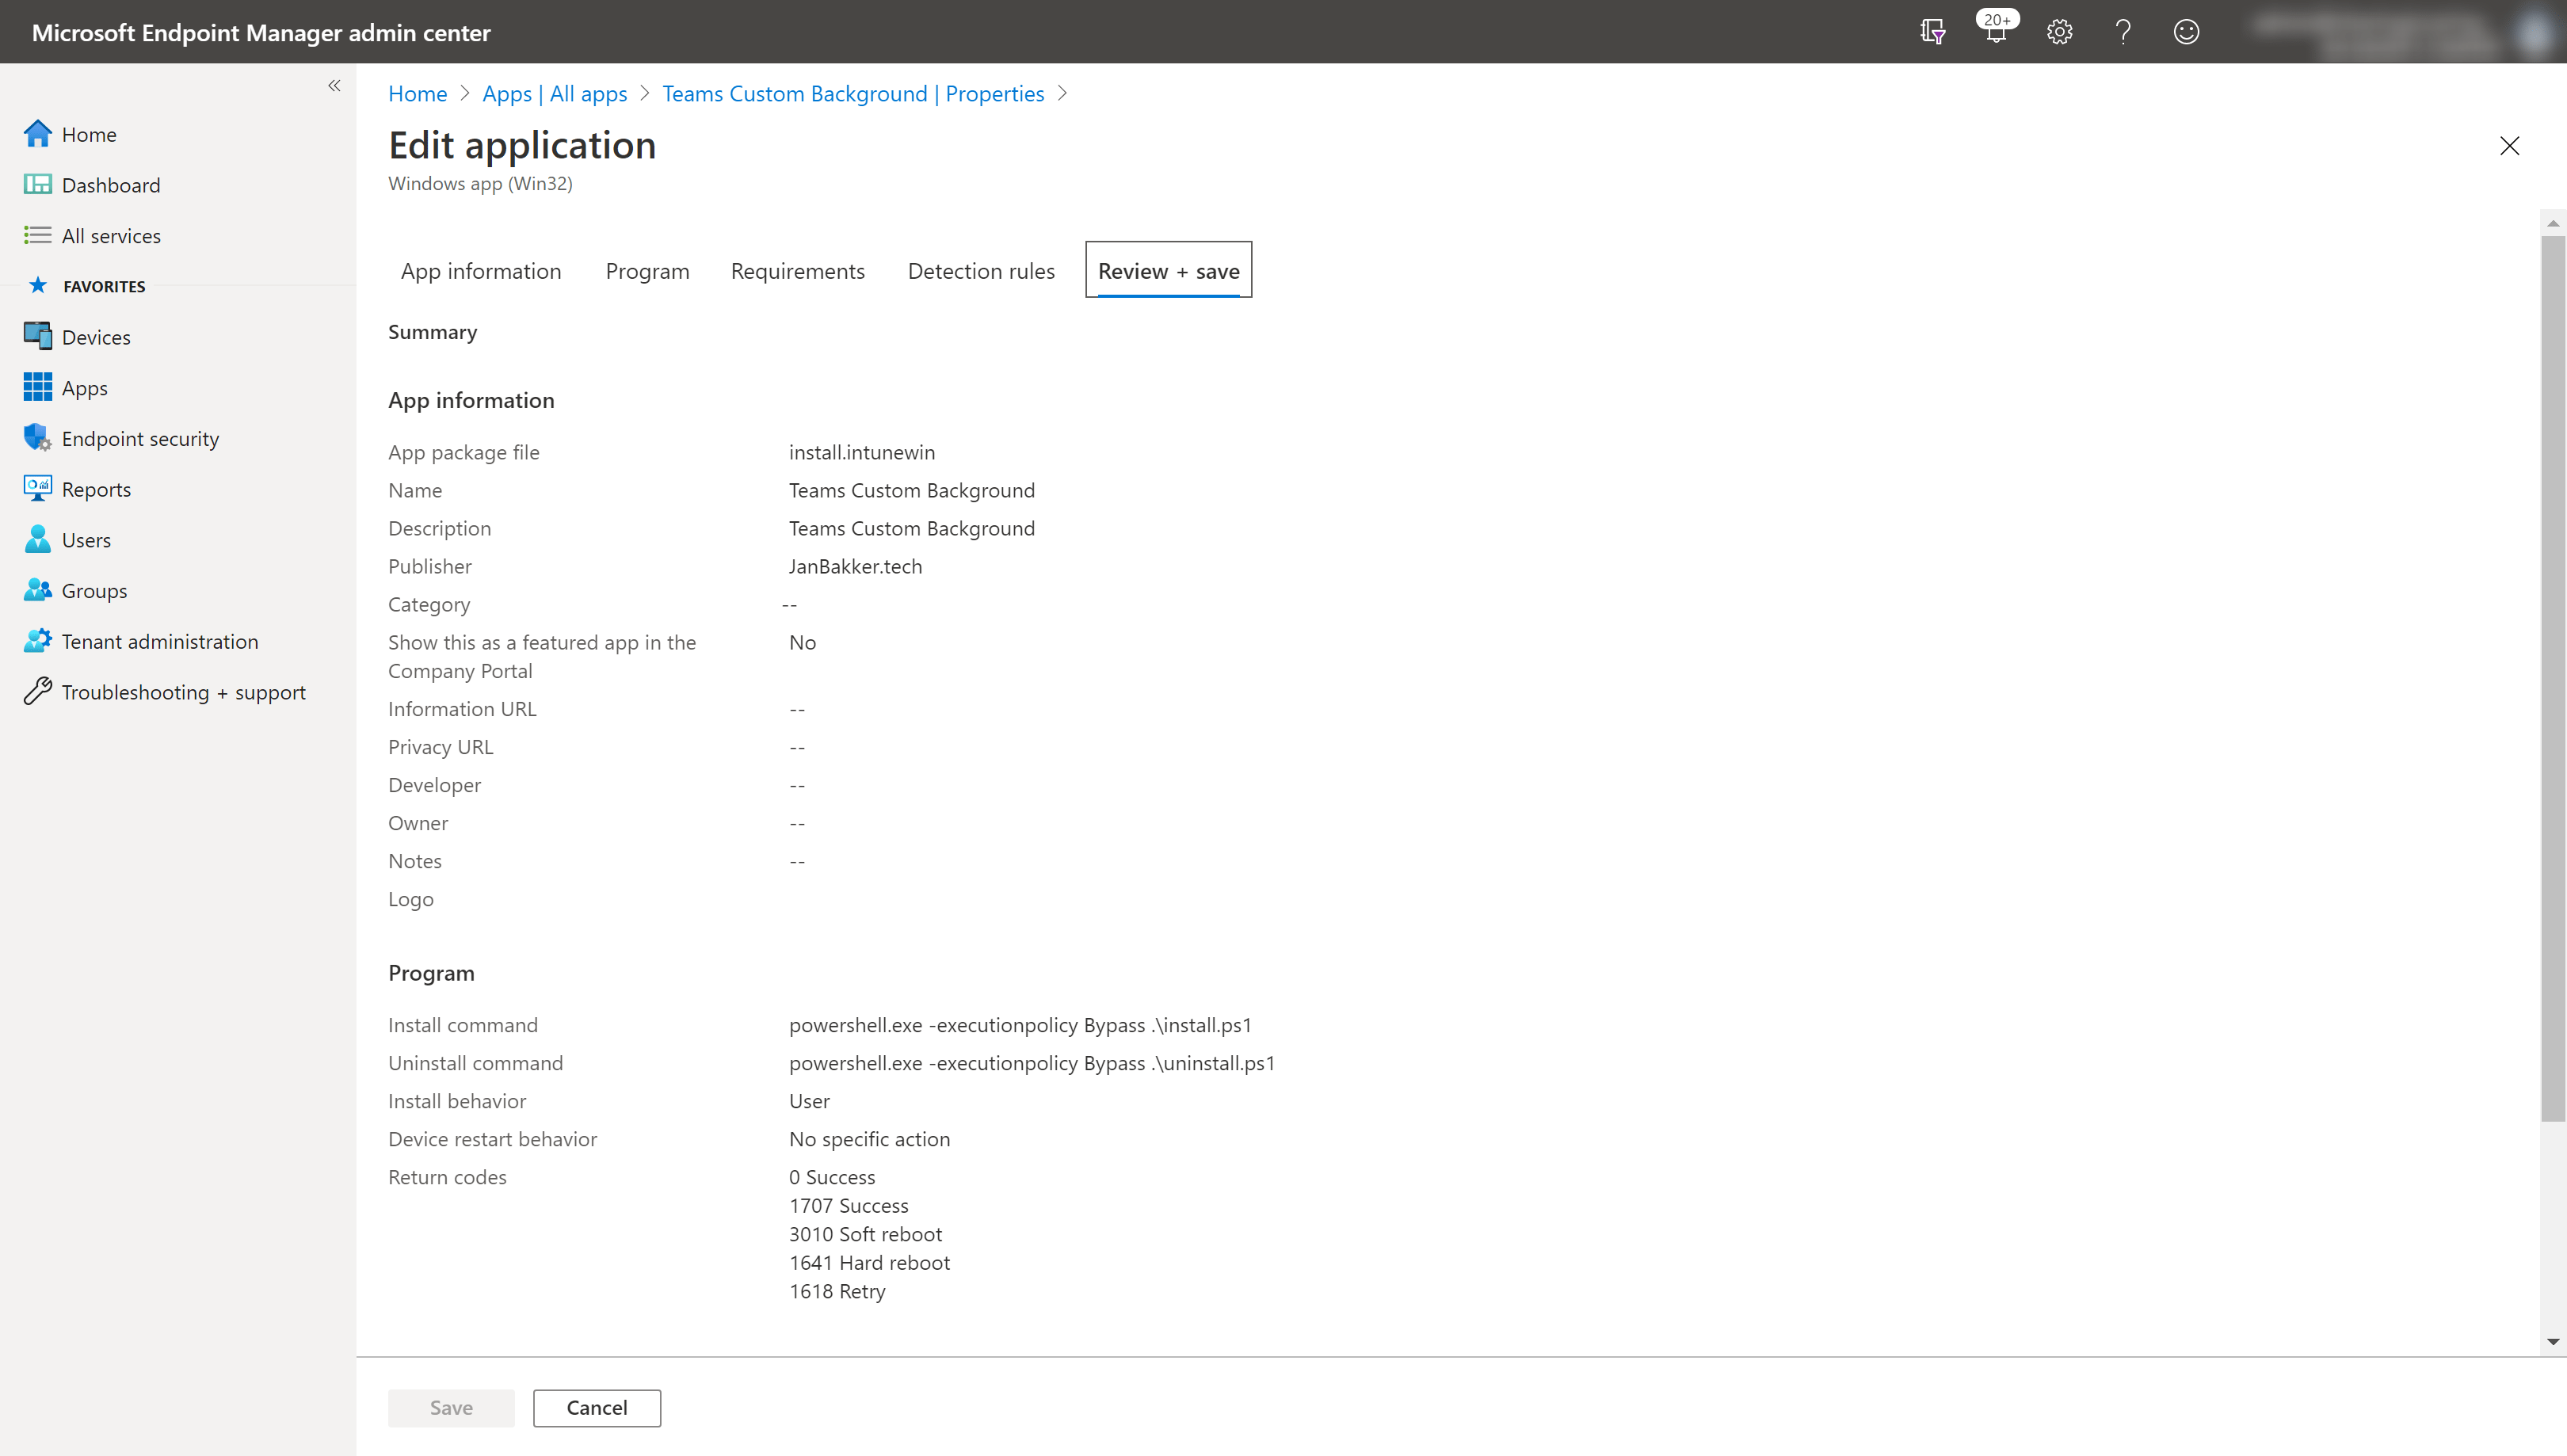
*Review your settings and click Create*
Let’s see if it works!#
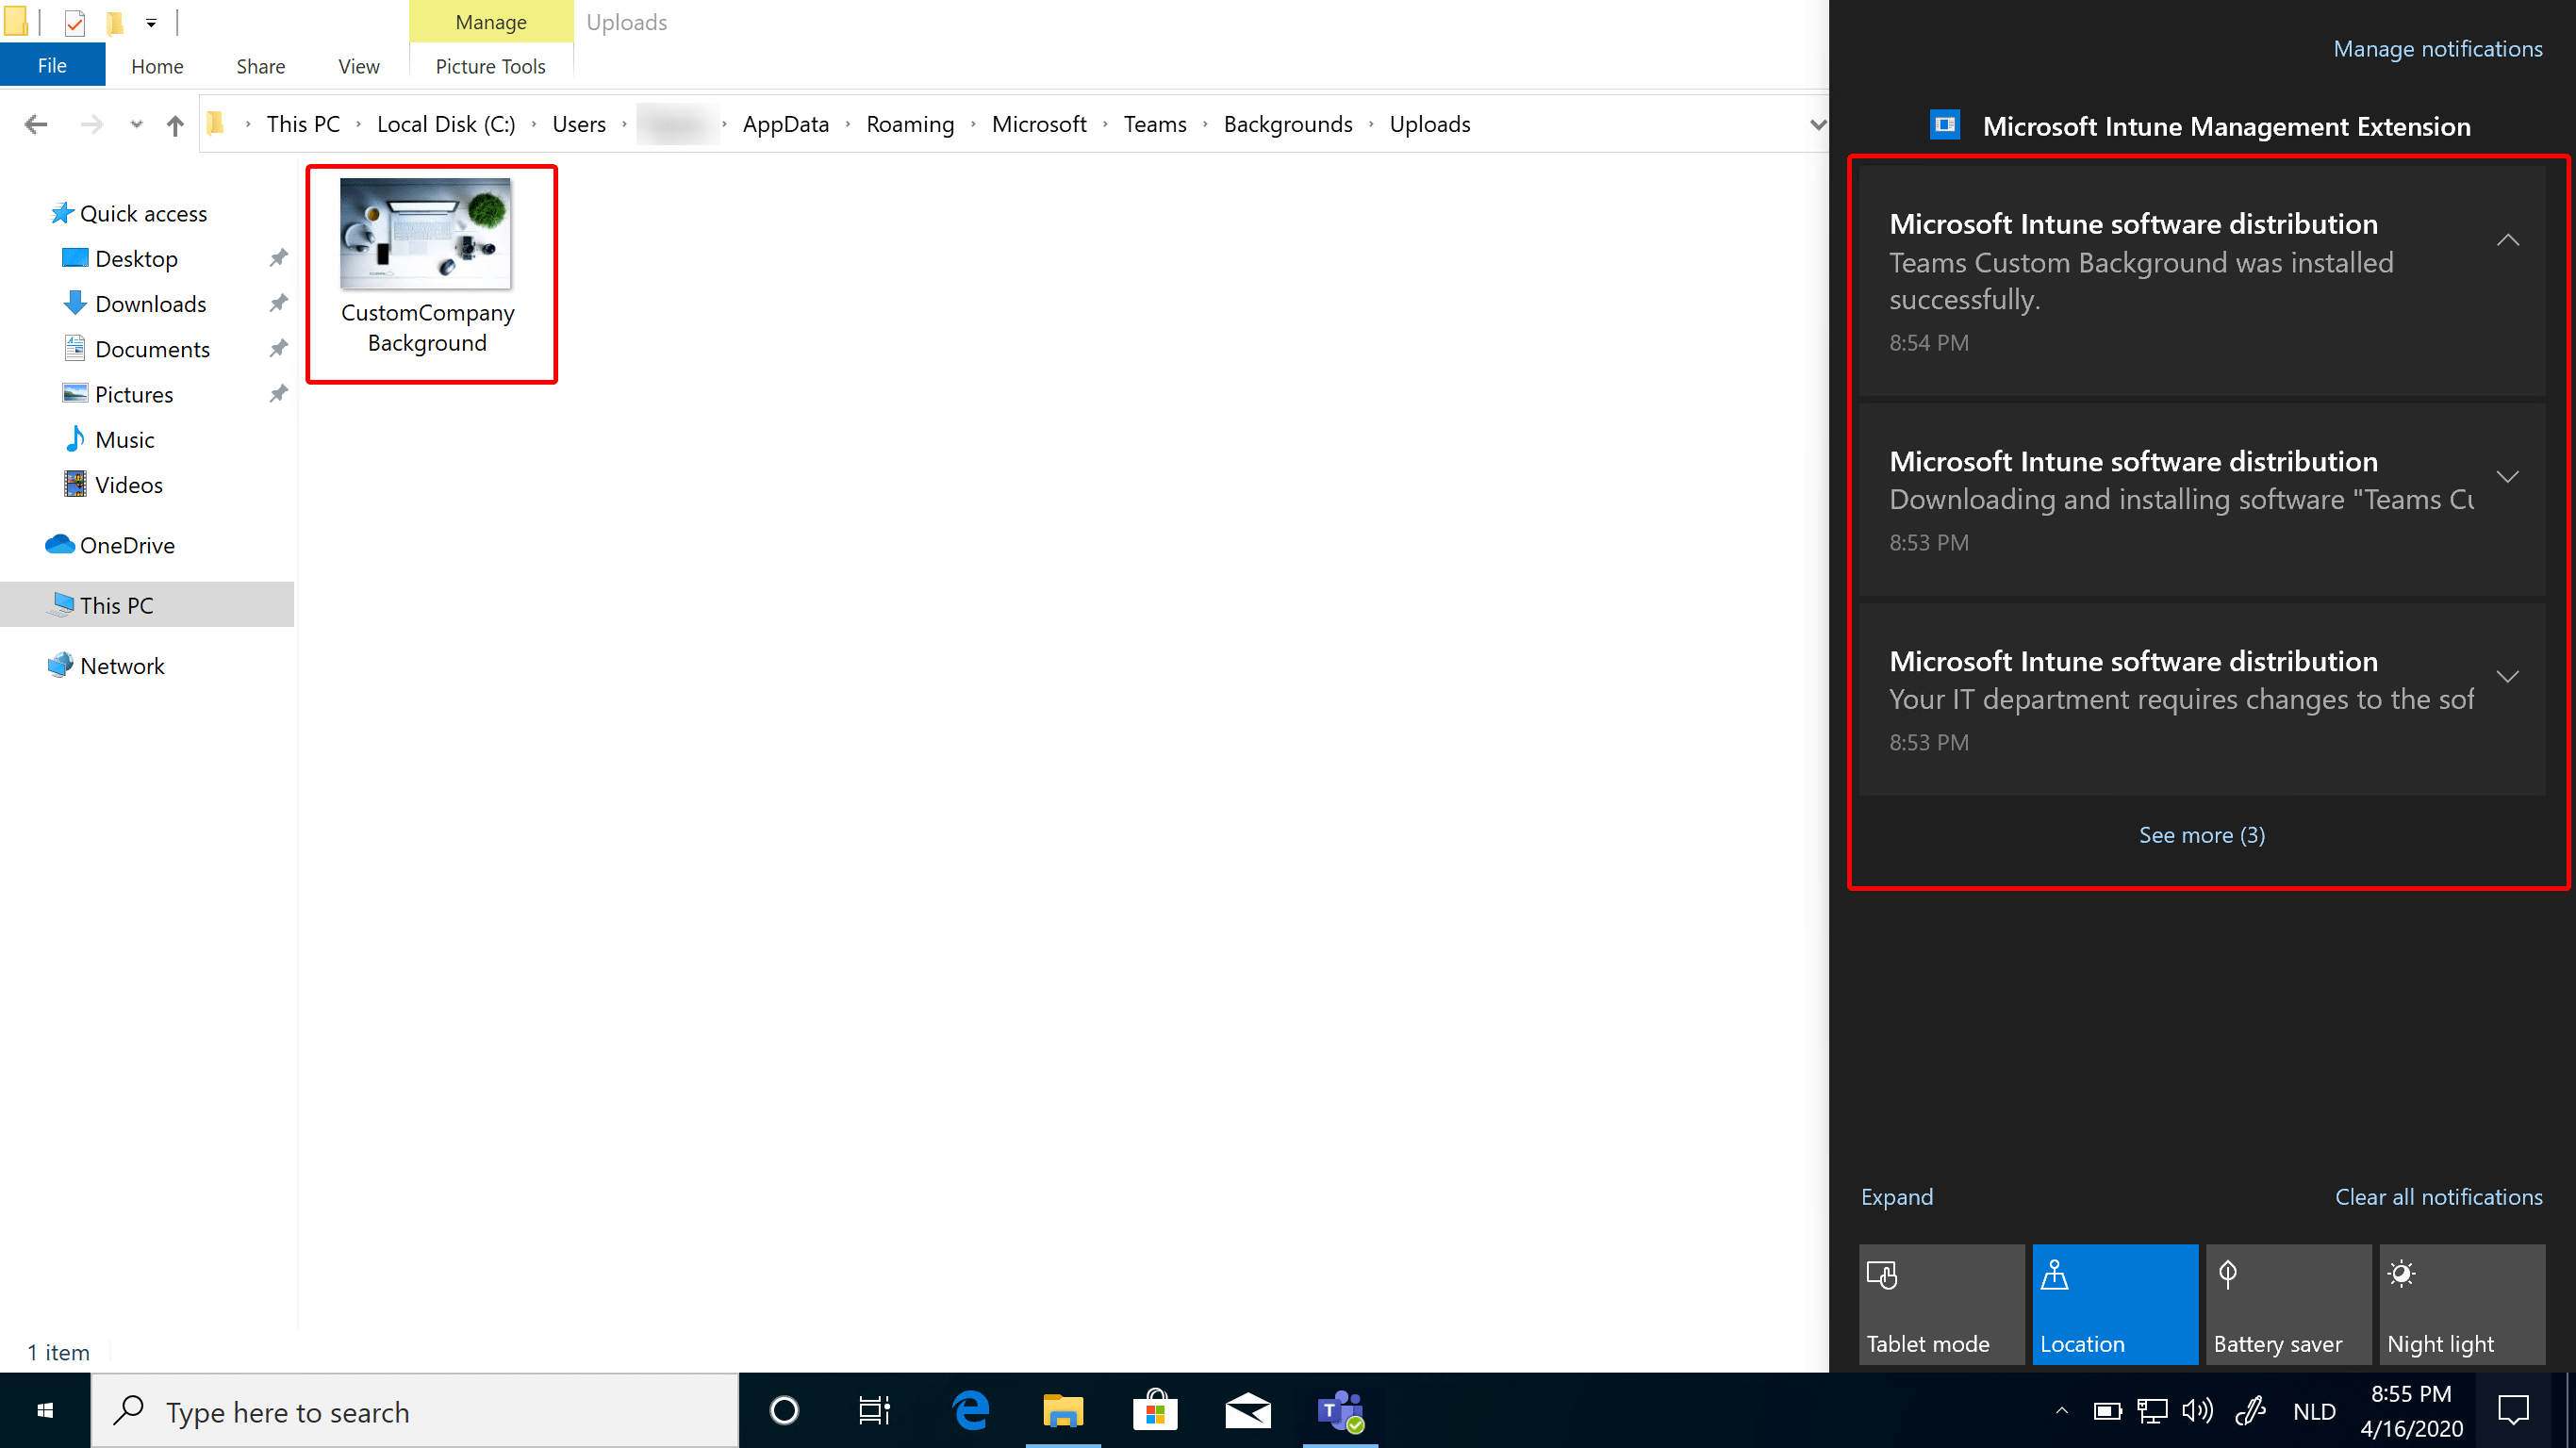
Head over to your device. You’ll see the application being installed, and the custom image is created in the Teams appdata folder.
Uninstall#
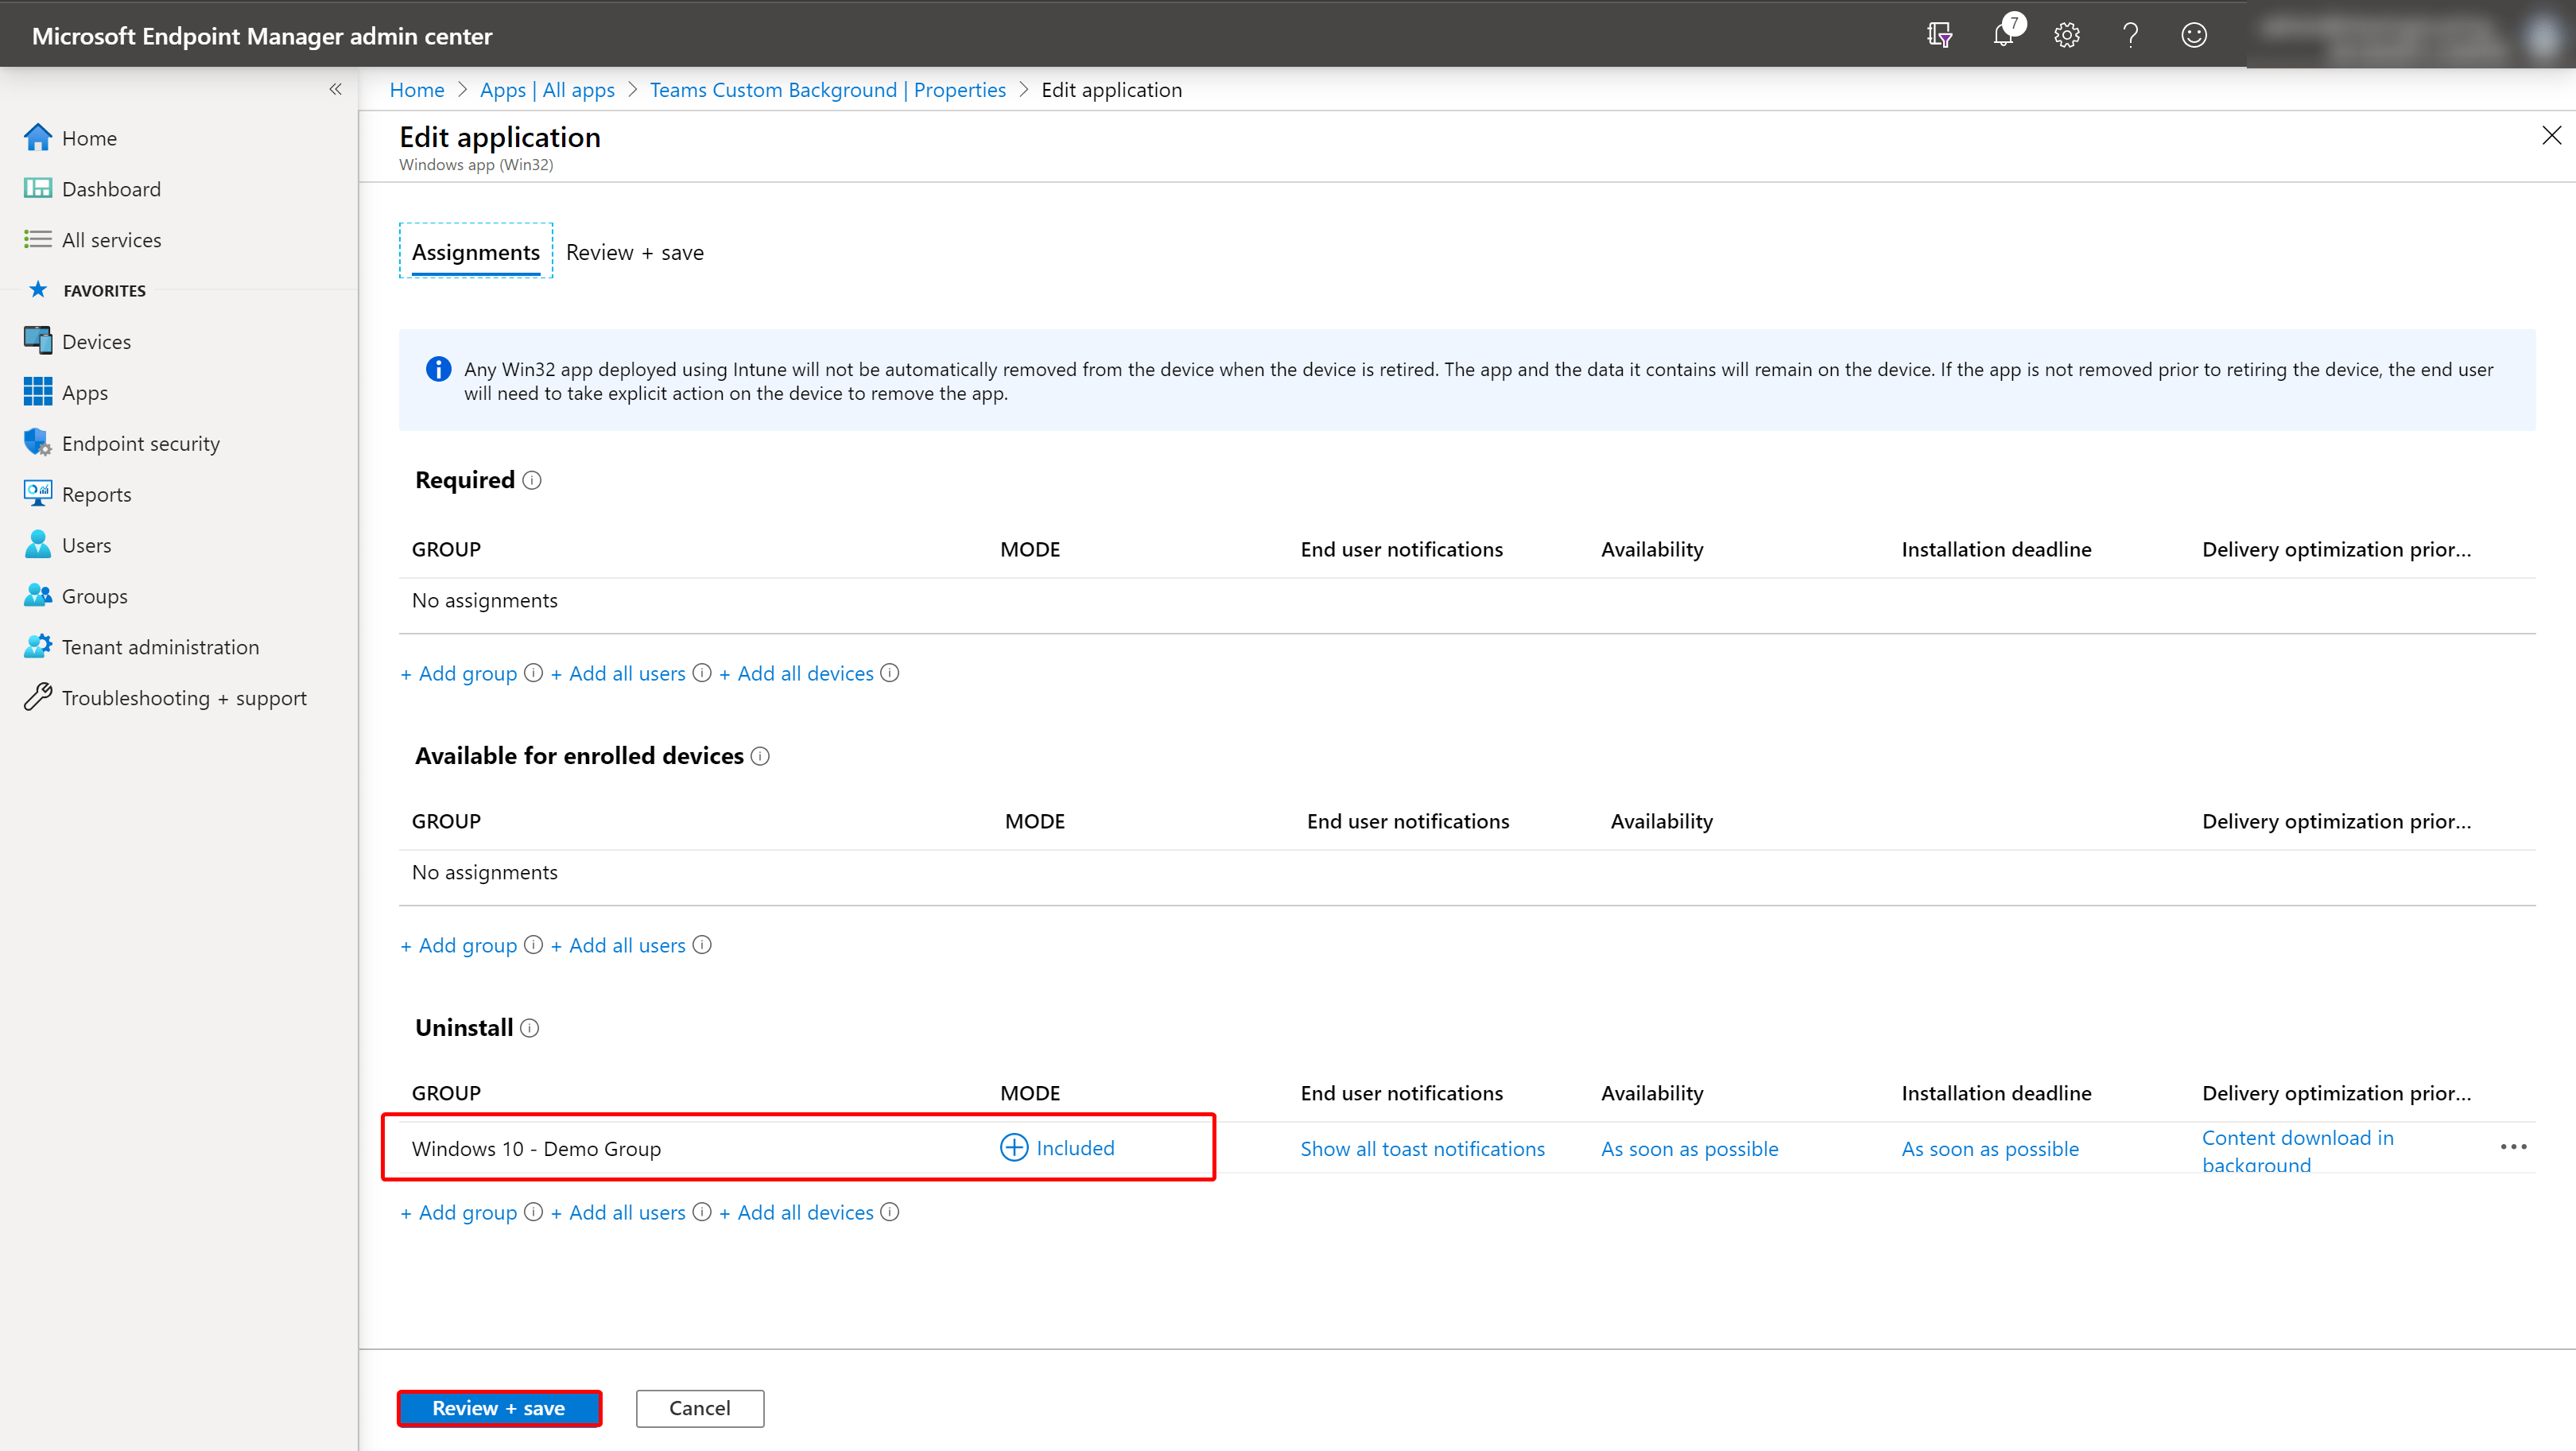
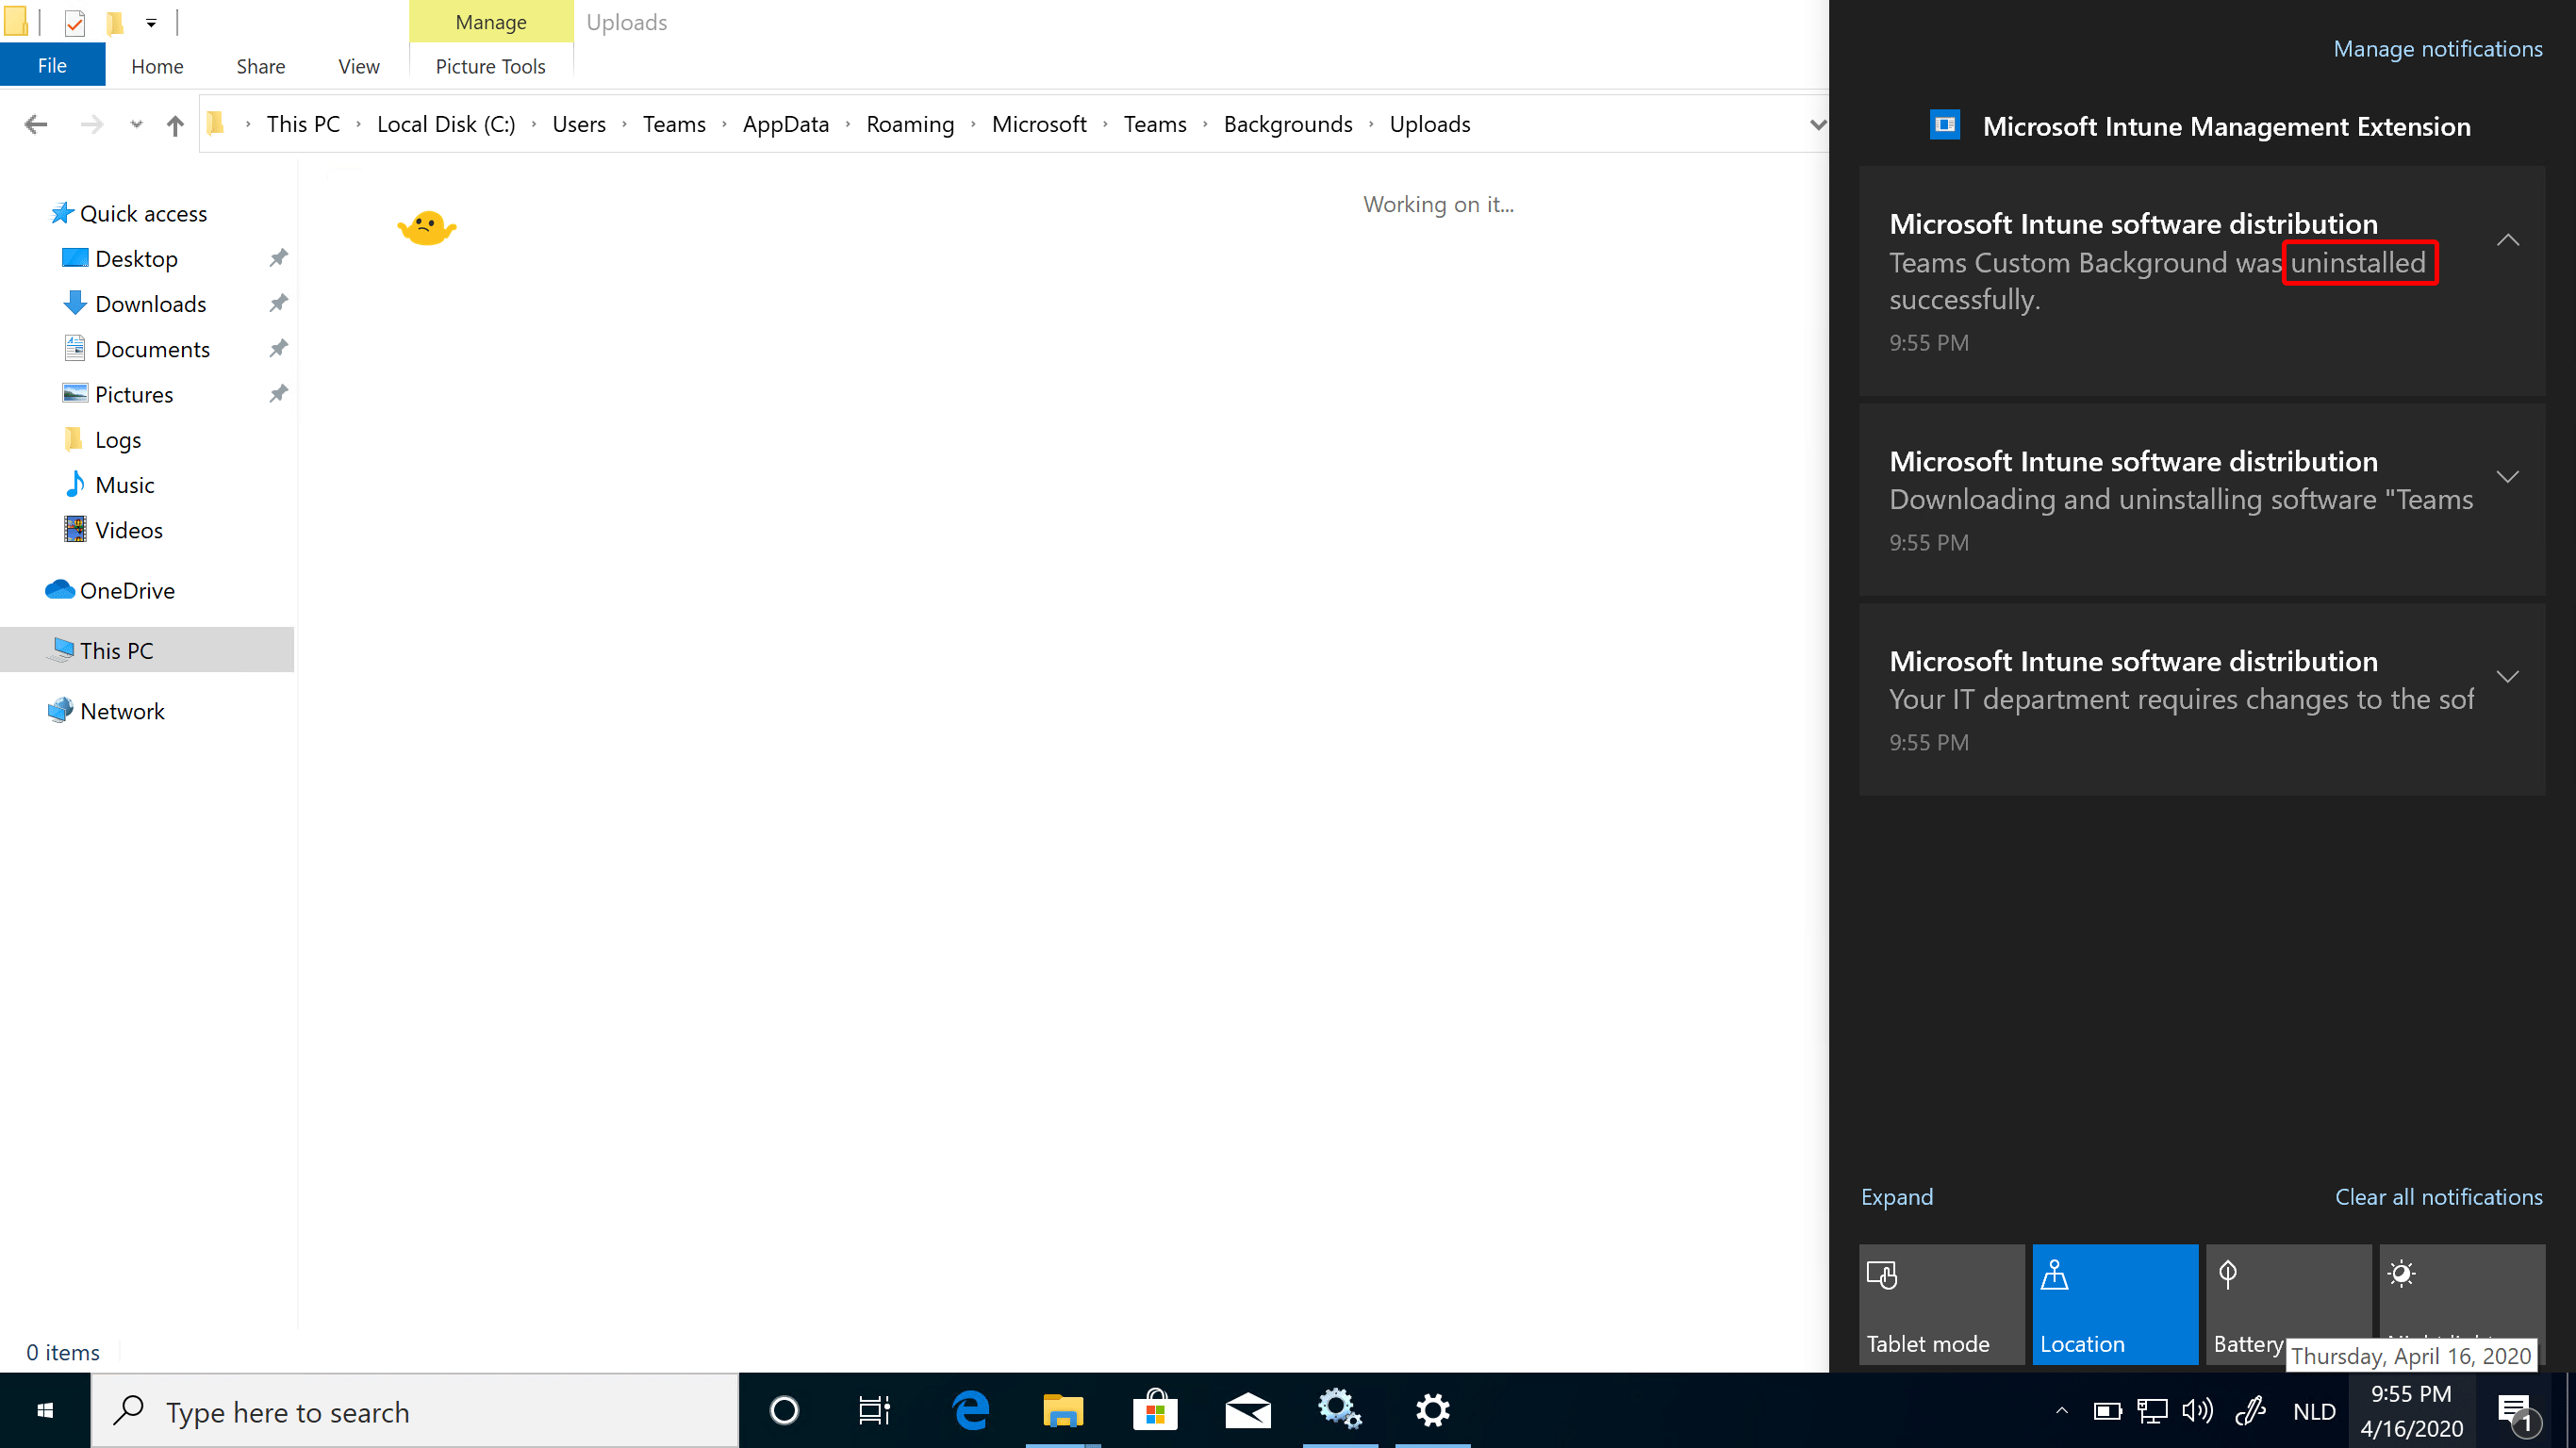
If you want your custom image deleted, just uninstall the Win32 application. Attach the group of devices in the uninstall section and make sure the mode is set to included.
Wrap things up#
I guess Microsoft is releasing a better way for the Teams users to manage their own custom background images. For now this will do the trick. You can push a company managed image, and instruct your user to use it in meetings.
This is also an example of whats is possible using Win32 apps and files. Happy deploying!
Sources used:
M365 Environment 11 – Copy Files (Win32 App)
Comments
Comments load when you scroll here.