
License on-demand with Power Automate and Azure AD
On this page
Most organizations are using group-based licensing in Azure Active Directory. This is often integrated with the onboarding process of the users. But there are some use cases where you have some non-standard licenses attached to your tenant that you hand out on demand. You could still use group-based licensing, but users are added manually to the group.
Thinking about that scenario, I came up with a pretty easy method to automate this flow. In short: a user can request a license using Microsoft Forms. Once that request is approved, the user is added to the Azure AD group. The group is attached to the specific license, so the user is ending up with the requested license within minutes after the approval. Here’s the overview of the process:
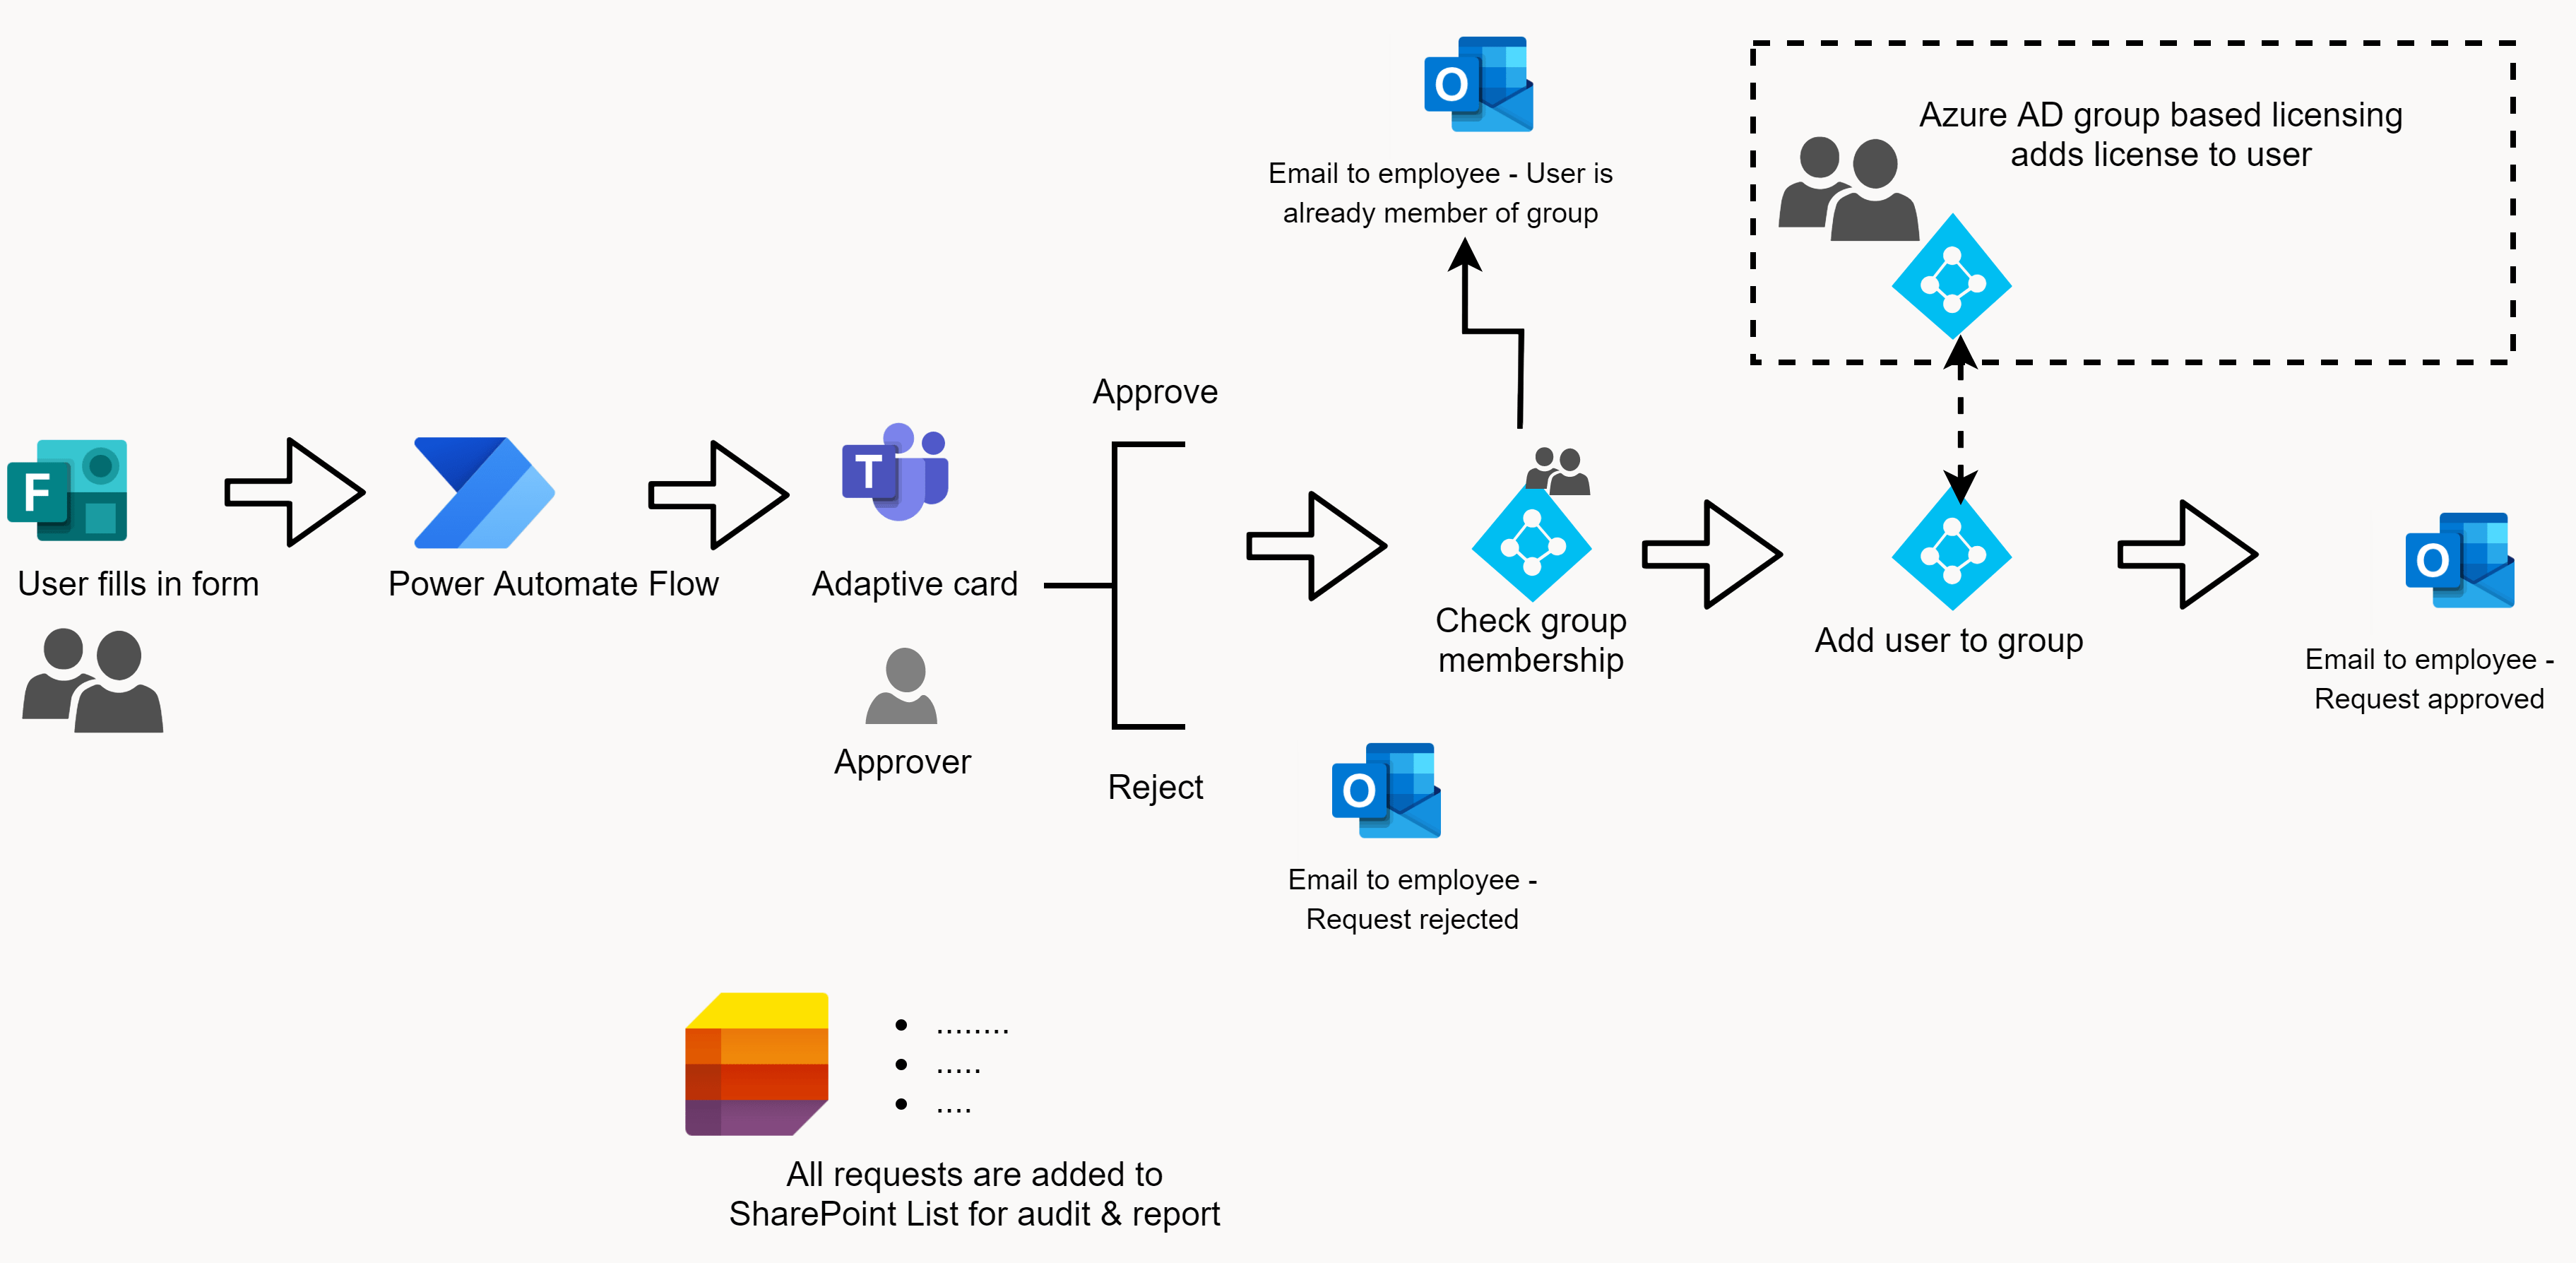
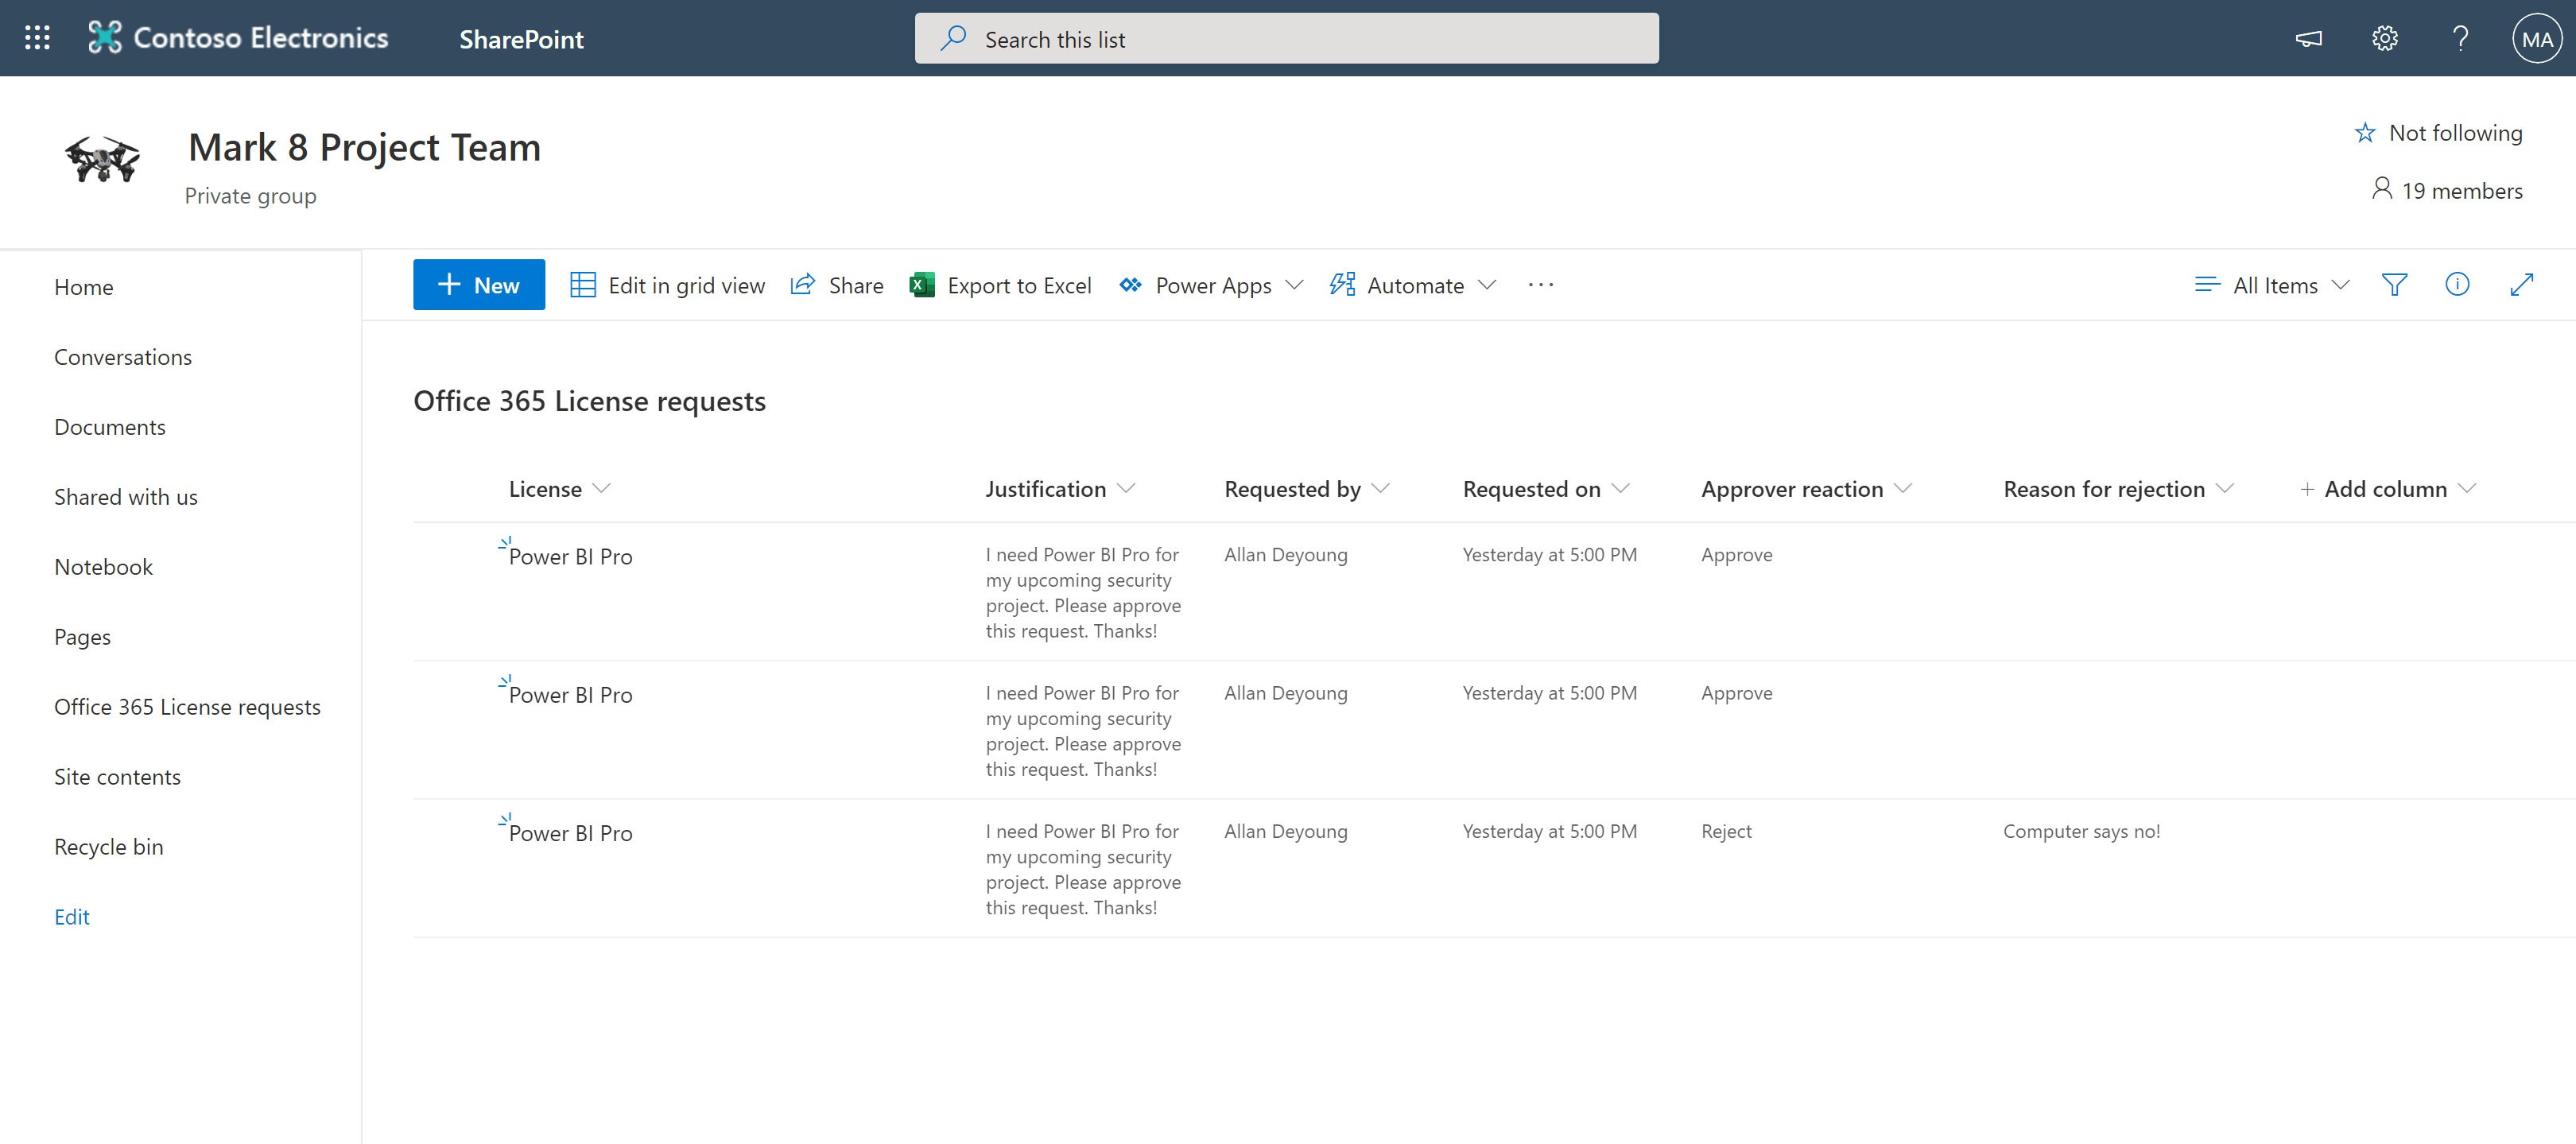
All requests are logged into a SharePoint list, and there is some notification in place using email. The flow checks the membership before adding the user to the specific group.
At the end of this article, there is a link where you can download the template for this flow. But first, make sure you have all the prerequisites in place before you start.
First things first#
Before you can use the flow, you’ll need to set up group-based licensing for your licenses. In this example, I have created 4 Azure AD Groups that will be attached to the licenses.
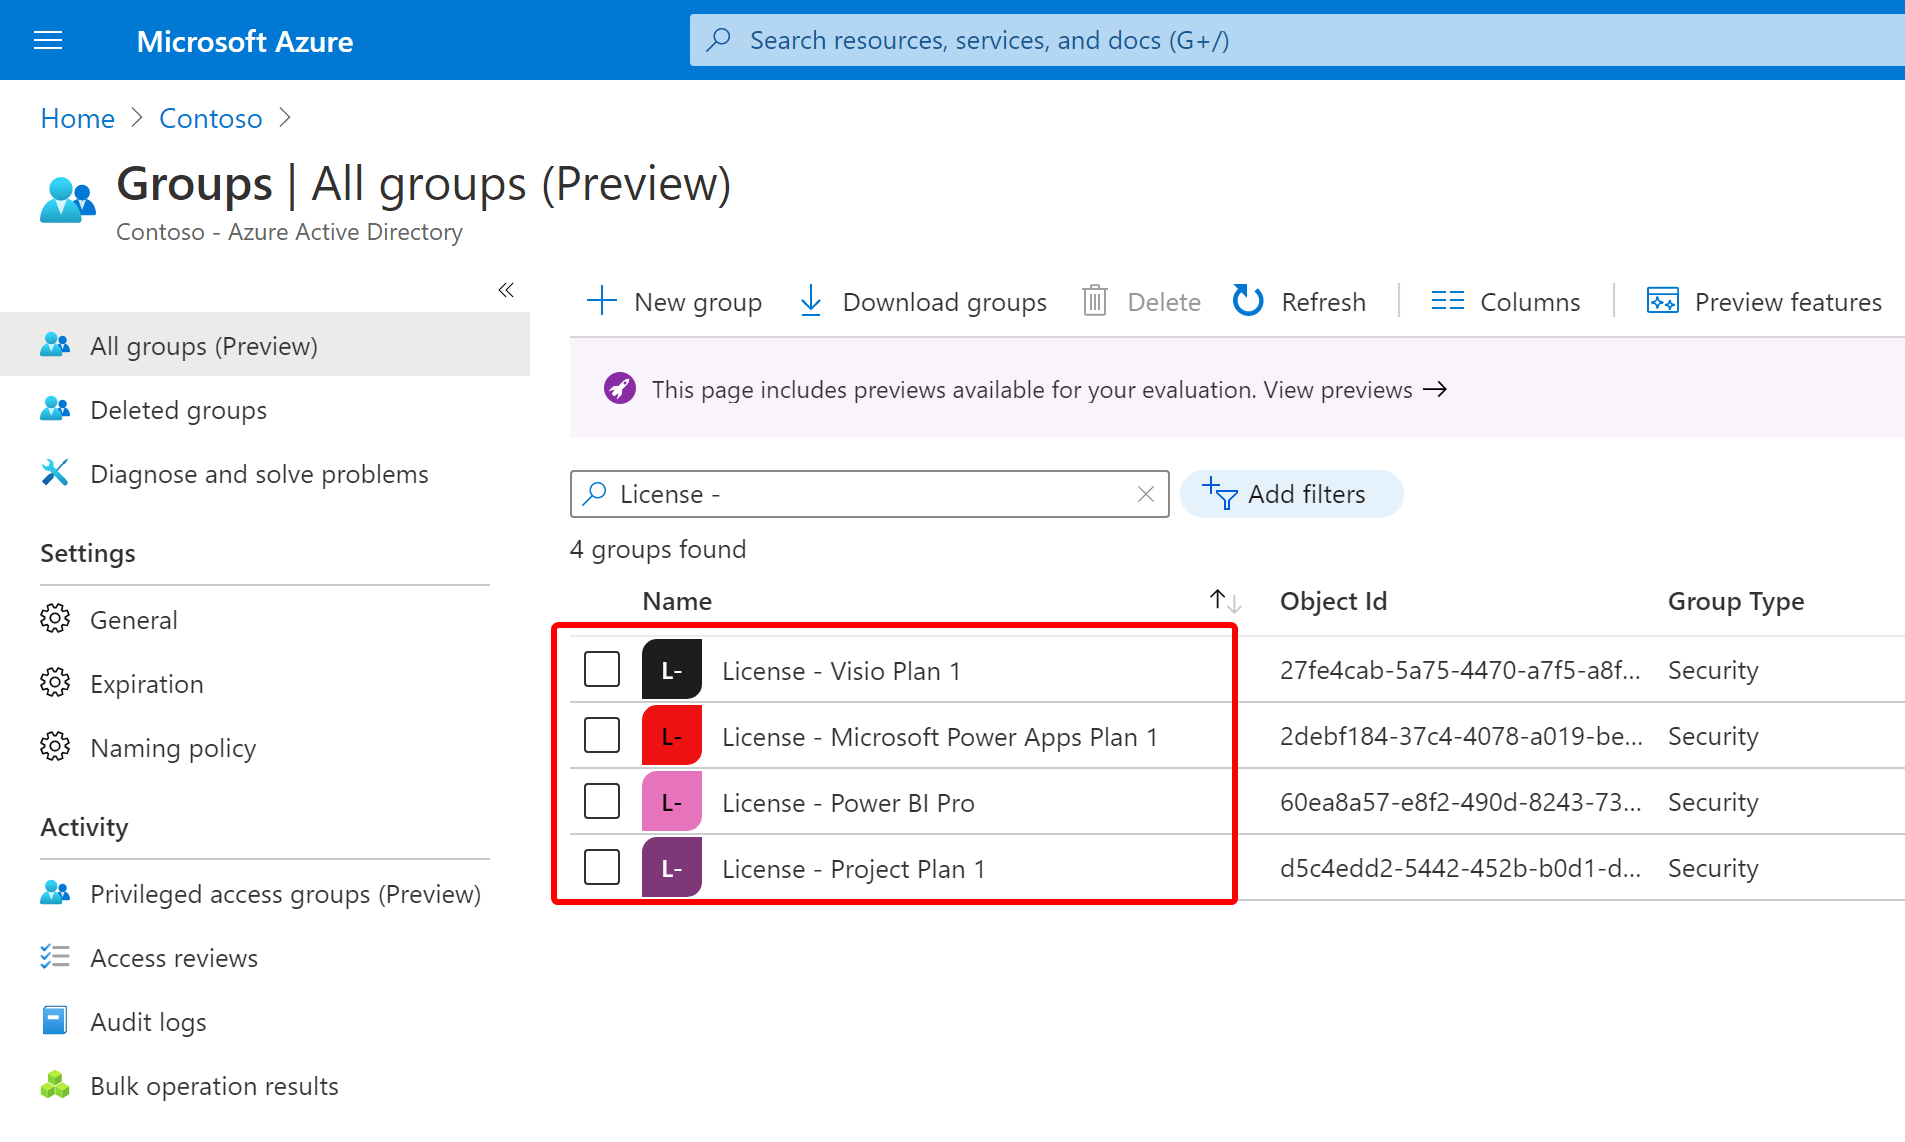
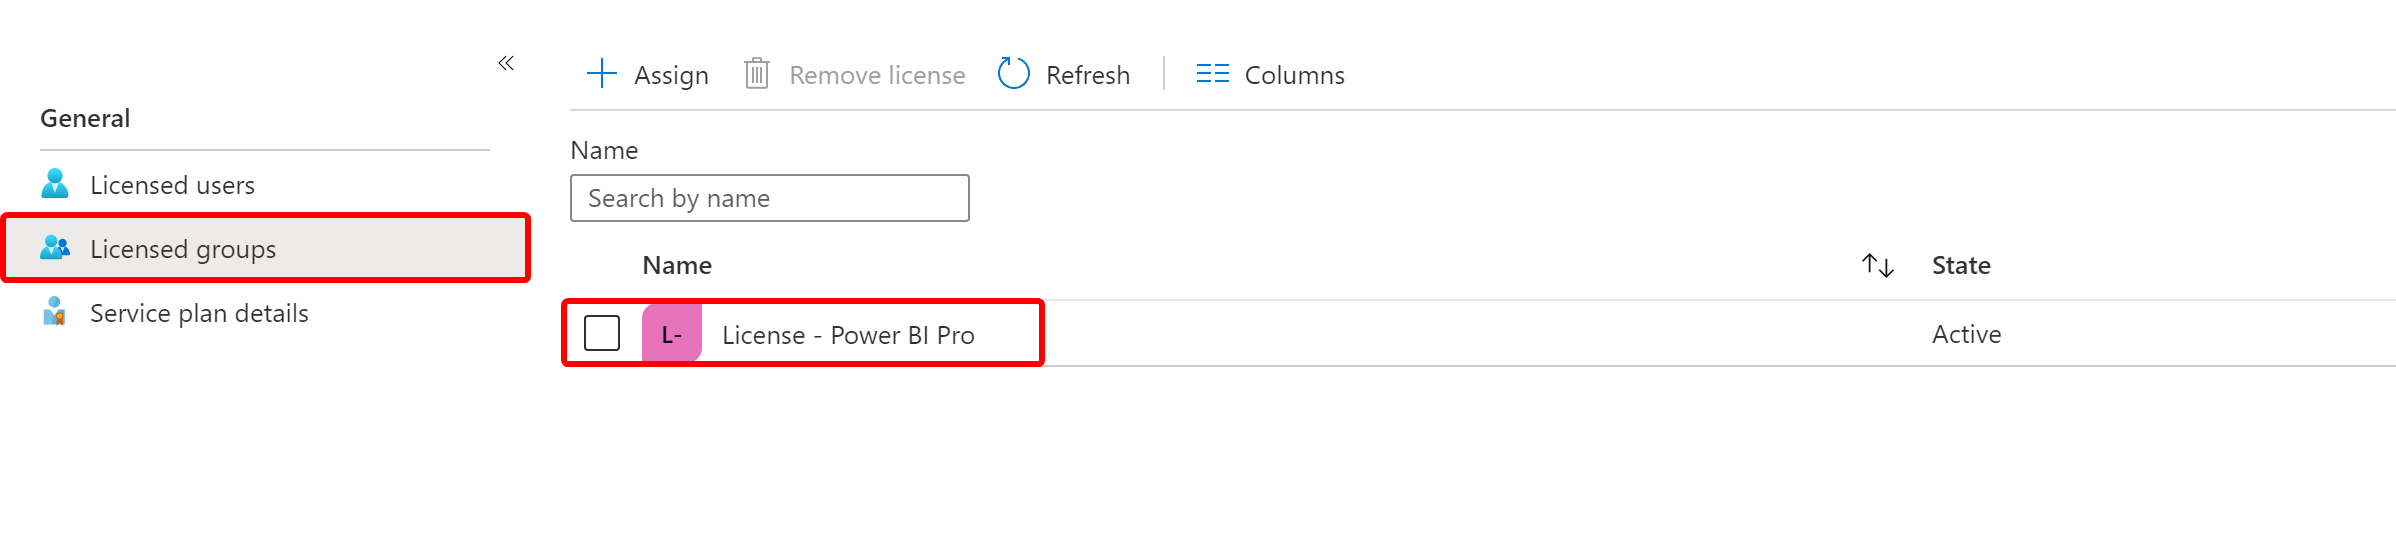
Next, make sure that you configured the groups with group-based licensing. You can configure the settings using the Azure portal. Under Azure Active Directory -> Licenses -> All products. Select your license, and configure the licensed groups.
The form#
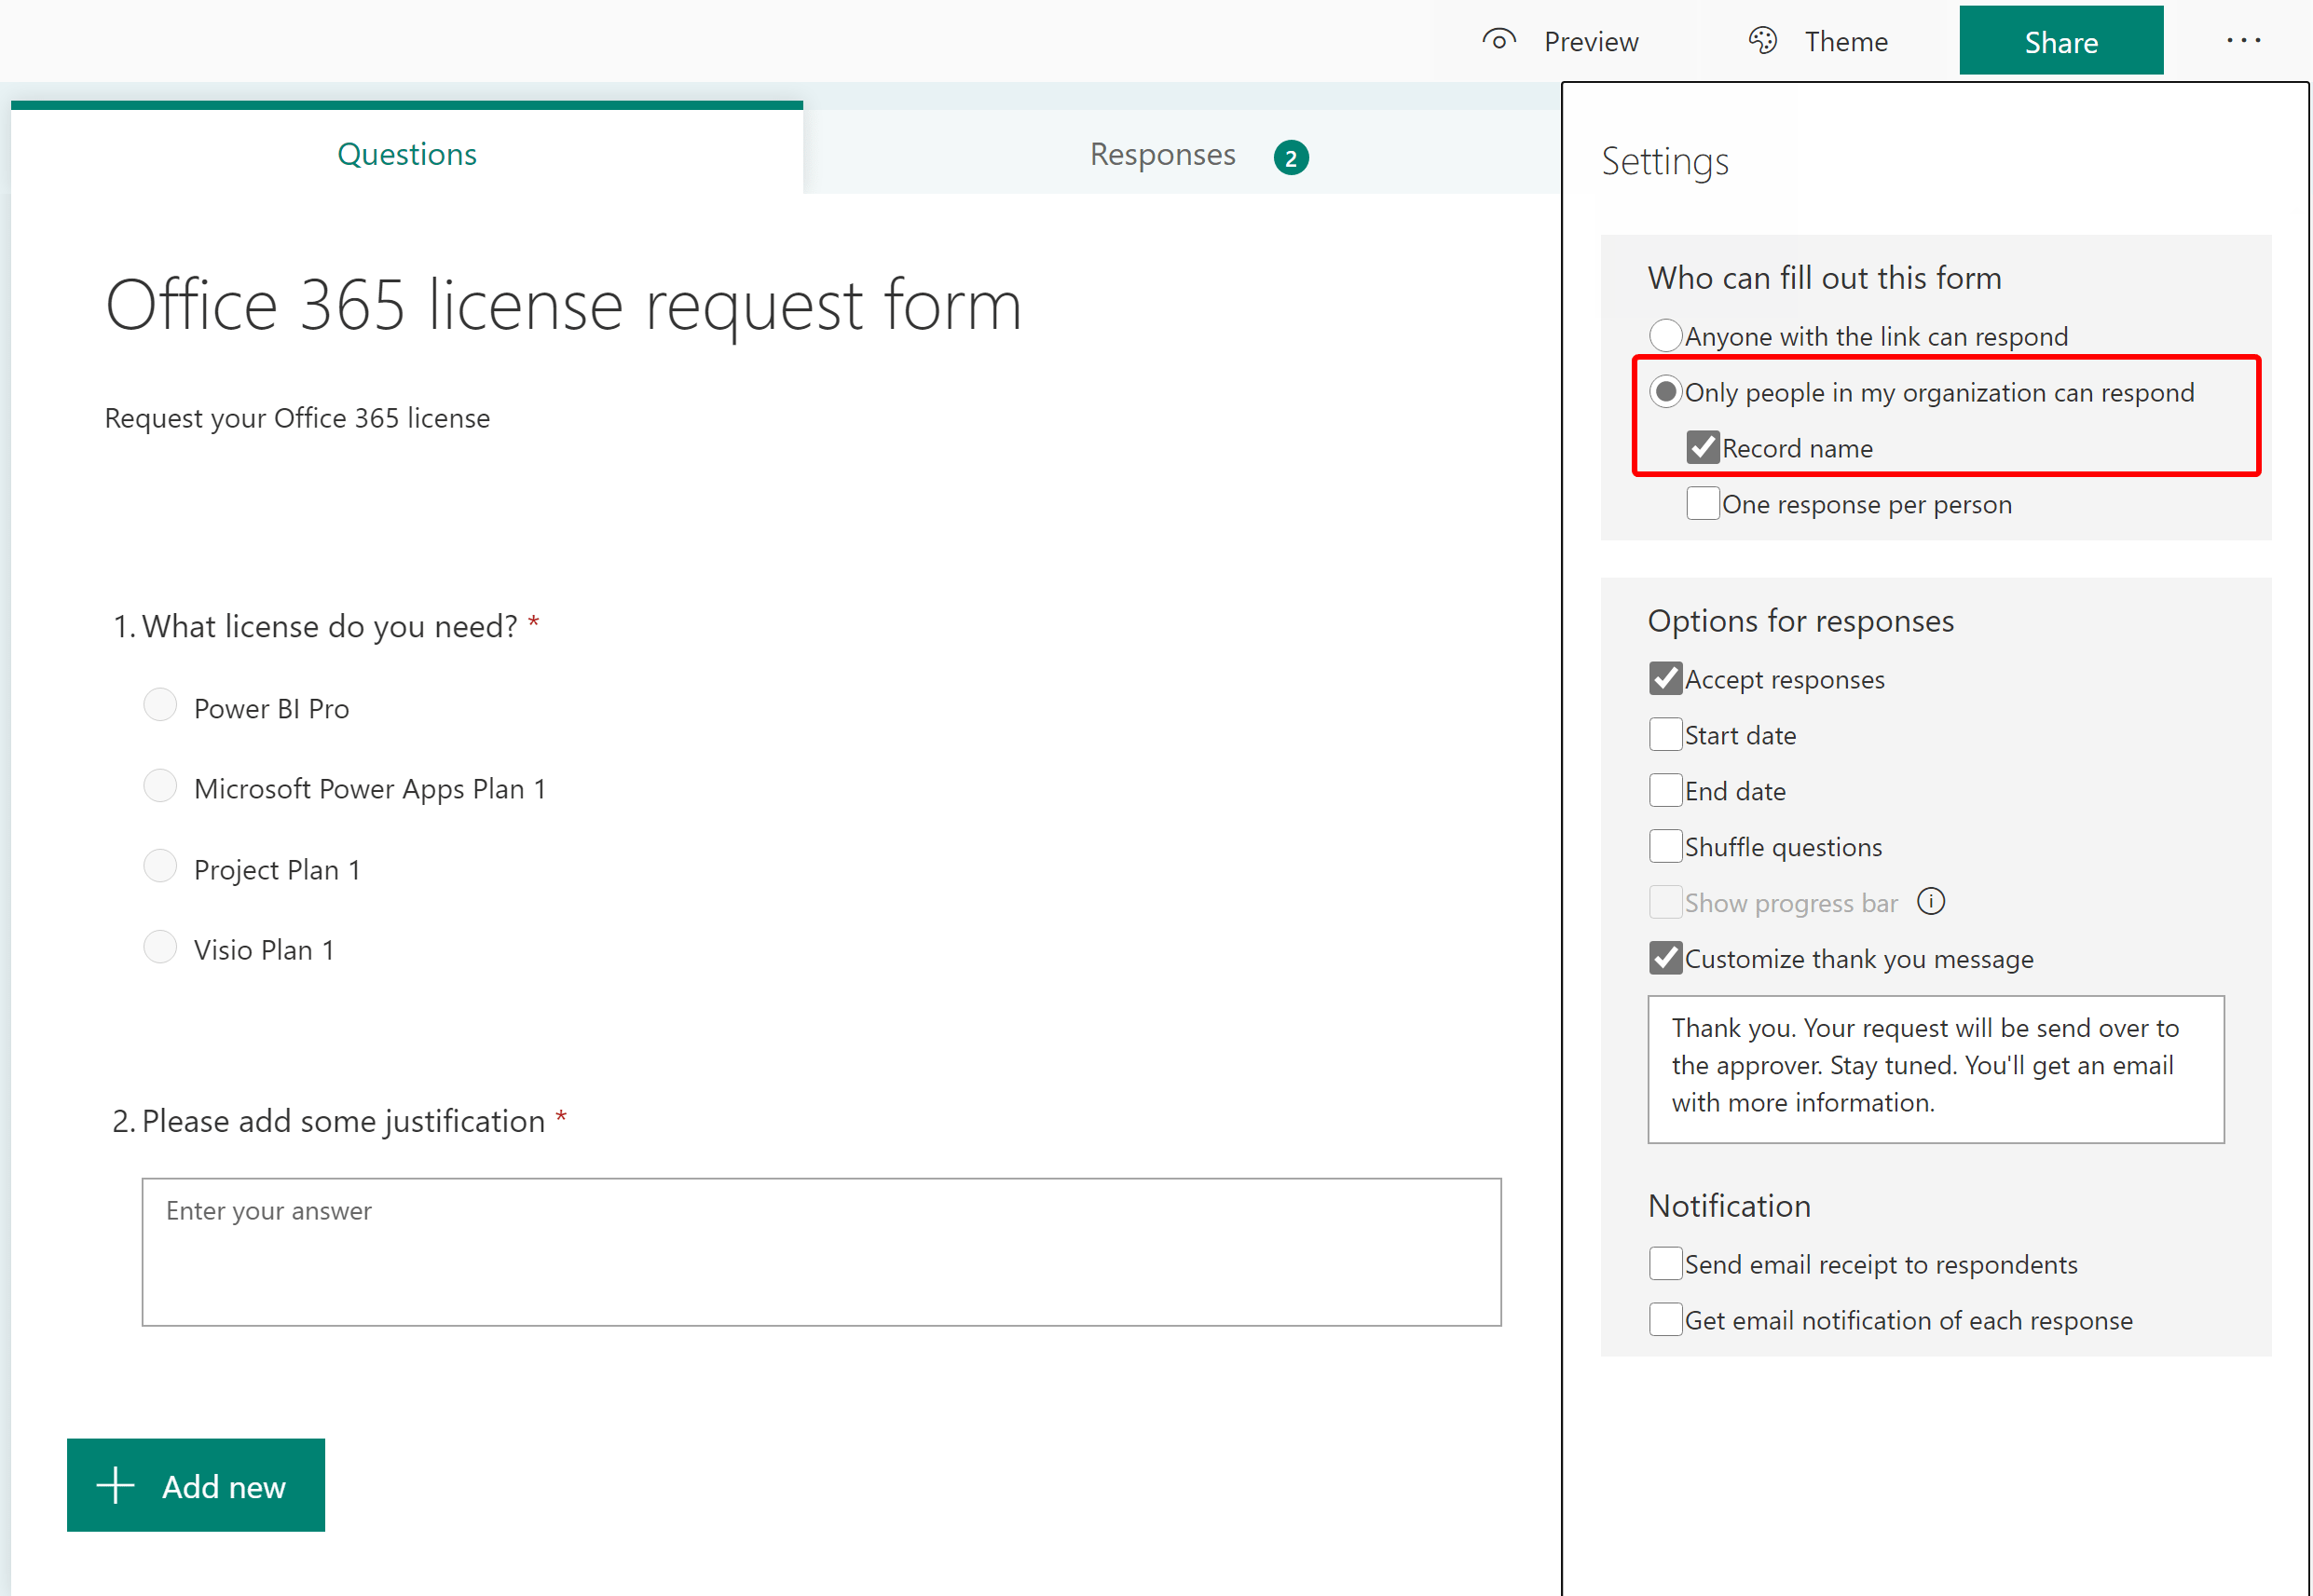
Next, we have to build the form. The form is very basic. Make sure that you select the right settings so that the form is only accessible for people within your organization.
Prepare the SharePoint list#
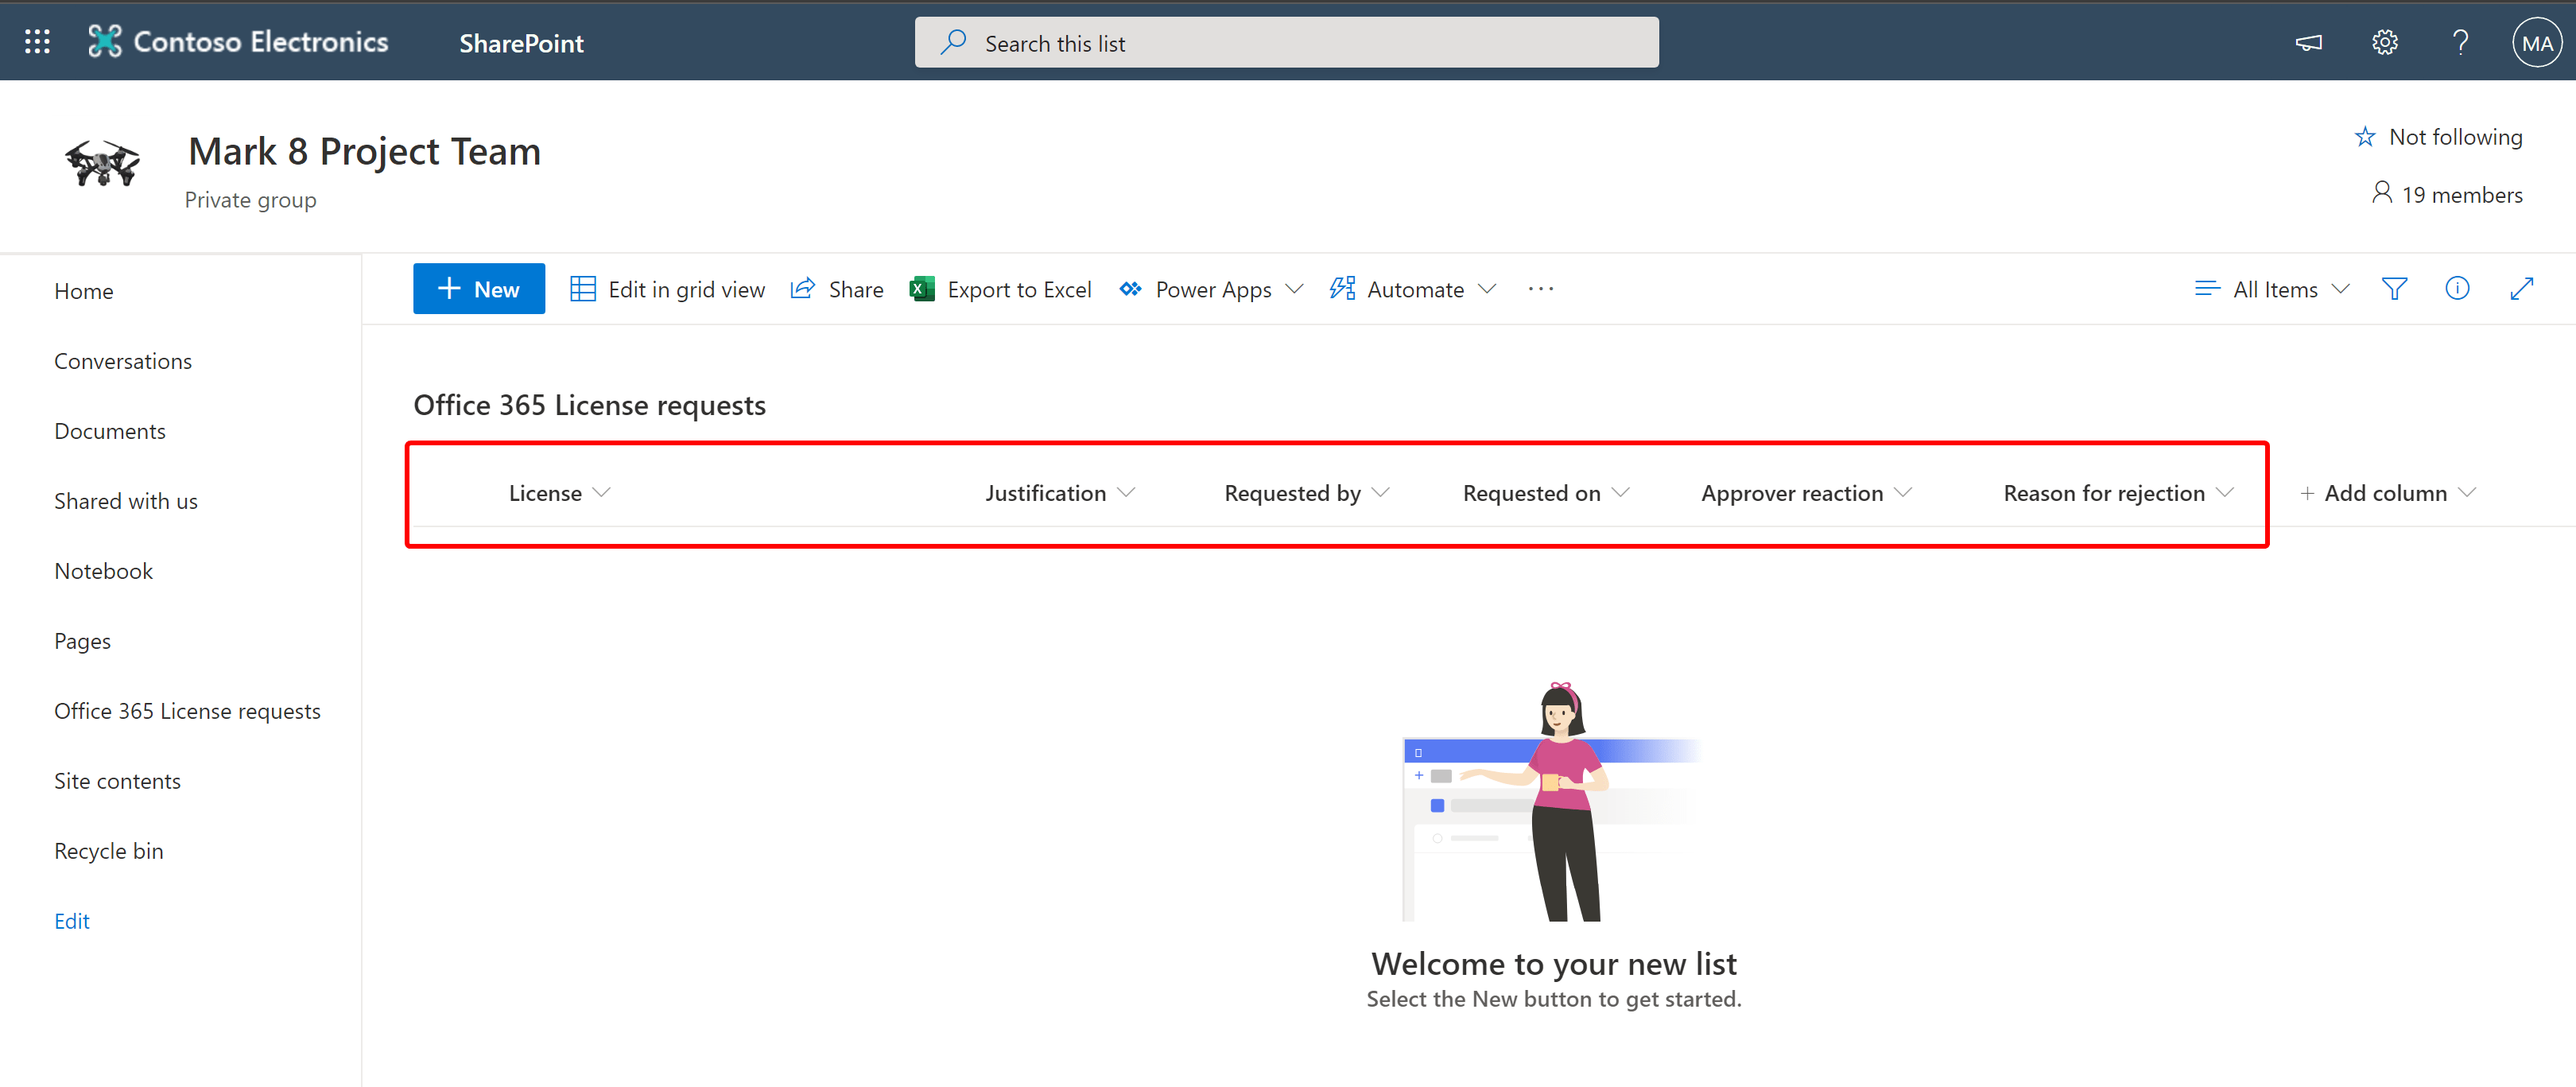
Create a new list in SharePoint. Add the columns to your list, so you can keep track of the requests.
Build the flow#
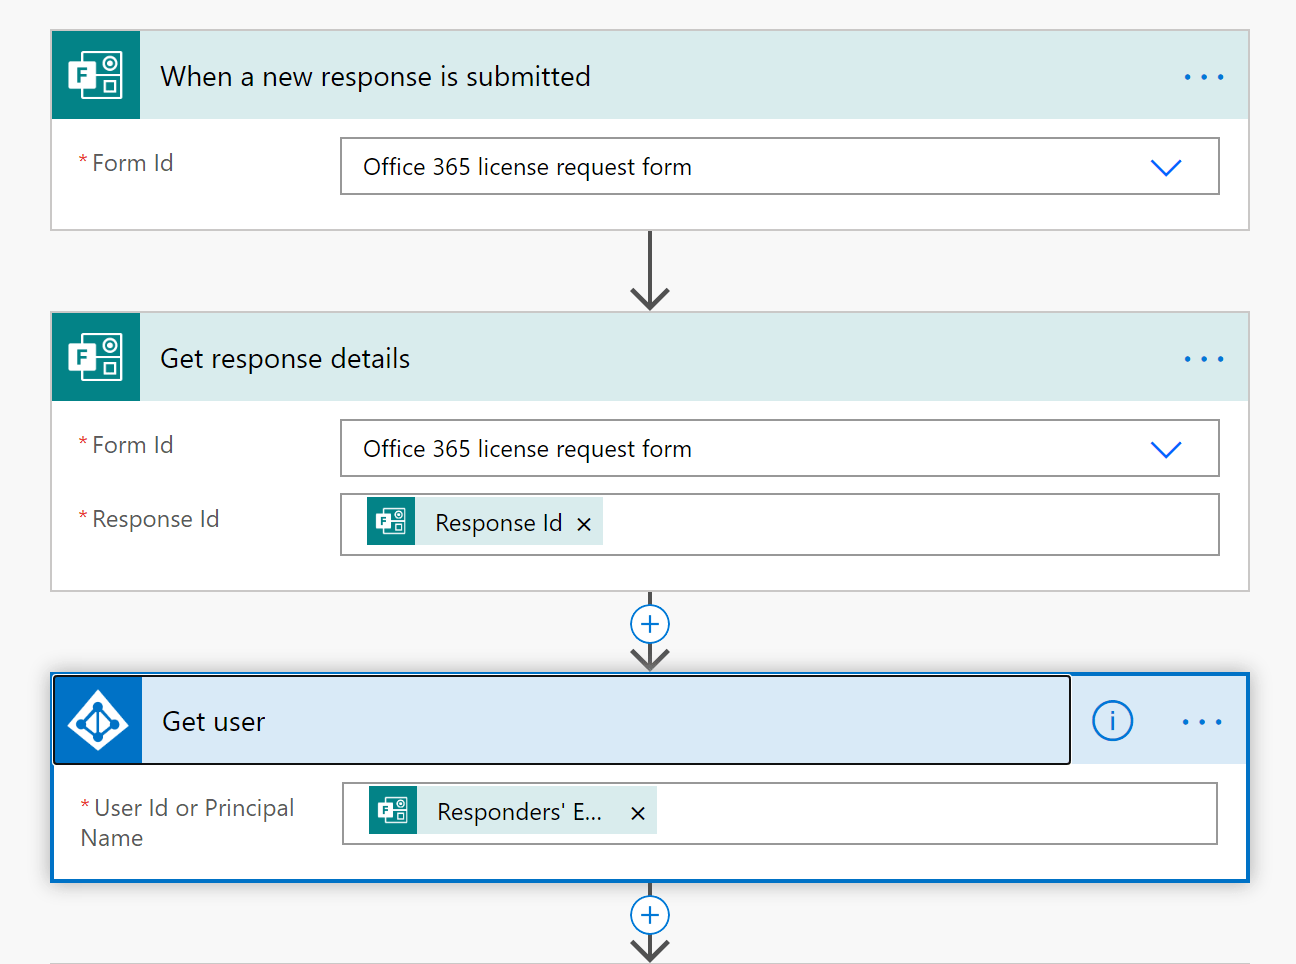
I’m not going into detail, but the flow in Power Automate is pretty straight forward. Begin with an empty flow, and grab the info from the request form and the user.
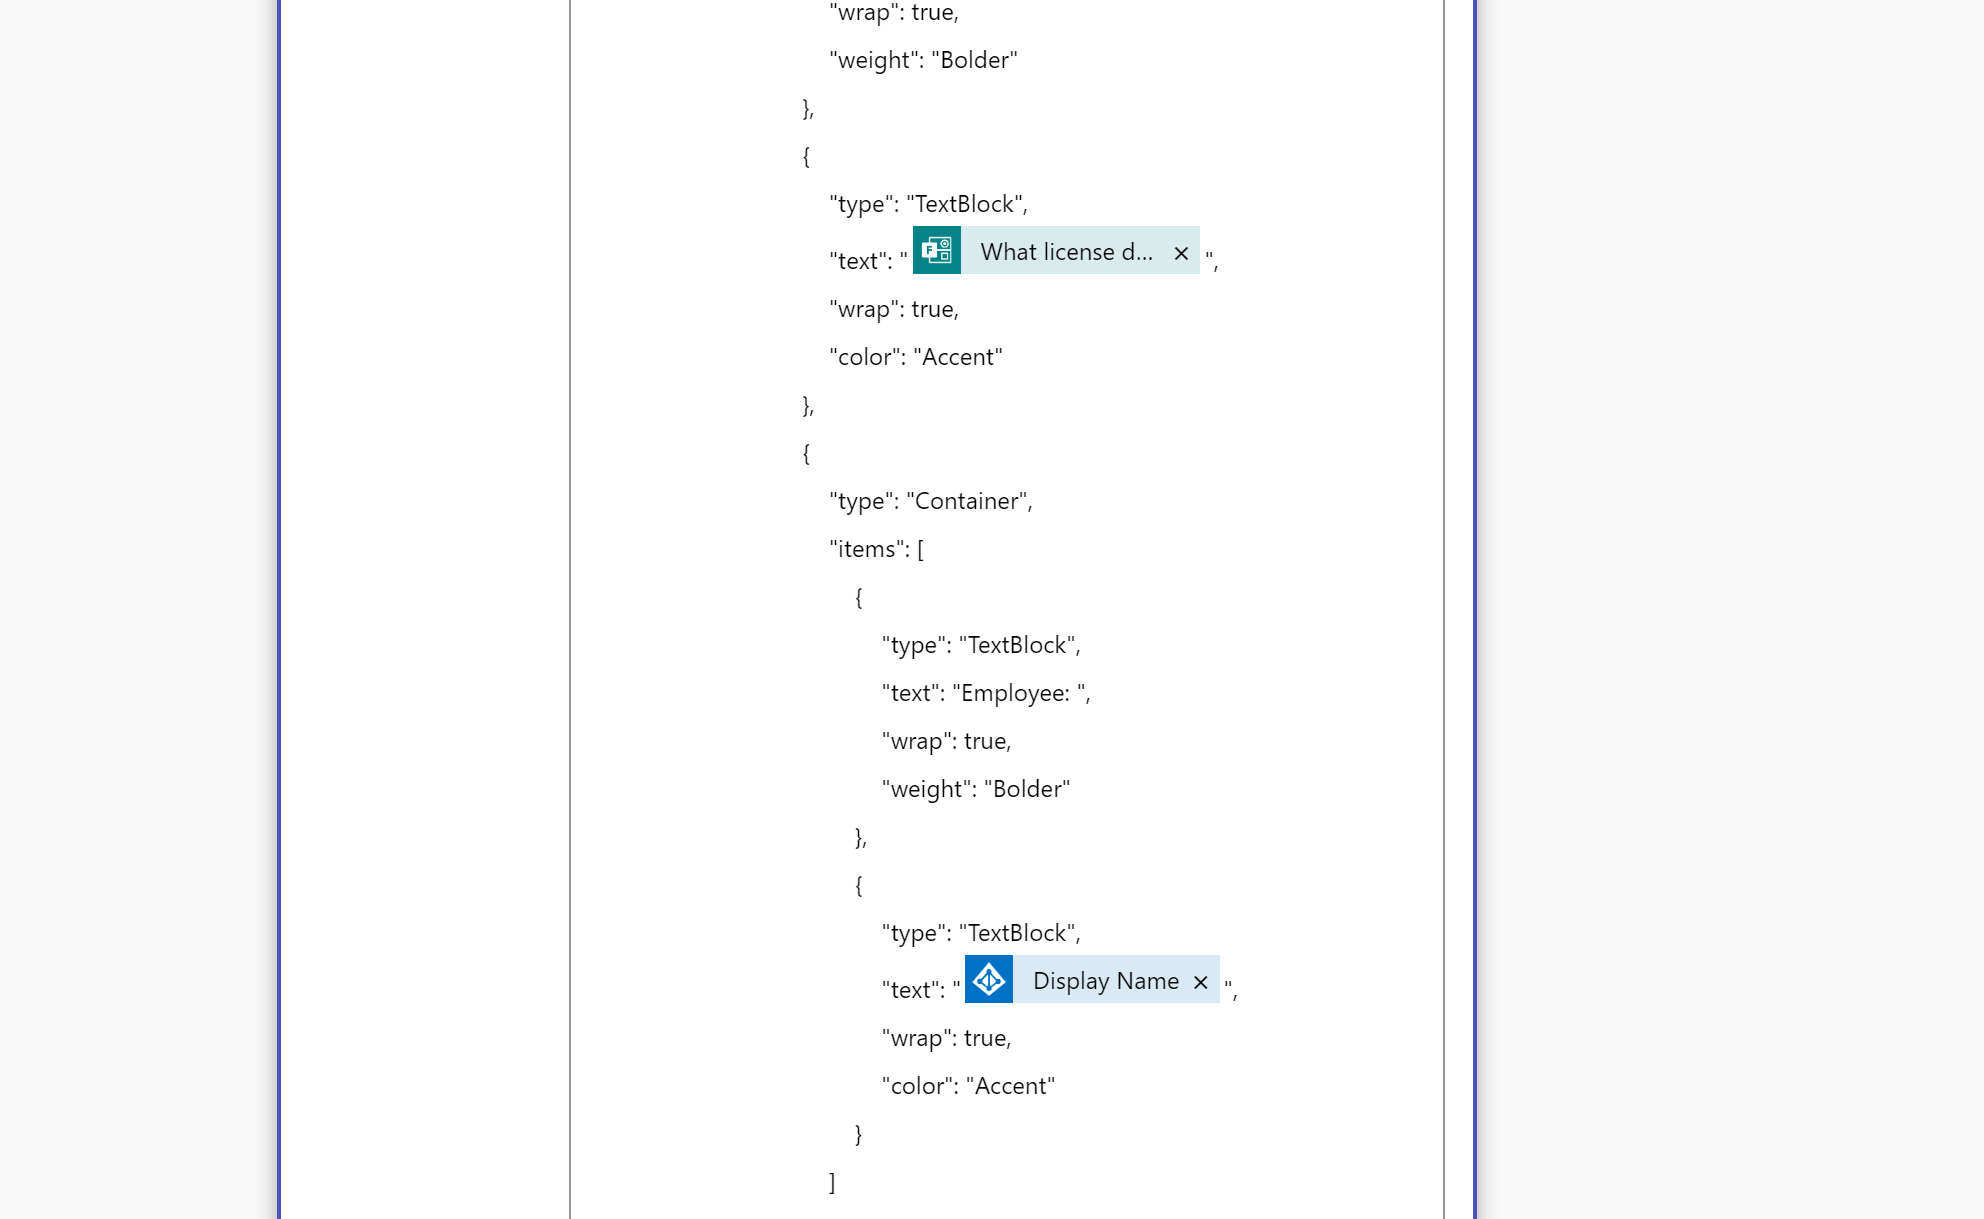
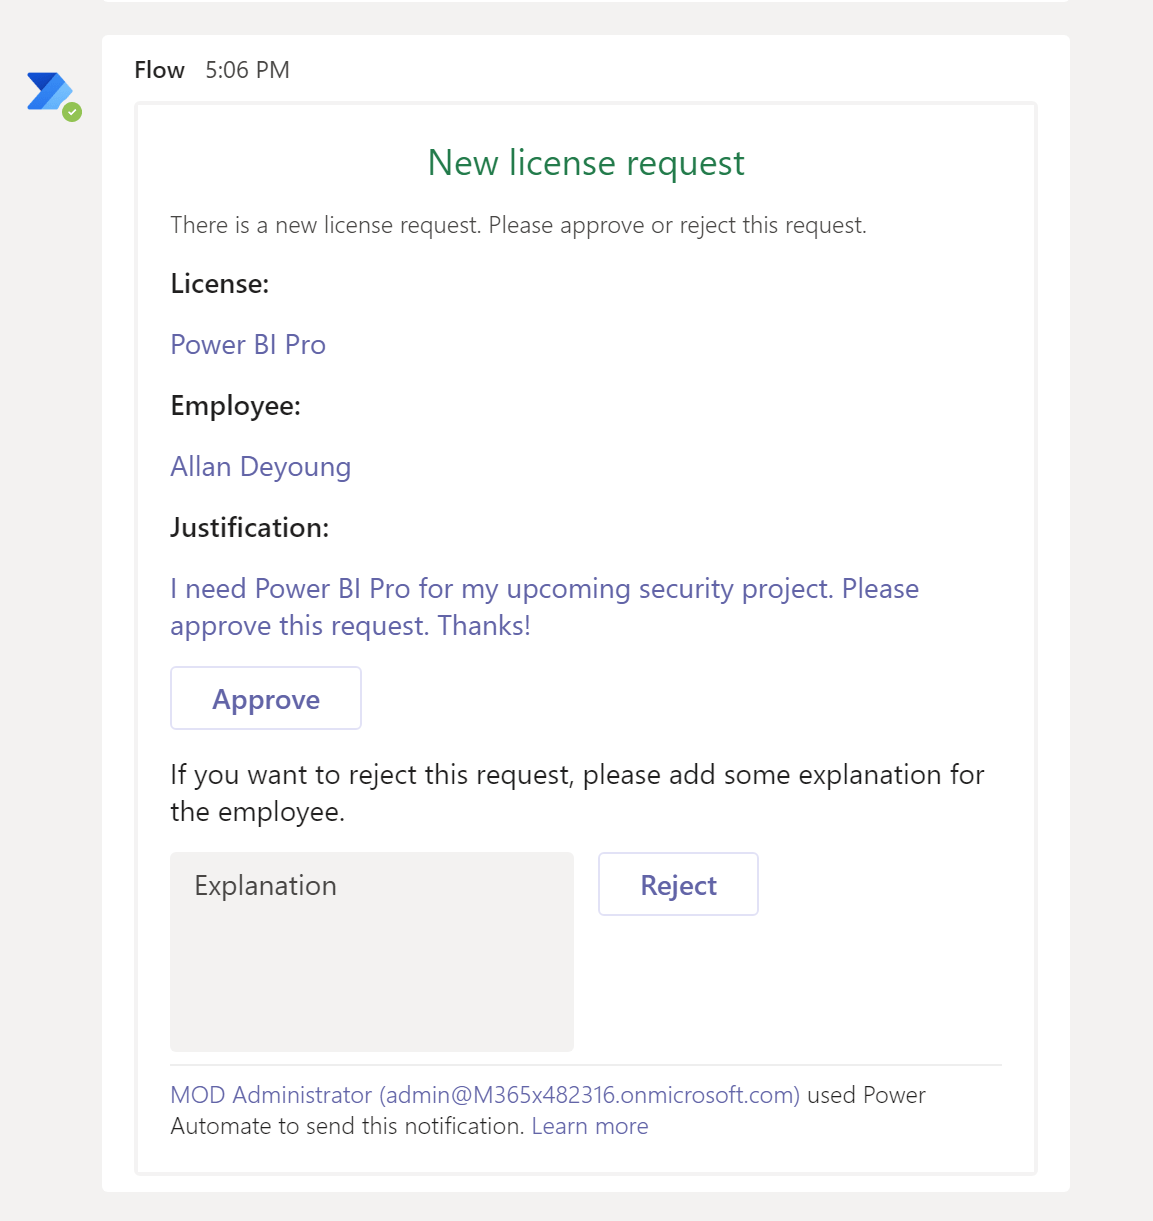
Next, we are going to send an adaptive card to the approver. We add the values from the request into the card.

{
    "type": "AdaptiveCard",
    "body": [
        {
            "type": "TextBlock",
            "text": "New license request",
            "wrap": true,
            "isVisible": true,
            "size": "Large",
            "color": "Good",
            "separator": true,
            "horizontalAlignment": "Center"
        },
        {
            "type": "Container",
            "items": [
                {
                    "type": "Container",
                    "items": [
                        {
                            "type": "TextBlock",
                            "text": "There is a new license request. Please approve or reject this request. ",
                            "wrap": true,
                            "isSubtle": true,
                            "separator": true,
                            "weight": "Lighter",
                            "fontType": "Default",
                            "size": "Small"
                        },
                        {
                            "type": "Container",
                            "items": [
                                {
                                    "type": "TextBlock",
                                    "text": "License: ",
                                    "wrap": true,
                                    "weight": "Bolder"
                                },
                                {
                                    "type": "TextBlock",
                                    "text": "@{outputs('Get_response_details')?['body/rd44893f2b67446fd8eb2e776b91fa9aa']}",
                                    "wrap": true,
                                    "color": "Accent"
                                },
                                {
                                    "type": "Container",
                                    "items": [
                                        {
                                            "type": "TextBlock",
                                            "text": "Employee: ",
                                            "wrap": true,
                                            "weight": "Bolder"
                                        },
                                        {
                                            "type": "TextBlock",
                                            "text": "@{outputs('Get_user')?['body/displayName']}",
                                            "wrap": true,
                                            "color": "Accent"
                                        }
                                    ]
                                }
                            ]
                        }
                    ]
                }
            ]
        },
        {
            "type": "Container",
            "items": [
                {
                    "type": "TextBlock",
                    "text": "Justification:",
                    "wrap": true,
                    "weight": "Bolder"
                },
                {
                    "type": "TextBlock",
                    "text": "@{outputs('Get_response_details')?['body/re7a4177b028f44cbbe1fbfd8a228f03a']}",
                    "wrap": true,
                    "color": "Accent"
                },
                {
                    "type": "ActionSet",
                    "actions": [
                        {
                            "type": "Action.Submit",
                            "title": "Approve",
                            "style": "positive",
                            "id": "Approve"
                        }
                    ]
                },
                {
                    "type": "TextBlock",
                    "text": "If you want to reject this request, please add some explanation for the employee.",
                    "wrap": true
                },
                {
                    "type": "ColumnSet",
                    "columns": [
                        {
                            "type": "Column",
                            "width": "stretch",
                            "items": [
                                {
                                    "type": "Input.Text",
                                    "placeholder": "Explanation",
                                    "isMultiline": true,
                                    "separator": true,
                                    "id": "clarification"
                                }
                            ]
                        },
                        {
                            "type": "Column",
                            "width": "stretch",
                            "items": [
                                {
                                    "type": "ActionSet",
                                    "actions": [
                                        {
                                            "type": "Action.Submit",
                                            "title": "Reject",
                                            "style": "destructive"
                                        }
                                    ]
                                }
                            ]
                        }
                    ]
                }
            ]
        }
    ],
    "$schema": "http://adaptivecards.io/schemas/adaptive-card.json",
    "version": "1.2"
}
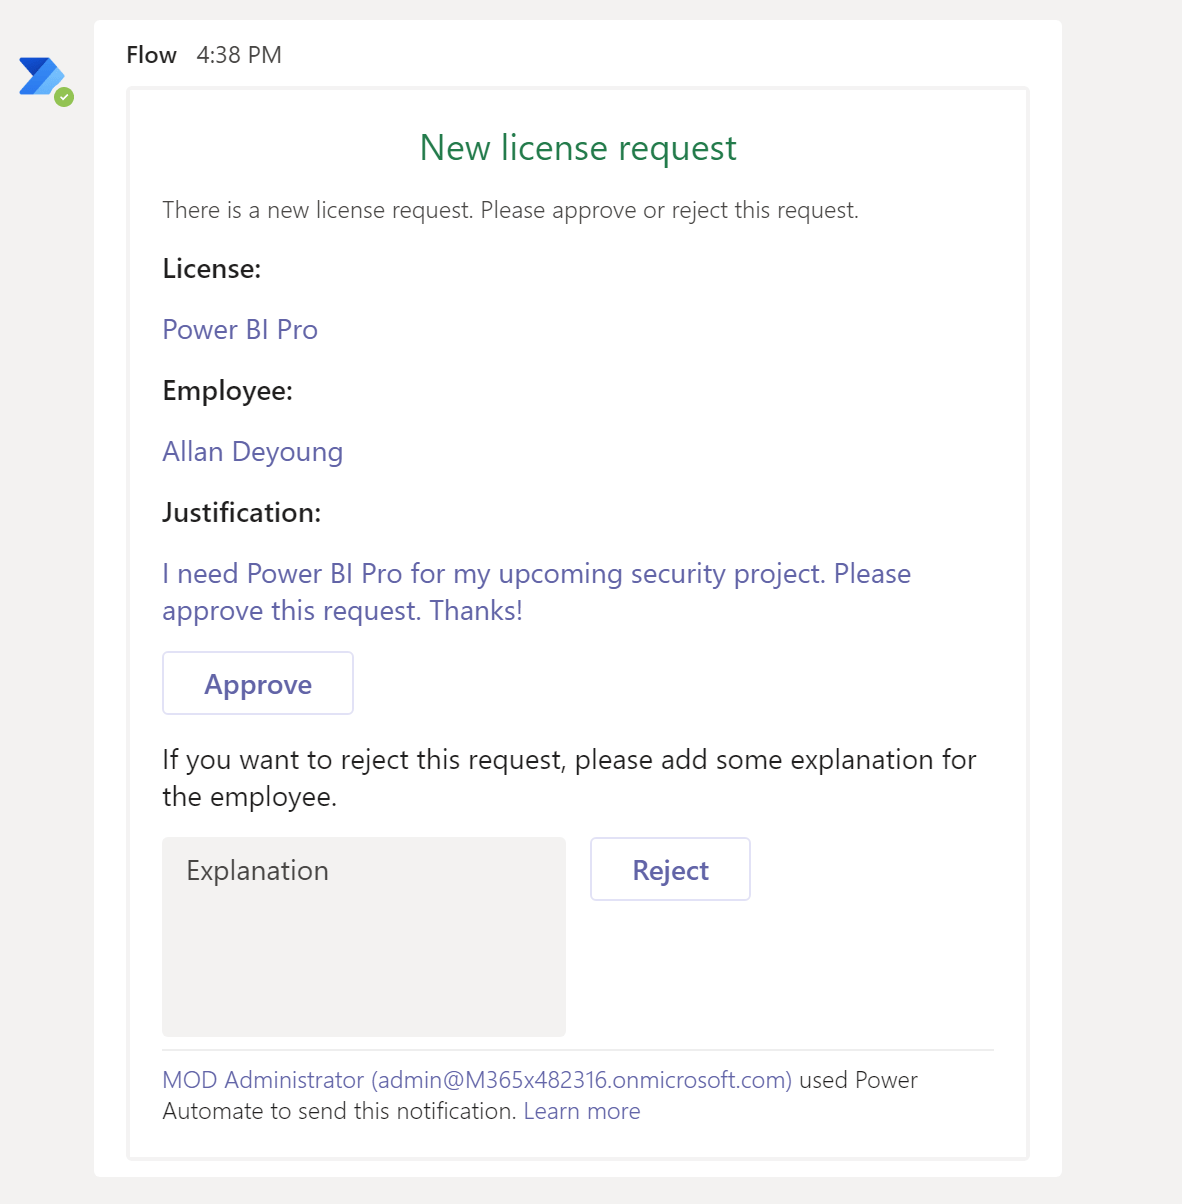
The card will look like this:
Next, we are using a condition in reaction to the approval. The condition is created using the approval data of the adaptive card, using this expression:
body('Post_an_Adaptive_Card_to_a_Teams_user_and_wait_for_a_response')?['submitActionId']When the request is rejected, the user gets an email. When the request is approved, the flow continues. To add the message from the approver to the email, use an expression that holds the clarification field from the adaptive card:
body('Post_an_Adaptive_Card_to_a_Teams_user_and_wait_for_a_response')?['data']?['clarification']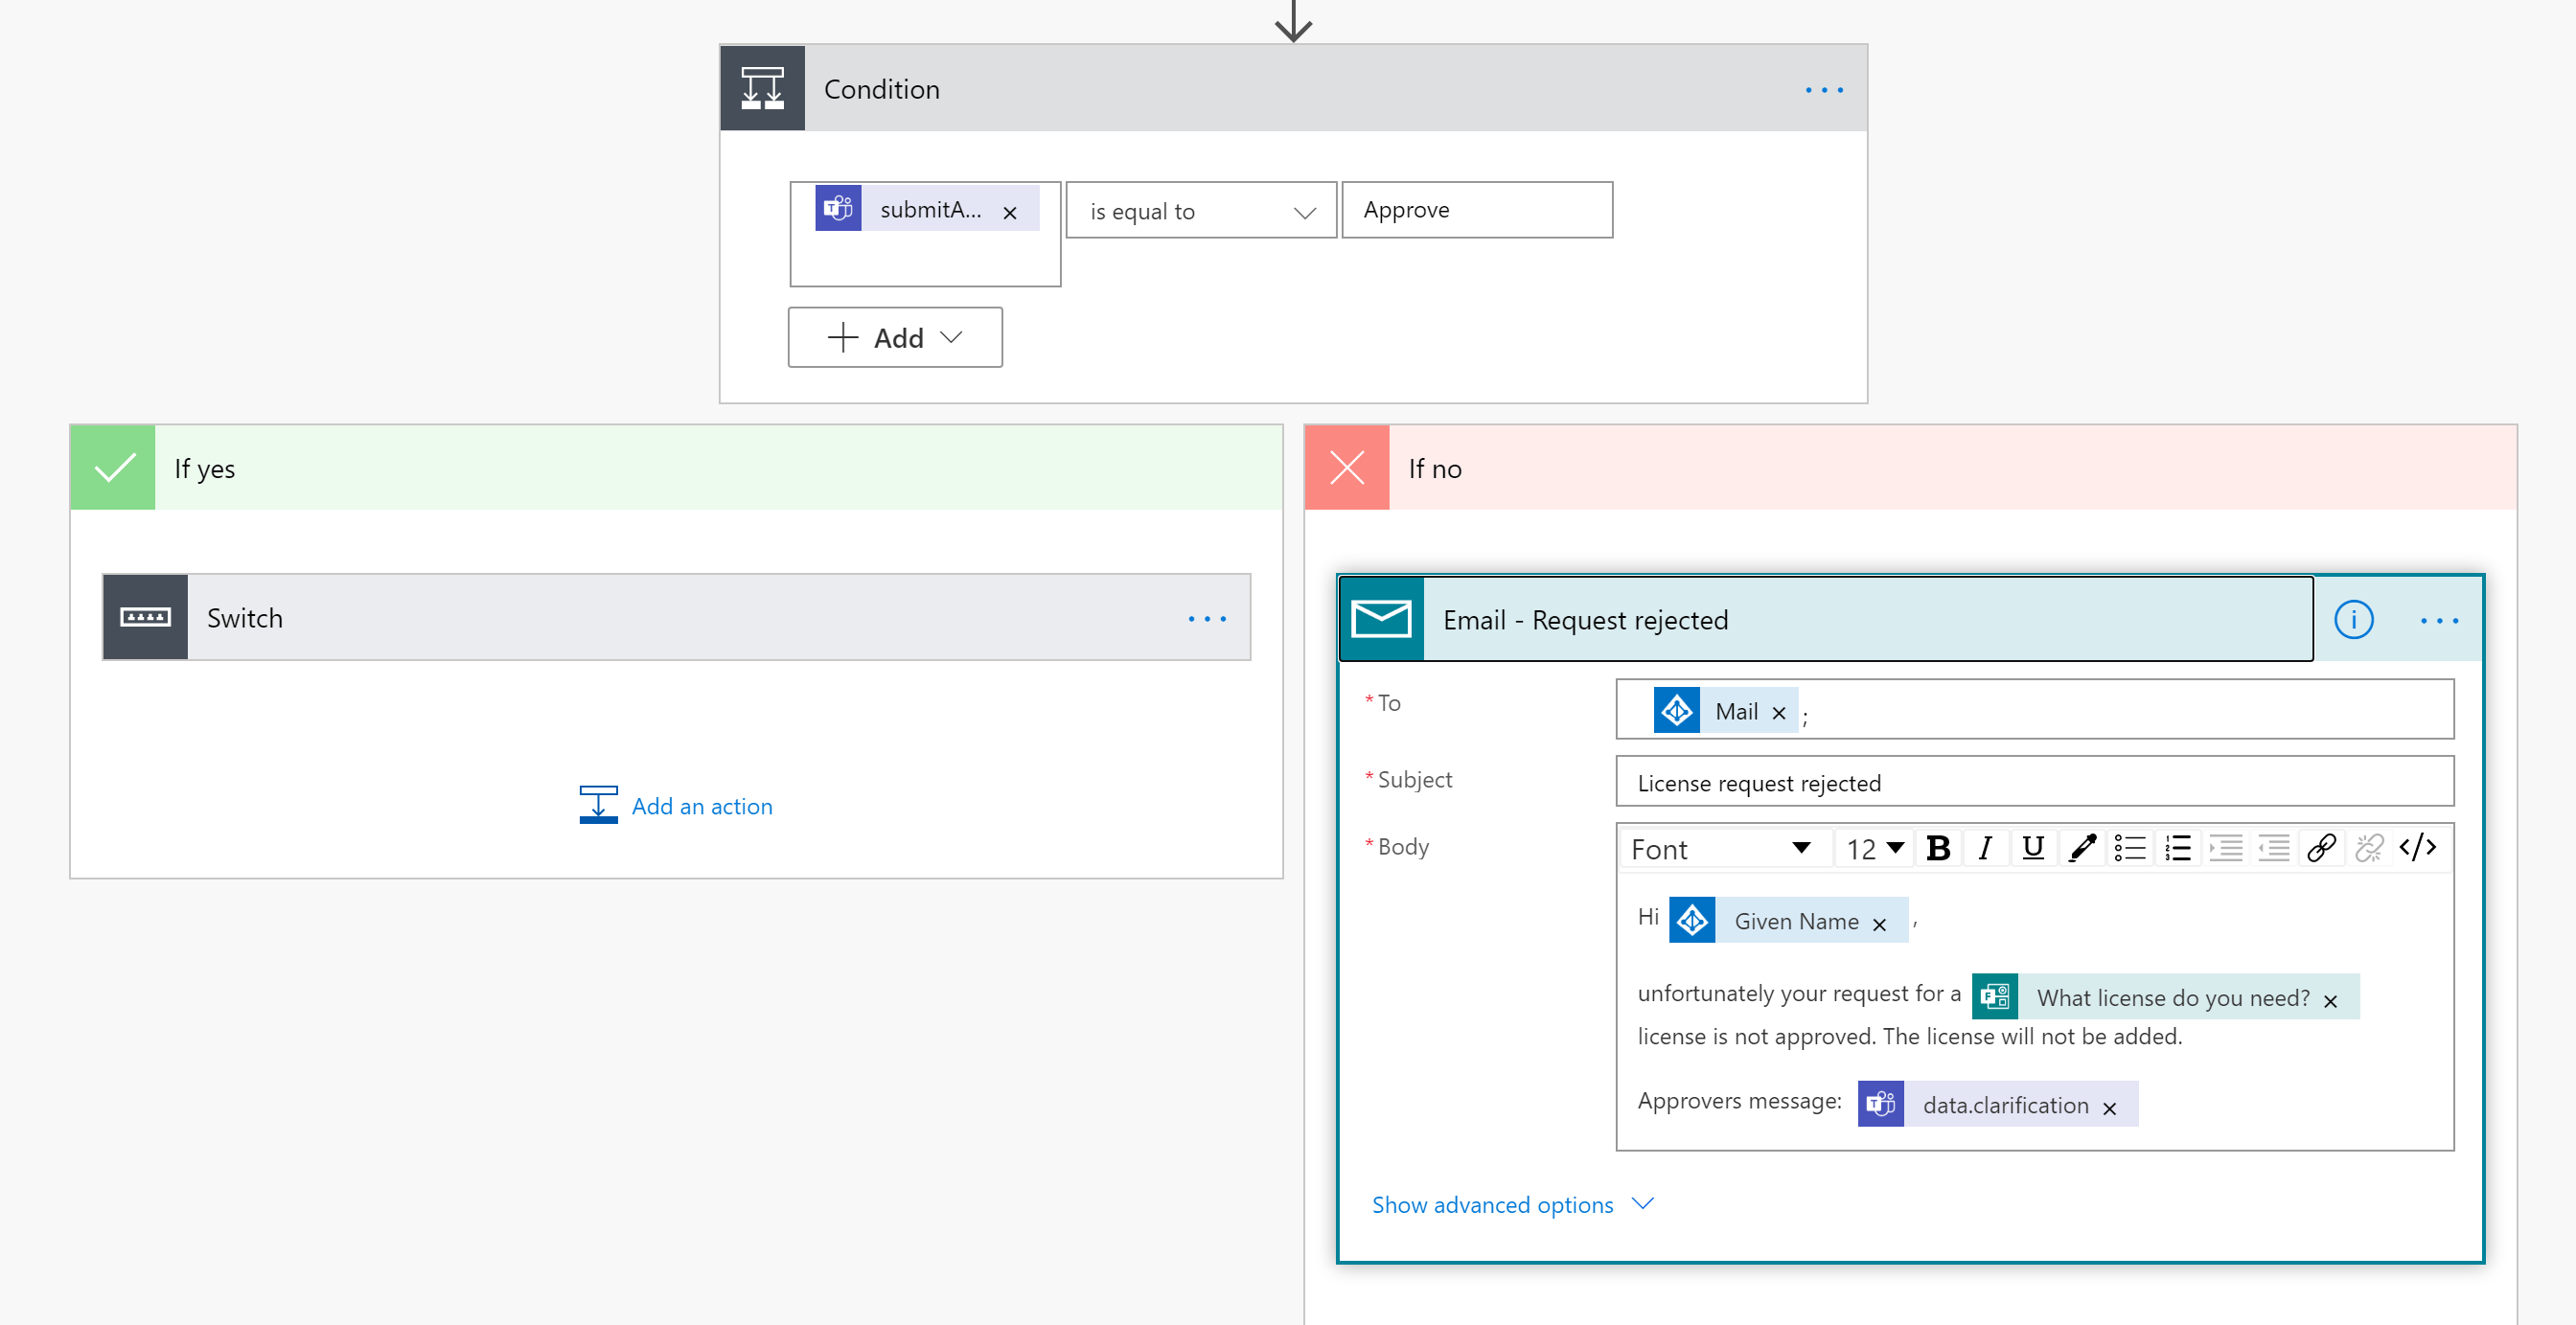
Next, I use a switch to create a different section for each license. Use the license output from the form as input for the switch.

Let’s zoom in on one of the licenses, Power BI Pro for example. The other cases are exactly the same, except for the group ID’s.
Make sure that you copy the exact same output from the form (Power BI Pro) so that the switch is working correctly.
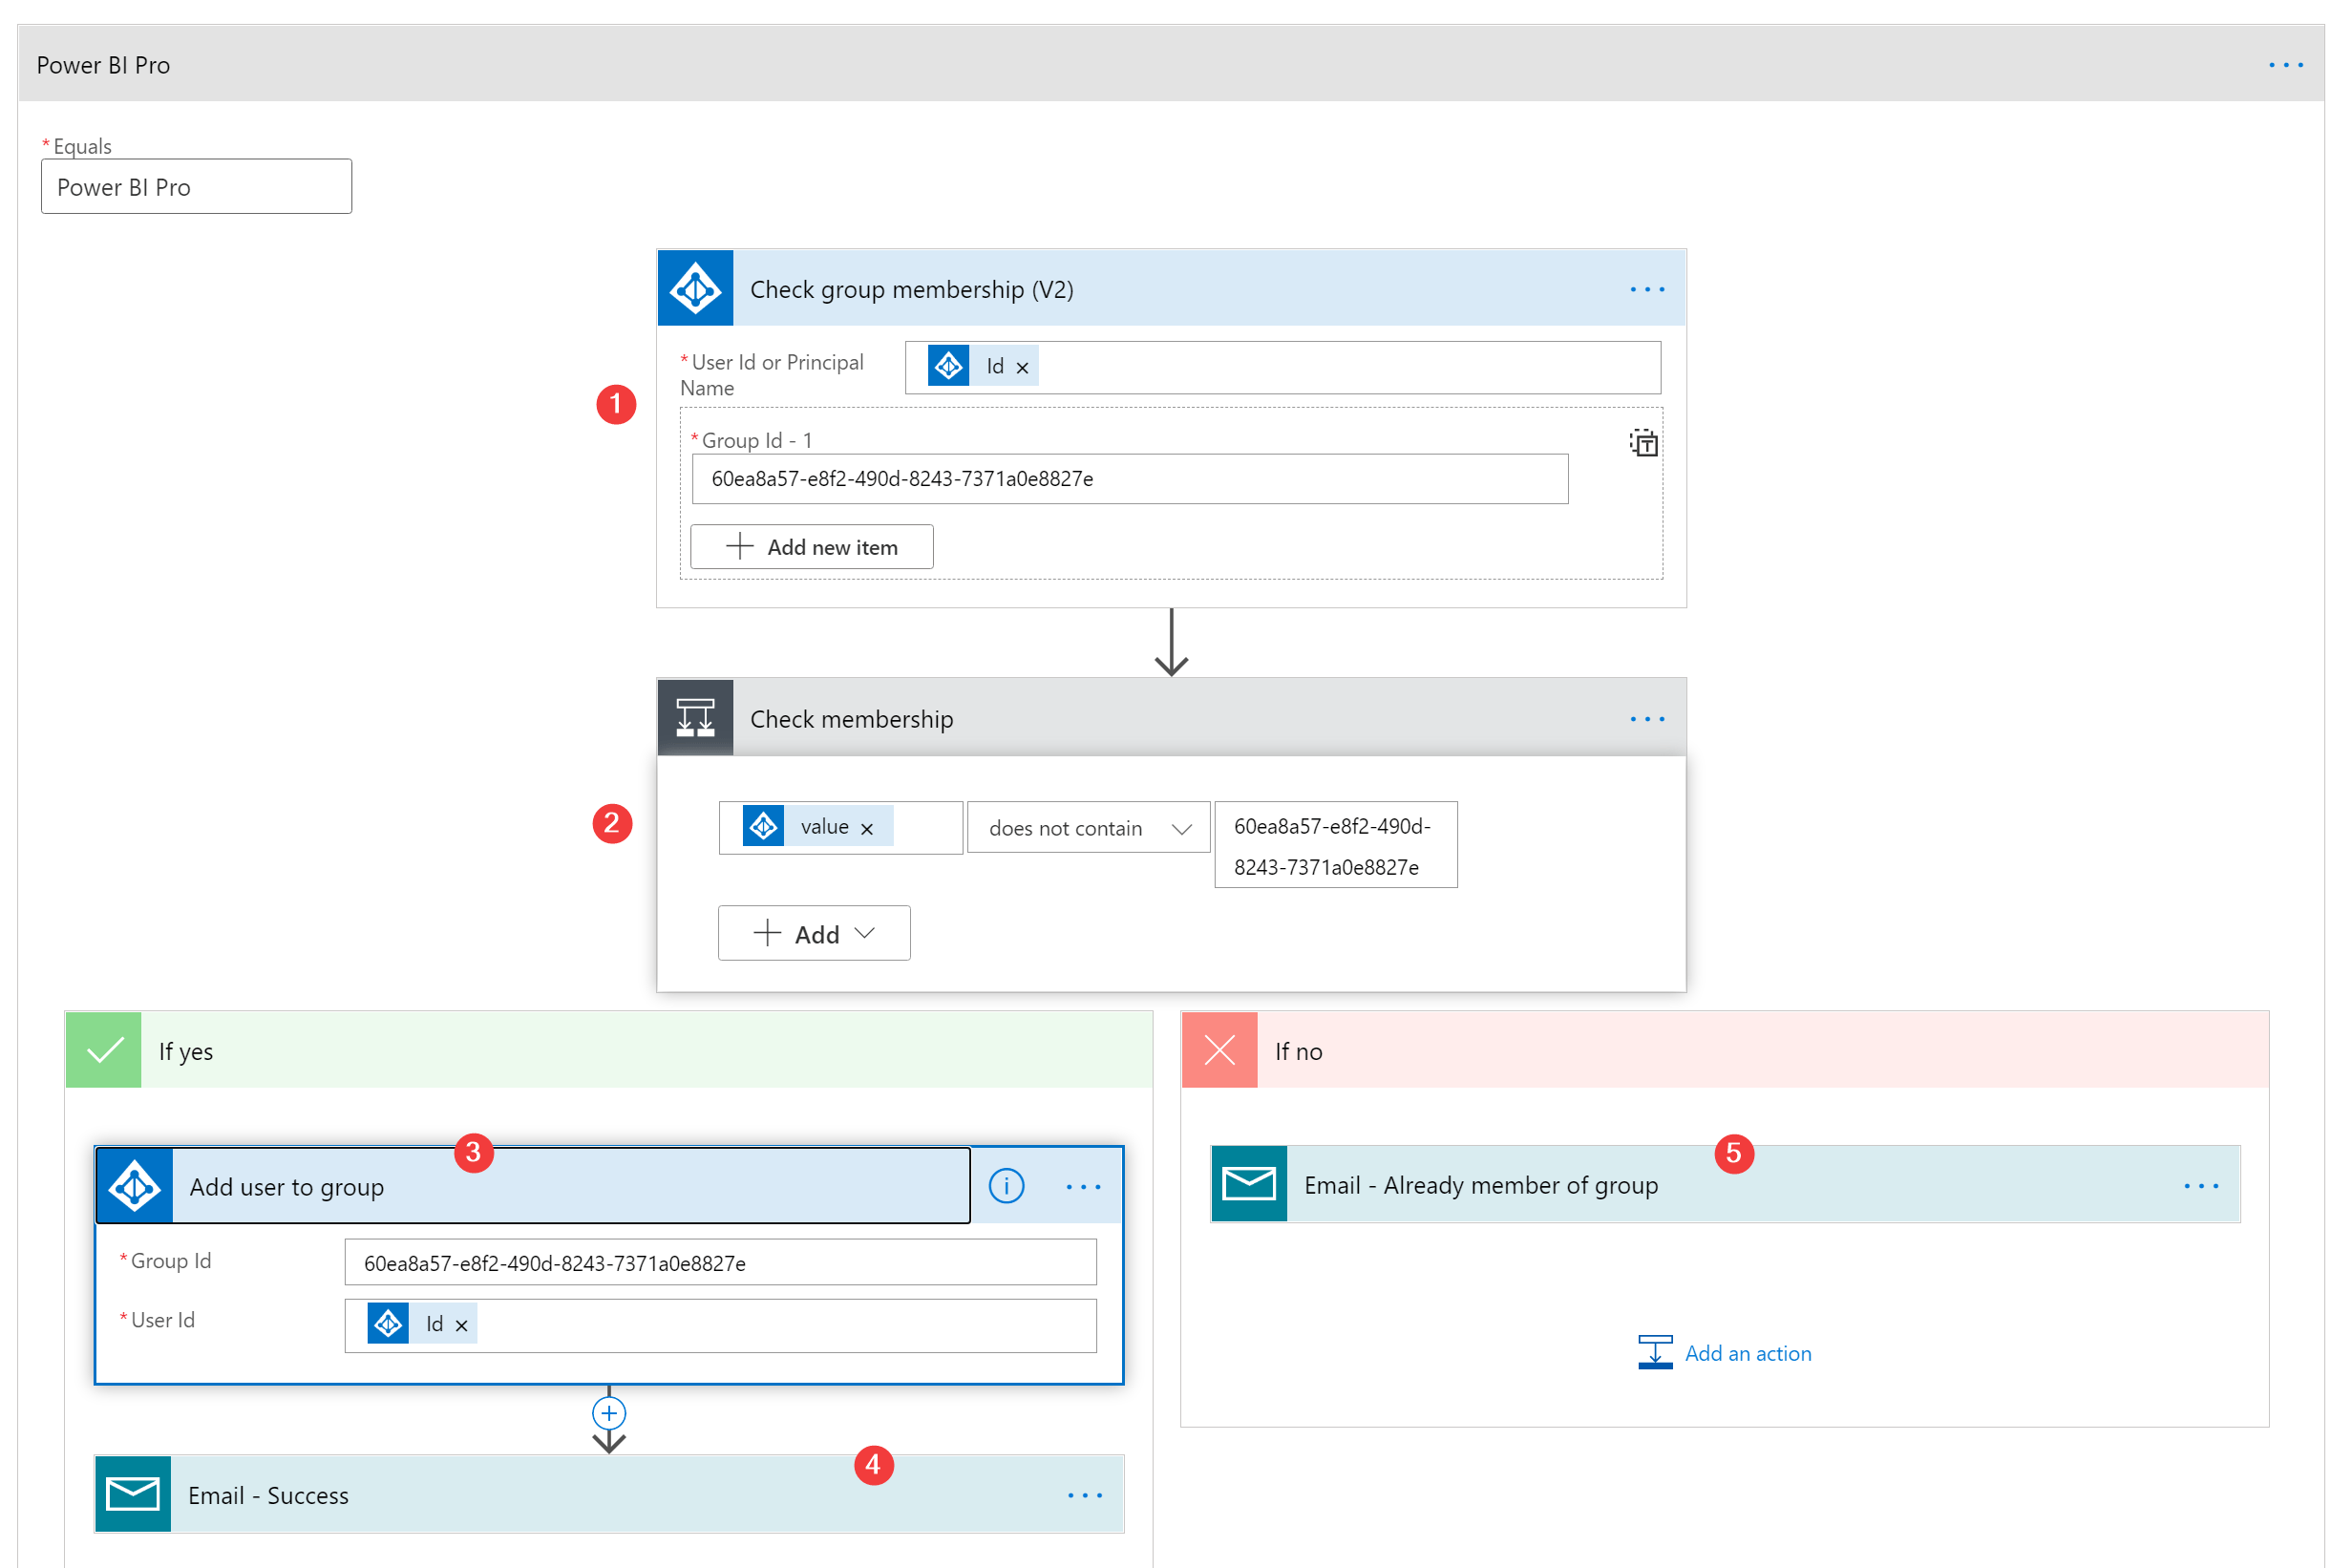
- Check if the user is already a member of the license group. The group ID can be found in the properties page of the license group in Azure AD.
- Use the ID to determine if the user is a member. Use the “does not contain” option here.
- Next, I add the user to the group. Again, I’m using the same group ID.
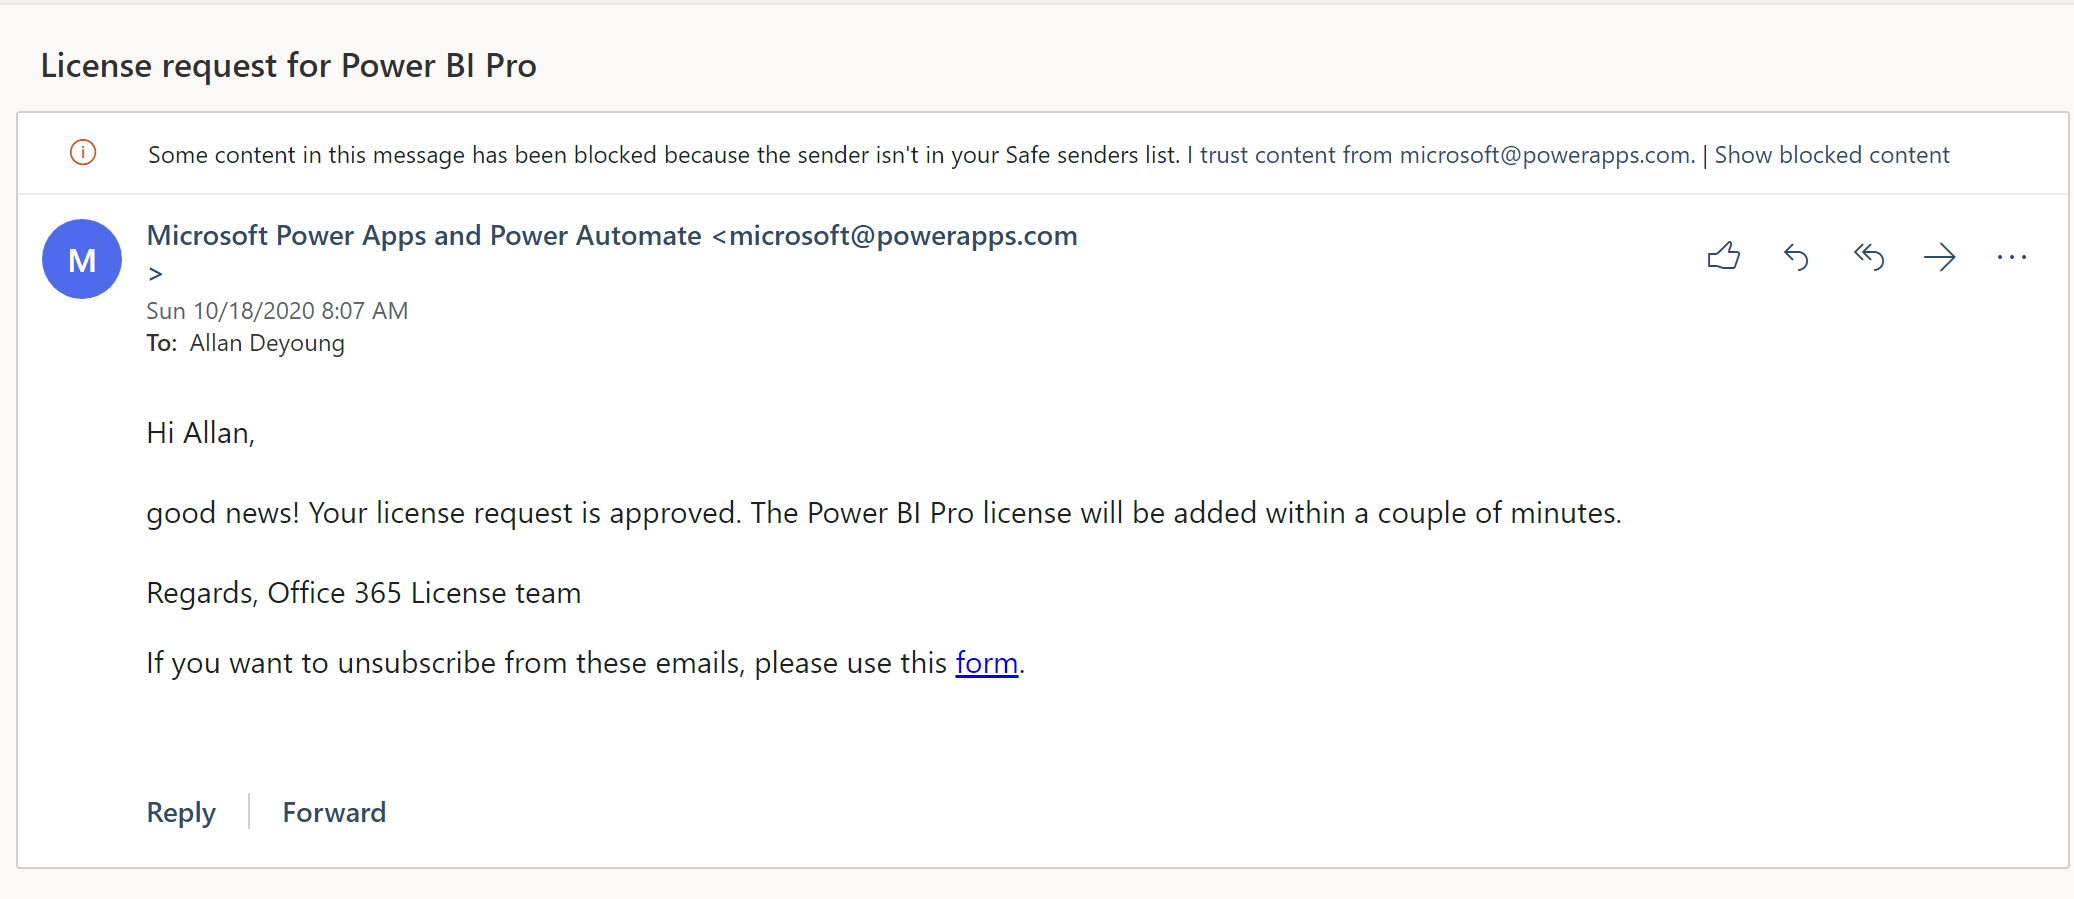
- An email is sent to the user that the license is accepted and will be added soon.
- If the user is already a member, a notification is sent to inform the user.
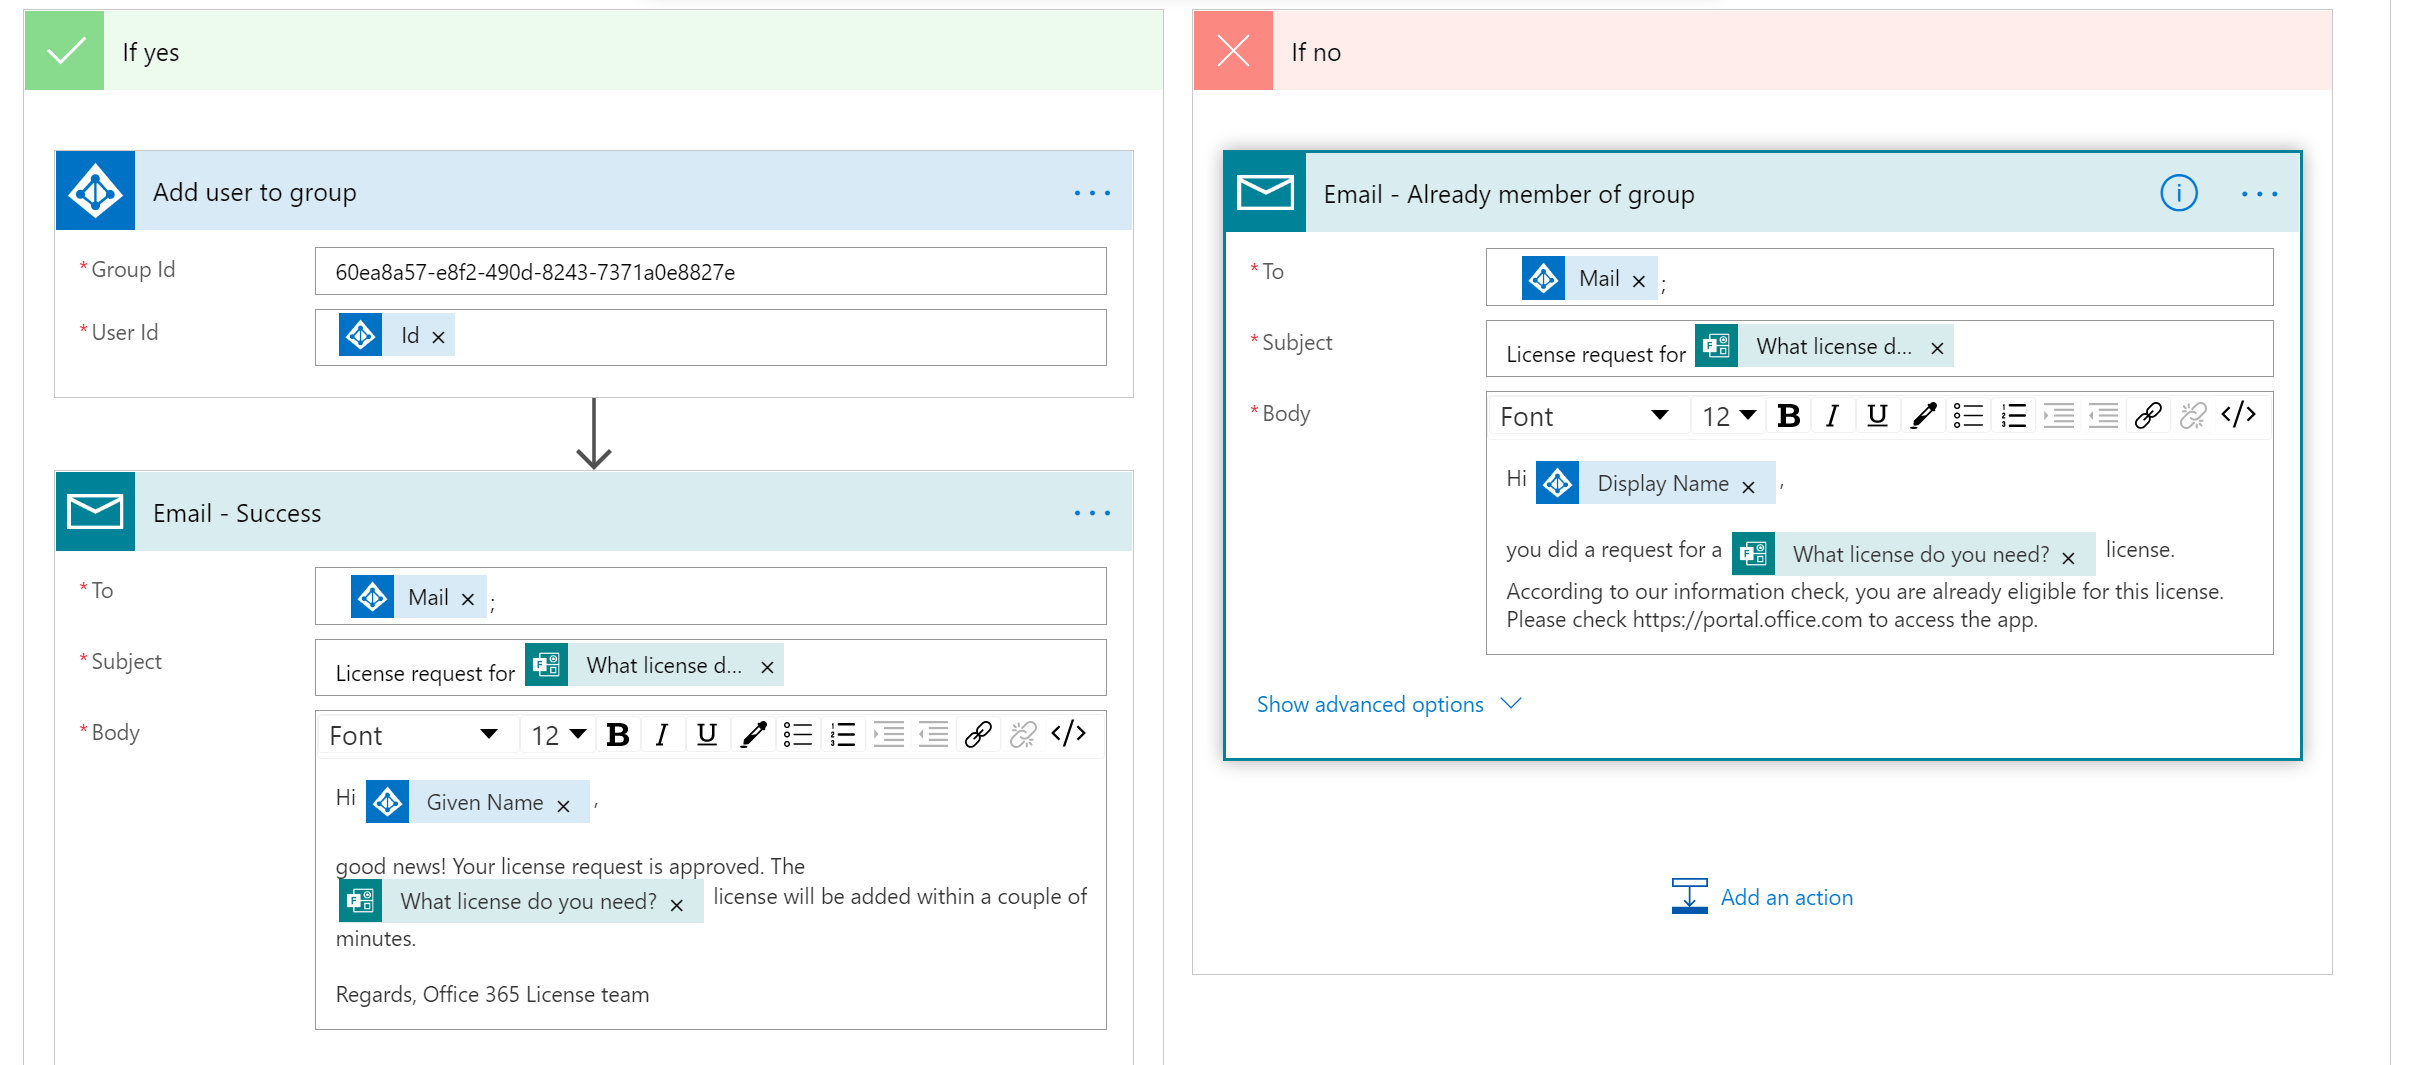
In both emails I use the variables from the form and user information that we grabbed earlier.
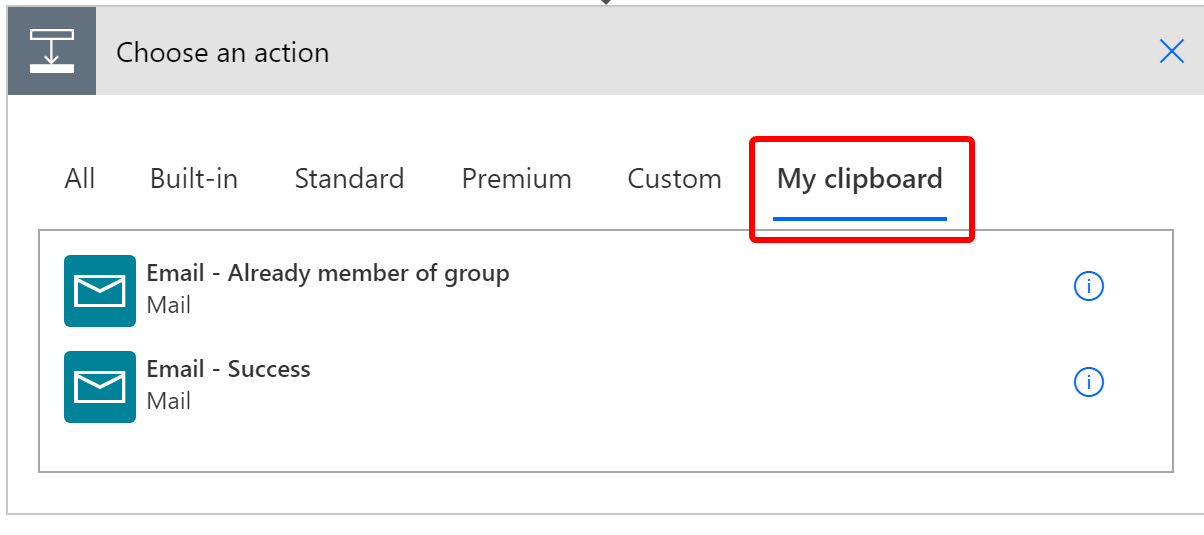
!Quick tip#
Use the clipboard to duplicate the emails. You can create one email, and re-use them in the other cases.

The last step in the flow is to make a record of each request for audit and logging purposes.
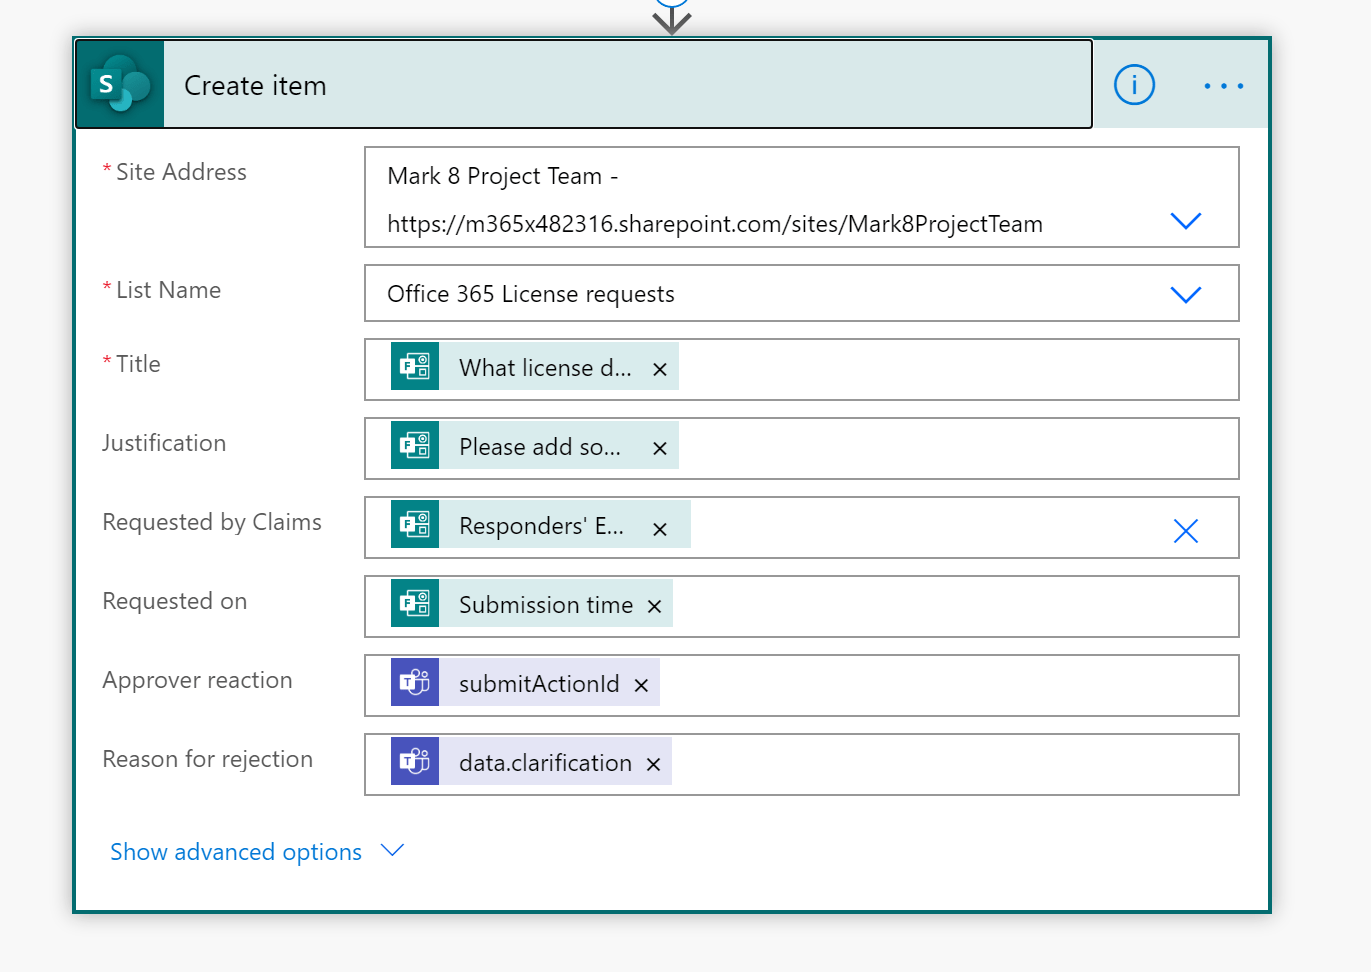
Here, I use the same fields from the form, and the data from the approval card, using these expressions:
body('Post_an_Adaptive_Card_to_a_Teams_user_and_wait_for_a_response')?['submitActionId']body('Post_an_Adaptive_Card_to_a_Teams_user_and_wait_for_a_response')?['data']?['clarification']User experience#
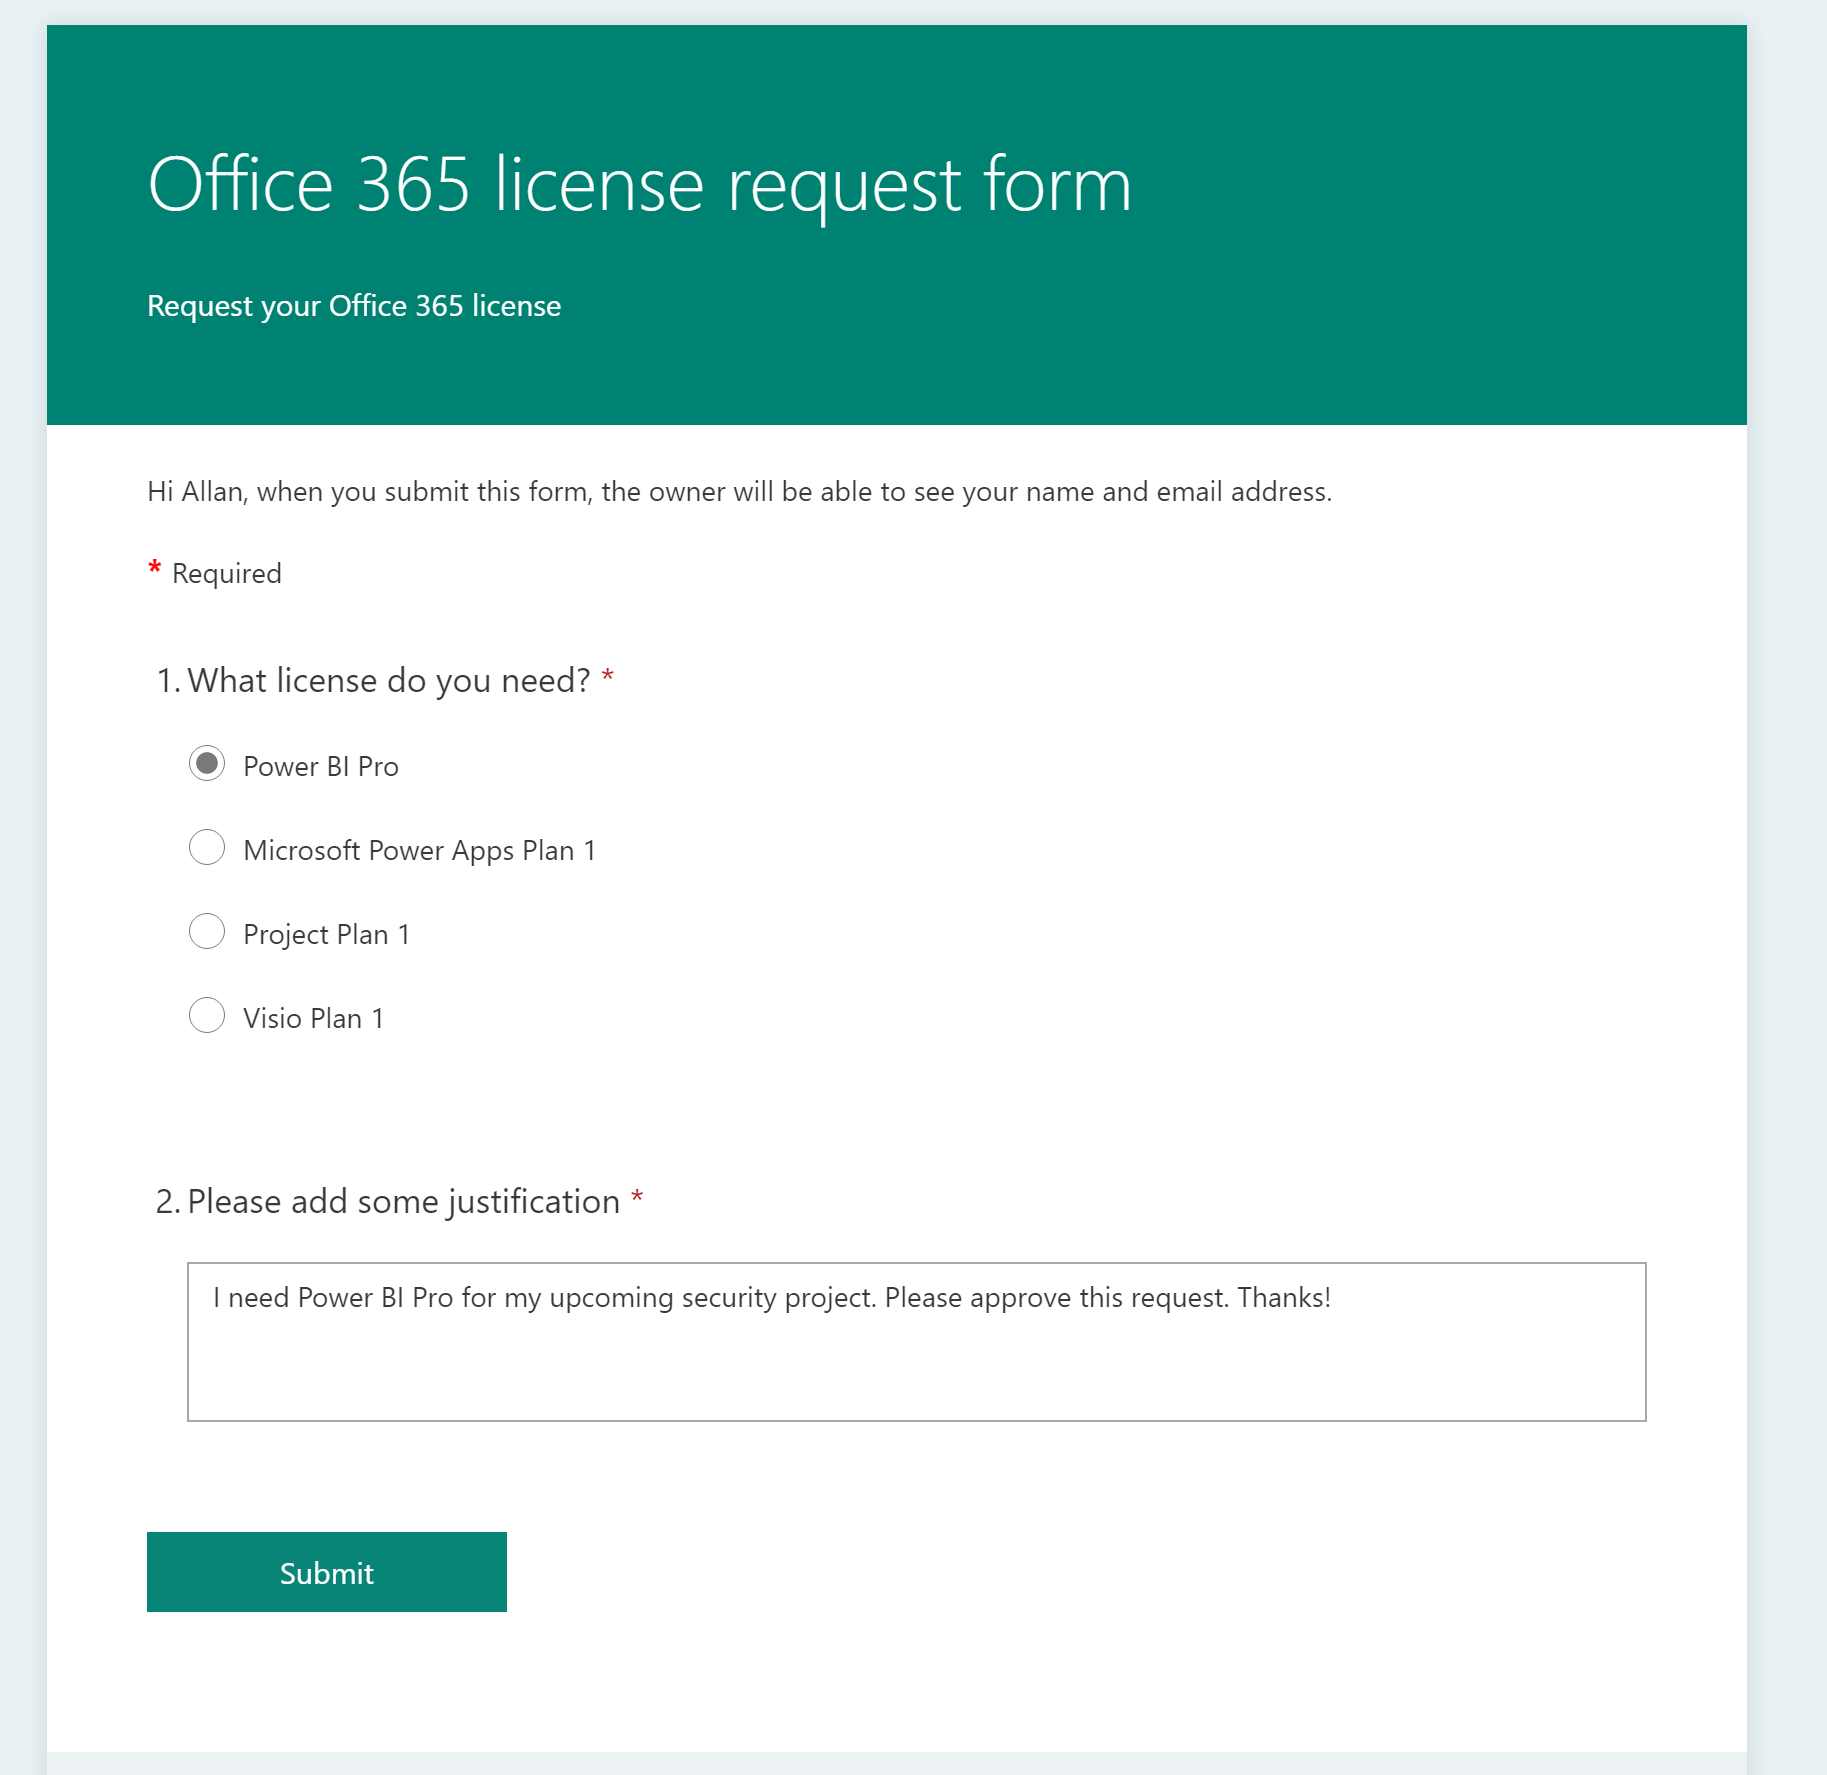
User request using Office 365 Forms.
Approver is receiving the adaptive card in Teams via chat.
When approved, user gets the following email:
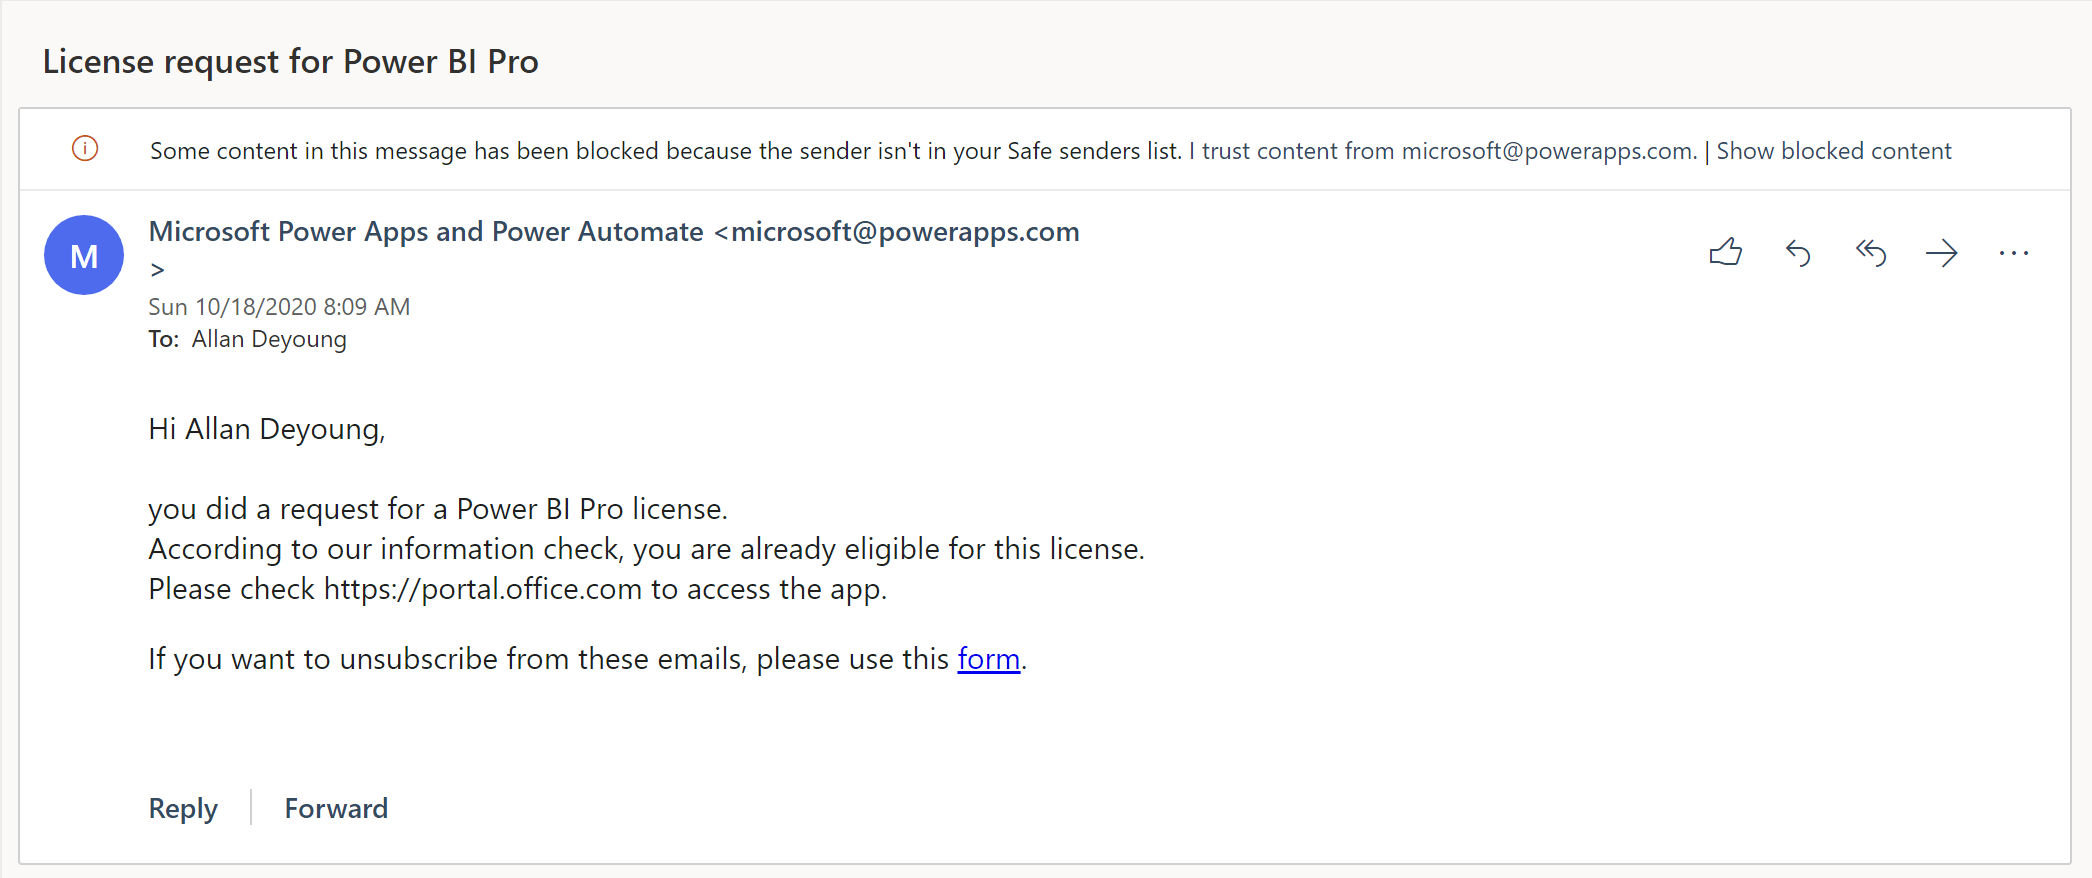
When the user is already member of the license group, the following email is send:
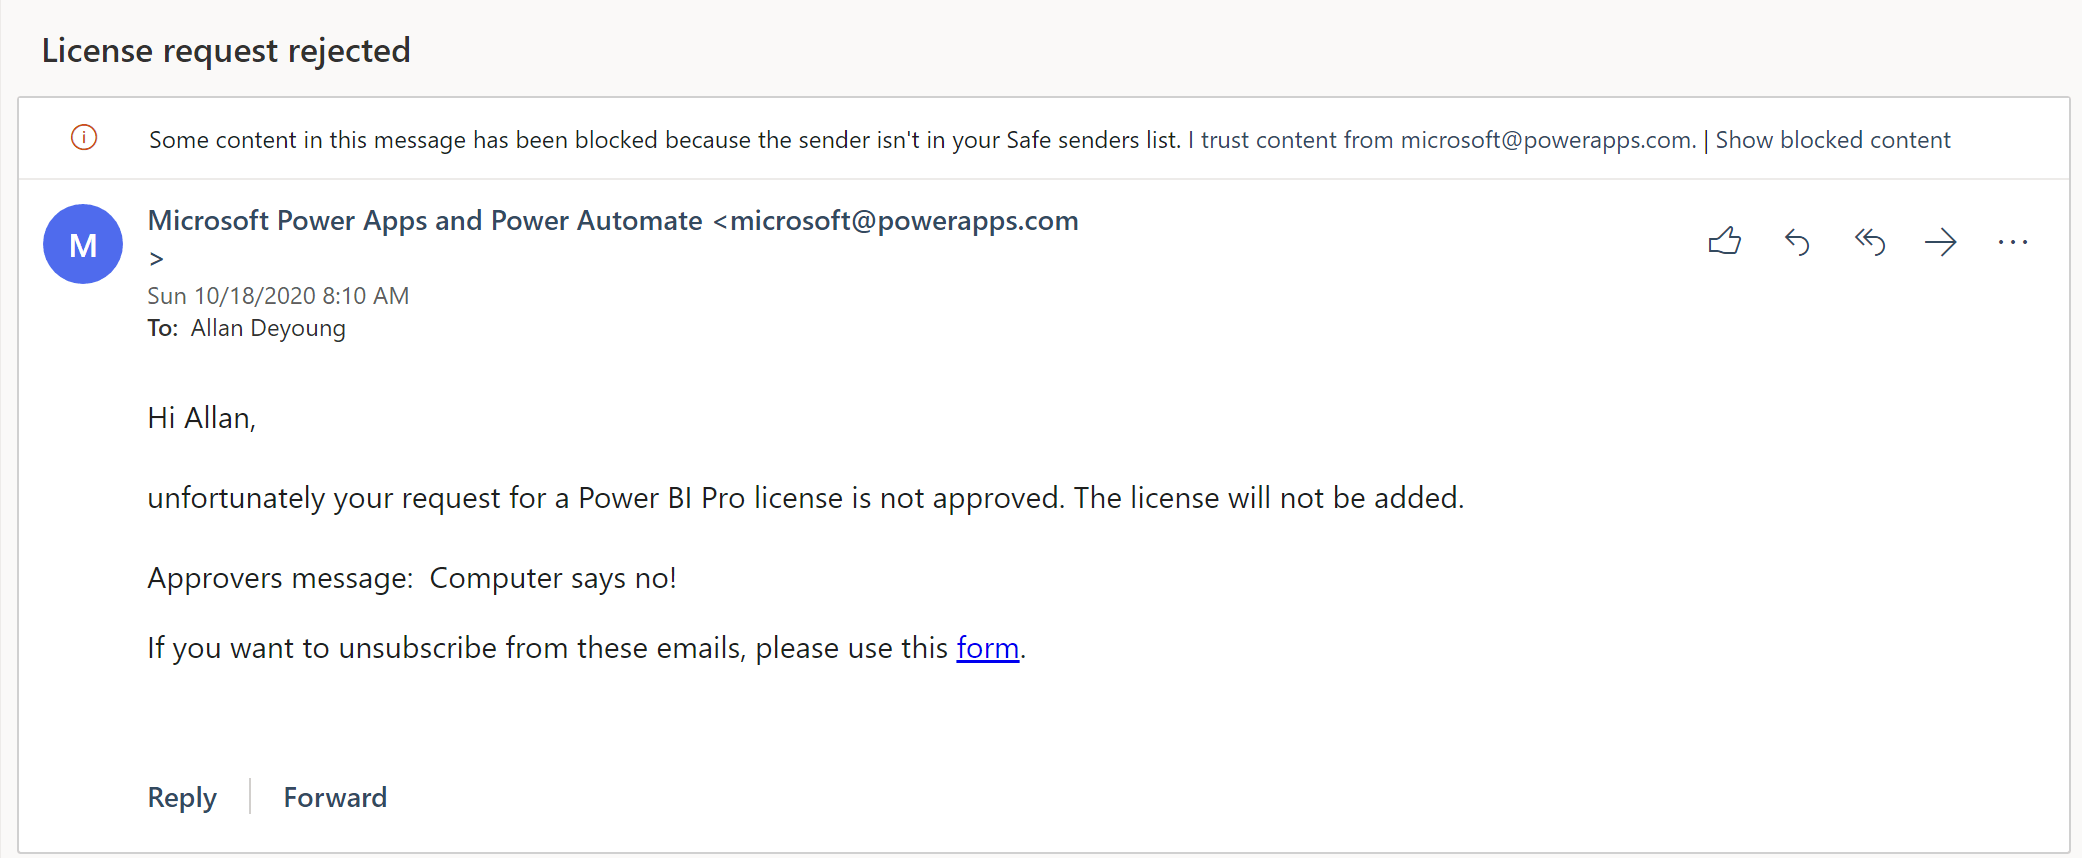
When the request is rejected, the following email is received:
The requests are tracked in the SharePoint list:
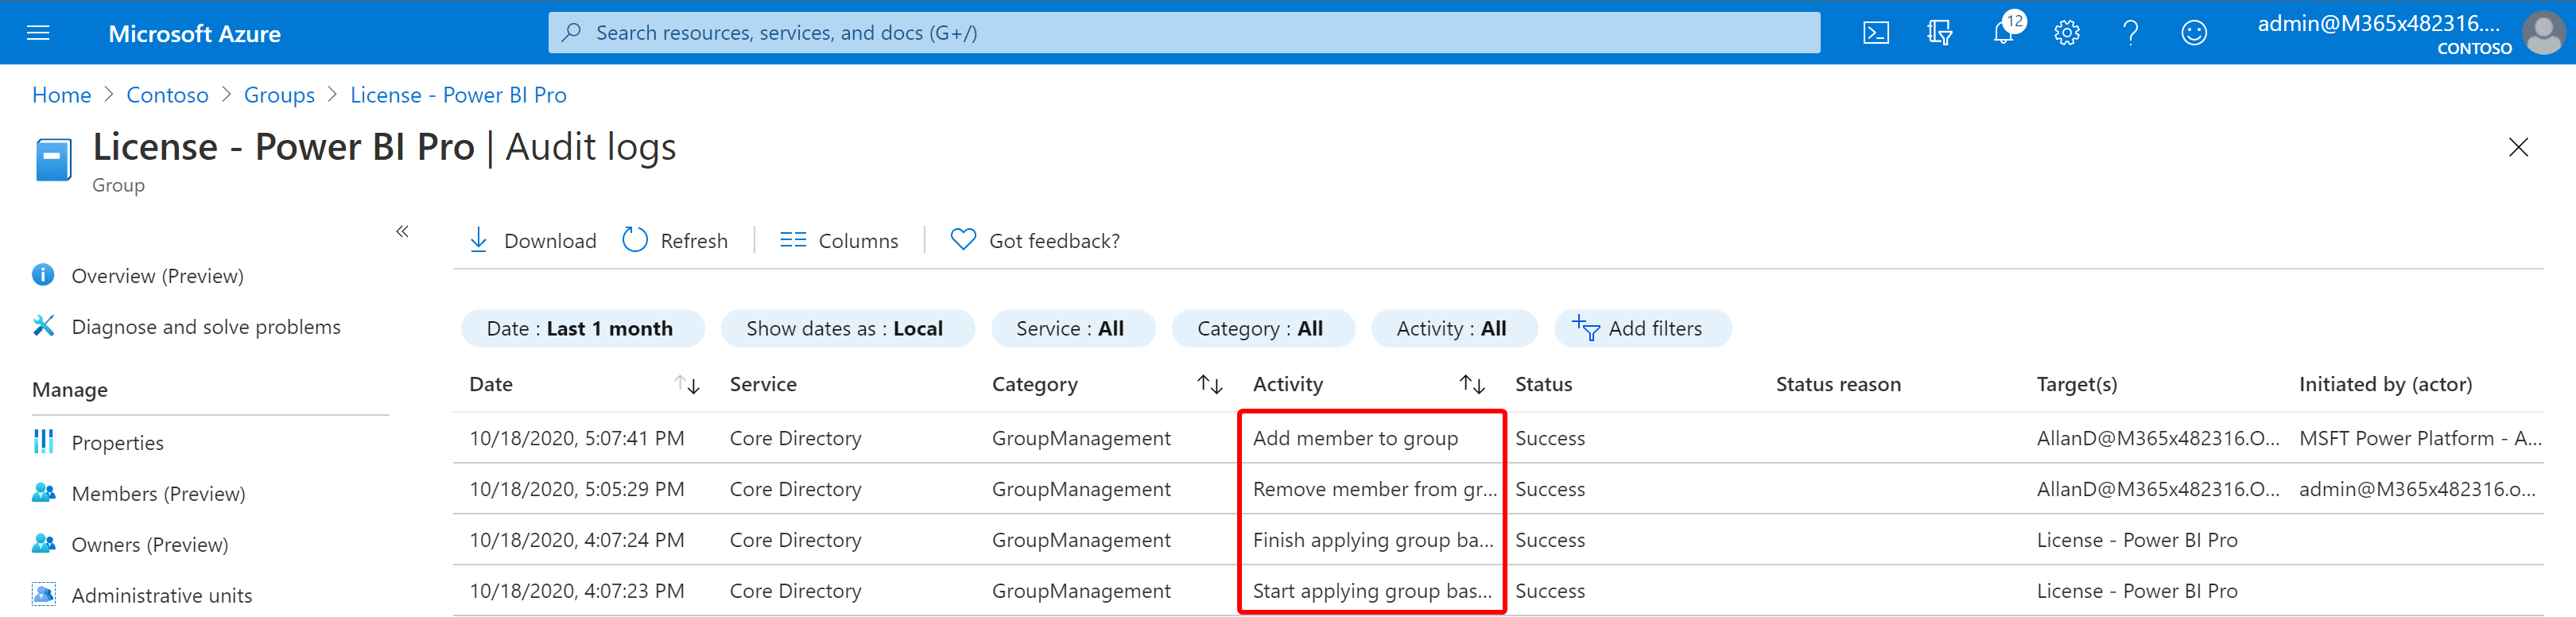
Administrators can keep track with the default audit information in Azure AD:
Wrap things up#
That looks pretty cool, right? If you’re building this, start with one license. If that works, expand to more licenses if needed. Needless to say, this flow cannot remove licenses, and cannot see if there are free licenses available. To keep an eye on your licenses, take a look at my other blog.
I recommend building this flow from scratch to get the best learning experience. You can download the template here.
I hope this example inspires you to do more with Power Automate and gives you an idea of how all the components can work together.
If you want to see this in action, take a look at this demo video:
Stay creative!
Comments
Comments load when you scroll here.