
Entra · Knowledgebase · Security
KB - Enable Single Sign On for Windows 365 Cloud PC
This short tutorial explains how to enable Single Sign-On for Windows 365 Cloud PC using the Graph Explorer.
On Microsoft Learn, we can already find instructions for using PowerShell, but I’m a big fan of using the Graph API and Graph Explorer.
To enable SSO using Microsoft Entra ID authentication, there are four tasks we must complete:
- Enable Microsoft Entra authentication for Remote Desktop Protocol (RDP).
- Configure the target device groups.
- Review your Conditional Access policies.
- Turn on SSO for all Cloud PCs in your account.
However, in my test tenant, this instruction did not work, as the Windows Cloud Login service principal did not exist. That’s why we start with checking if the service principal is already present in Entra.
GET https://graph.microsoft.com/v1.0/servicePrincipals?$filter=appId eq '270efc09-cd0d-444b-a71f-39af4910ec45'In my tenant, the application did not exist, so let’s create it first.
POST https://graph.microsoft.com/v1.0/servicePrincipals

{
  "appId": "270efc09-cd0d-444b-a71f-39af4910ec45"
}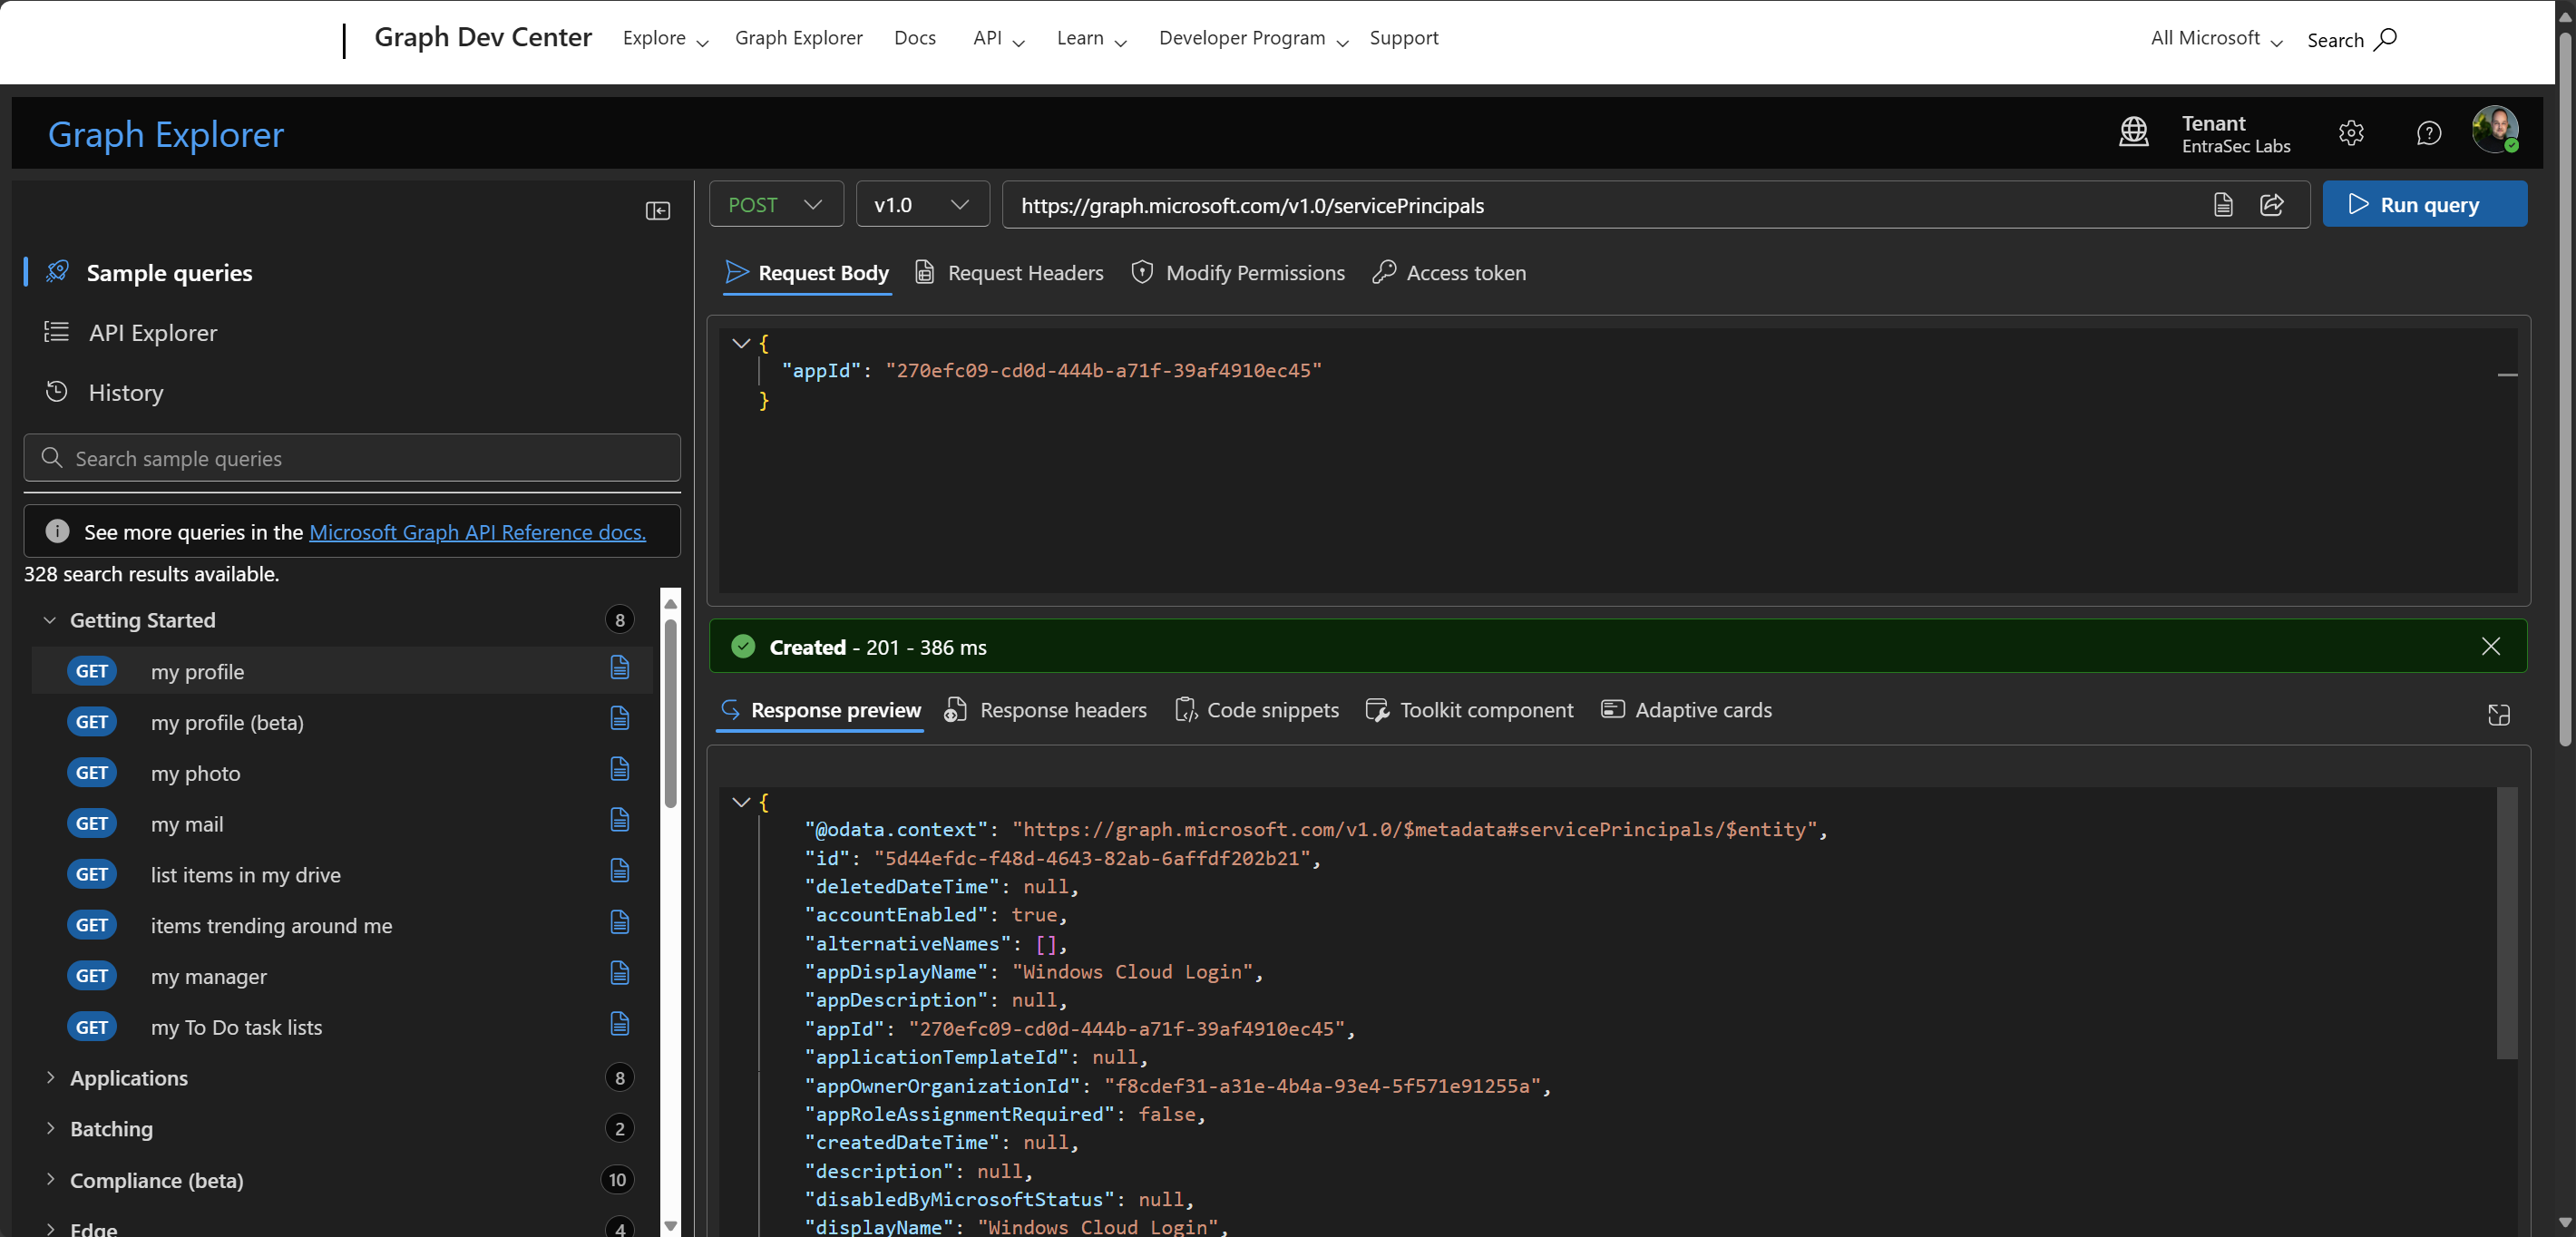
Copy the ID from the response, as we need it in the next step to fetch information about the remote desktop configuration.
GET https://graph.microsoft.com/v1.0/servicePrincipals/5d44efdc-f48d-4643-82ab-6affdf202b21?$expand=remoteDesktopSecurityConfiguration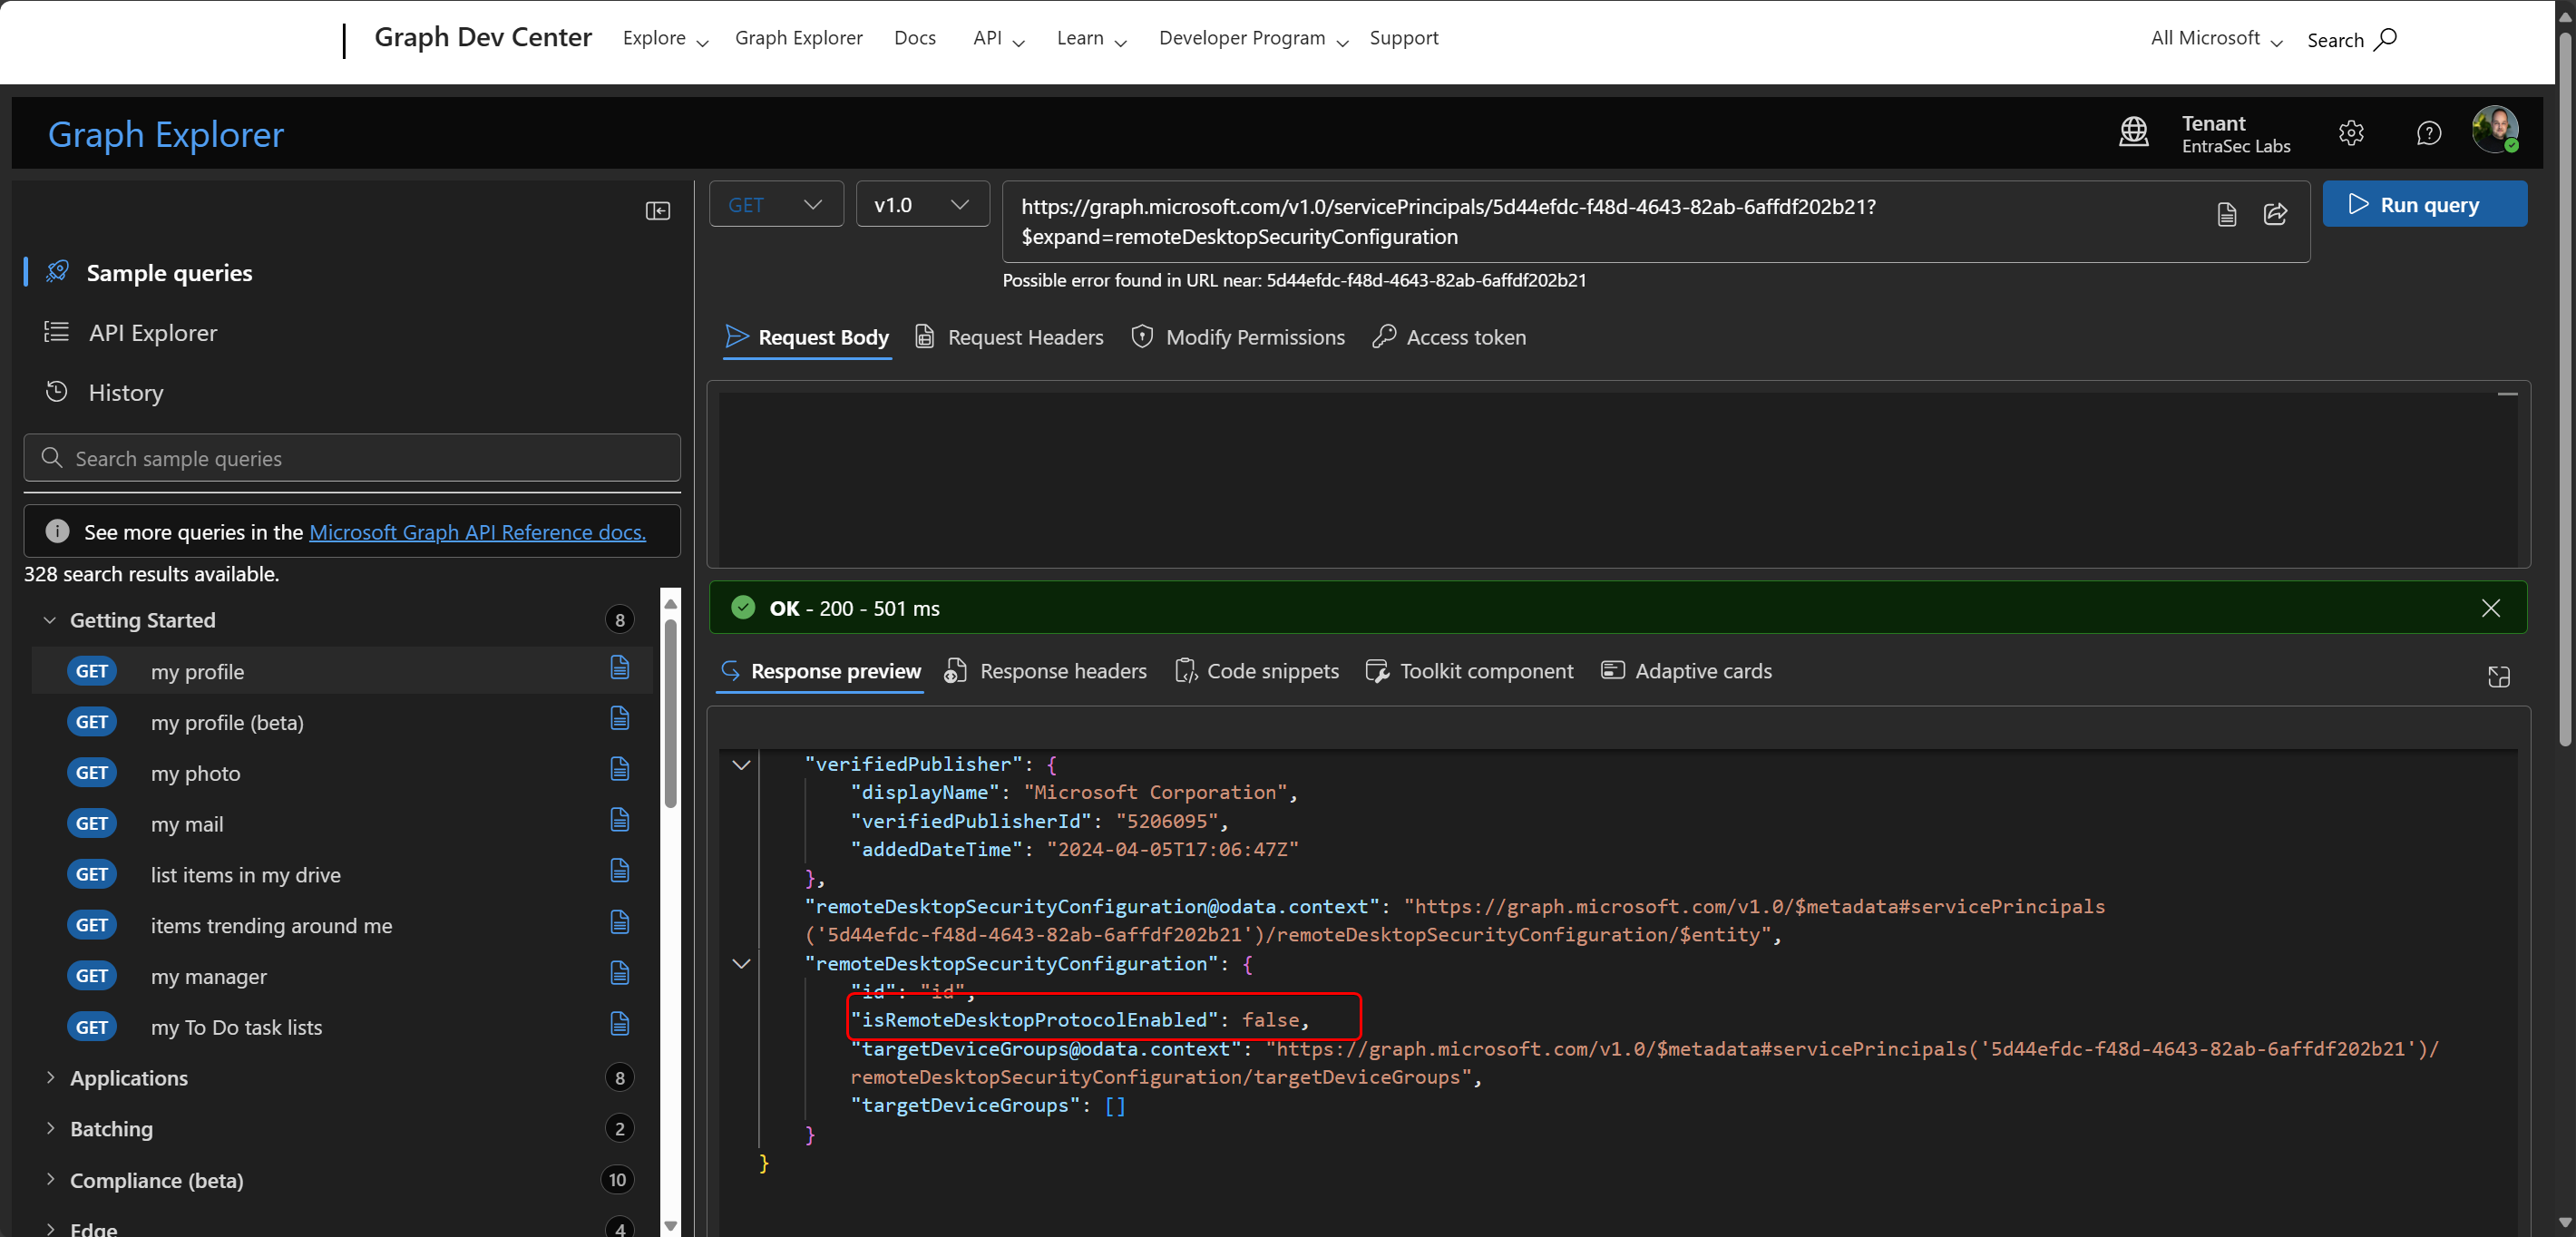
Now, we need to enable the feature:
PATCH https://graph.microsoft.com/v1.0/servicePrincipals/5d44efdc-f48d-4643-82ab-6affdf202b21/remoteDesktopSecurityConfiguration

{
  "isRemoteDesktopProtocolEnabled": true
}
Now we need to assign a device group to the service principal configuration. This group can also be a dynamic group that holds all your Cloud PC’s. For this demo, I created a new group and added my test device to it.
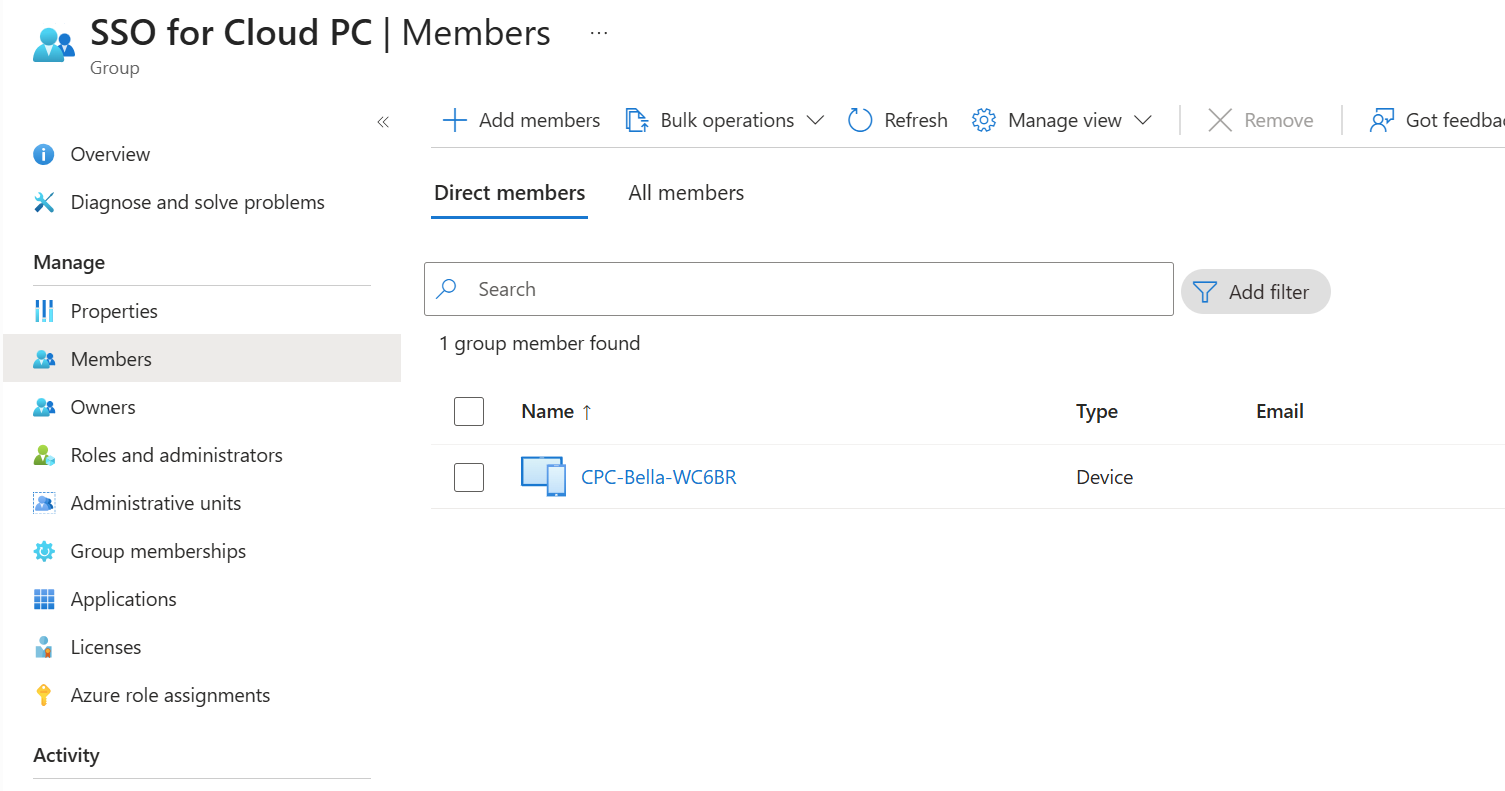
For our next Graph API call, we need the group’s object ID.
POST https://graph.microsoft.com/beta/servicePrincipals/5d44efdc-f48d-4643-82ab-6affdf202b21/remoteDesktopSecurityConfiguration/targetDeviceGroups

{
  "@odata.type": "#microsoft.graph.targetDeviceGroup",
  "id": "f43eab10-ea35-41e8-8dfe-f77fcab84ca3",
  "displayName": "Cloud PC Groups for SSO"
}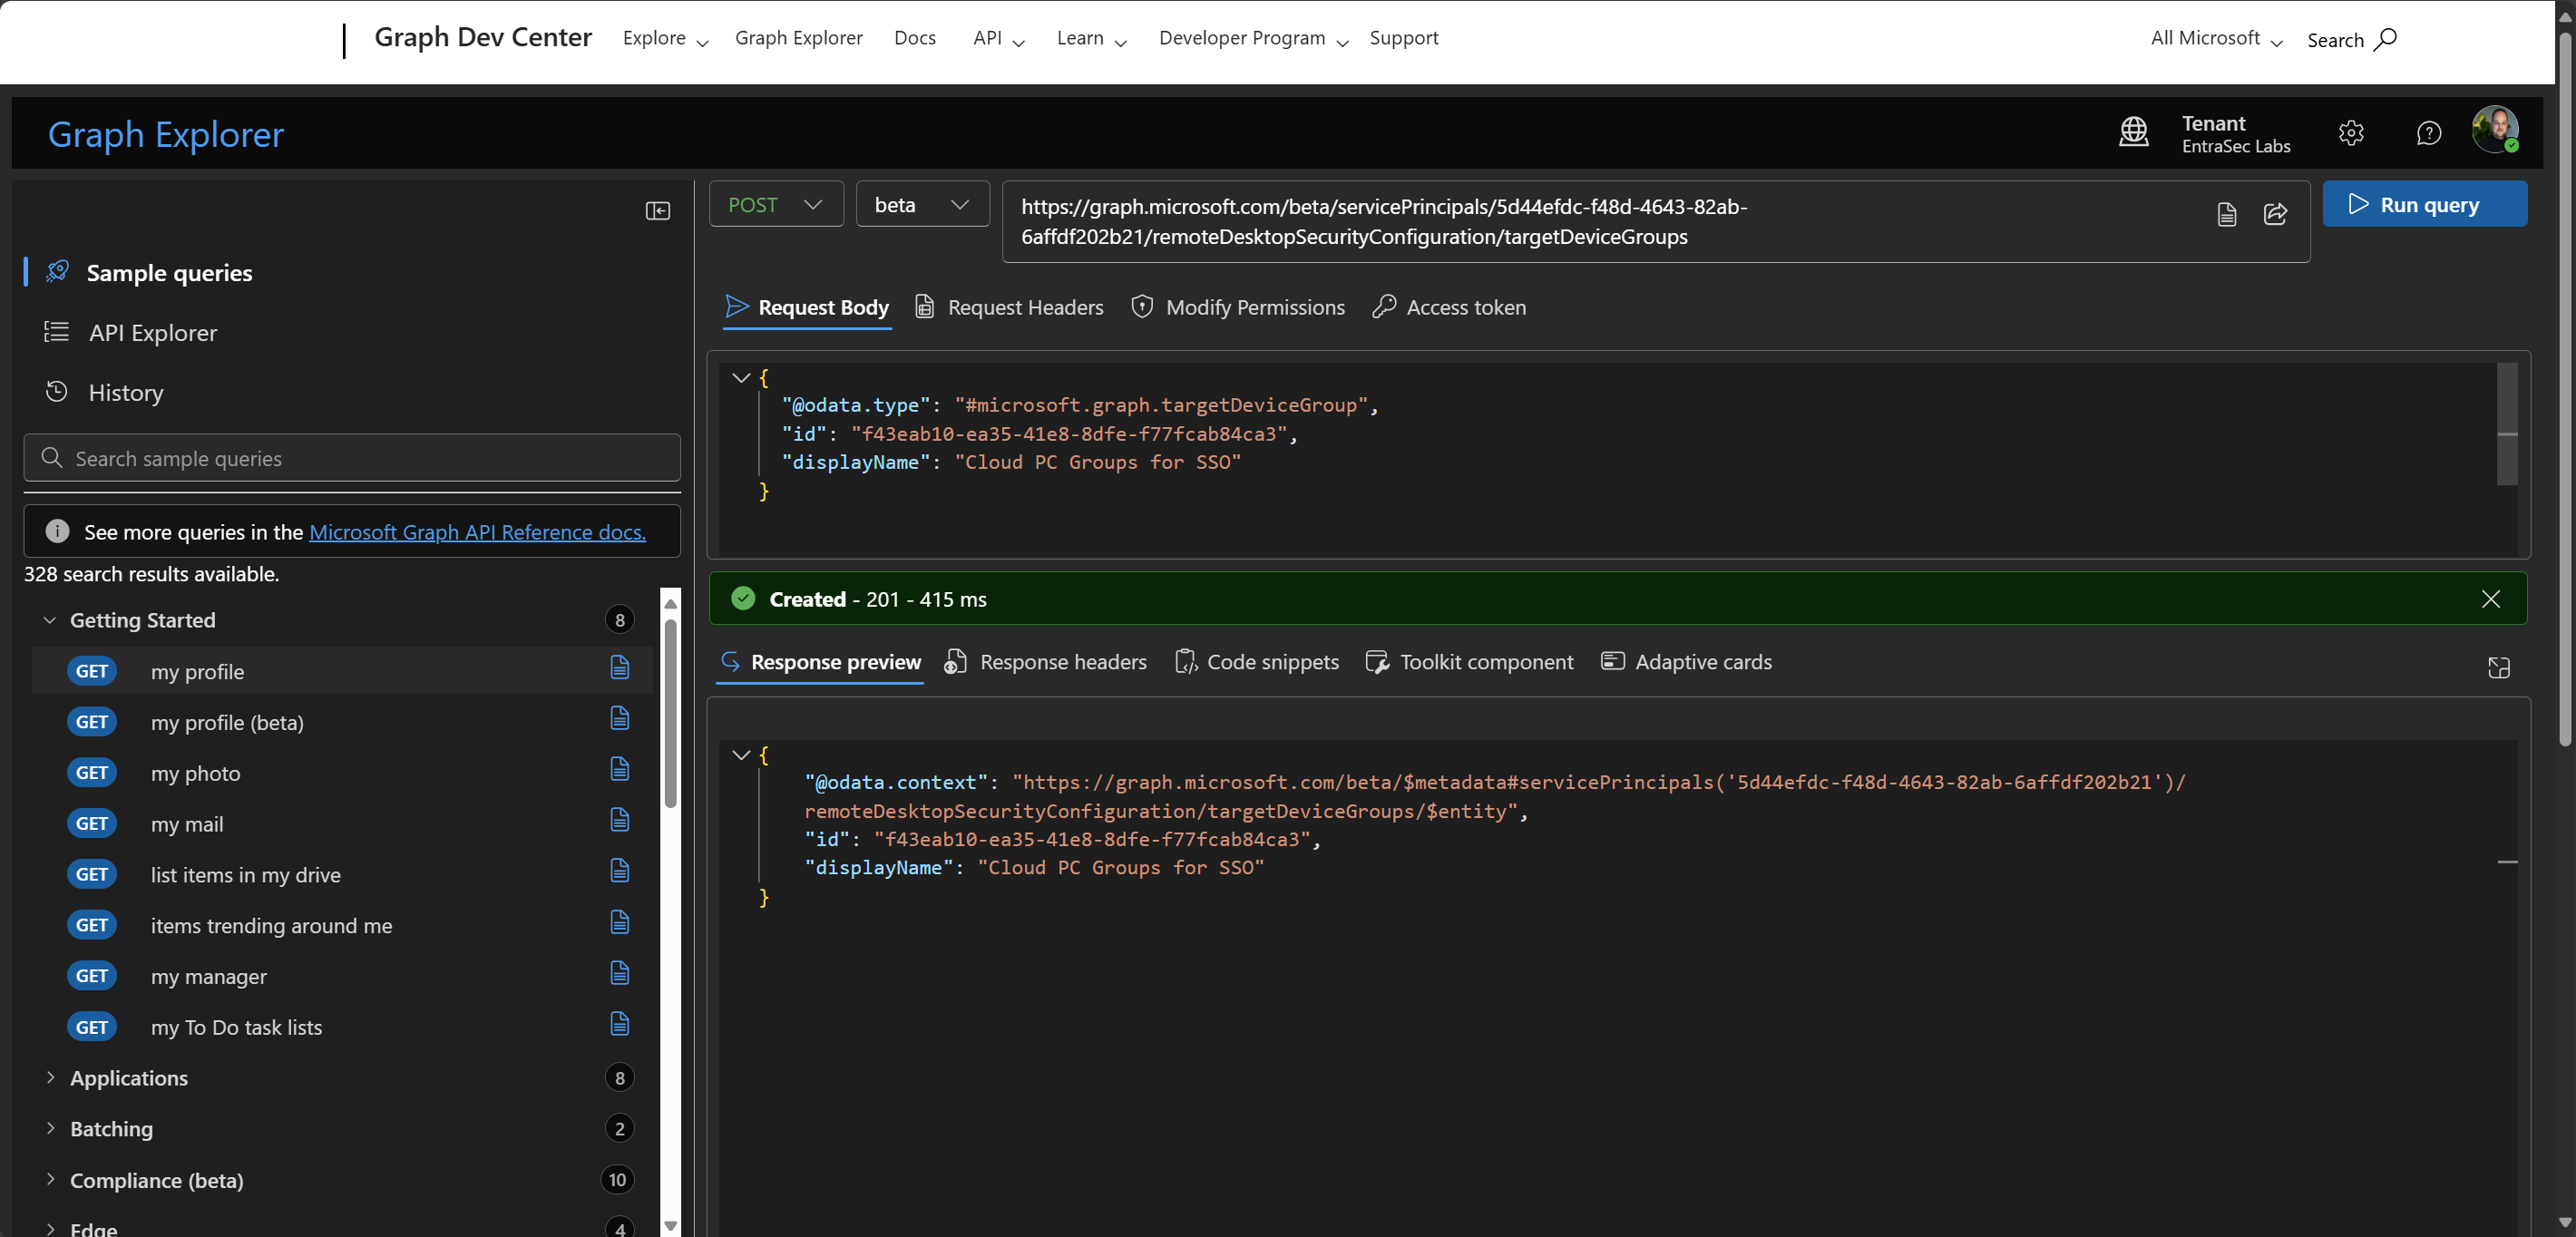
When you fetch the updated information, it should look like this:
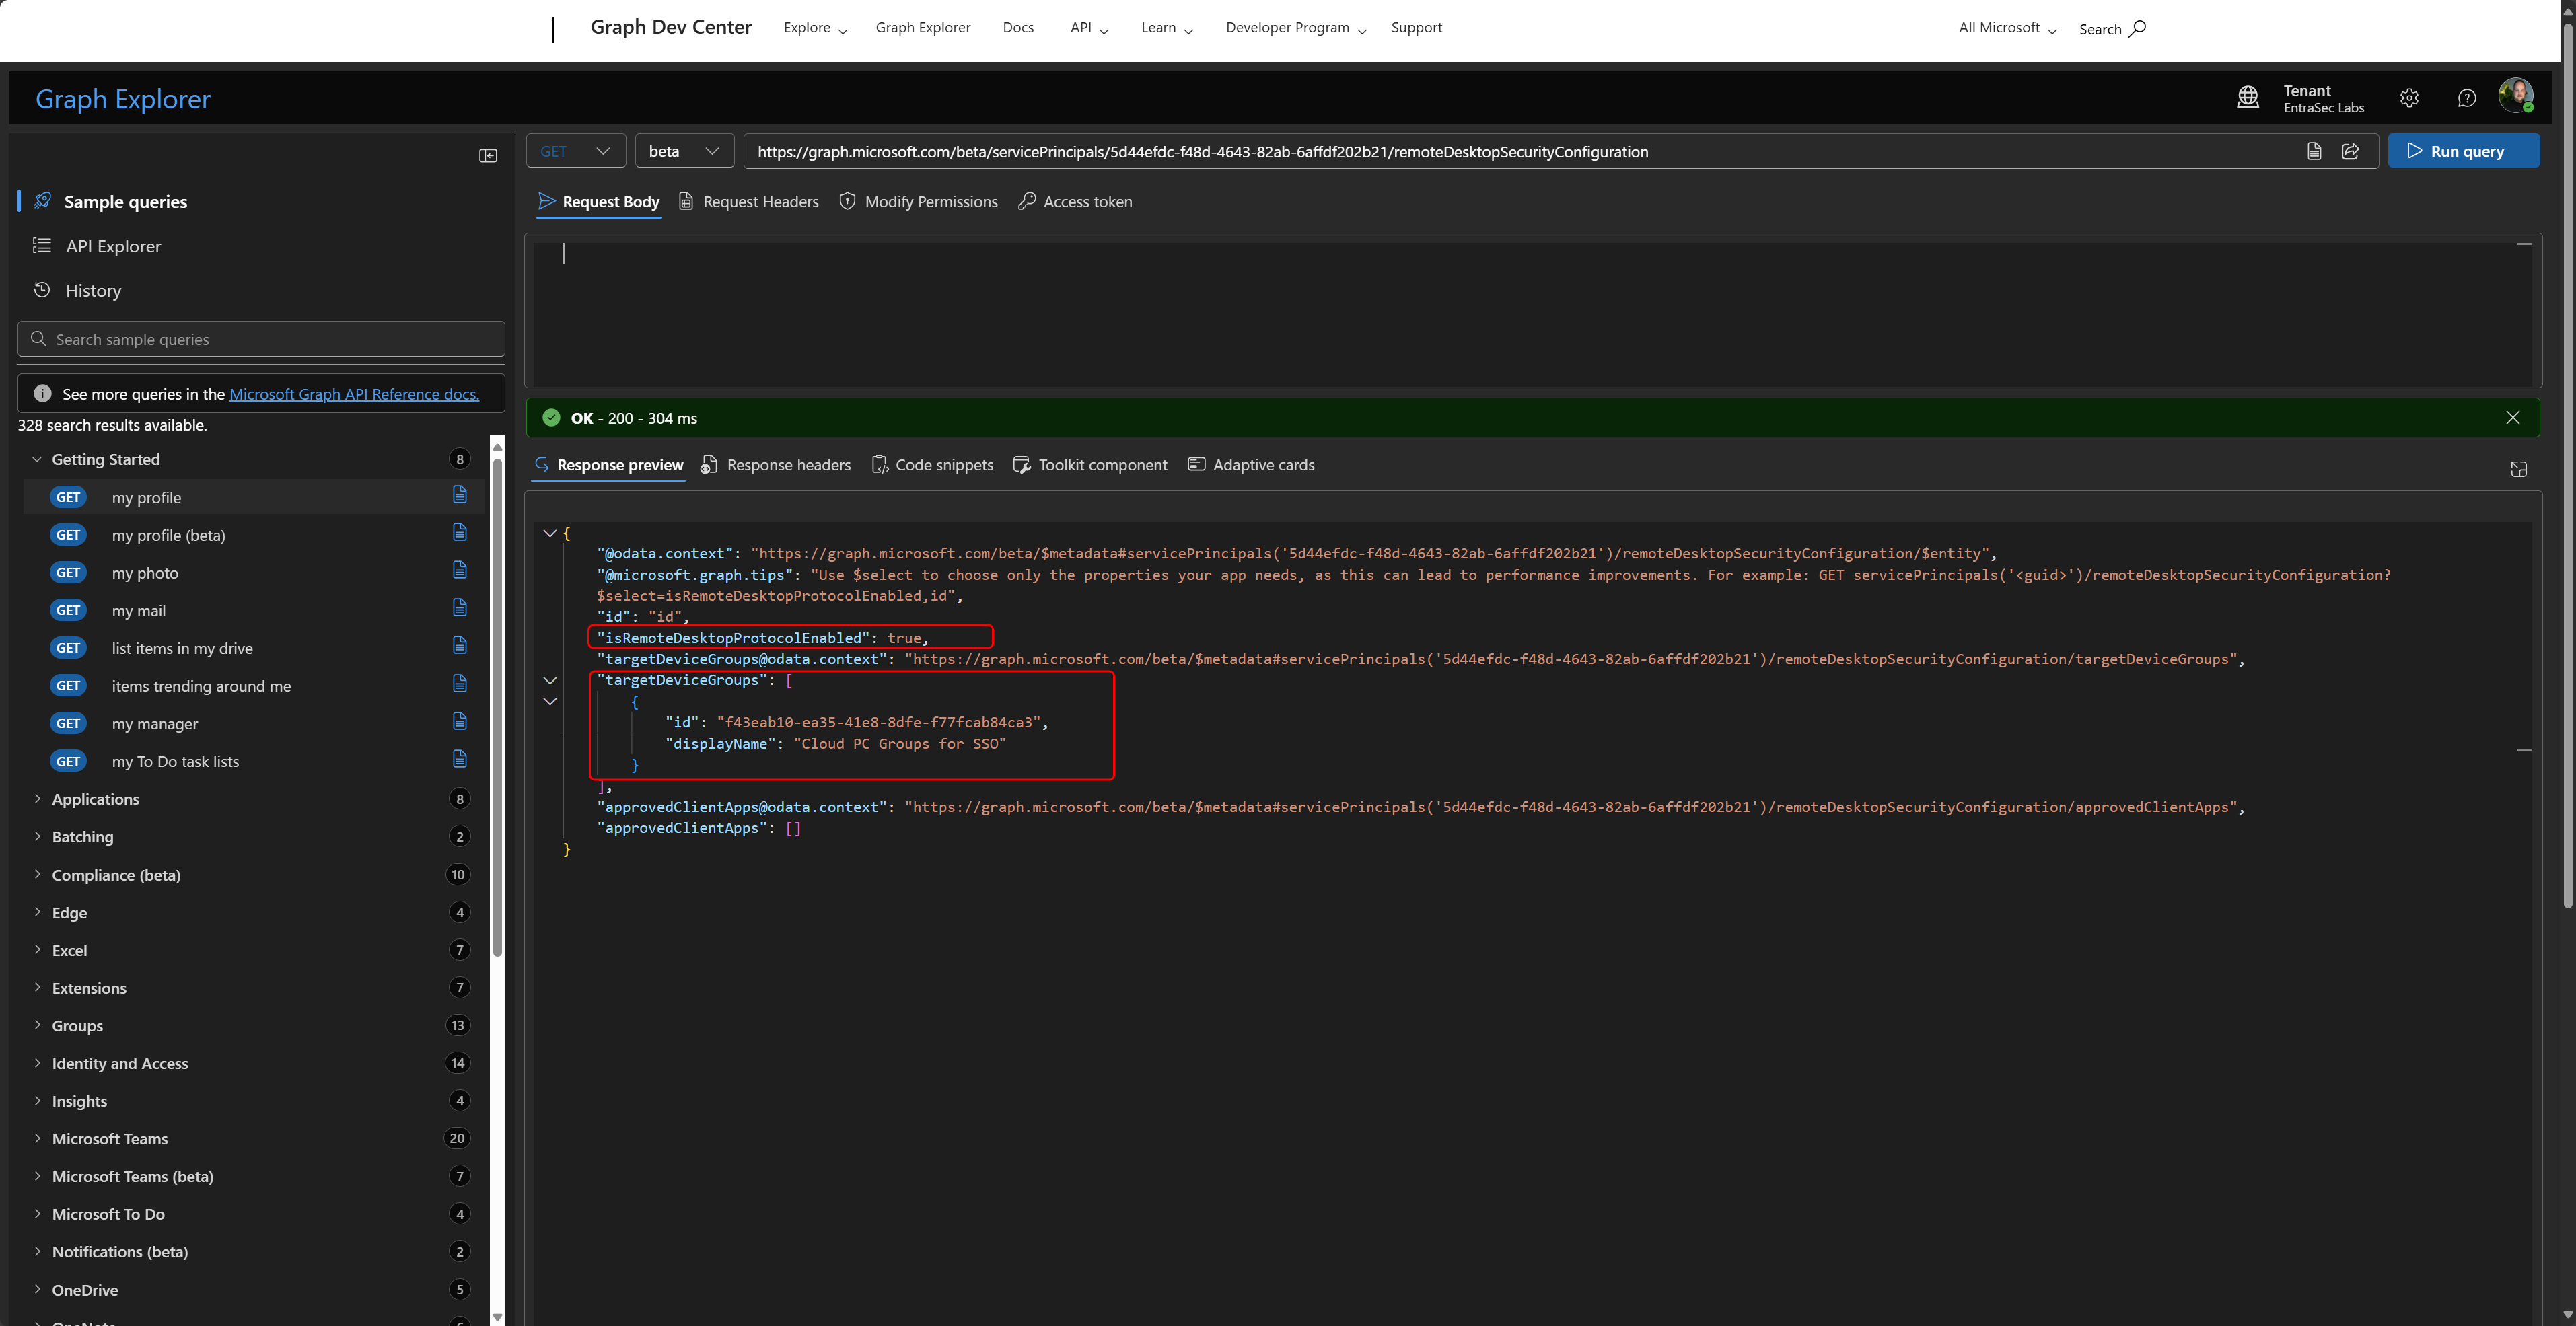
The last step is to enable SSO for all Cloud PCs using the admin center.
- Sign in to windows365.microsoft.com with an account that has the Windows 365 Administrator role.
- Select Your organization’s Cloud PCs, and then select Update organization settings.
- Select the Single sign-on option under Cloud PC settings.
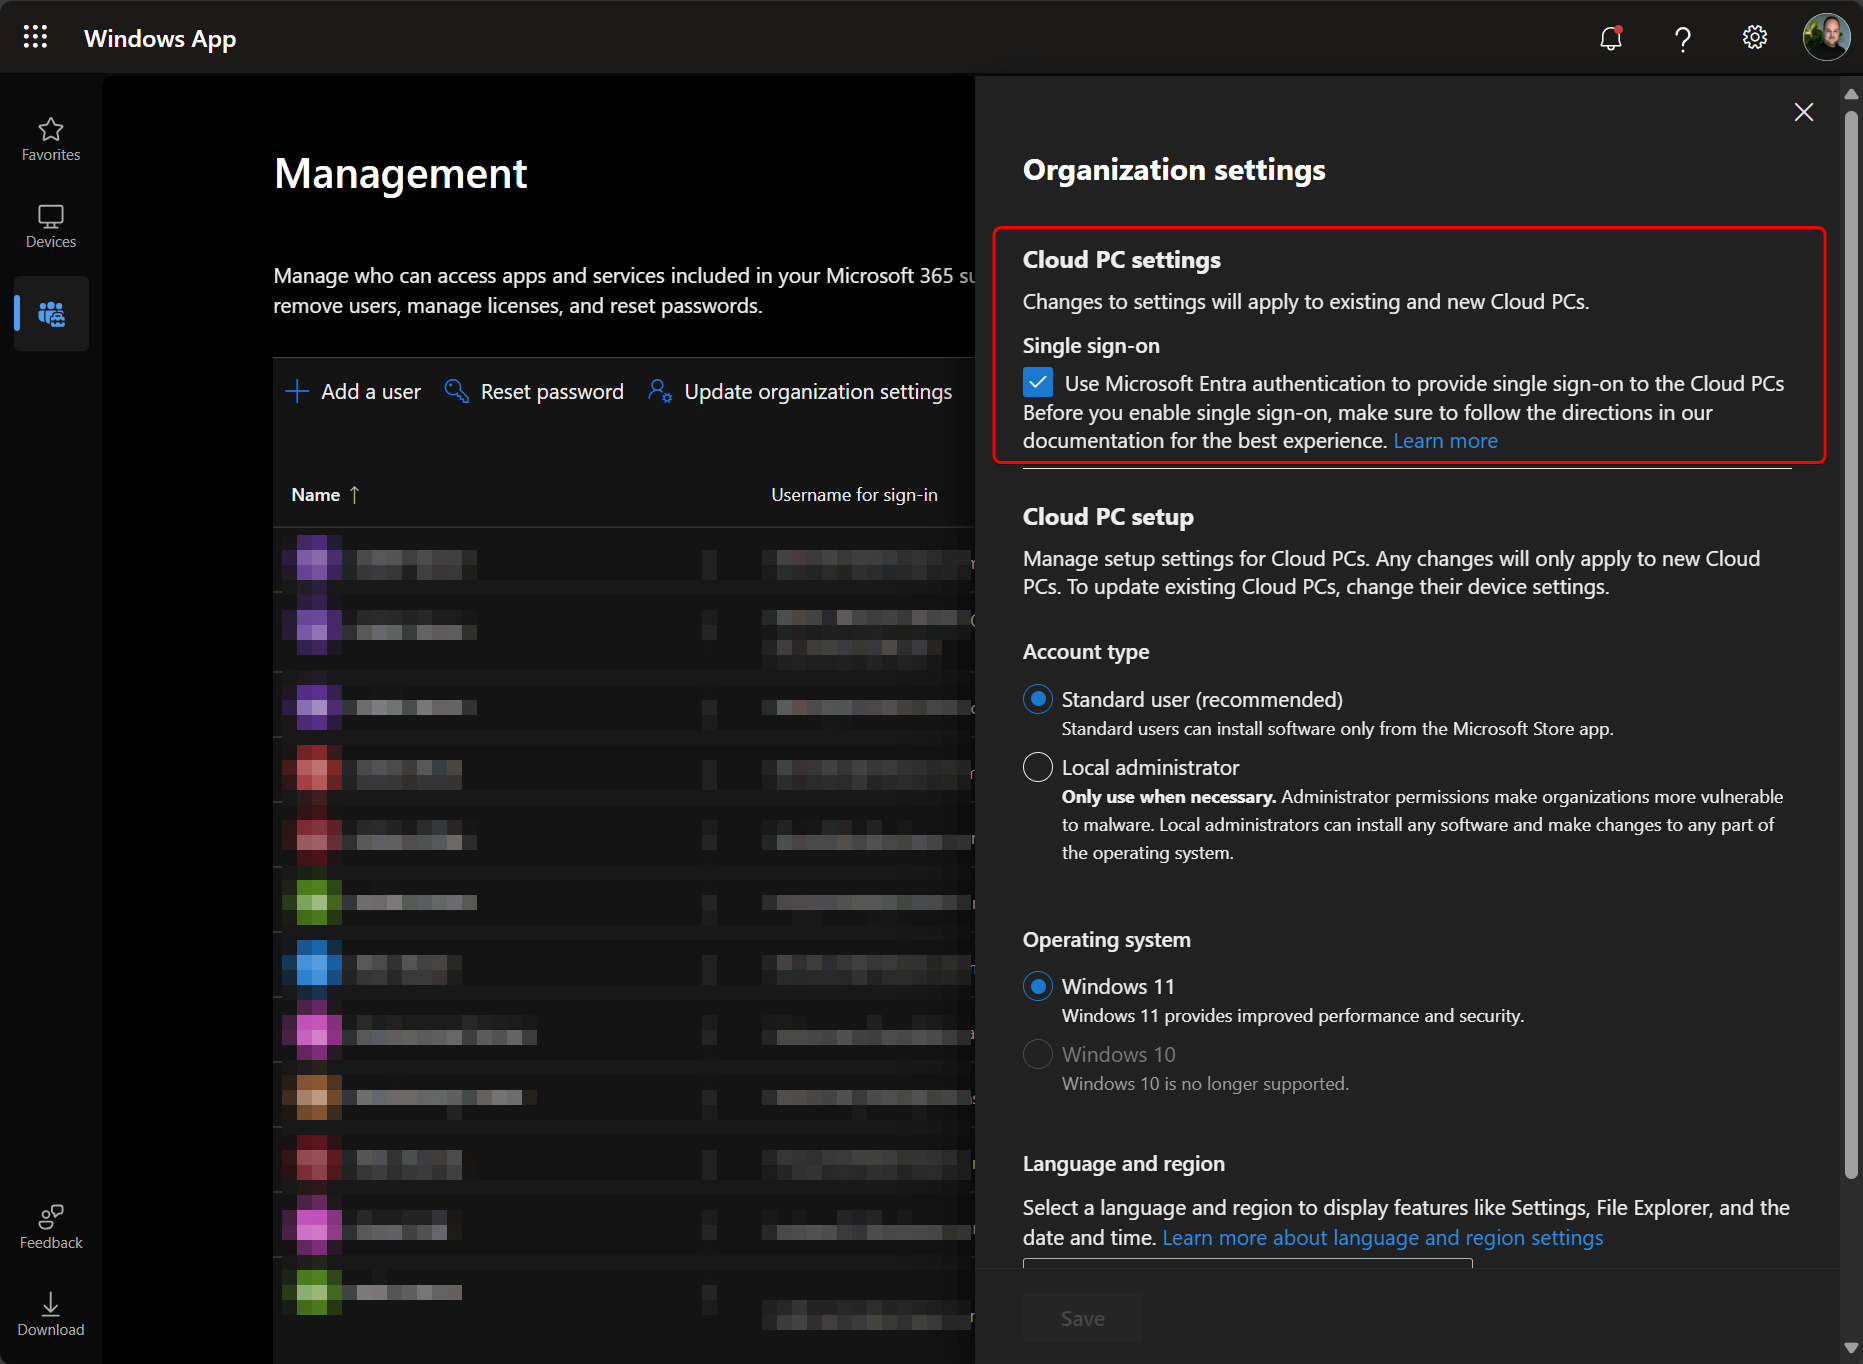
If all goes well, the experience using the Windows App should look like this, and the user should not be prompted.
More info: remoteDesktopSecurityConfiguration resource type - Microsoft Graph v1.0 | Microsoft Learn
Comments
Comments load when you scroll here.