
Entra · Power Platform · Security
How to build a PowerApp - Temporary Access Pass Manager – Part 5
On this page
Part 5: Create an app in PowerApps using a custom connector#
This article is part of a series.
Part 1 part 2 Part 3 Part 4 Part 5 Part 6 (BONUS)
This is the part where everything comes together. In this final part of the series, we are going to build a PowerApp based on the custom connector that we created. There is some stuff that you have to figure out on your own, like how to edit text on a button, or how to change color, icon type, and borders for example. Most of the stuff is just drag-and-drop. The complex part is in the properties of the items. We will get to that later. First, make yourself comfortable with the interface of the PowerApp designer. Add some of the components to see how they work and how they can be used. If you feel ready, let’s make our app!
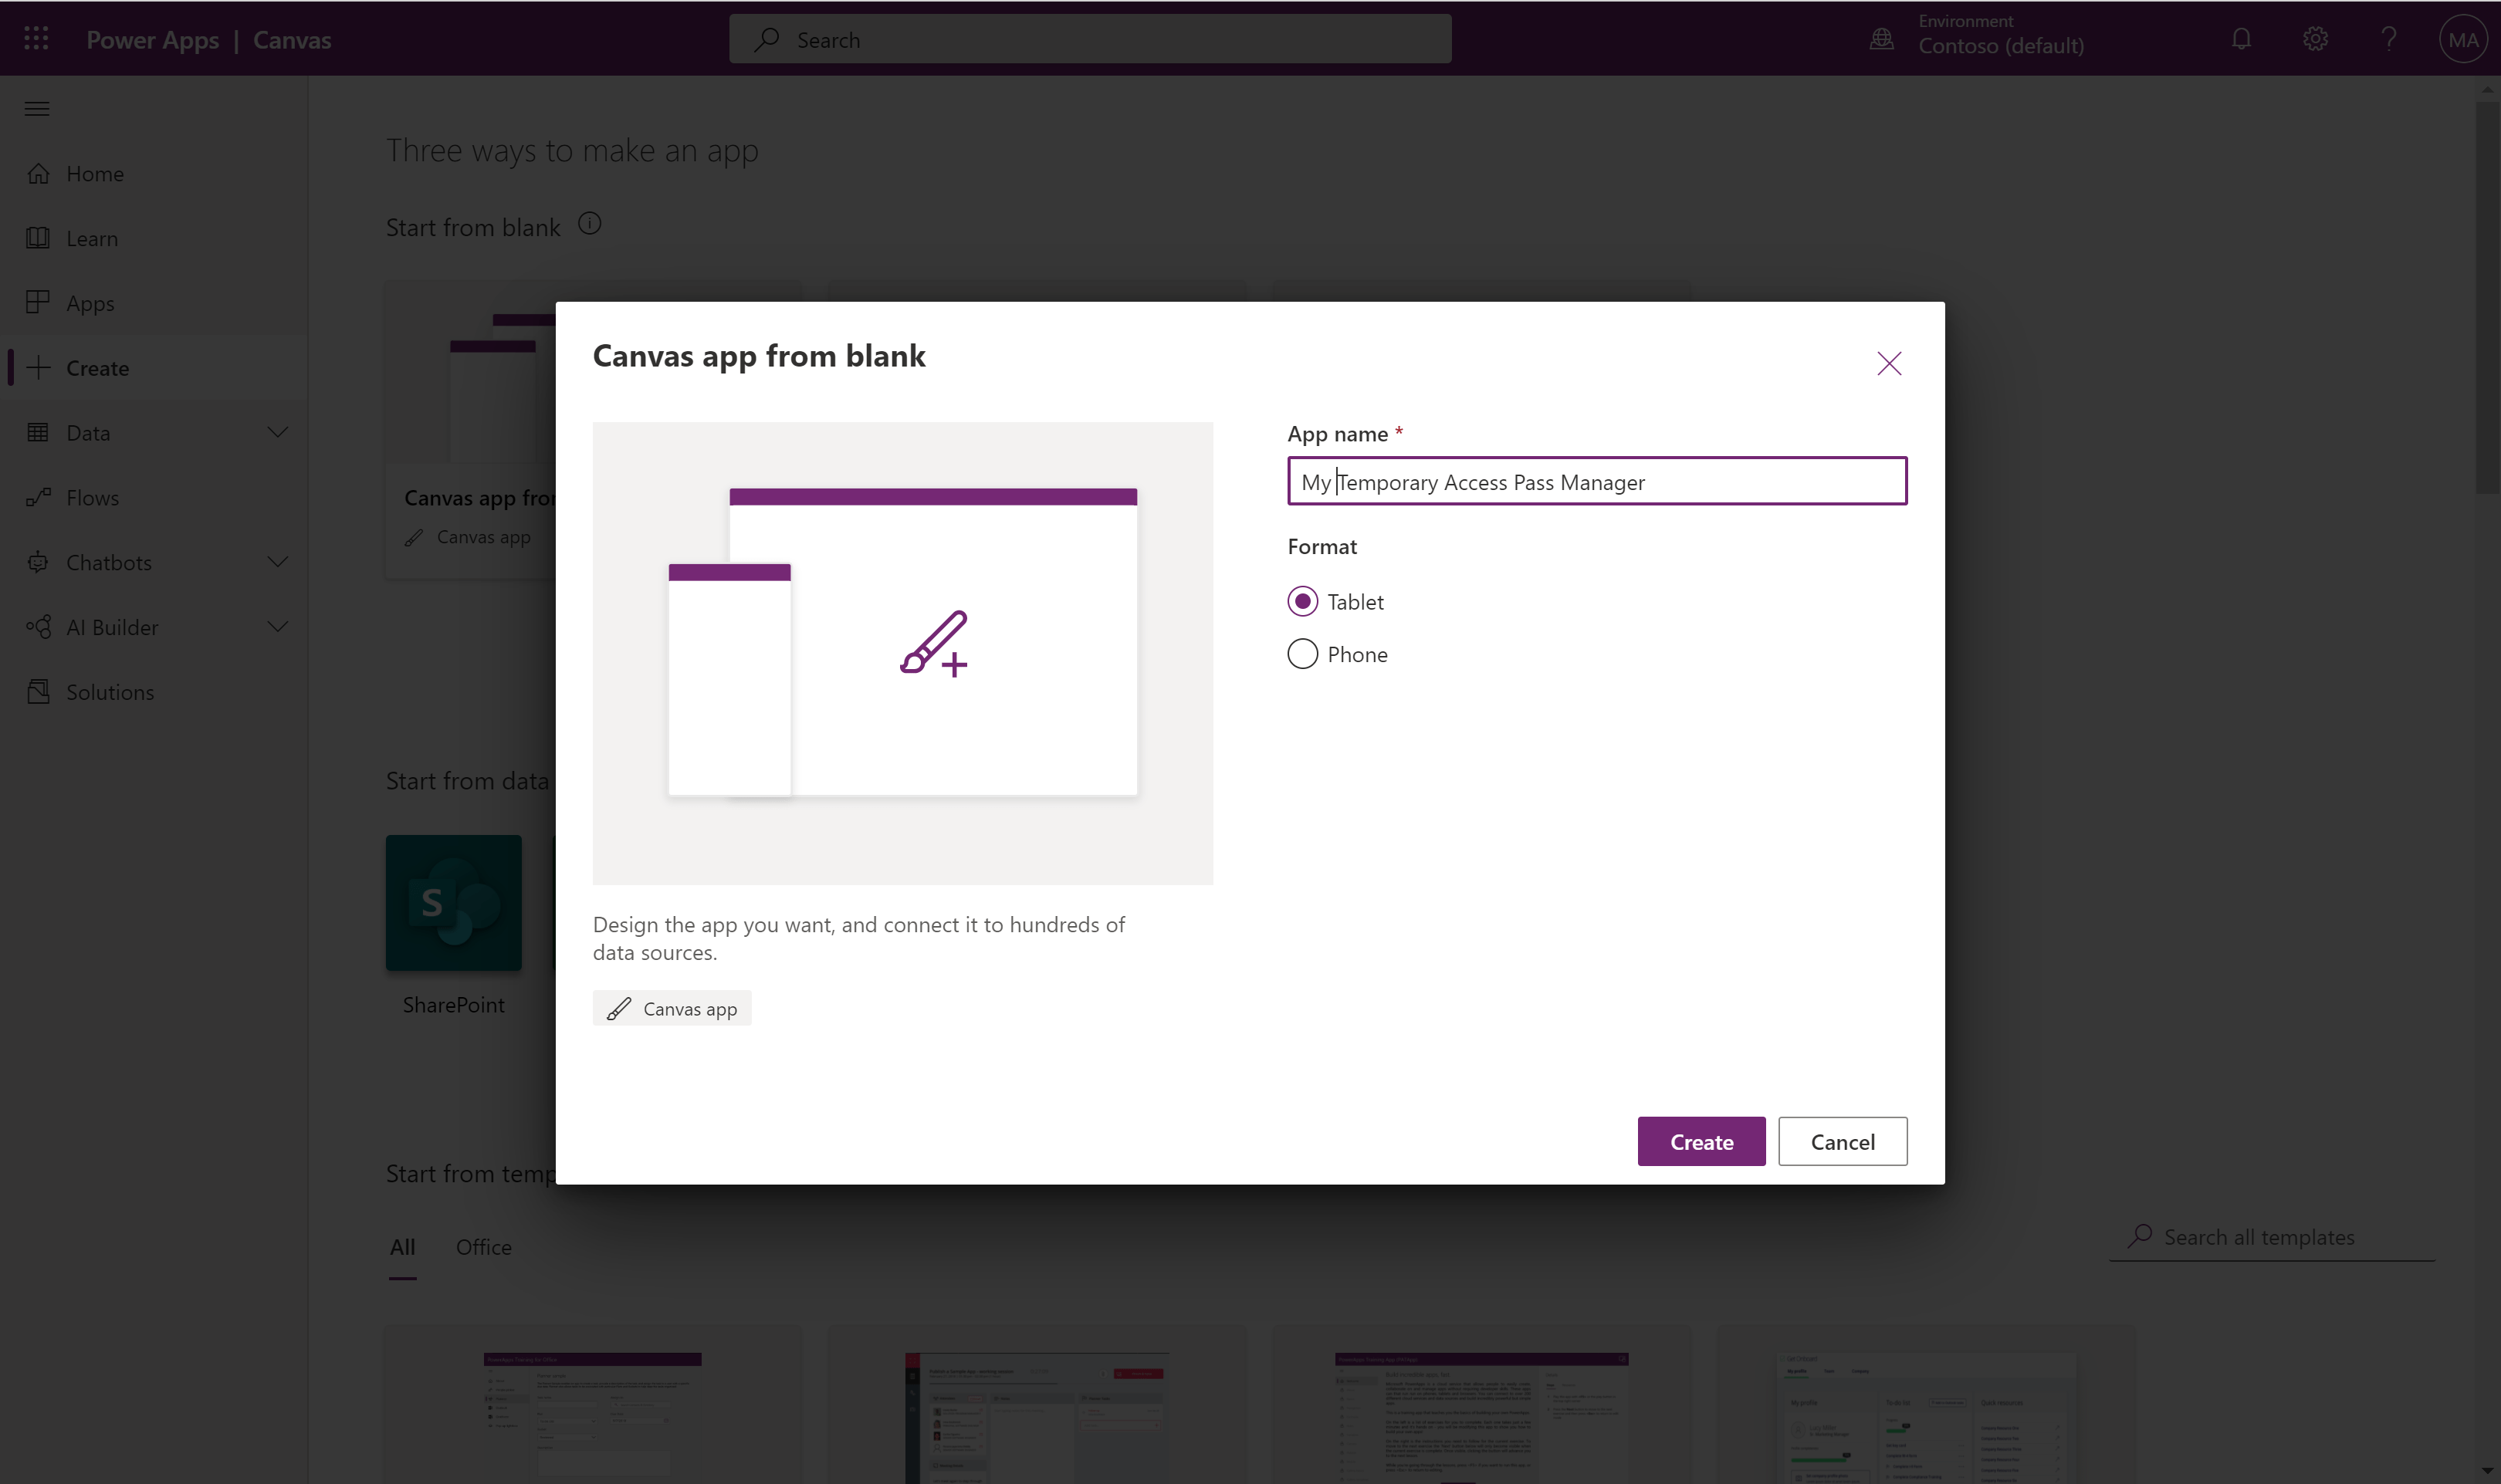
Go to https://make.powerapps.com and start with a fresh Canvas App. Choose tablet as your format. Give it a proper name and click Create to get started.
Connectors#
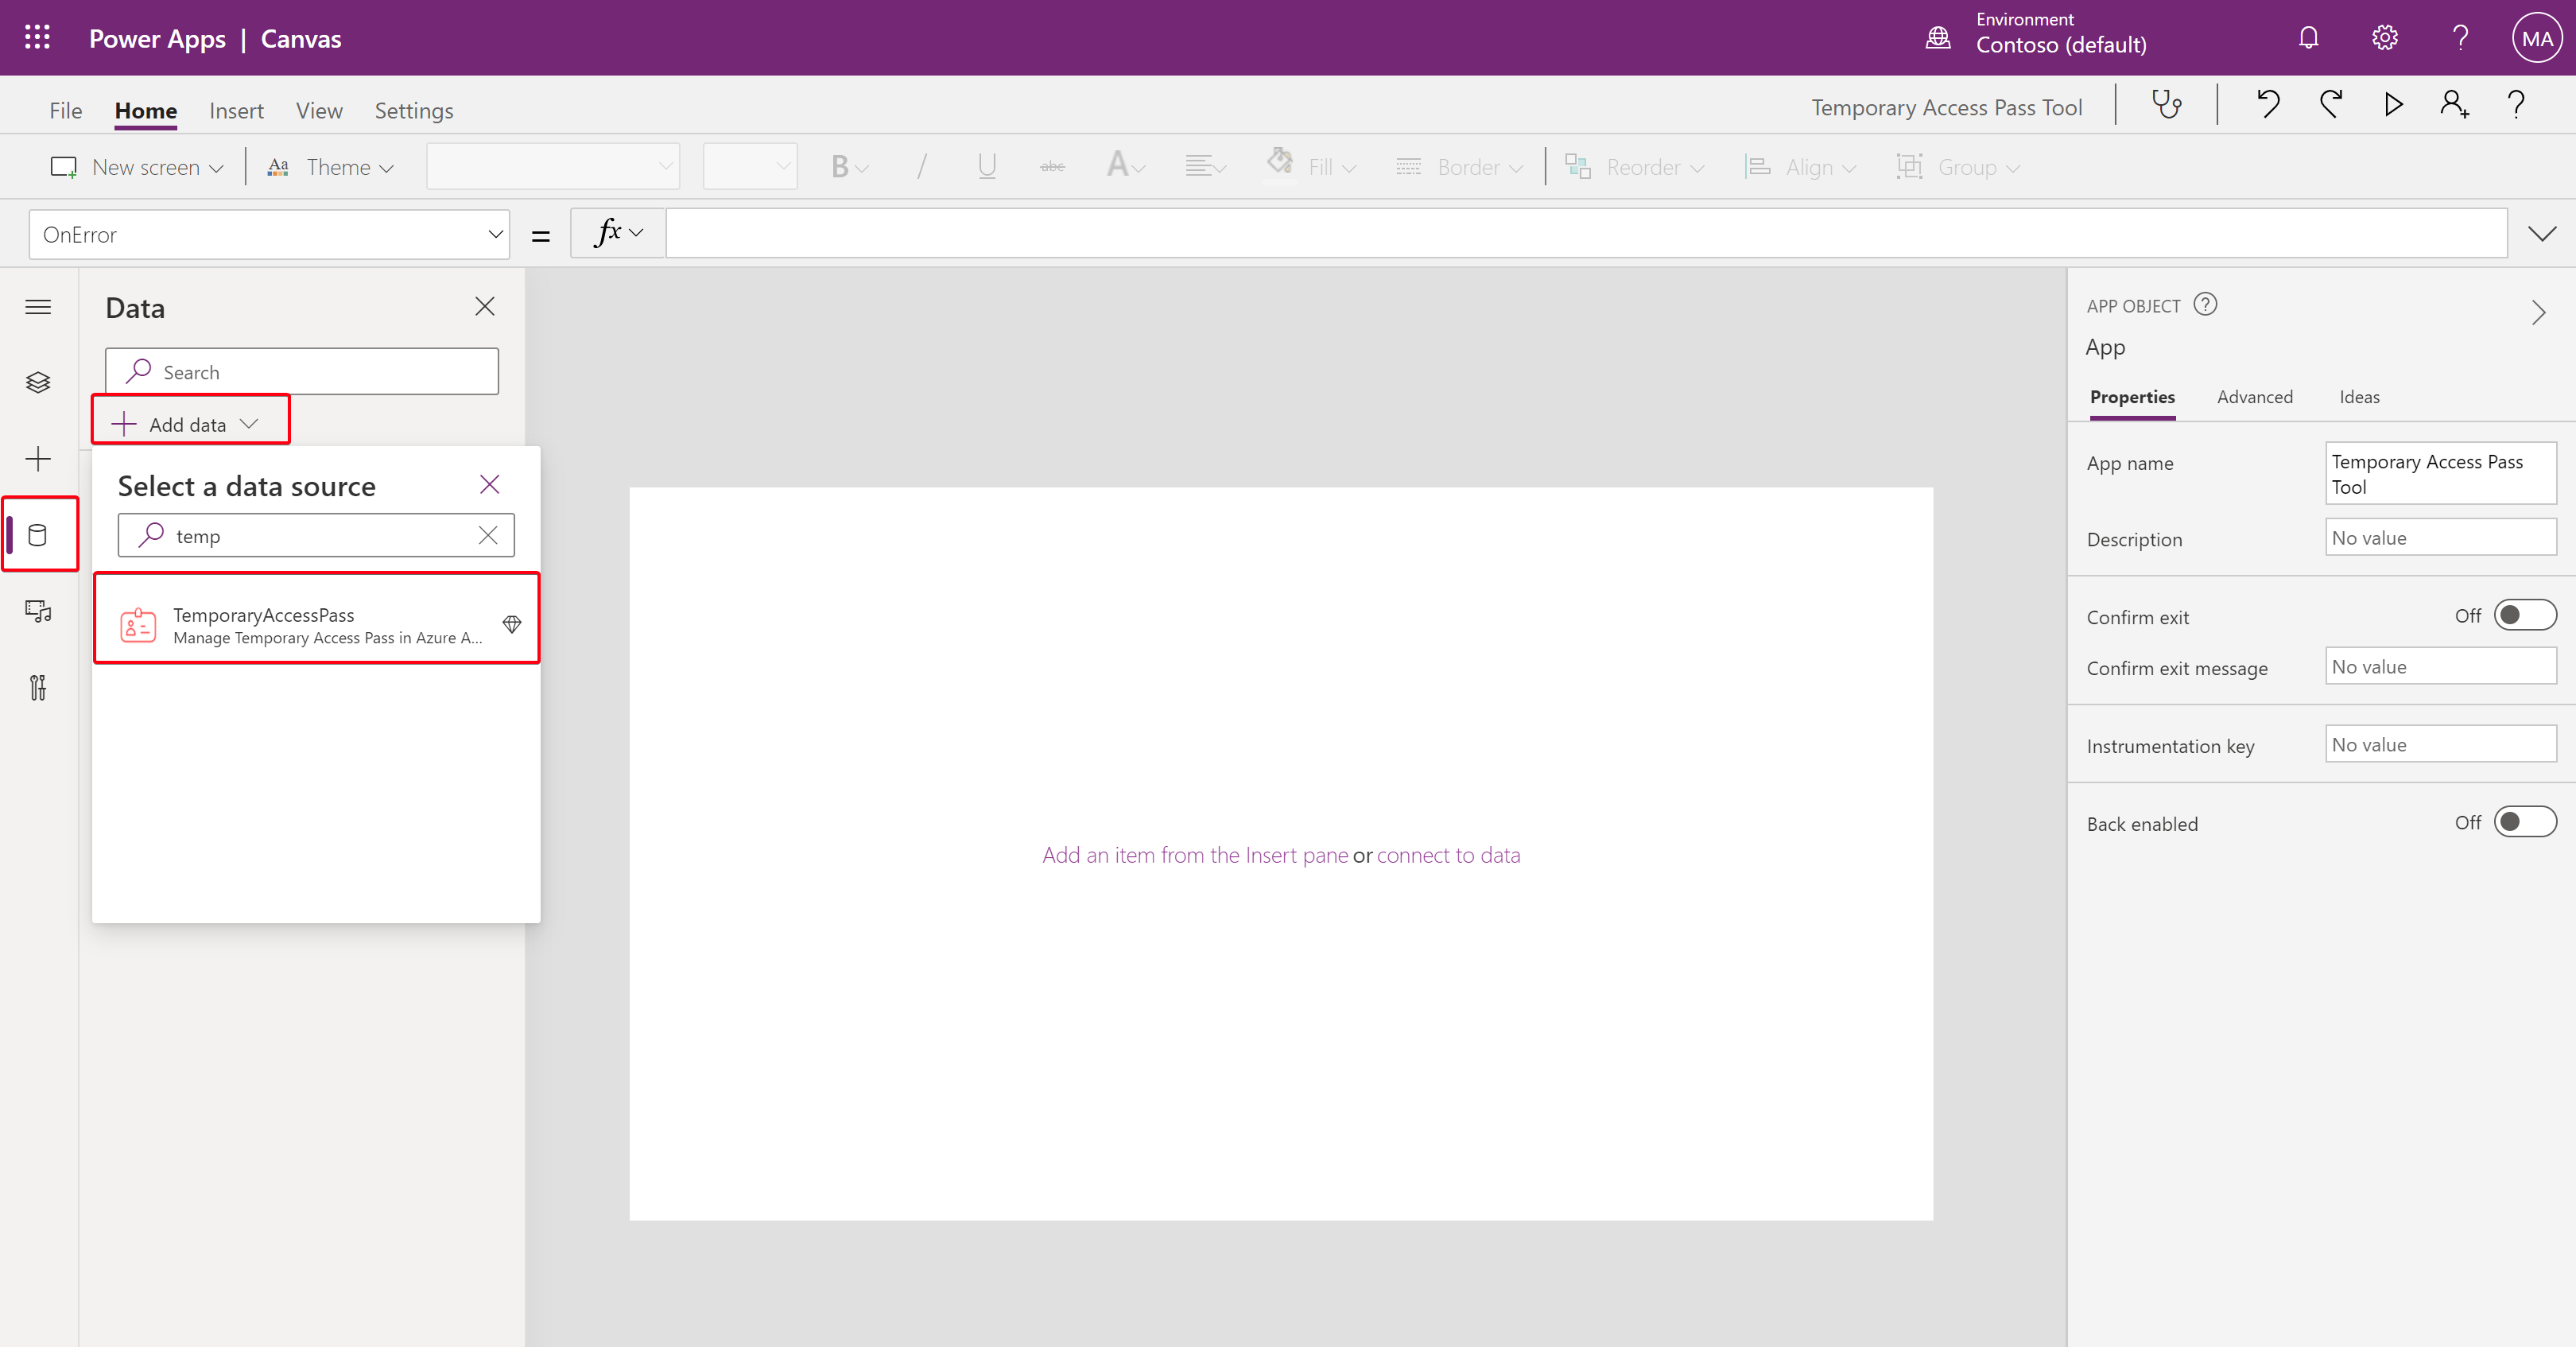
Go to the Data tab, and choose + Add data. Search for your custom connector and click to add.
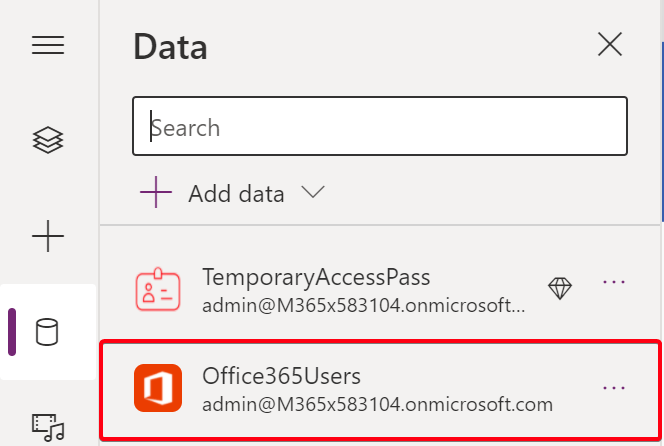
After that, also add the Office365Users connector. We are going to need this one as well.
The framework#
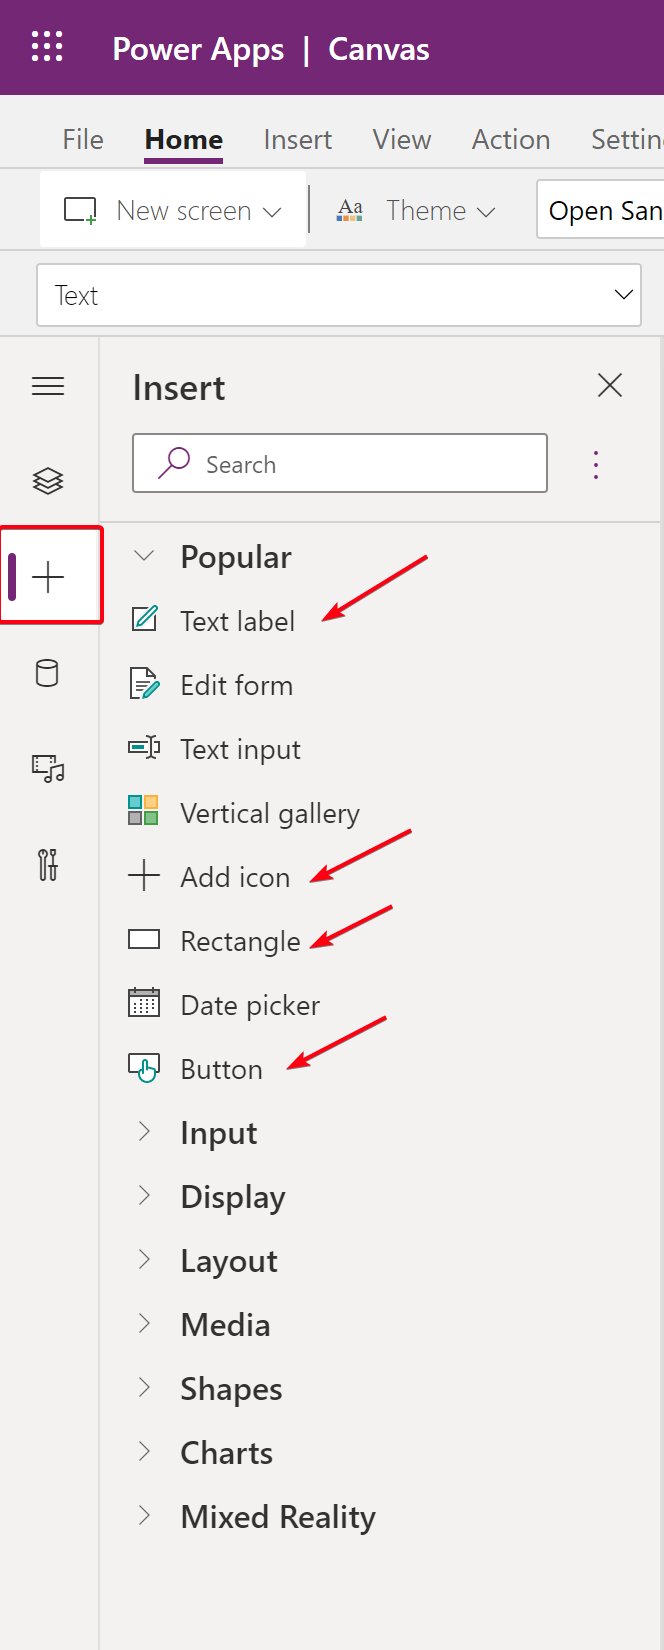
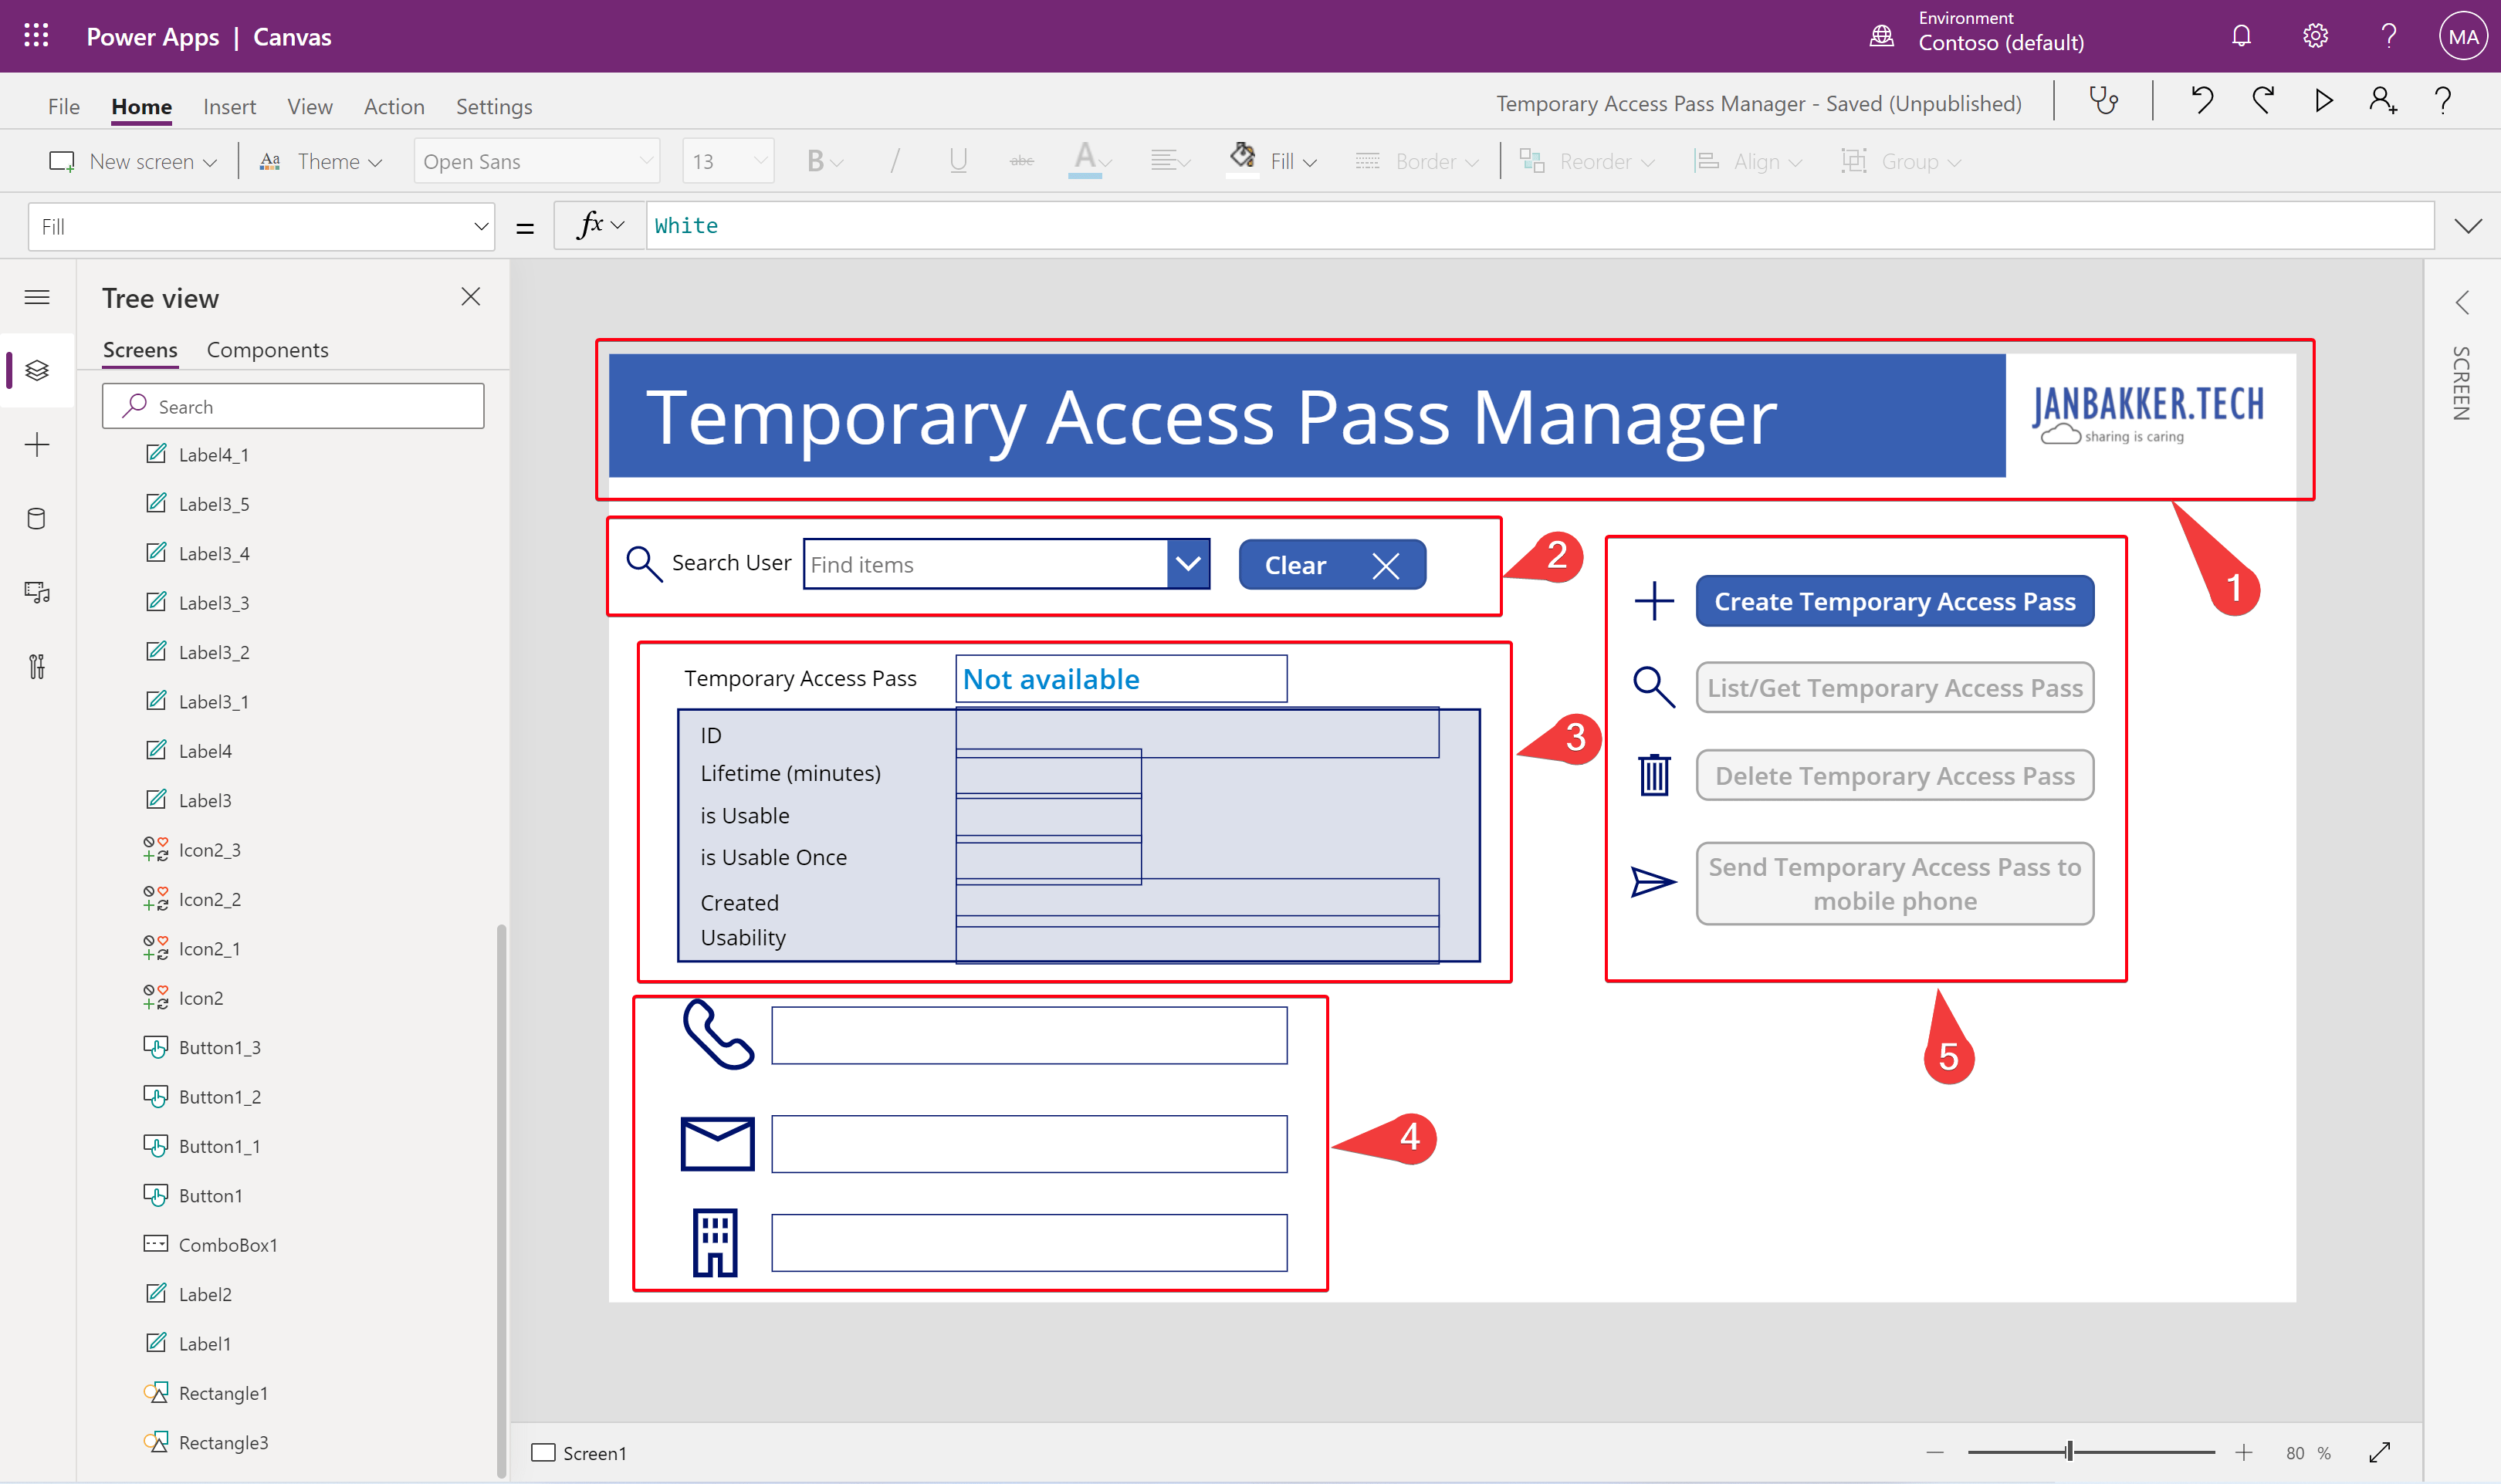
Let’s start with the framework. You can easily find all the elements on the left side of the PowerApps designer. Most elements that are being used are buttons, text labels, and icons.
You don’t have to build exactly like this example, but you can use other colors, fonts, and sizes if you like. Also, you can place the objects anywhere in the app. I’ve divided the app into different sections.
Section 1#
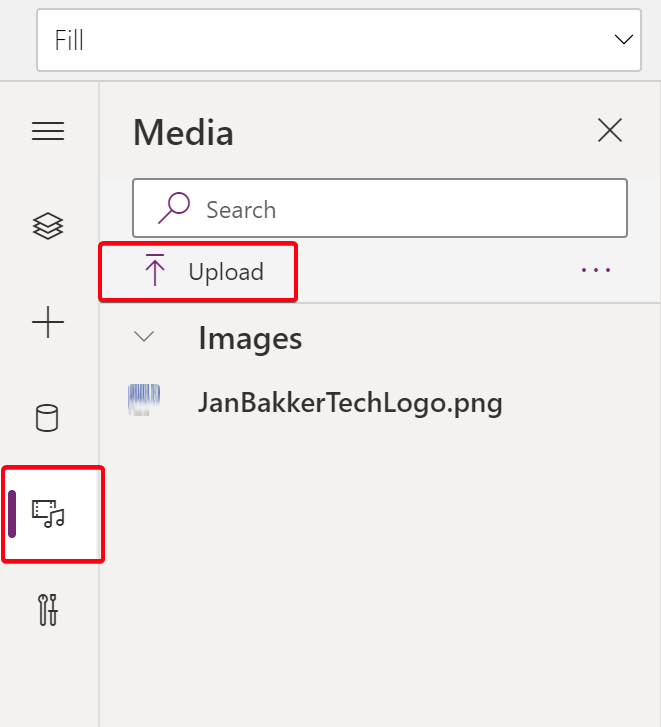
The header is just a rectangle for the background color and a text label on top. You can change the label to use it as the name of your app. Next to that I’ve uploaded an image, and added that to the very top corner of the app.
Section 2#
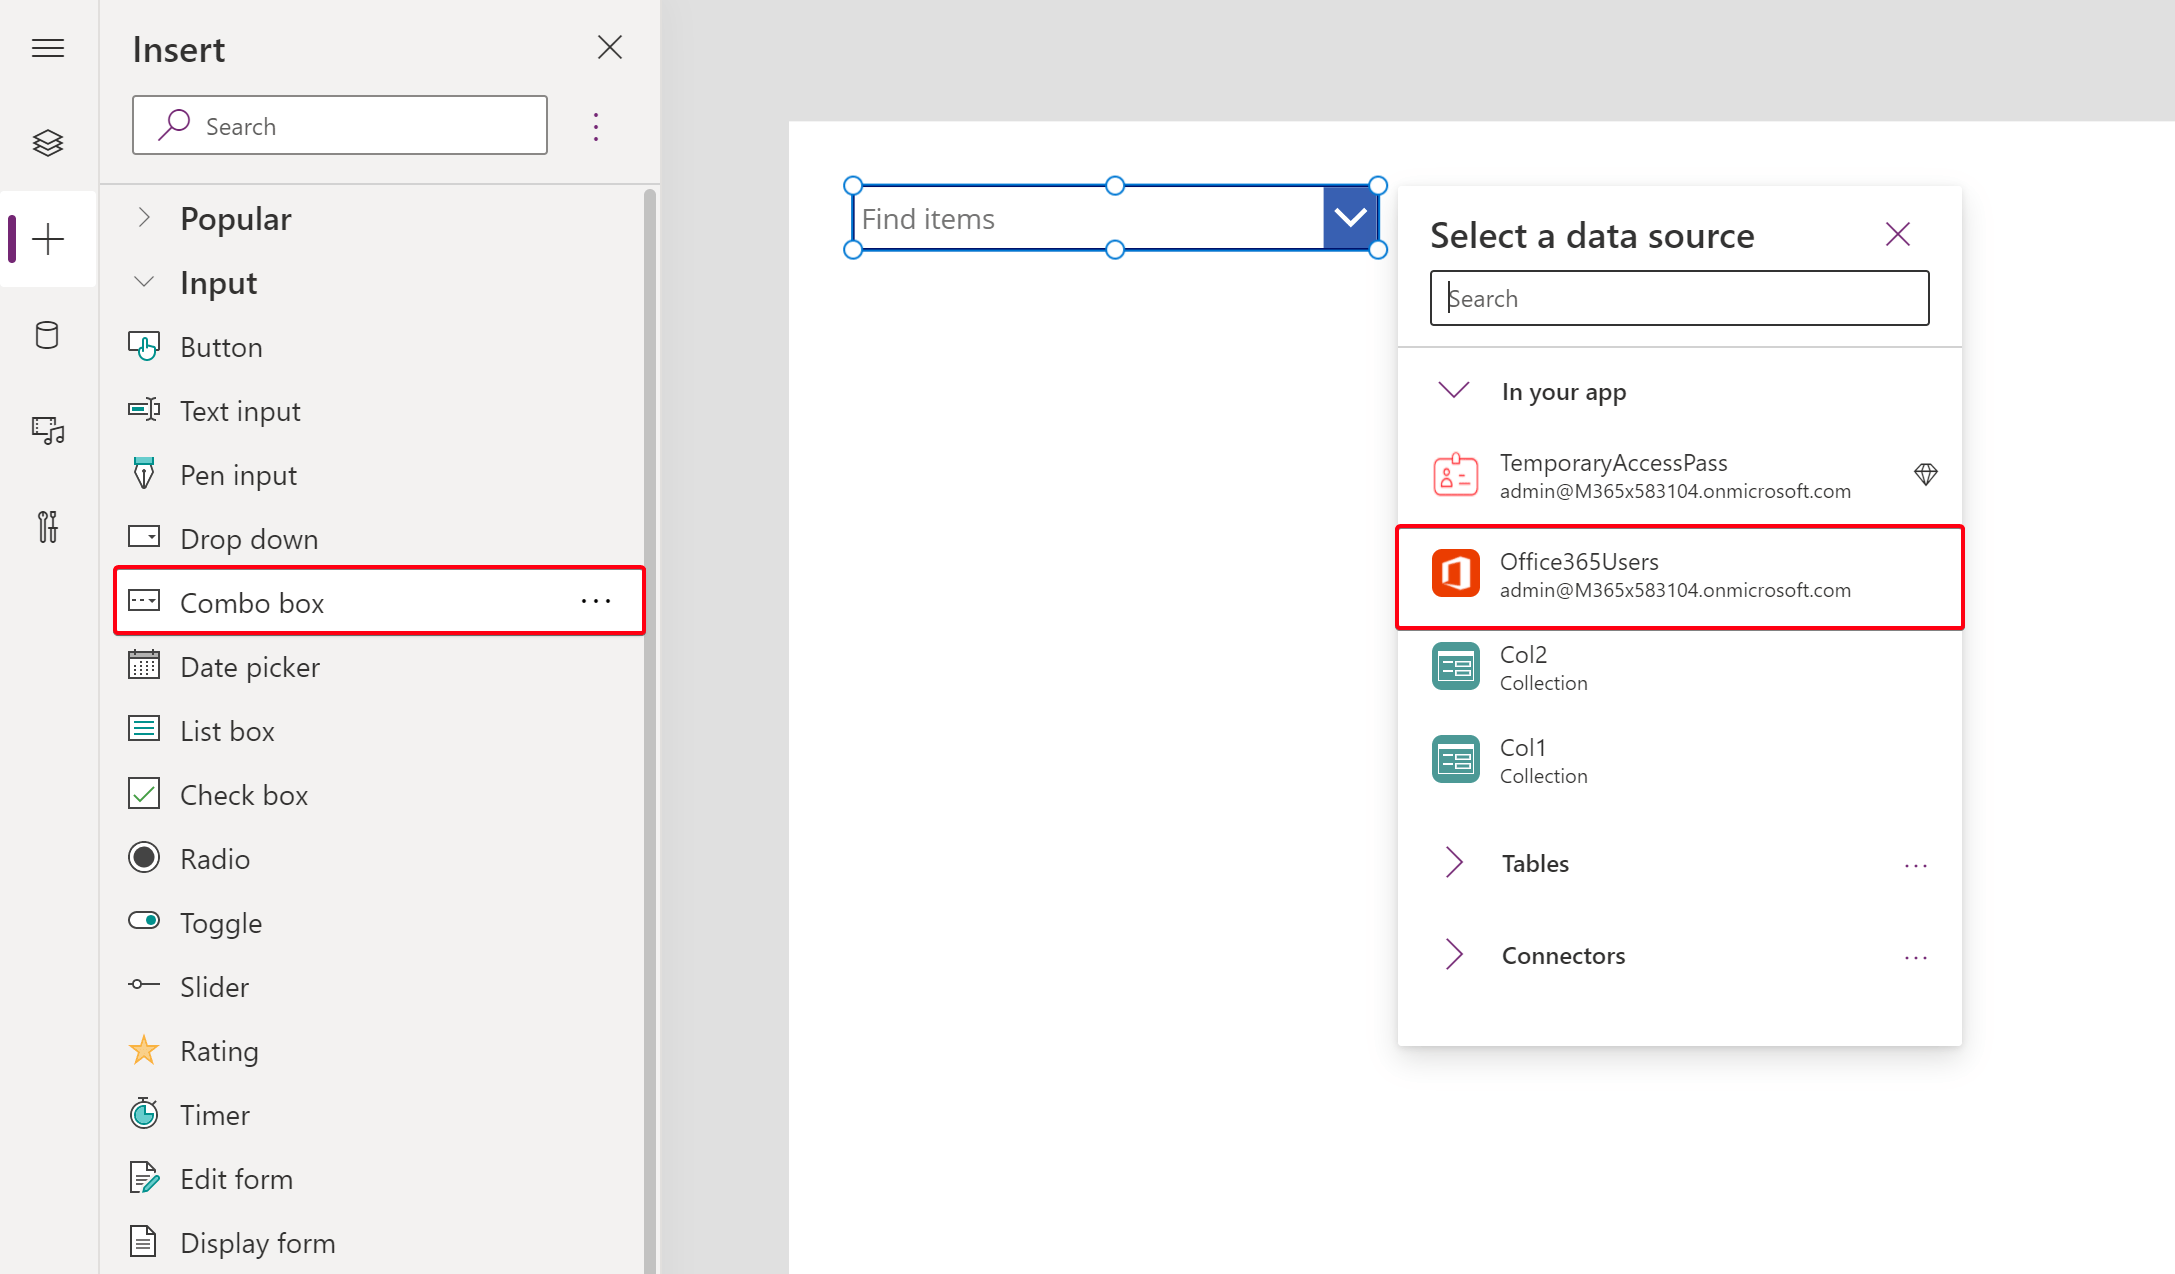
This part is the input part of the app. The search box with the dropdown is called a Combobox. When you add that to your app, select the Office365Users connector as the source. The magnifier is an icon, and the “Search User” text is a text label. The “Clear-button” also holds an icon.
Section 3#
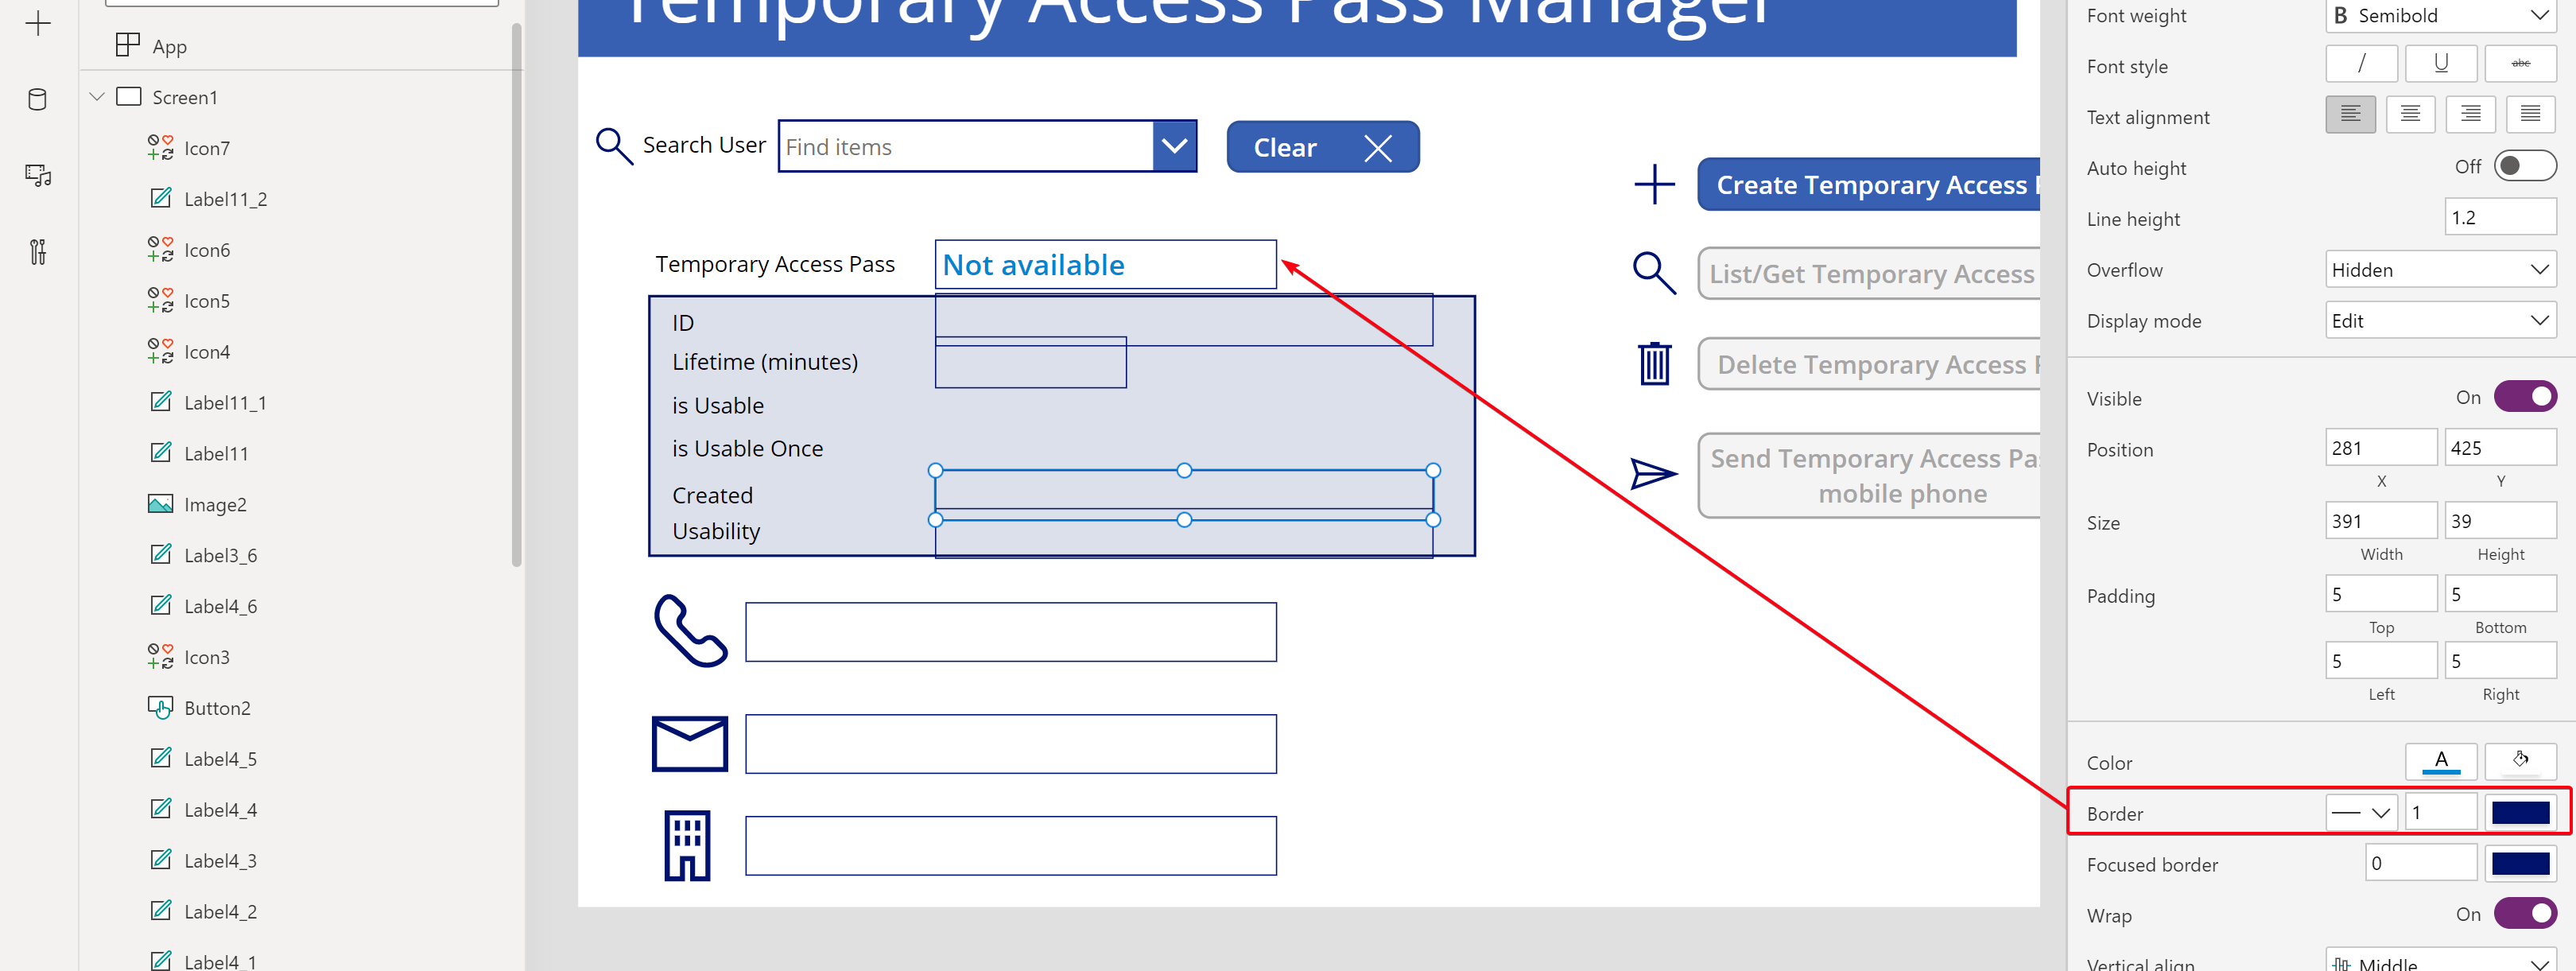
This section holds only text labels, 7 by 7. Tip: change the border to one pixel, so you can still see them in the app. Text labels are white by default, and since a few of them are empty, it’s easy to lose track of them. I’ve put a rectangle behind the fields, to let it stand out a little bit more, but that’s optional. Name the labels on the left to match the example. The fields in the right can stay empty for now.
Section 4#
This section is basically three icons and three text labels. These will hold the phone number, email address, and city attribute of the user. The icons that I used are phone, mail, and office building.
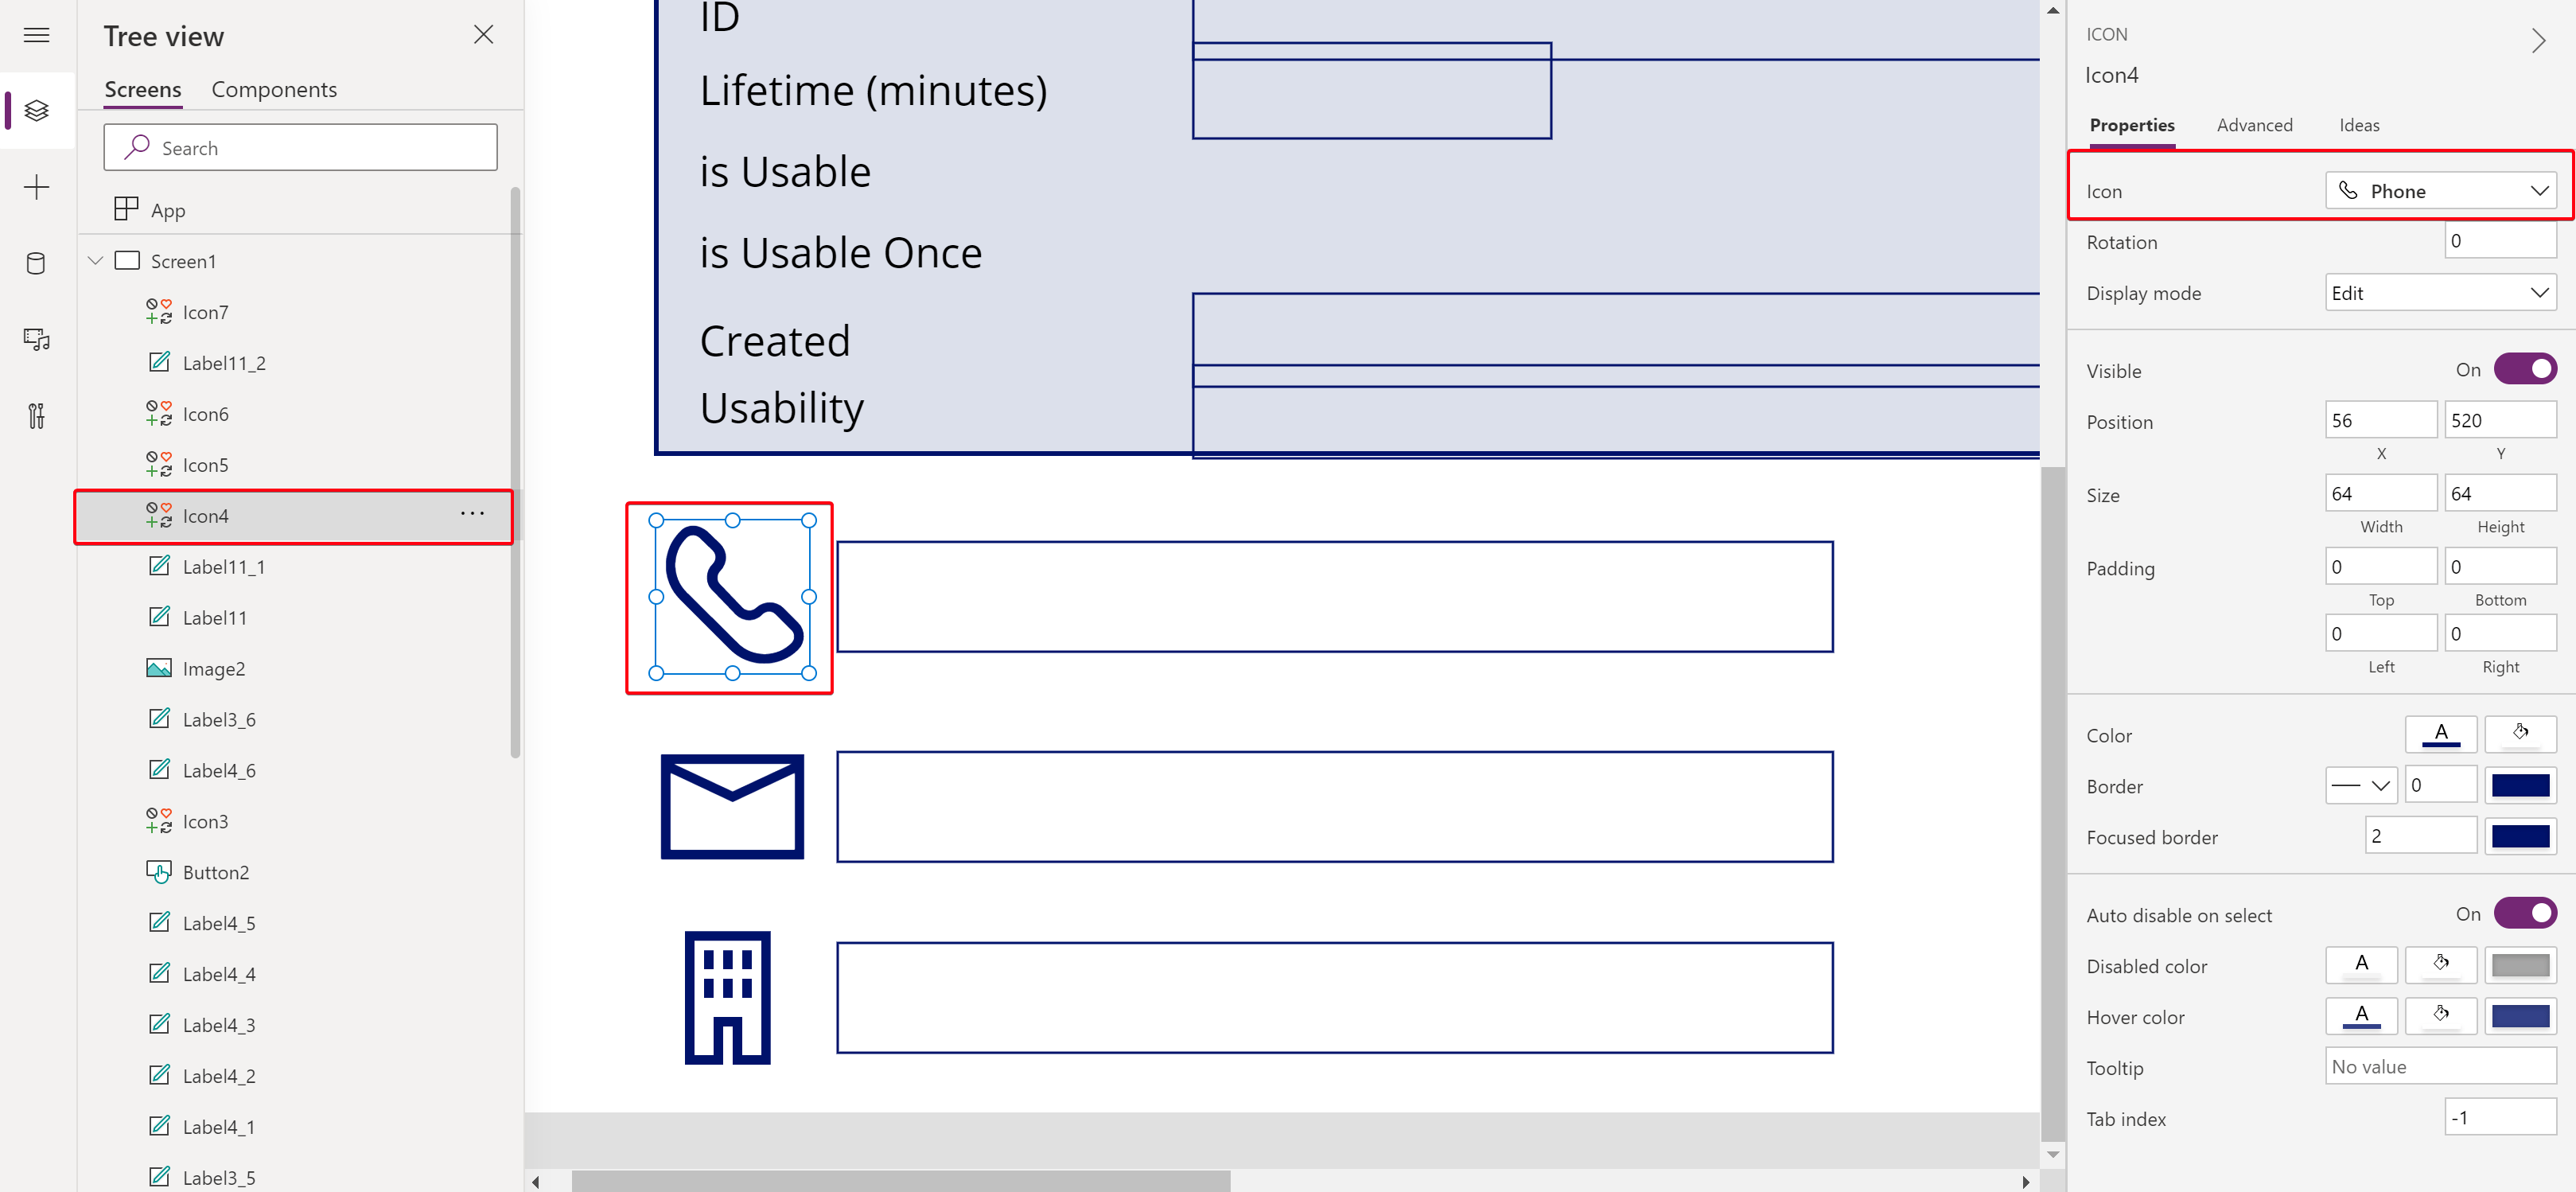
Section 5#
In this section, we need 4 buttons and 4 icons. Change the text and the icons to match the screenshot. As you can see, some of the buttons are grayed out. These are additional configurations that we are going to configure later.
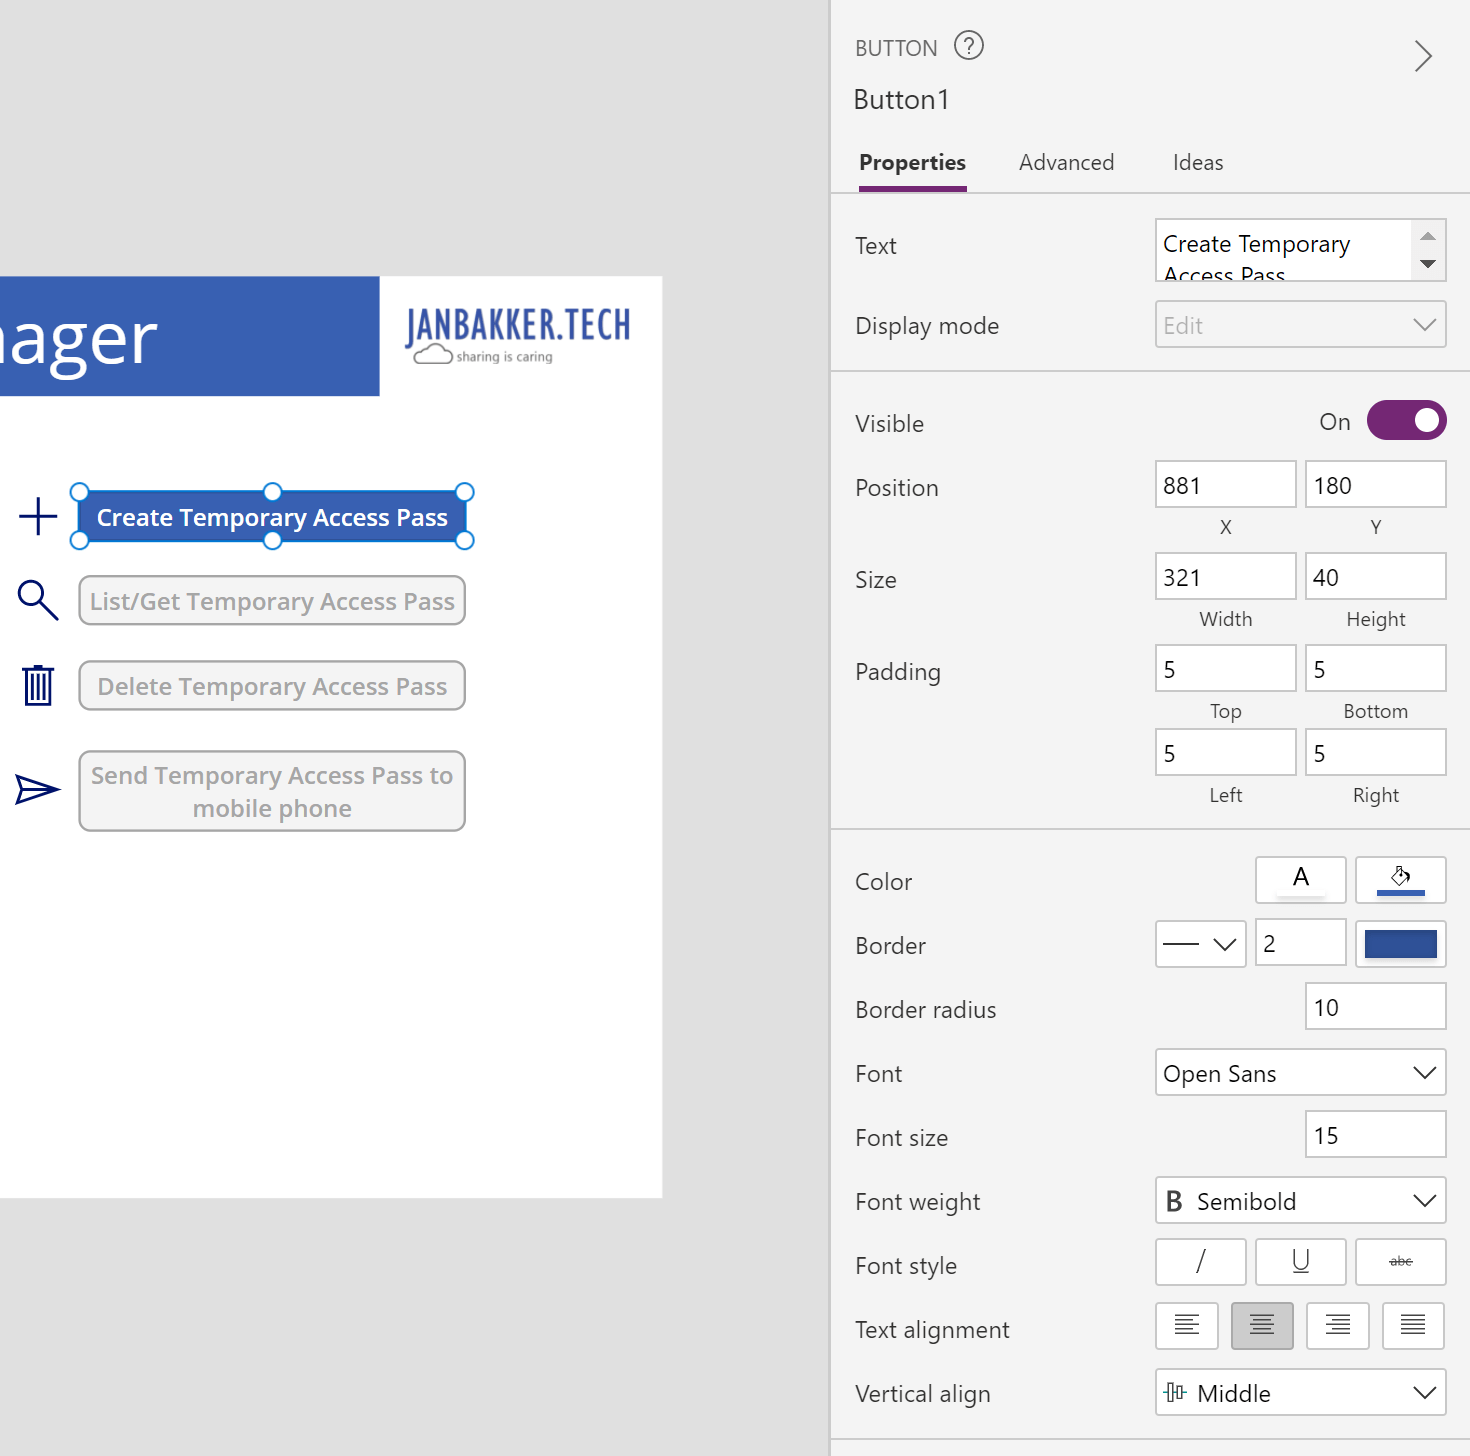
After these steps, you should have the outline of the app configured. Now, none of the buttons work, and none of the fields contain information. Let’s configure the sections step by step.
Combobox / Search field#
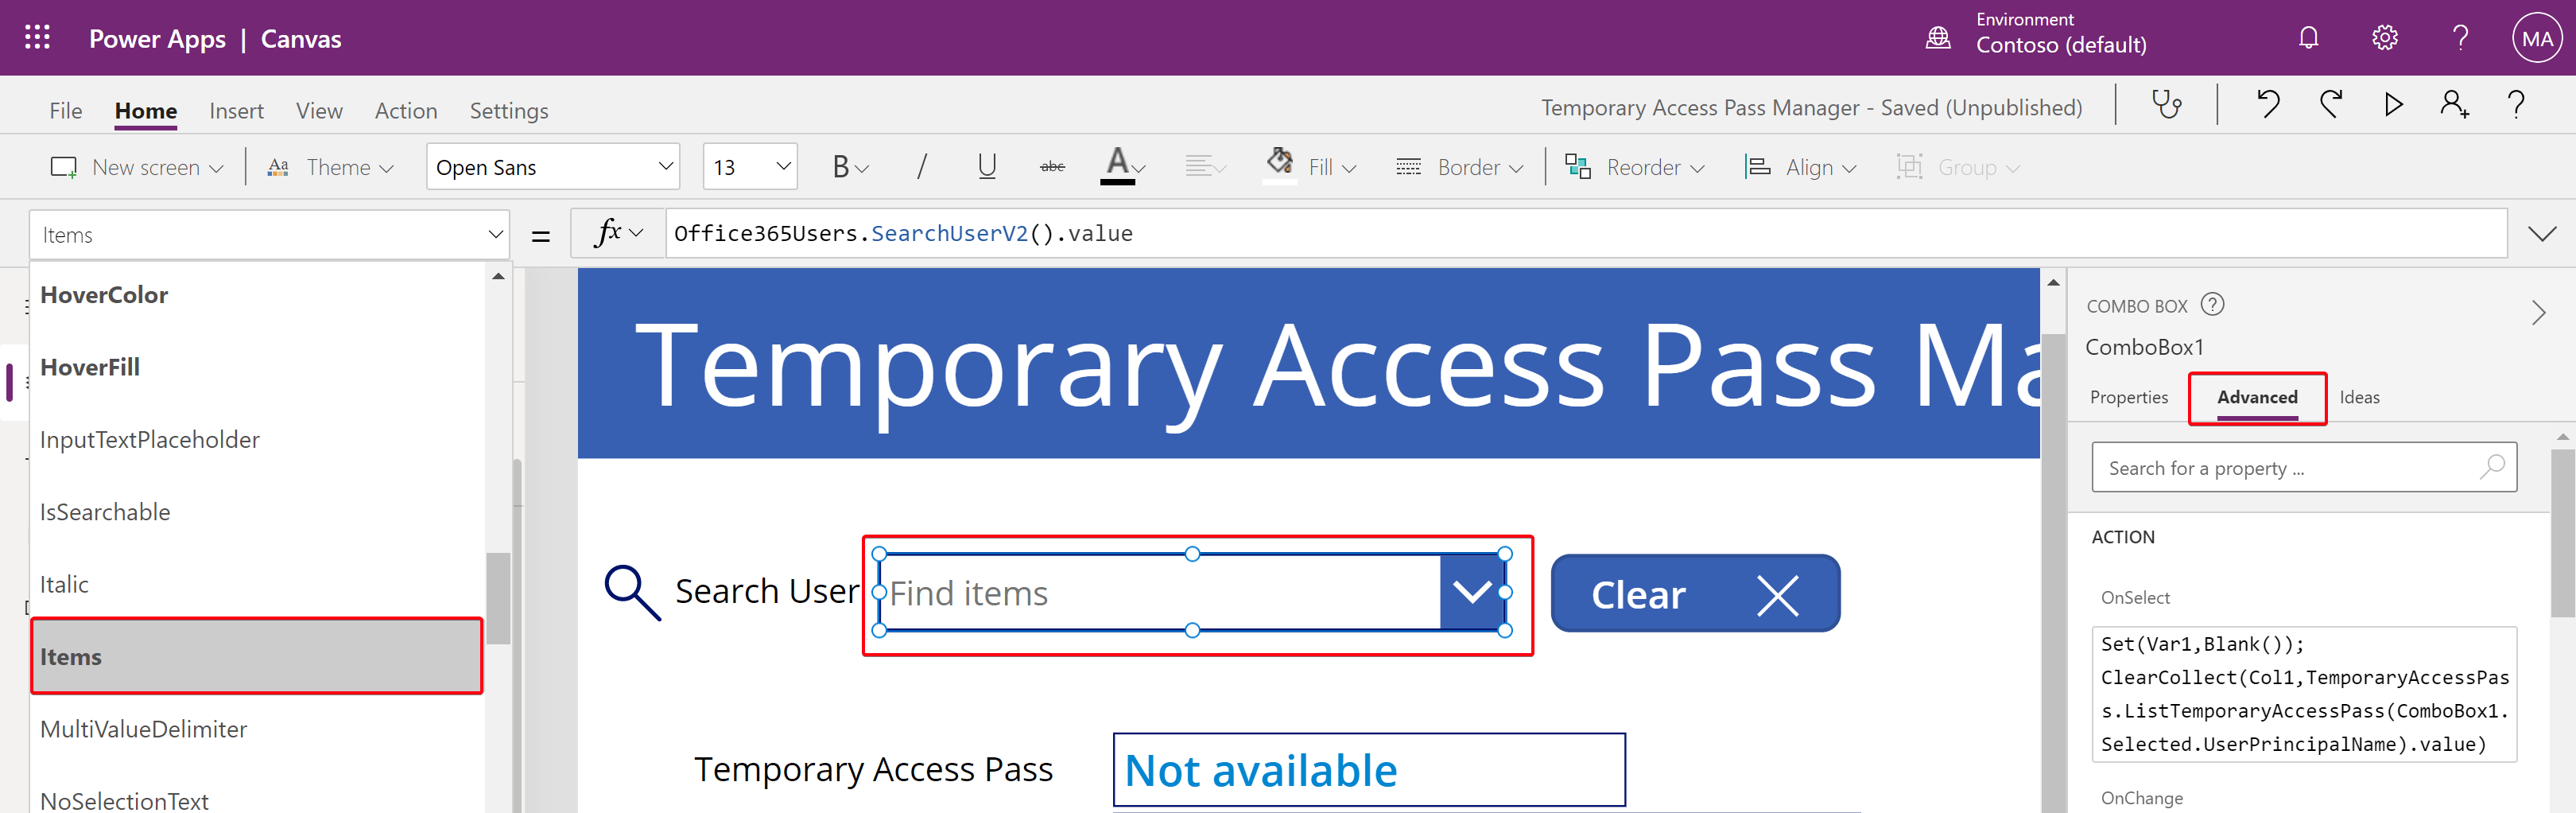
You are able to configure the advanced properties of your objects. Let’s start to configure the Combobox that we use for the search field.
Important!
In some of the properties we configre the query towards the custom connector. We are calling both the name of the custom connector and the action. Example: ClearCollect(Col1,TemporaryAccessPass.ListTemporaryAccessPass(ComboBox1.Selected.UserPrincipalName).value)
TemporaryAccessPass = name of the custom connector
ListTemporaryAccessPass = name of the action/operation ID\
If you used other names, you should change these types of queries so they match up with your custom connector and actions, like this: ClearCollect(Col1,CONNECTORNAME.OPERATIONID(ComboBox1.Selected.UserPrincipalName).value) \
| Property | Value |
|---|---|
| Items | Office365Users.SearchUserV2().value |
| OnSelect | Set(Var1,Blank()); ClearCollect(Col1,TemporaryAccessPass.ListTemporaryAccessPass(ComboBox1.Selected.UserPrincipalName).value) |
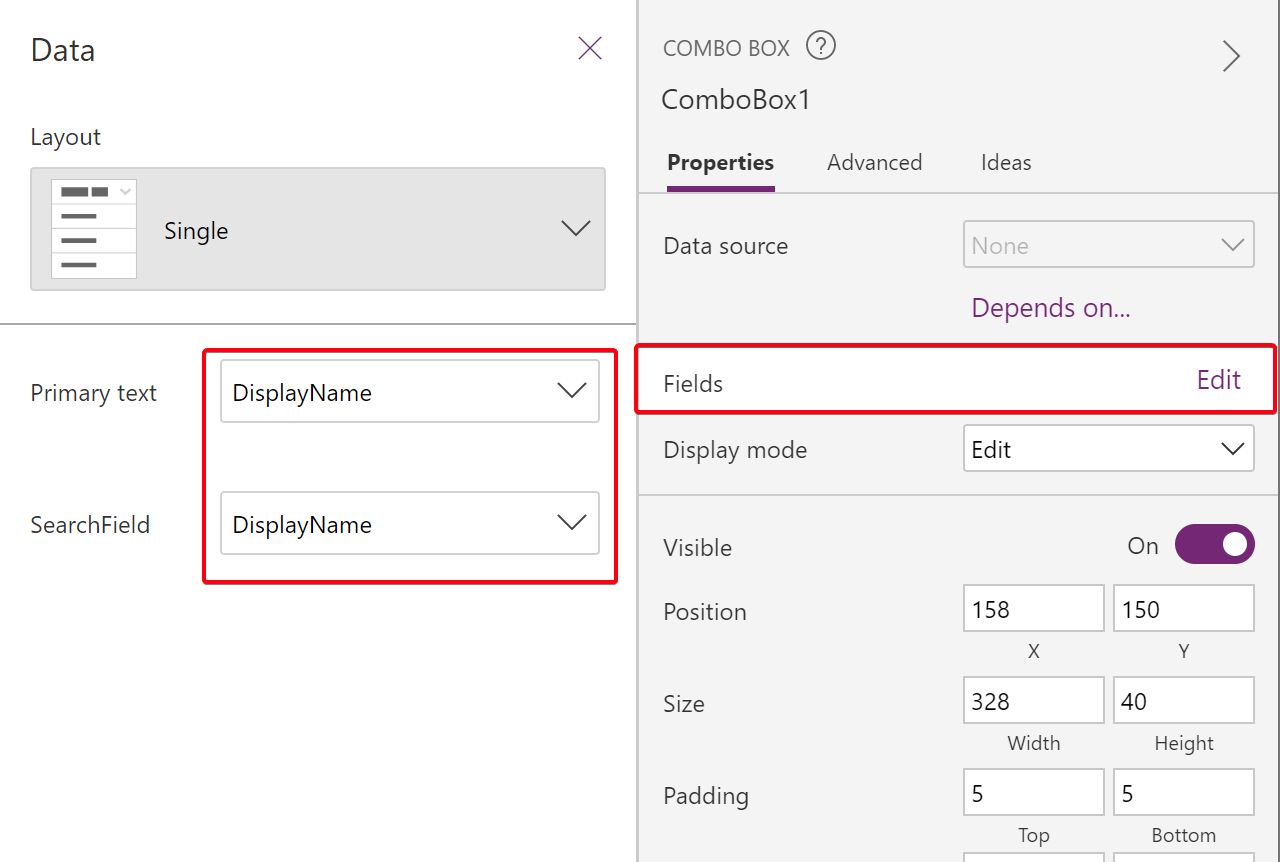
| DisplayFields | [“DisplayName”] |
| SearchFields | [“DisplayName”] |
| IsSearchable | true |
| SelectMultiple | false |
Doublecheck if the fields are configured to show Displayname.
Next, the clear button. This is optional, but if you like to have a “reset” button, add the button and change the property of the button.
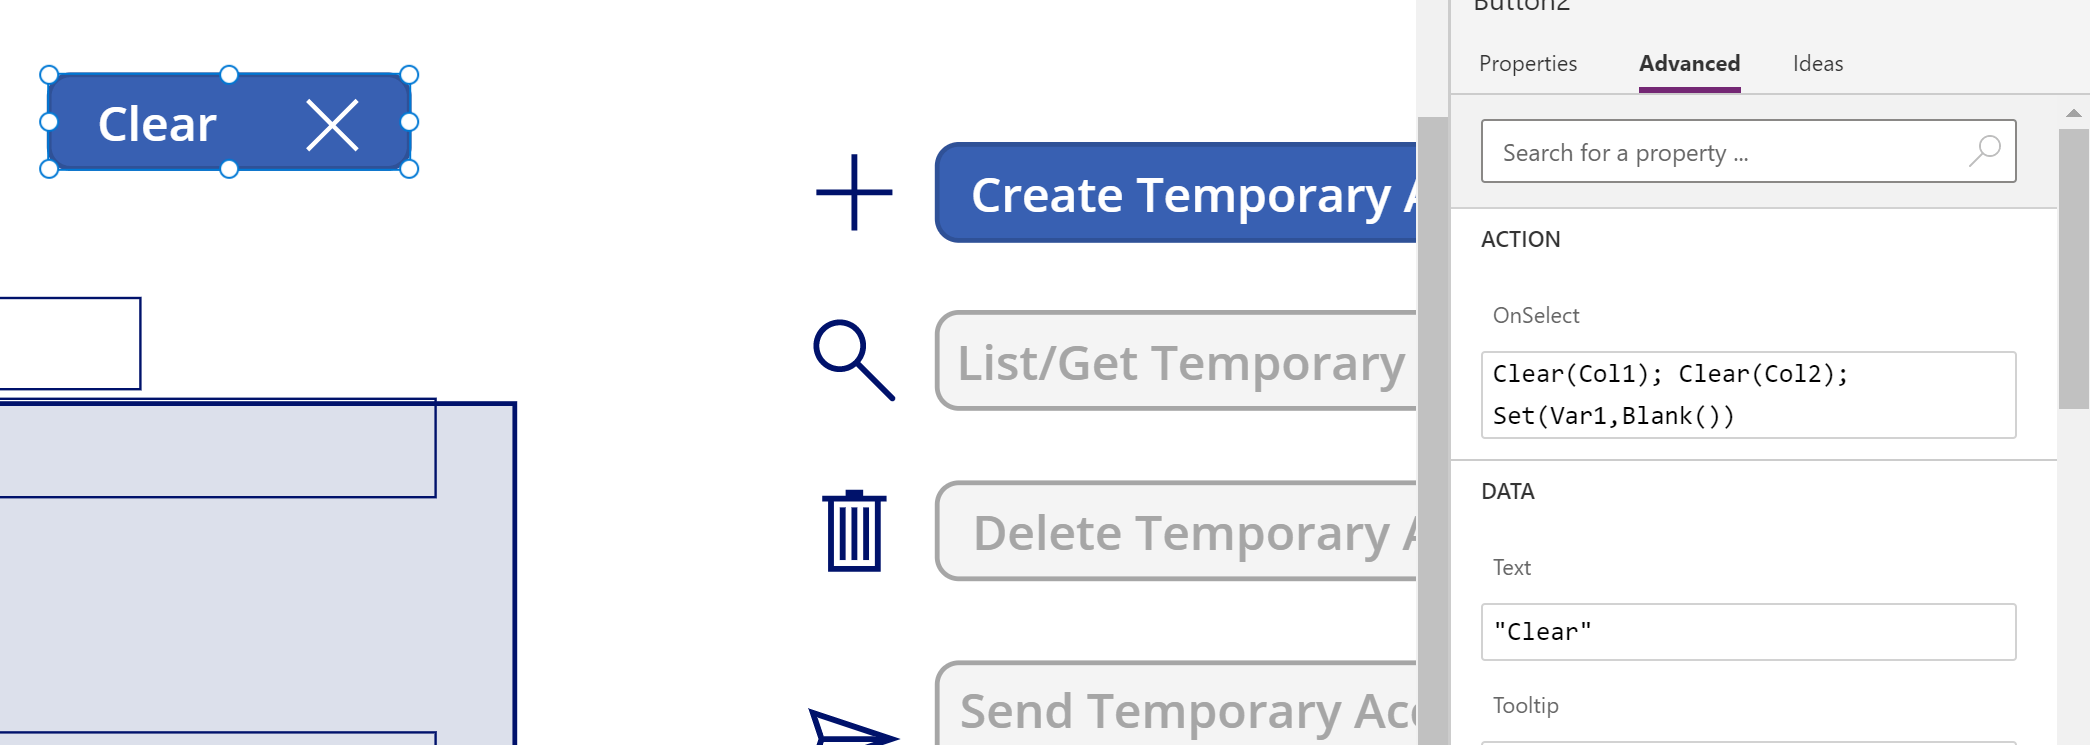
| Property | Value |
|---|---|
| OnSelect | Clear(Col1); Clear(Col2); Set(Var1,Blank()) |
| PaddingLeft | 20 |
| Align | Align.Left |
Change the display mode of the icon to view only.
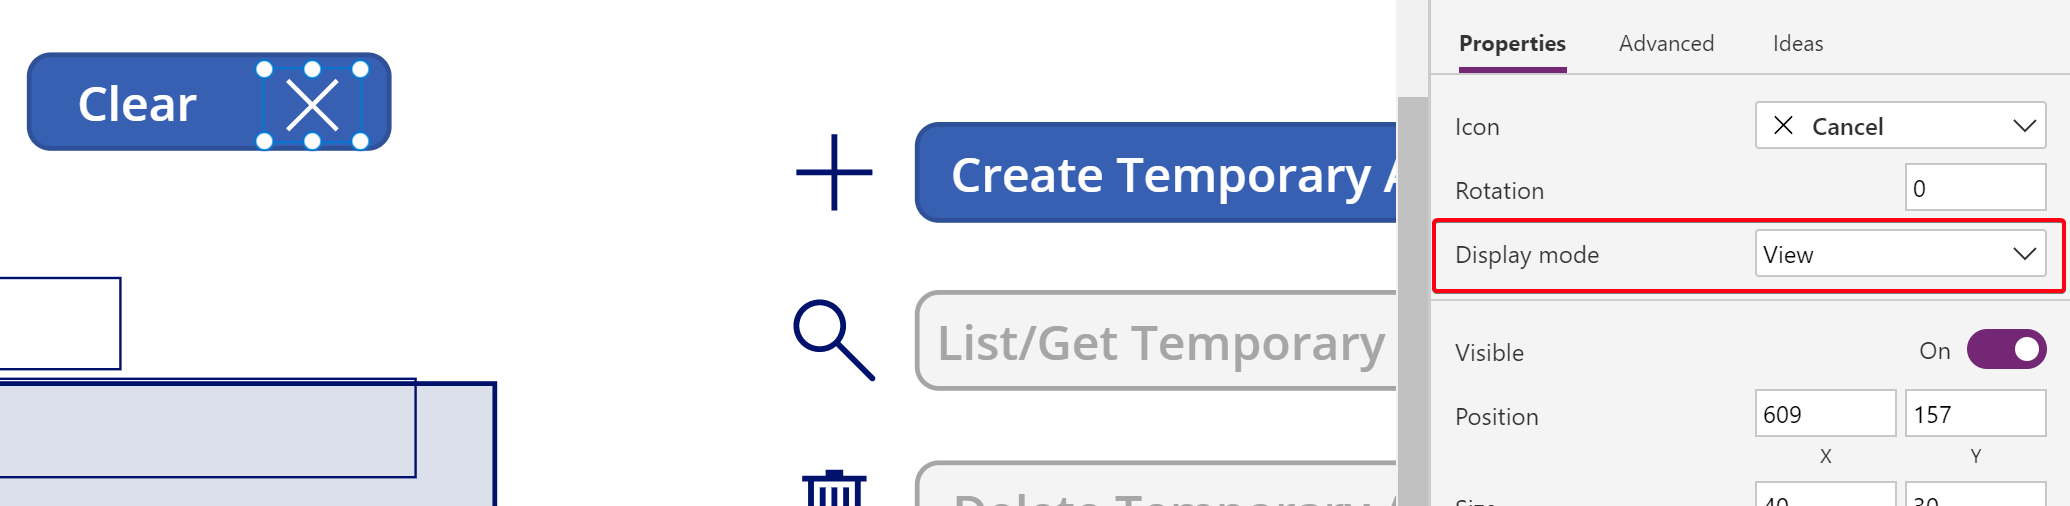
You can run your app to test by clicking the ‘play’ button in the top right corner.

If configured correctly, you should be able to search for office 365/Azure AD users.
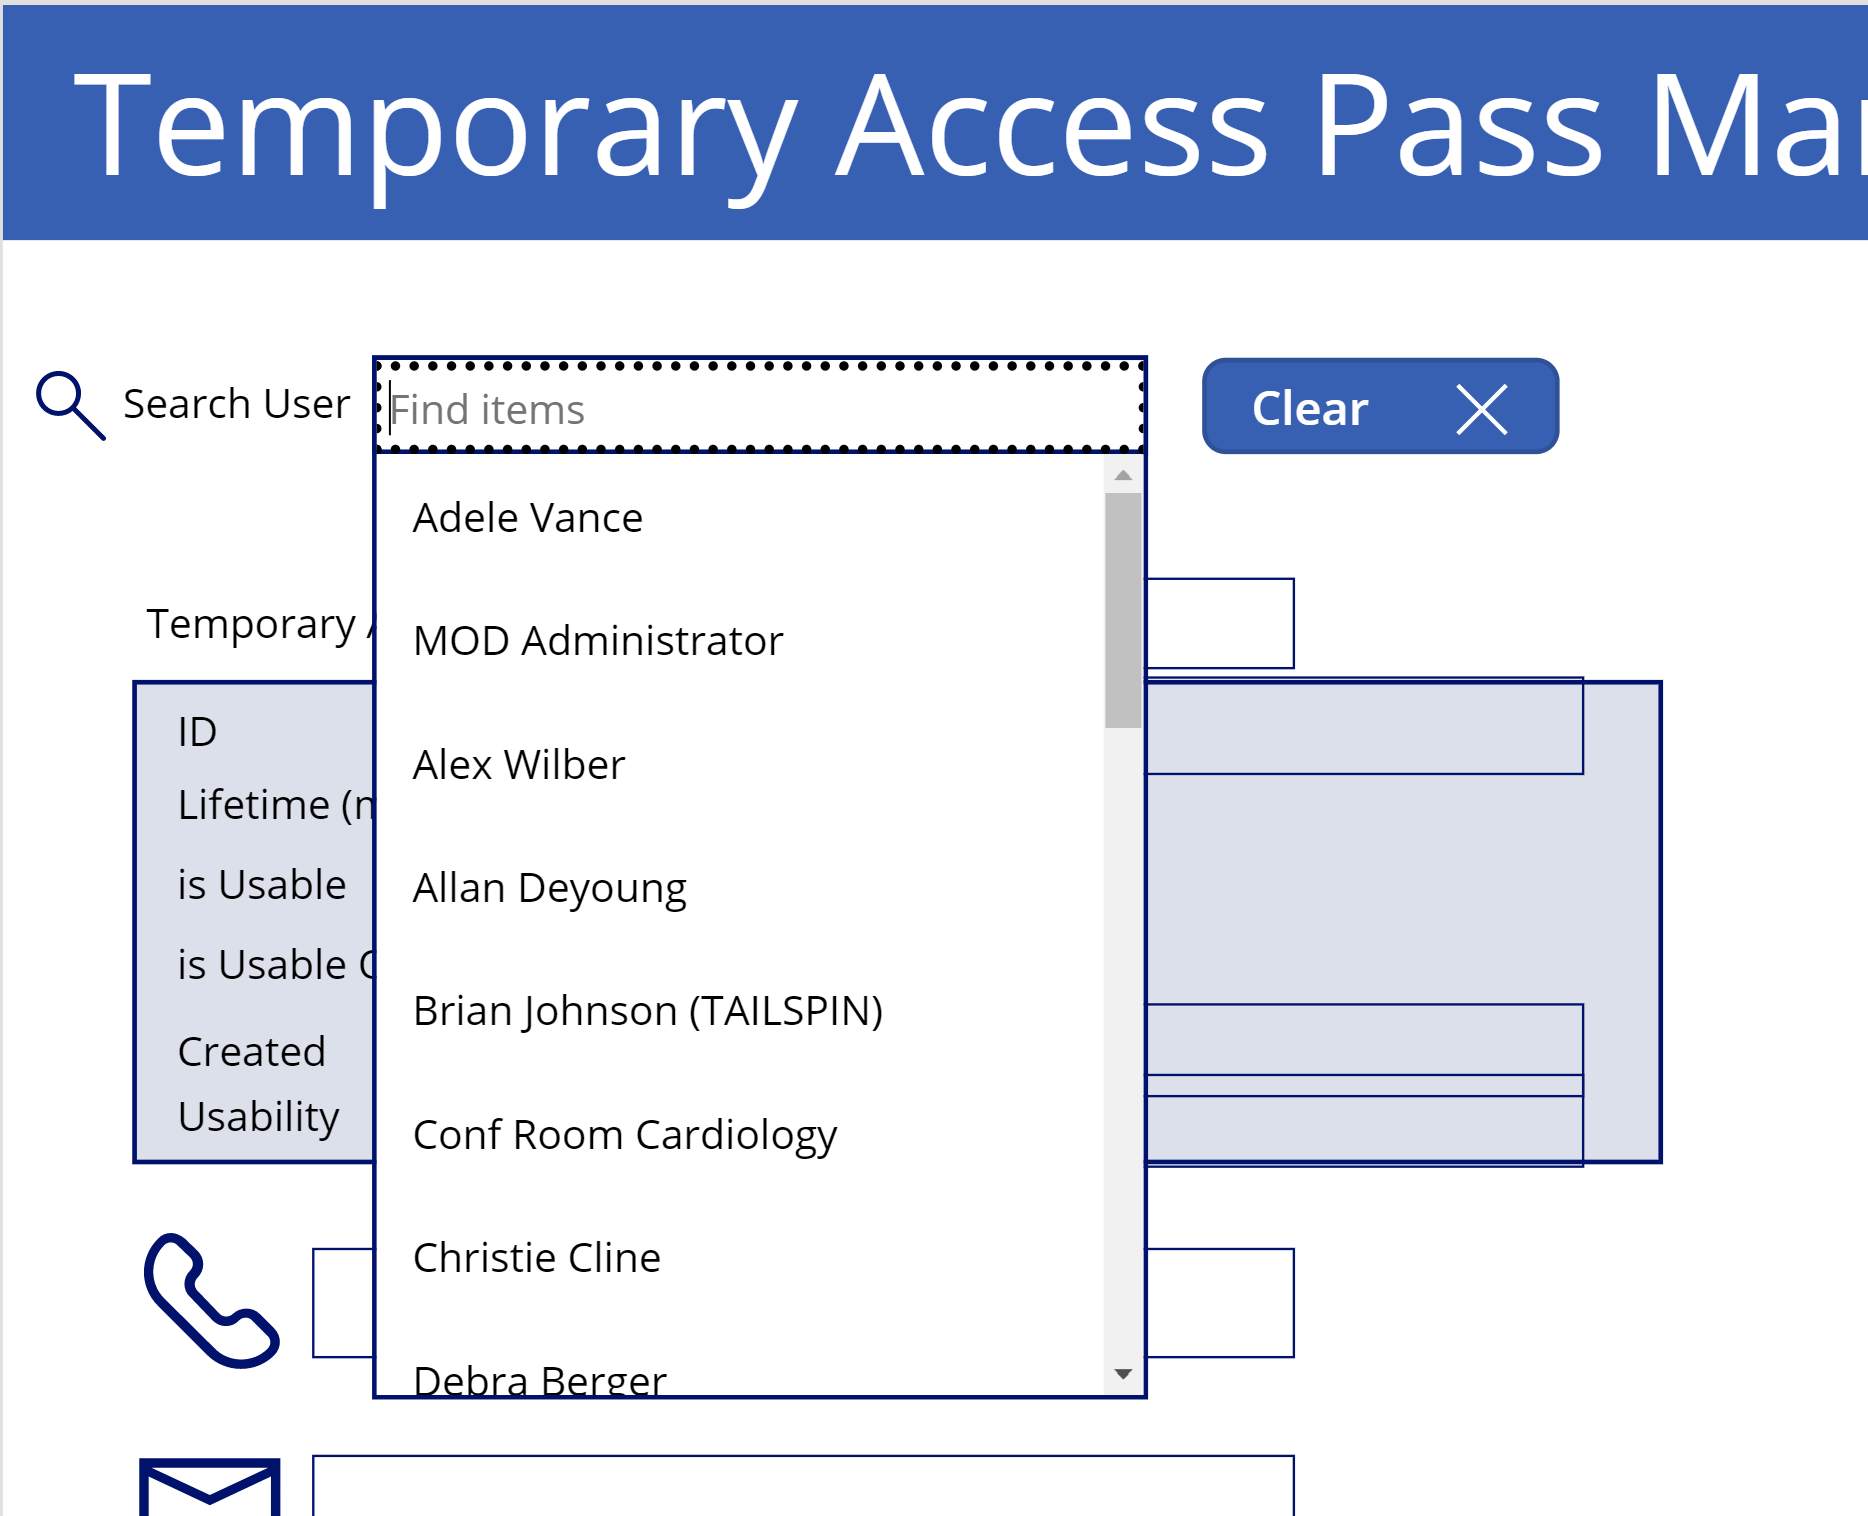
If you select your test user from the Combobox, you should see a Collection1 being created that is holding the schema (and values if Temporary Access Pass is already present for that user). The collection is still empty.
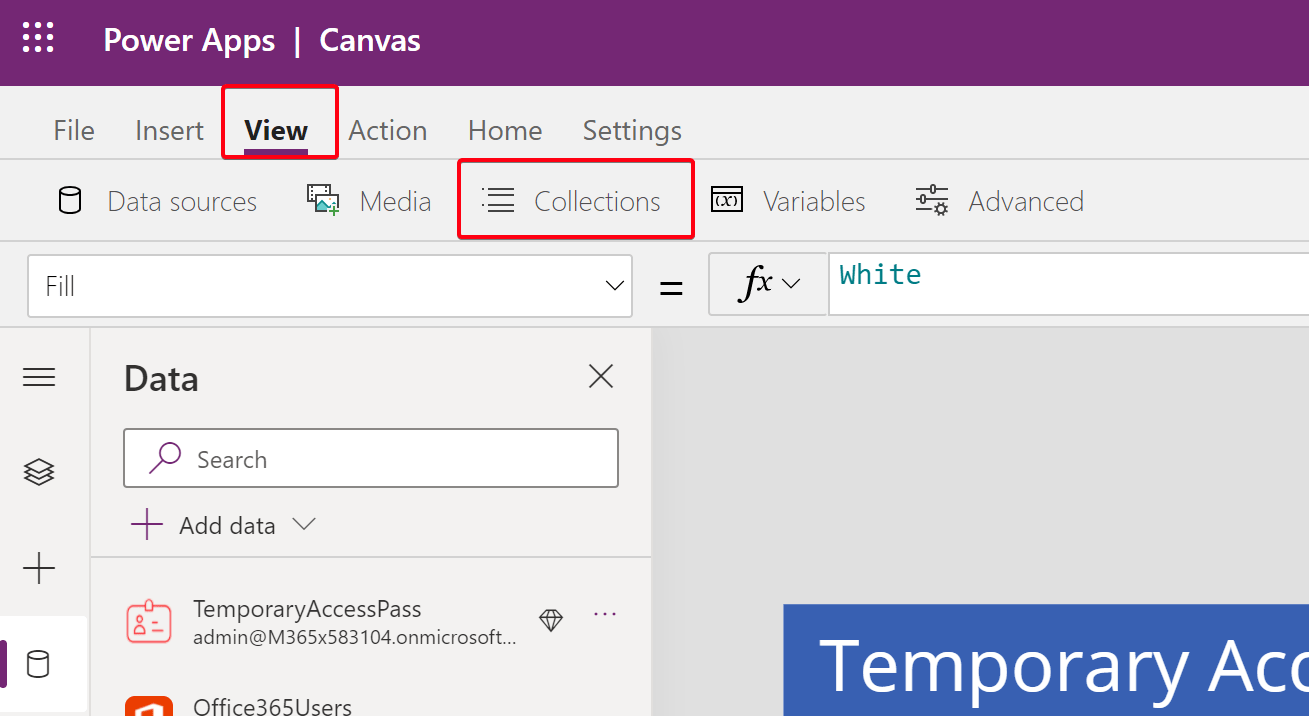
Labels Temporary Access Pass information#
On to the next section. These labels will hold information from the collection and variables. Change the text property of these labels.
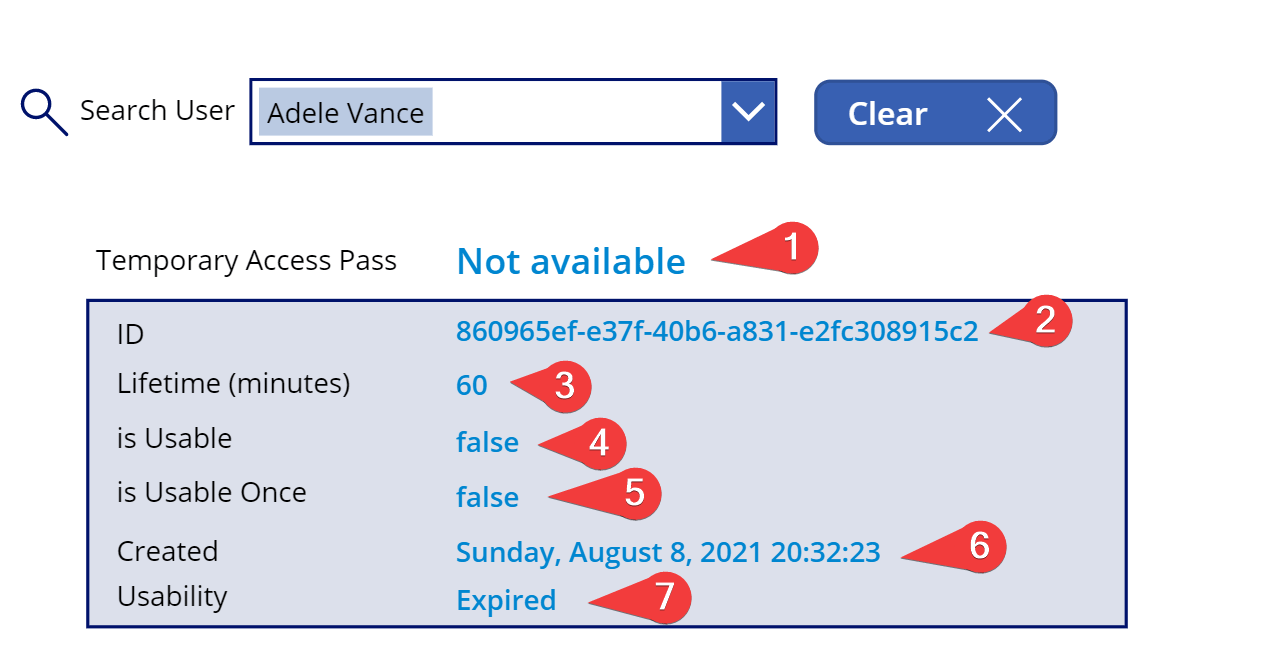
| Item | Text property |
|---|---|
| 1 | [raw]If(IsBlank(Var1.temporaryAccessPass),“Not available”,Var1.temporaryAccessPass)[/raw] |
| 2 | First(Col1).id |
| 3 | First(Col1).lifetimeInMinutes |
| 4 | First(Col1).isUsable |
| 5 | First(Col1).isUsableOnce |
| 6 | Text(DateTimeValue(First(Col1).createdDateTime),DateTimeFormat.LongDateTime24) |
| 7 | First(Col1).methodUsabilityReason |
*Because Col1 is a table, and a user can only have 1 Temporary Access Pass, we select the first (and only) item from the table. That’s why we use First().
The value of Temporary Access Pass will only show on creation. If the user already has a valid Temporary Access Pass, the value will be empty. That’s why we use an If statement. If the value is empty, it will show “Not available”. Otherwise, the field would just be empty, and that might be confusing.
Buttons / Actions#
Let’s configure the buttons.
Create Temporary Access Pass button#

This button will create a new Temporary Access Pass for the user that is selected in the Combobox. The information is stored in a variable and a collection. The button will be grayed out when the user already has a (valid) Temporary Access Pass. If the pass is expired, you need to delete the current pass before creating a new one. The query will show a notification in the app.
| Property | Value |
|---|---|
| OnSelect | [raw]Set(Var1,TemporaryAccessPass.CreateTemporaryAccessPass(ComboBox1.Selected.UserPrincipalName,"{}")); ClearCollect(Col1,TemporaryAccessPass.ListTemporaryAccessPass(ComboBox1.Selected.UserPrincipalName).value); If(!IsEmpty(Col1),Notify(“Temporary Access Pass Created”,NotificationType.Success),Notify(“Something went wrong”,NotificationType.Error))[/raw] |
| DisplayMode | If(!IsEmpty(Col1),DisplayMode.Disabled,DisplayMode.Edit) |
| Text | “Create Temporary Access Pass” |
List/Get Temporary Access Pass button#

This button will list the Temporary Access Pass for the user that is selected in the Combobox. The information is stored in two collections. Collection 2 is using the ID from collection 1 as input. The button will be grayed out when the user does not have a (valid) Temporary Access Pass.
| Property | Value |
|---|---|
| OnSelect | ClearCollect(Col1,TemporaryAccessPass.ListTemporaryAccessPass(ComboBox1.Selected.UserPrincipalName).value); ClearCollect(Col2,TemporaryAccessPass.GetTemporaryAccessPass(ComboBox1.Selected.UserPrincipalName,First(Col1).id)) |
| DisplayMode | If(IsEmpty(Col1),DisplayMode.Disabled,DisplayMode.Edit) |
| Text | “List/Get Temporary Access Pass” |
Delete Temporary Access Pass button#

This button will delete the Temporary Access Pass for the user that is selected in the Combobox. The information is stored in a collection. The button will be grayed out when the user already has no Temporary Access Pass (nothing to delete here). Because this query has no feedback, the If statement checks if there is a valid pass for the user after the delete action. If not, we are assuming that the delete action was successful. The Notify feature will push out a notification bar with the status.
| Property | Value |
|---|---|
| OnSelect | [raw]TemporaryAccessPass.DeleteTemporaryAccessPass(ComboBox1.Selected.UserPrincipalName,First(Col1).id); ClearCollect(Col1,TemporaryAccessPass.ListTemporaryAccessPass(ComboBox1.Selected.UserPrincipalName).value); If(IsEmpty(Col1),Notify(“Temporary Access Pass deleted”,NotificationType.Success),Notify(“Something went wrong”,NotificationType.Error)); Set(Var1,Blank())[/raw] |
| DisplayMode | If(IsEmpty(Col1),DisplayMode.Disabled,DisplayMode.Edit) |
| Text | “Delete Temporary Access Pass” |
Send Temporary Access Pass button#

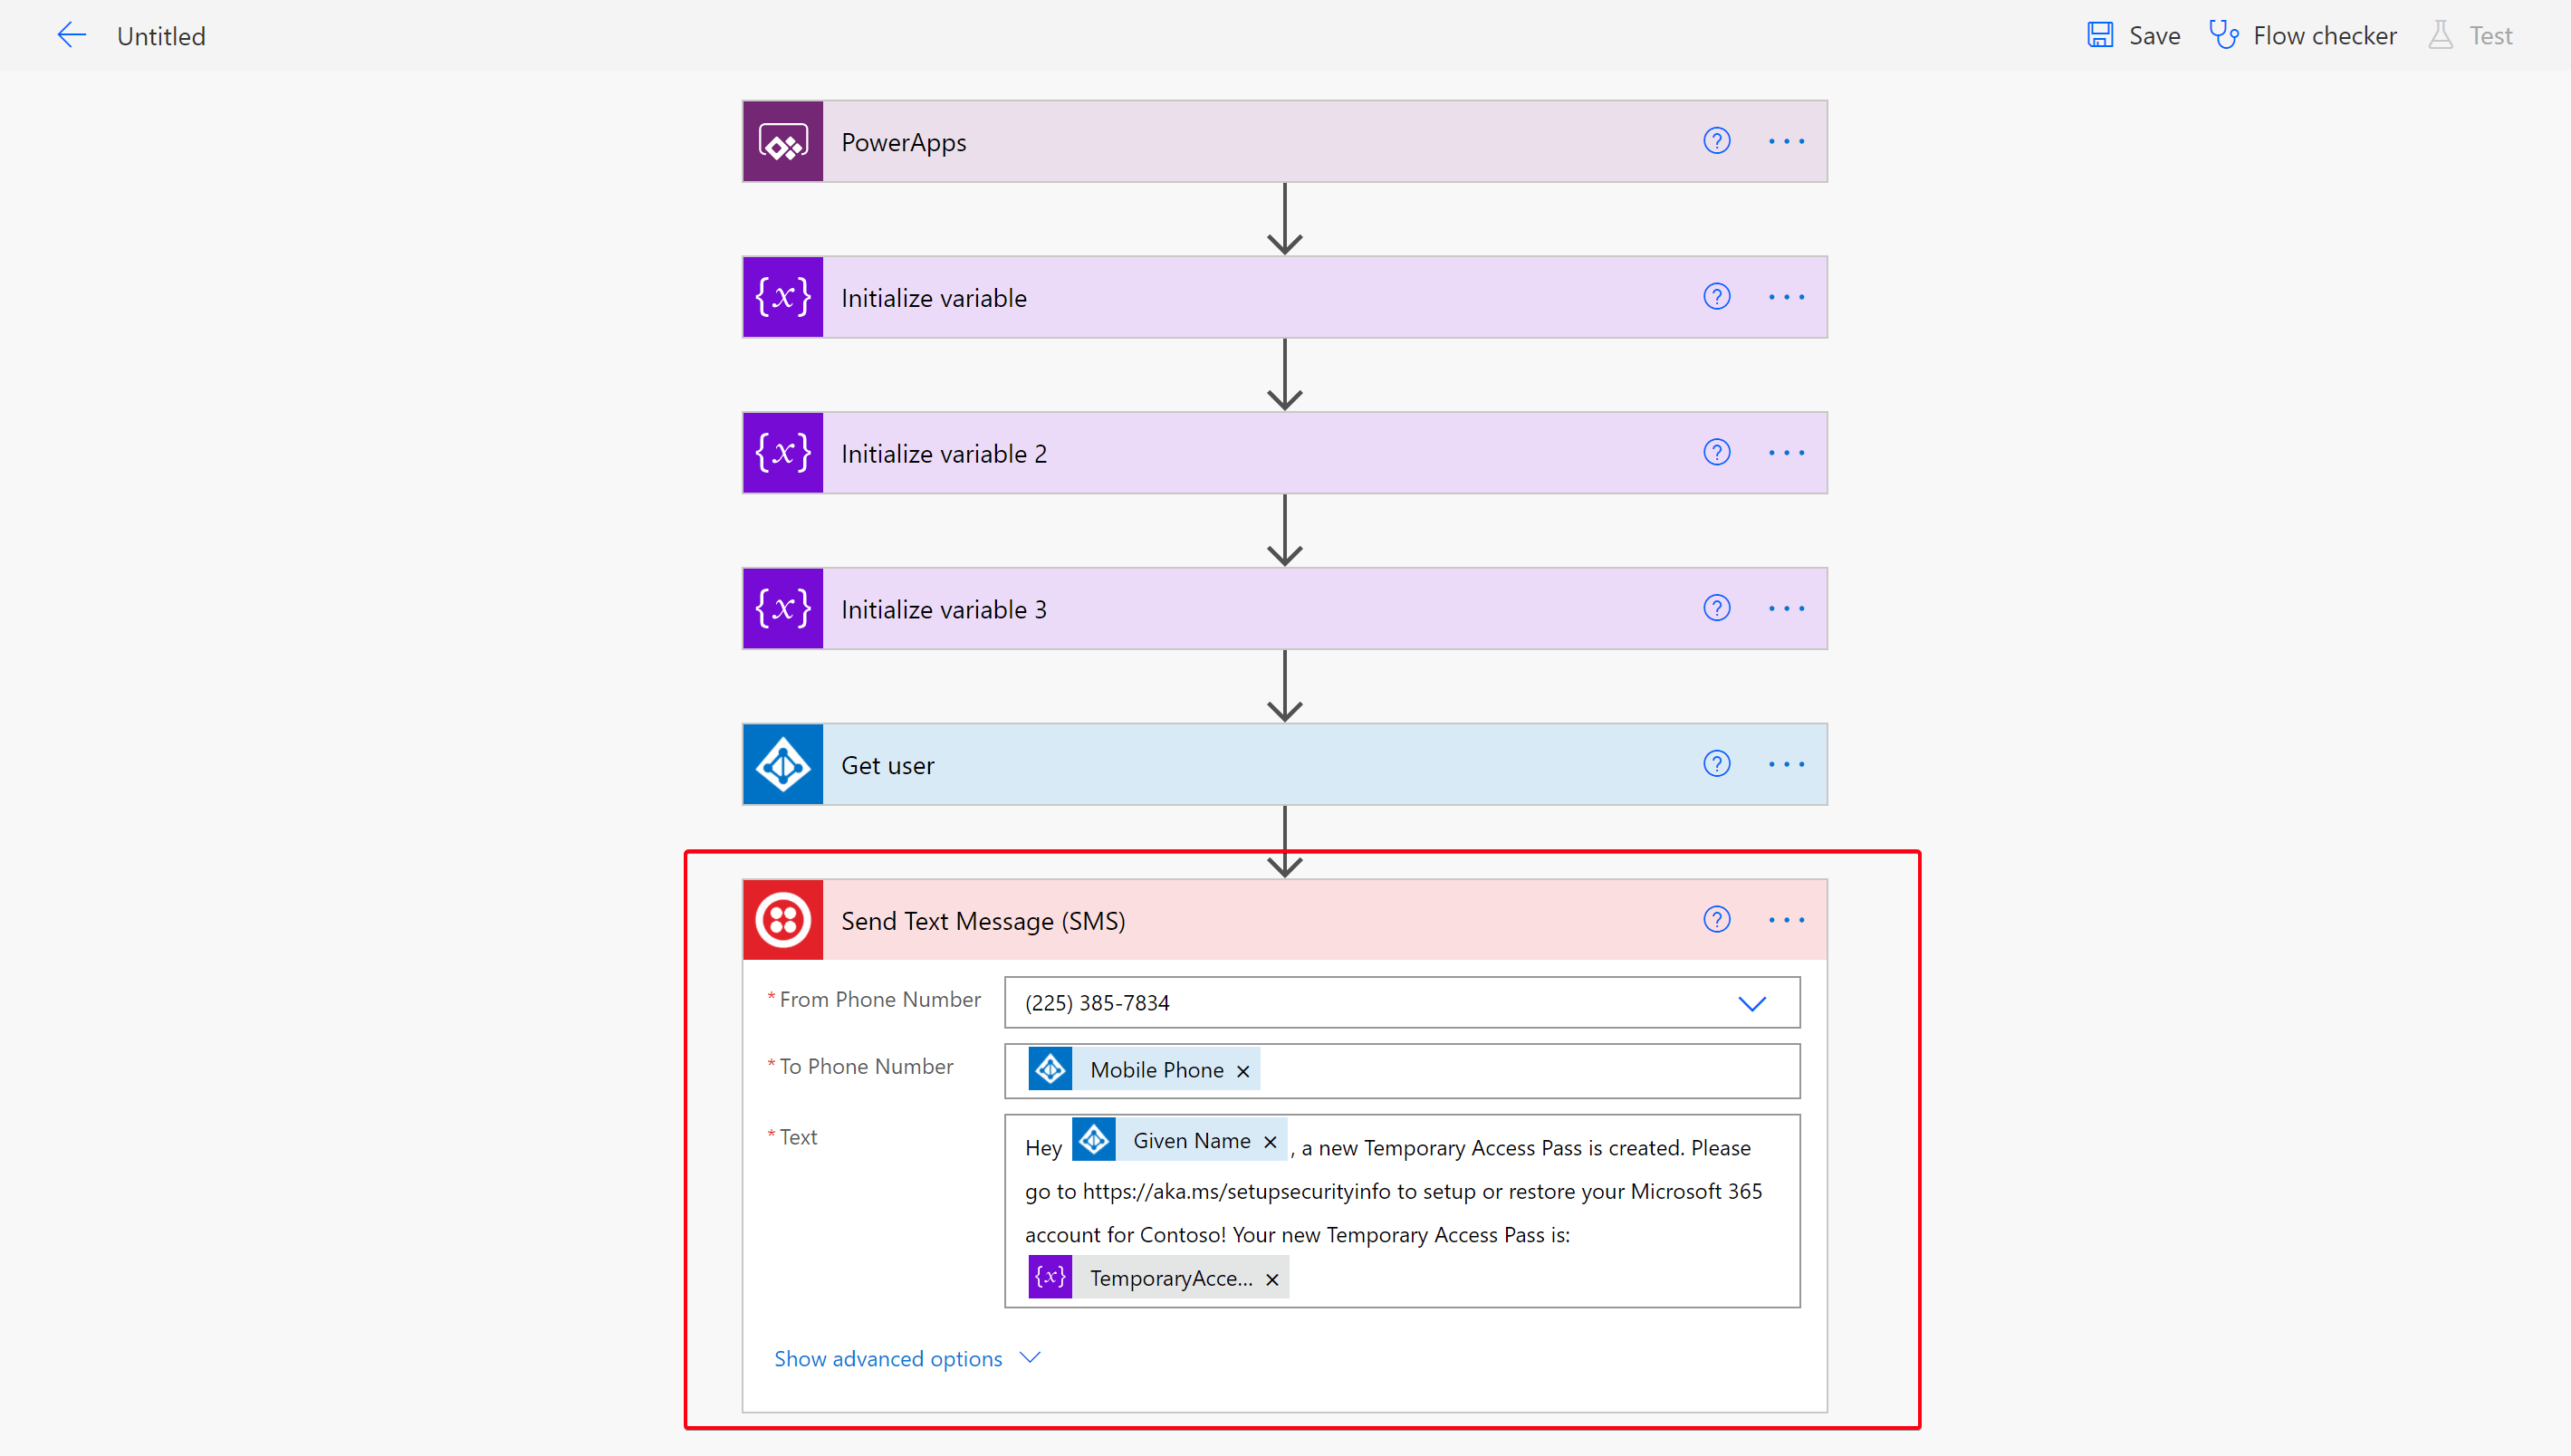
This button is optional and is covered in a separate bonus episode. This button is using a Power Automate flow to send out an SMS to the users’ mobile phone number.
Additional Office 365 User info#
The last section is holding some information that can be helpful. This information is provided by the Office365Users connector.
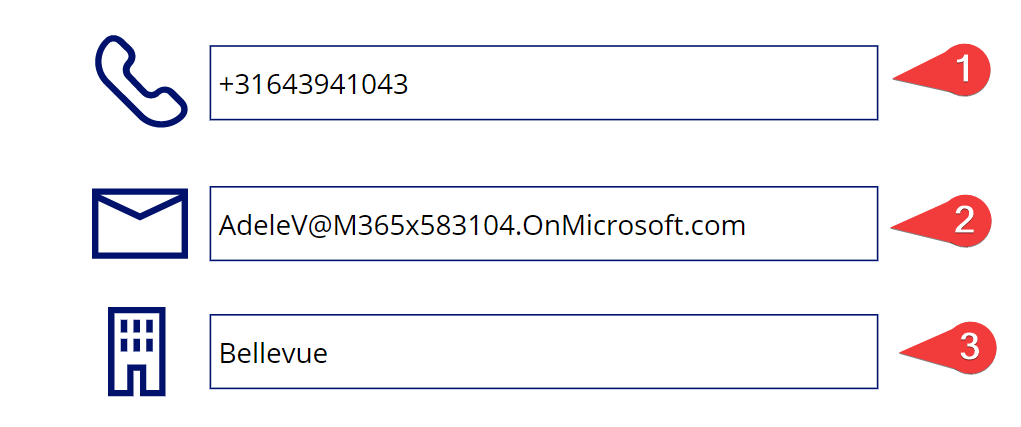
| Label | Text value |
|---|---|
| 1 | ComboBox1.Selected.mobilePhone |
| 2 | ComboBox1.Selected.Mail |
| 3 | ComboBox1.Selected.City |
Additional tweaks#
I’ve added some additional tweaks to fix some cosmetic stuff. This is optional.
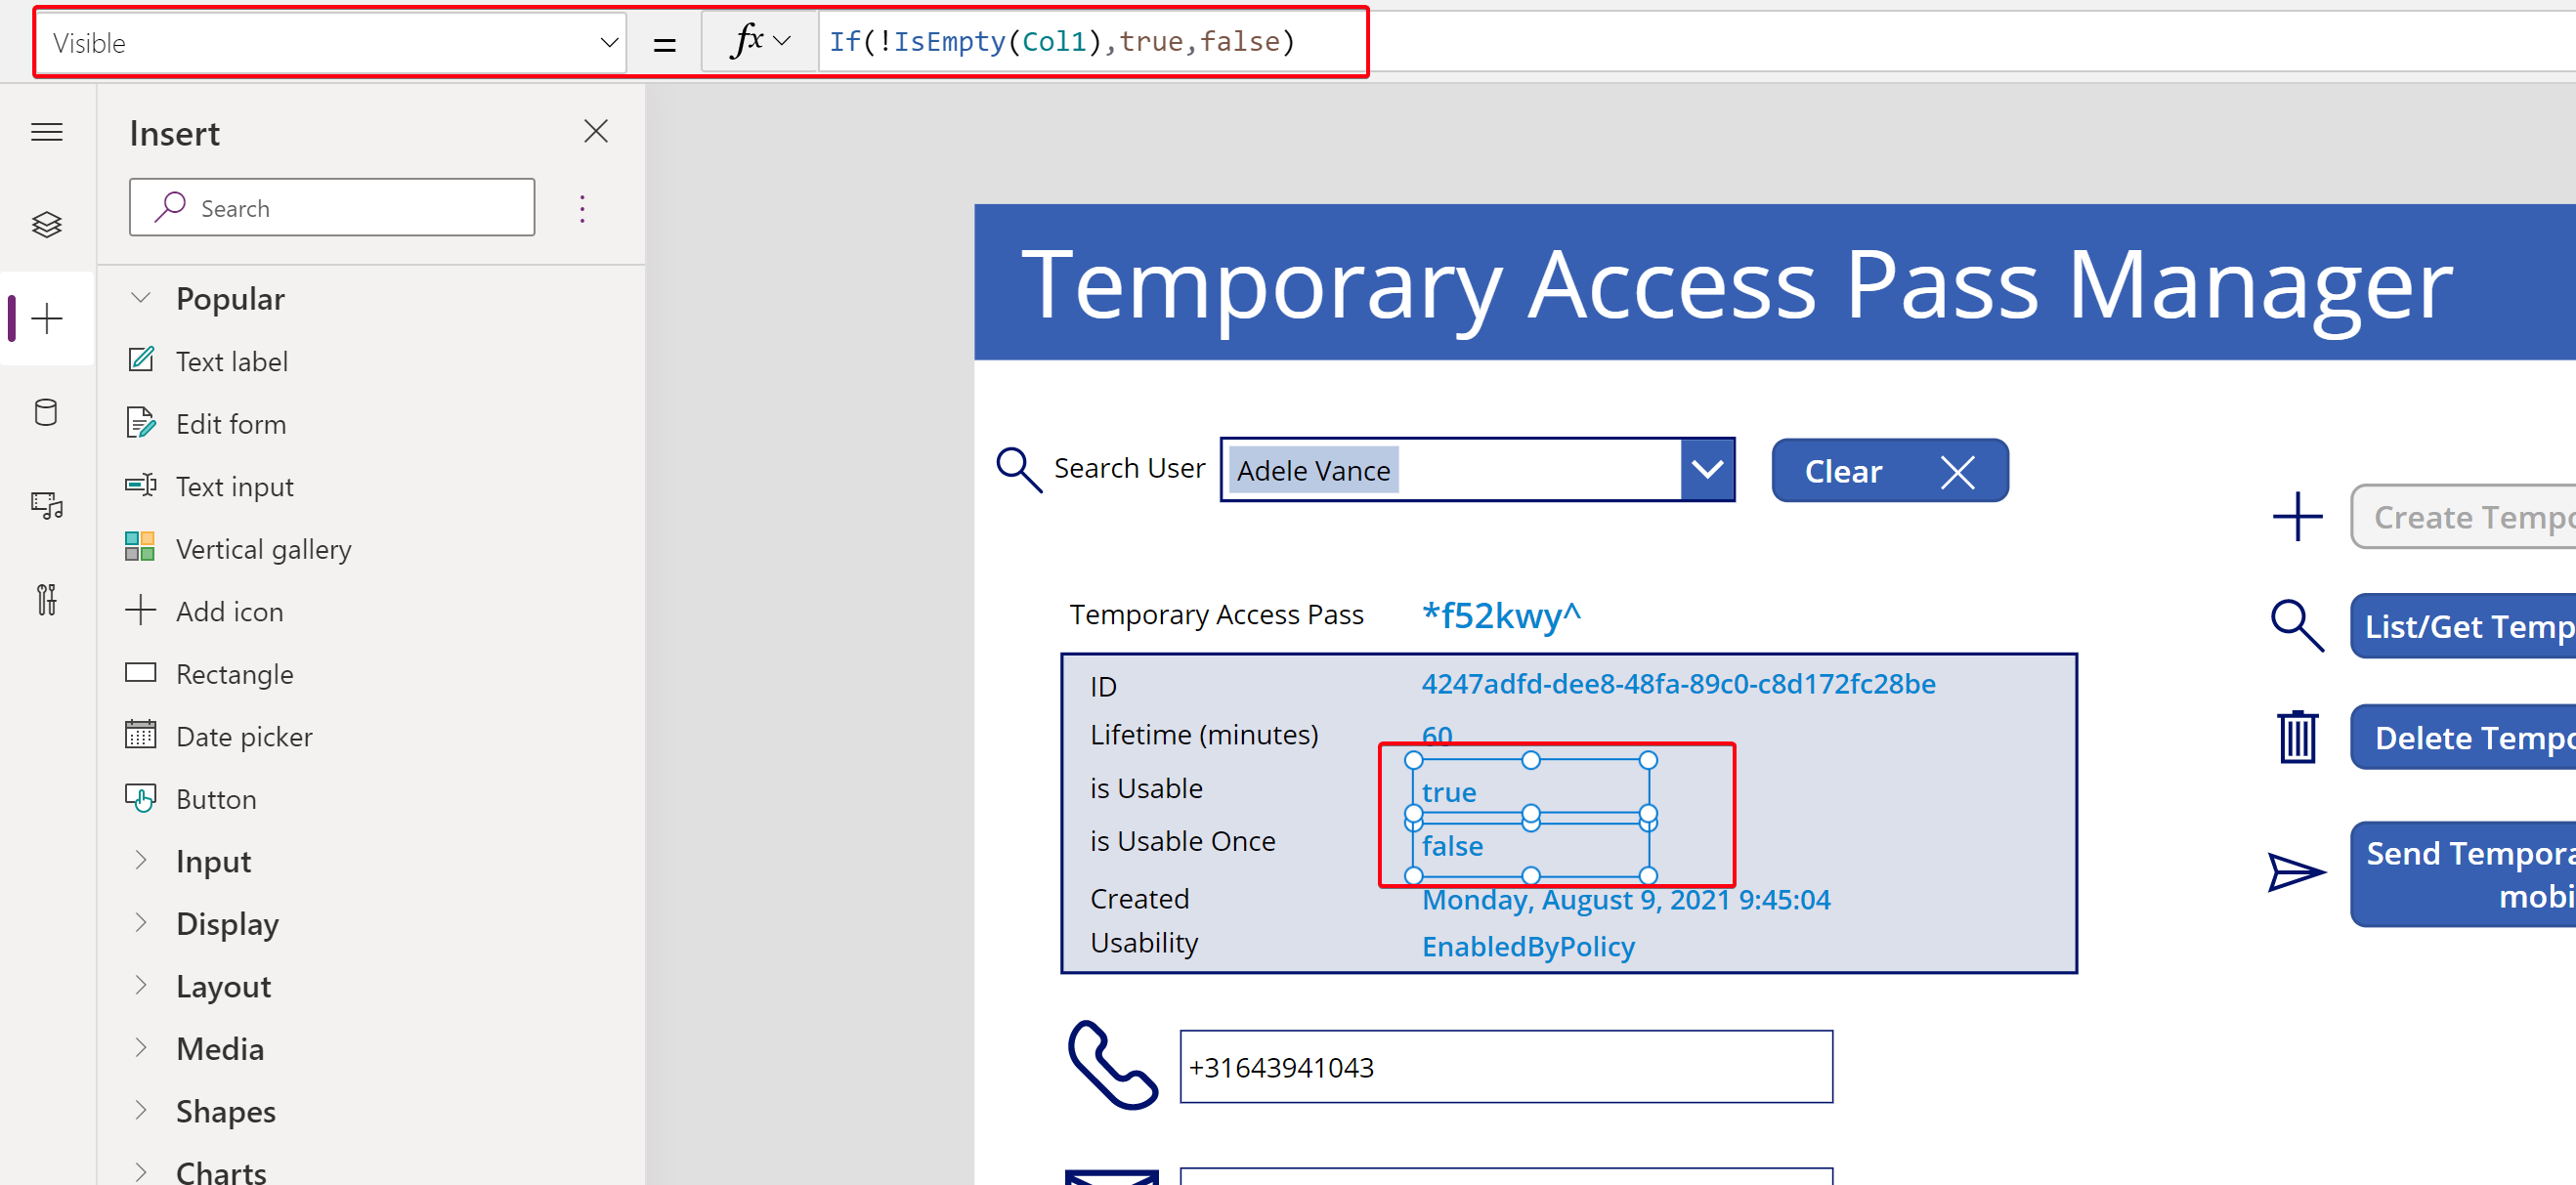
- Because the values ‘is Usable’ and is Usable Onece’ are booleans, they are not deleted when clearing the collections. I changed the ‘visible’ property to If(!IsEmpty(Col1),true,false). That way, they disappear when the collection is cleared.
- The rectangle is sent to the back, and the fonts of the values are in bold and in another color. The Temporary Acess Pass text fields are placed outside of the container on purpose to make them stand out more. The font size of the Temporary Access Pass is slightly bigger (17px)
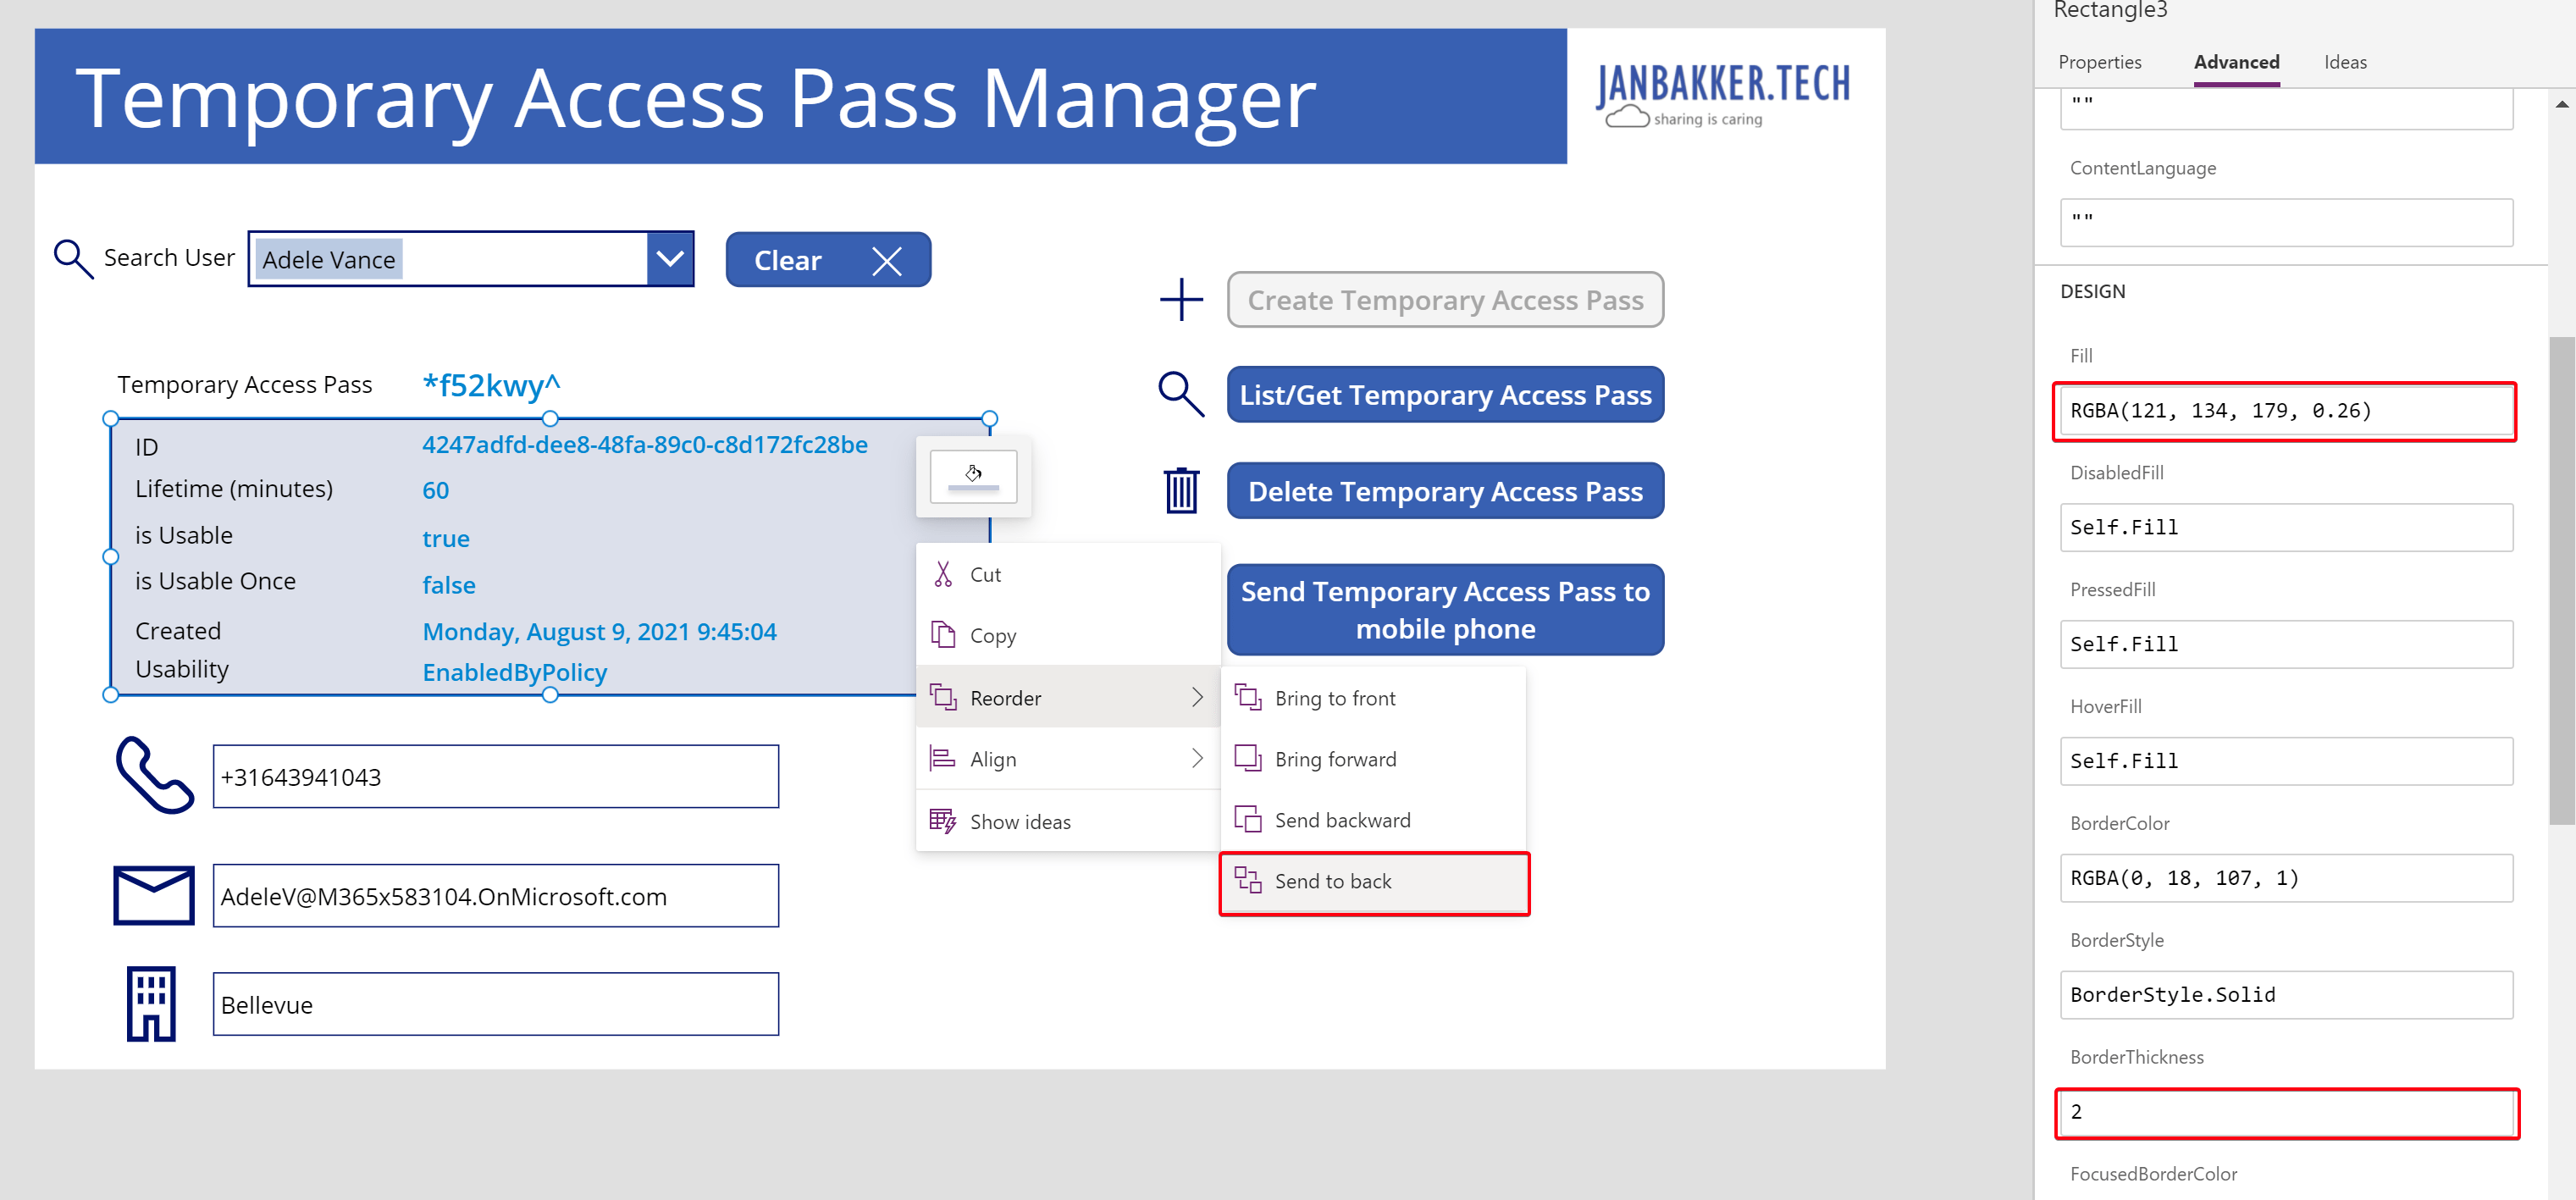
And that’s it! Your app should now work!
The easy way: import the app from github#
I’ve uploaded the custom connector and PowerApp files to Github. If you don’t want to create the app from scratch, this will get you started. Here’s a quick guide on how to import the app and connector:
- Create the app registration as explained in part 2, and collect the information.
- Download the files from both the custom connector and app to your local drive.
- Import the custom connector using the import button in PowerApps.
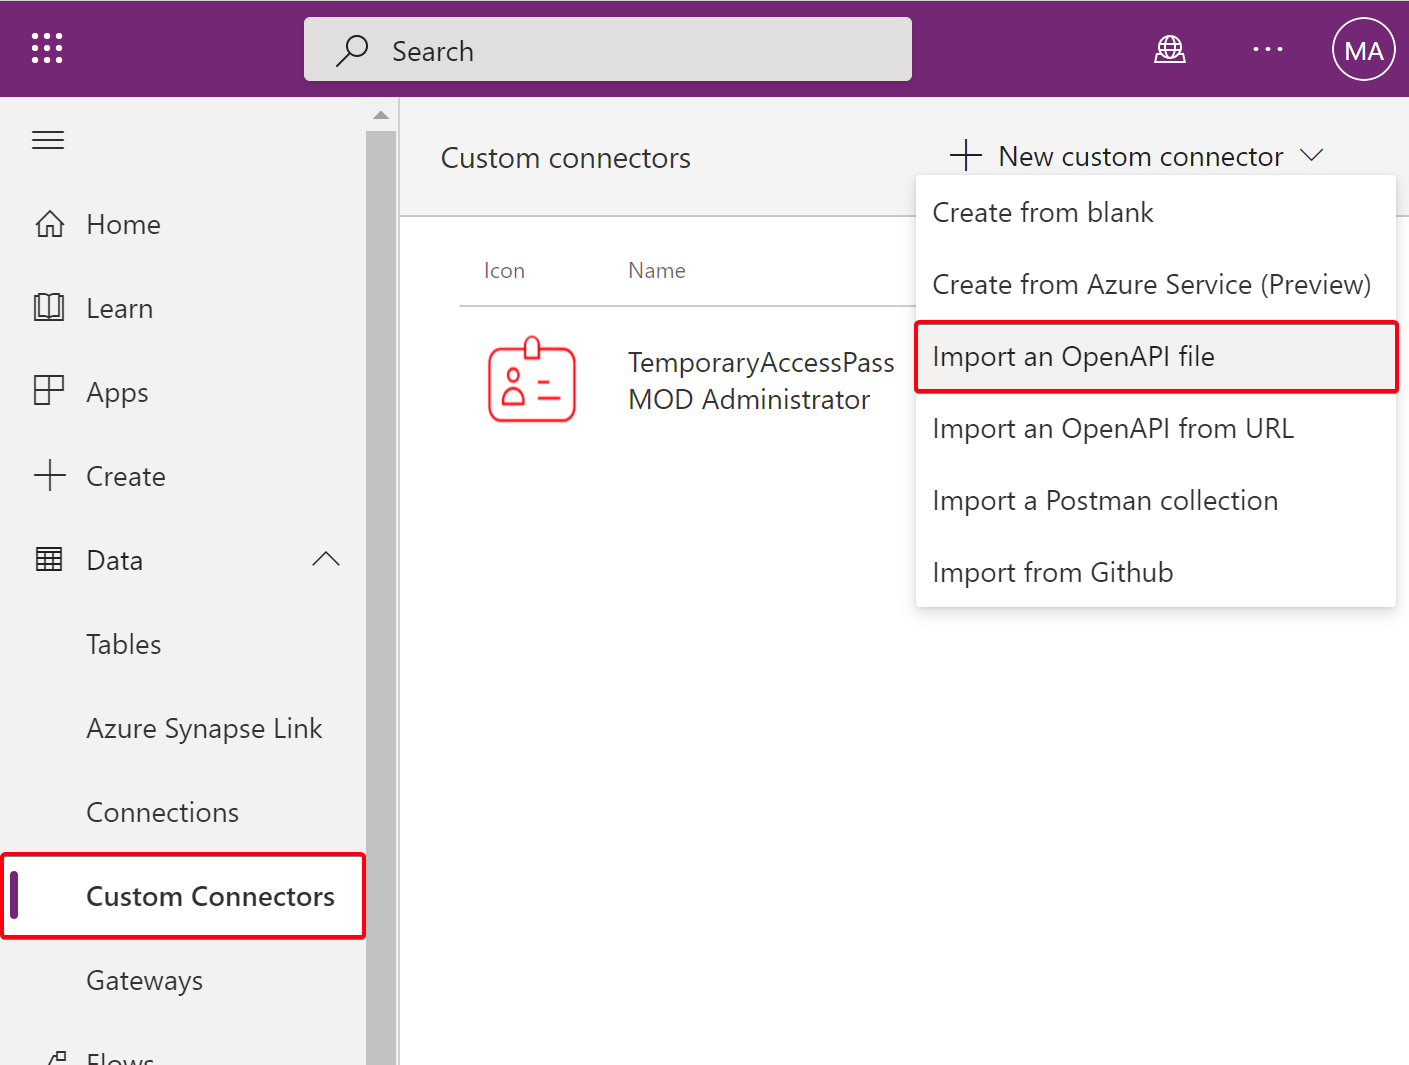
Update the Security information, save and test the custom connector. (explained in part 4)
Import the canvas app, and select the connector in the import wizard.
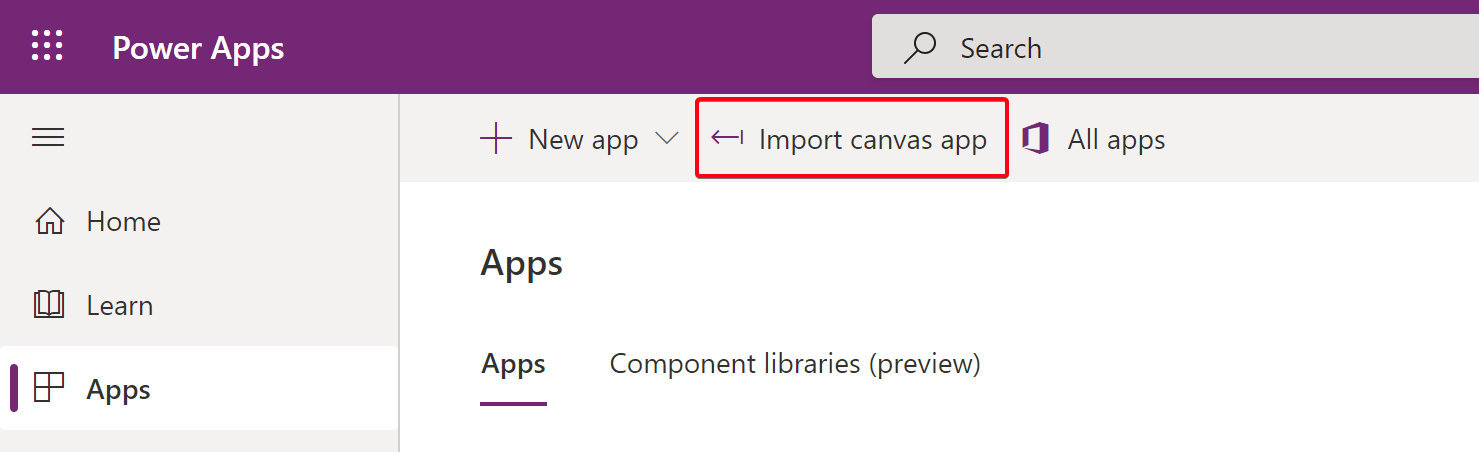
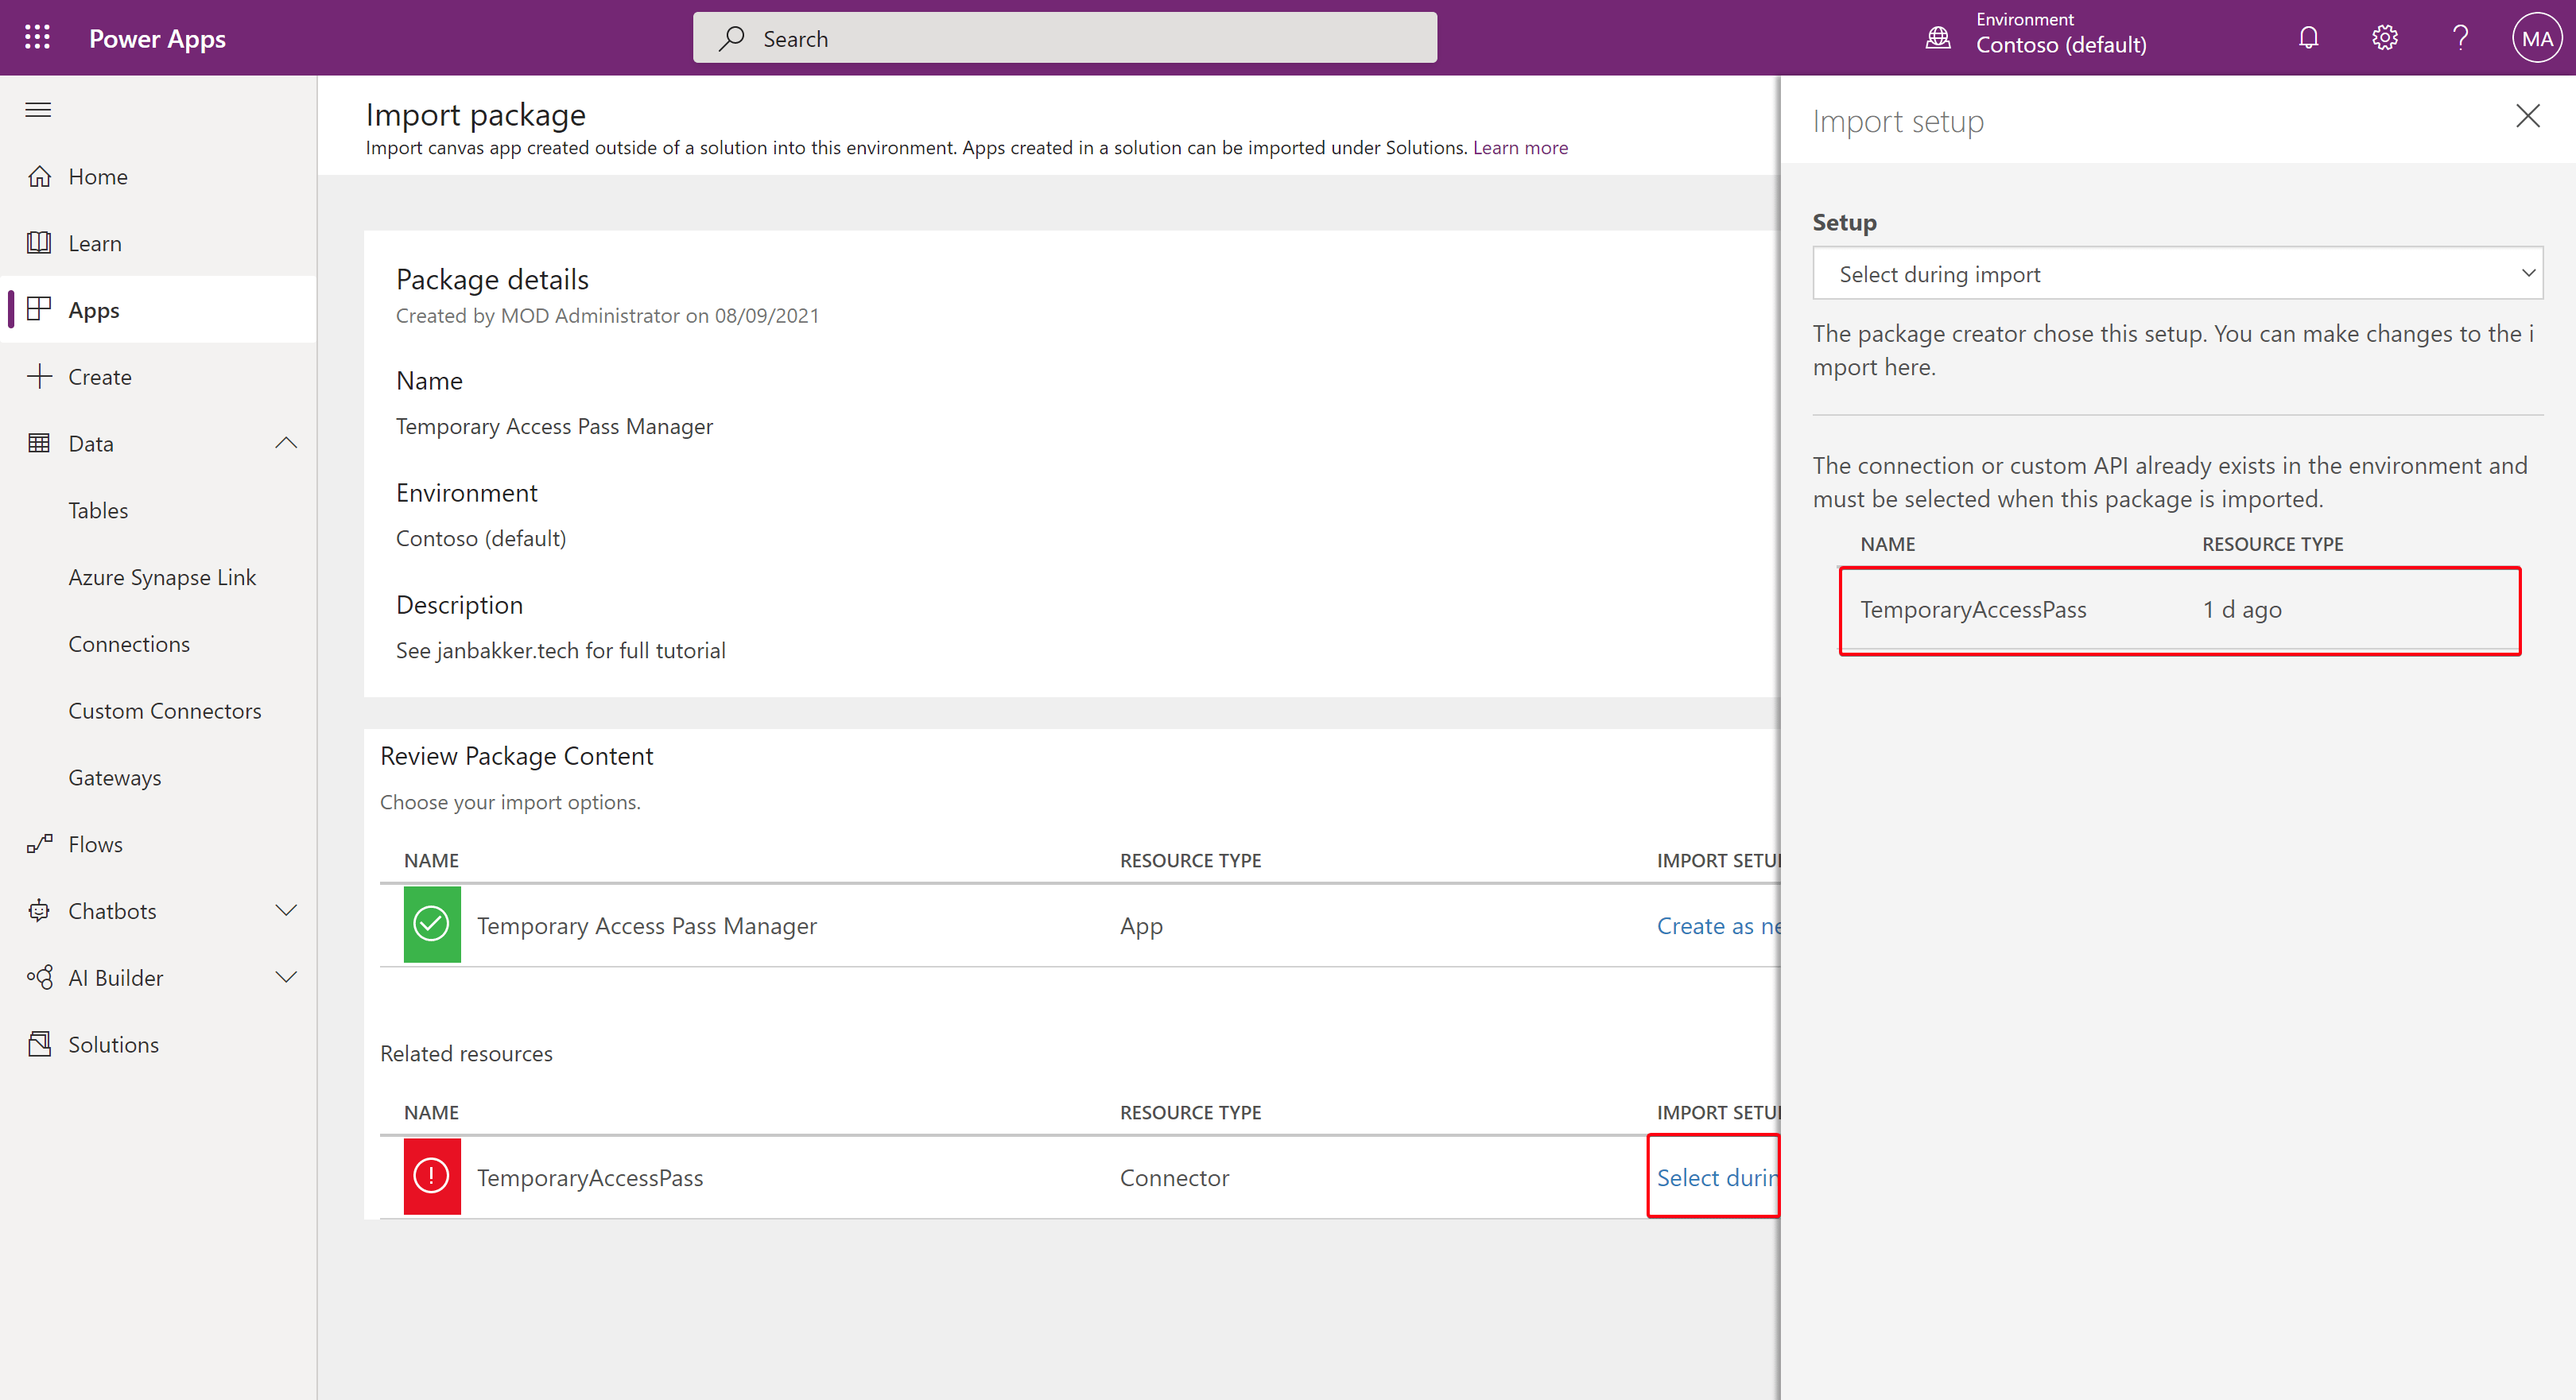
- Now you should be able to import the app.
Wrap things up#
I hope this series is useful to a lot of friends out there. It took me some time to figure this out (as a non-developer), but this has so much potential for everybody. I admit, I struggled sometimes with the formatting and weird errors, but in the end, it made me understand things even better. Now, you can do this the easy way and import the app from Github, or dive in headfirst and try to get this working from scratch. I strongly recommend the latter one. It’s going to be a fun ride! Never stop learning.
Stay safe!
Want to take it one step further? Check out the bonus part!#
Comments
Comments load when you scroll here.