
A closer look at Entra Application policies to govern secrets and certificates
On this page
My latest post on this topic introduced the new admin interface on Application Policies in Entra ID. Although the APIs had been around for a while, I personally didn’t see them being implemented at all. I believe the reason for that is the complexity of the API, in combination with the topic itself. Making sense of enterprise apps and app registrations is a complicated topic on its own. Add authentication and authorization into the mix, and you’ve got yourself a hot potato that nobody dares to keep in their hands for long.
I was hoping this would change now that the new interface is available. However, upon closer inspection and testing, I concluded that this feature needs further education, which is why I’m writing this blog post. In this post, we’ll take a closer look at all the settings and how they relate to the API. Just a couple of facts that help you understand this feature better, and hopefully give you the confidence to implement this in your own tenant sometime soon.
Fact 1. Settings in the Entra Admin center apply to both applications and service principals#
Where the API is very distinctive between app registrations and service principals, the policy in the Entra admin center will set both at the same time.
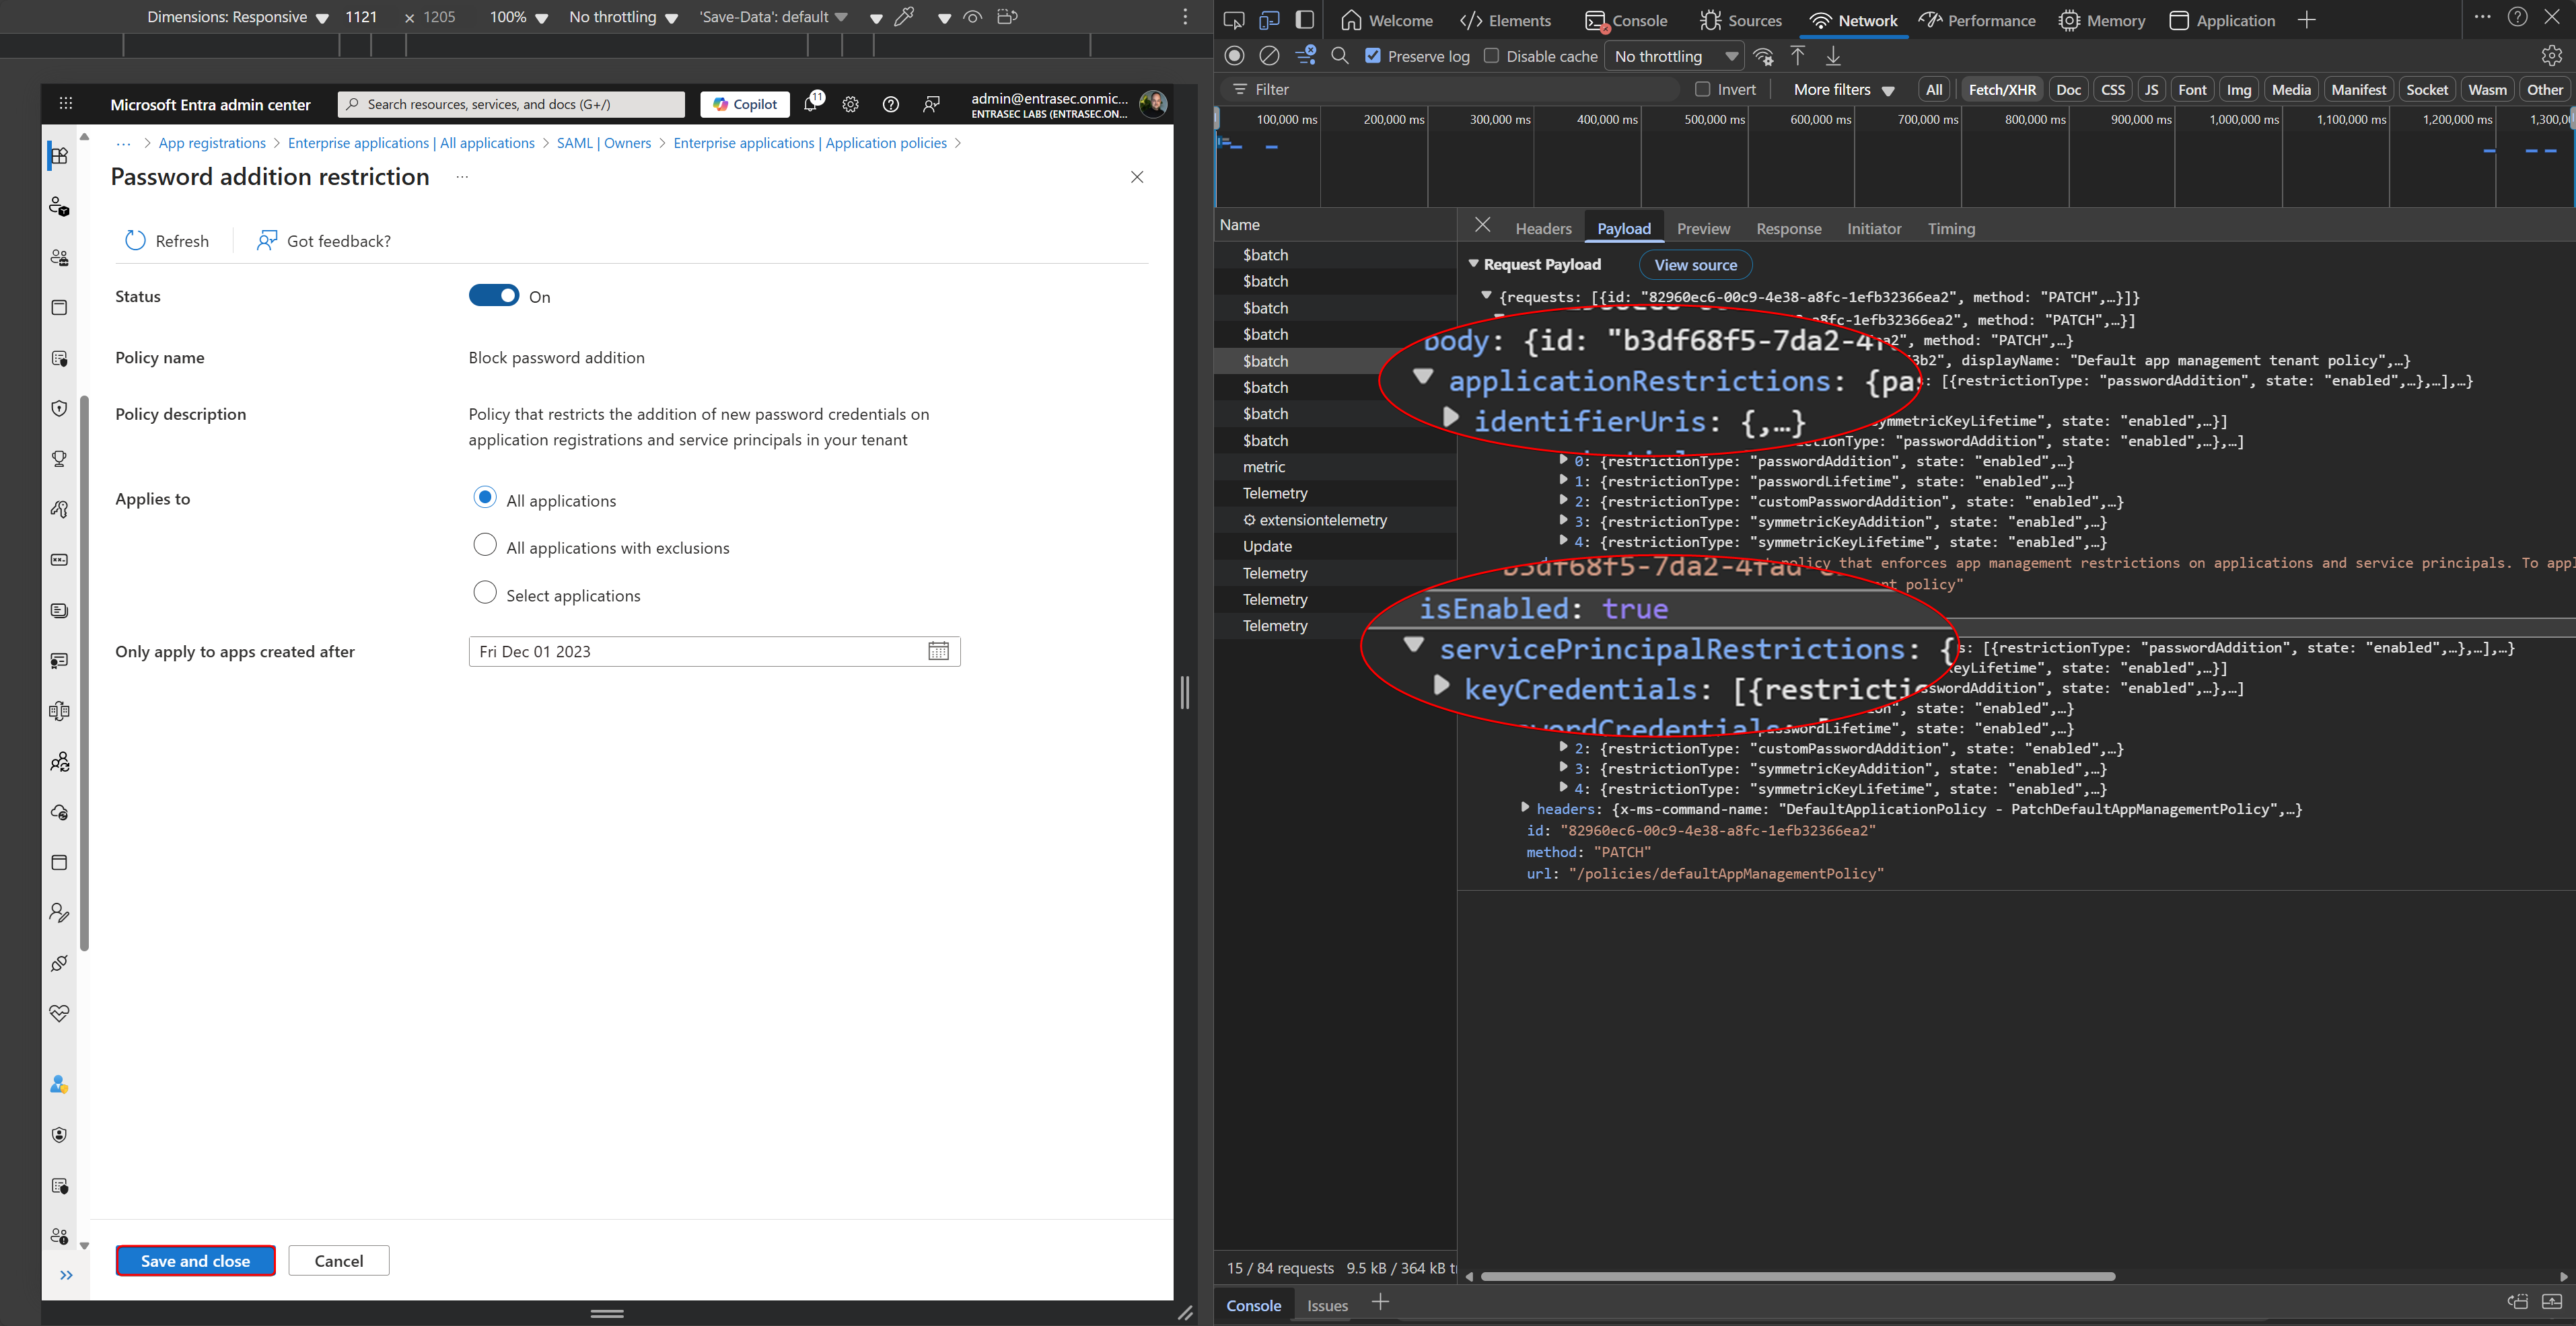
If you want to be specific, you need to use the Graph API instead. Update tenantAppManagementPolicy - Microsoft Graph beta | Microsoft Learn
Fact 2. Policies apply to new secrets and certificates only#
When you set the policy to block password addition, for example, these settings only apply to new secrets. All existing secrets remain active and valid.
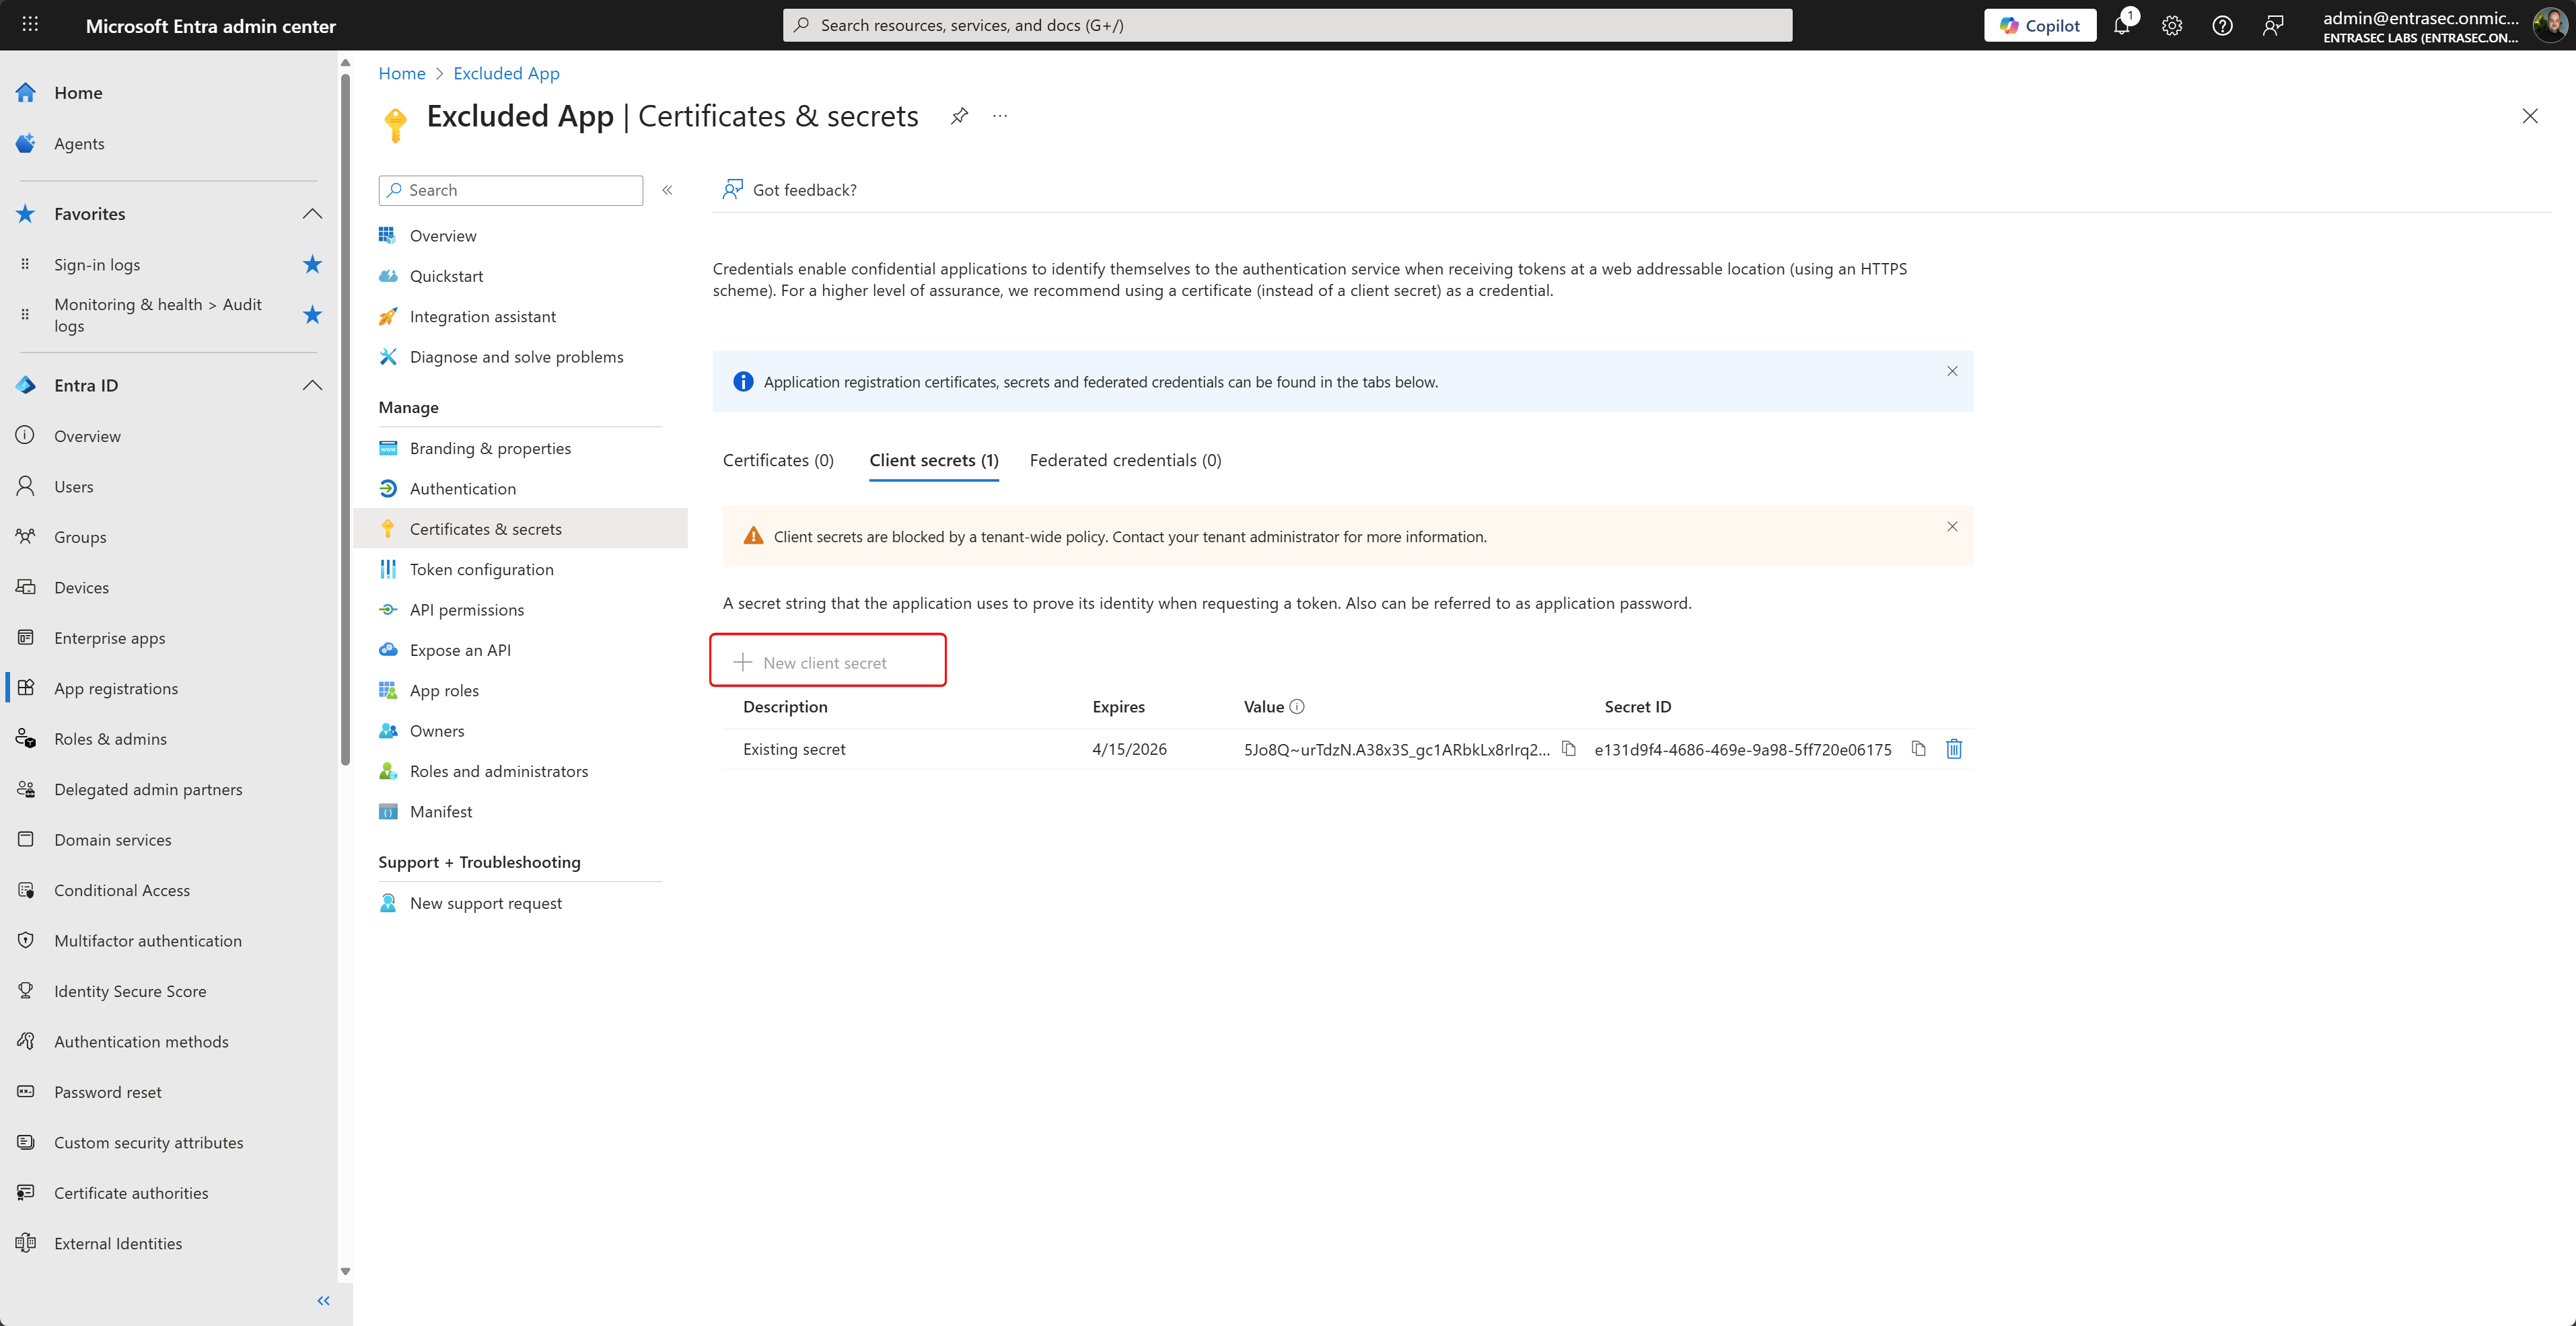
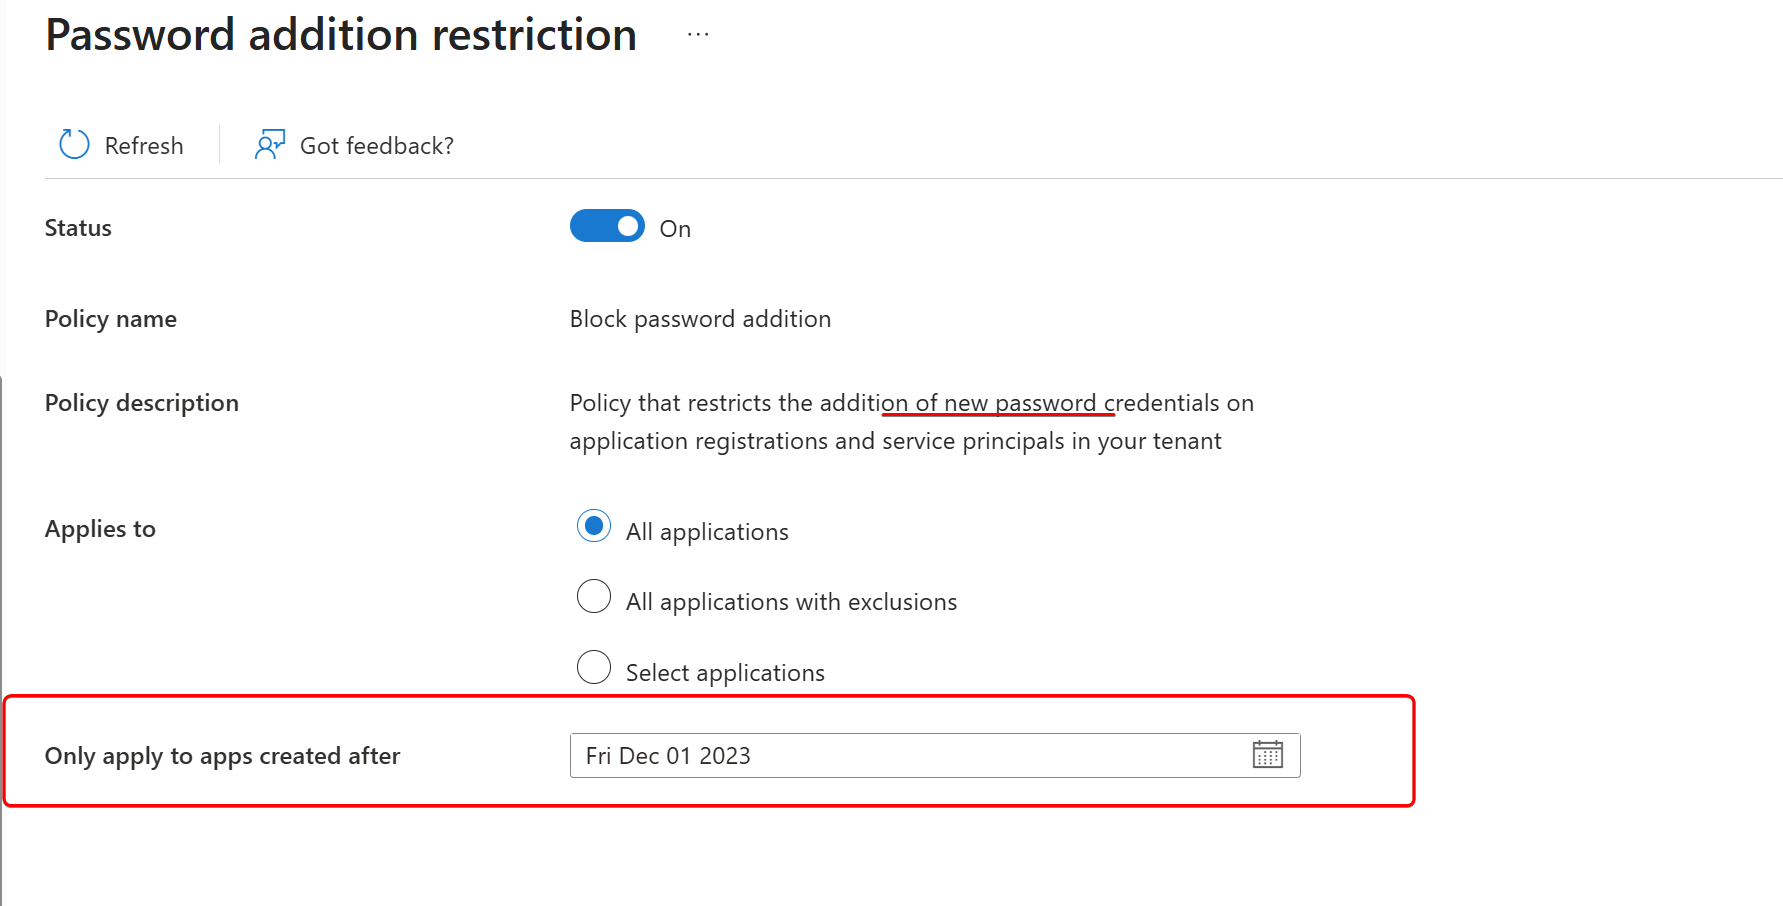
You can apply the policy more fine-grainedly, only to include apps created after a specific date. That can help minimize the impact and give you time to inform your developers and admins of the new policies. First, stop the bleeding; then eliminate the existing secrets.
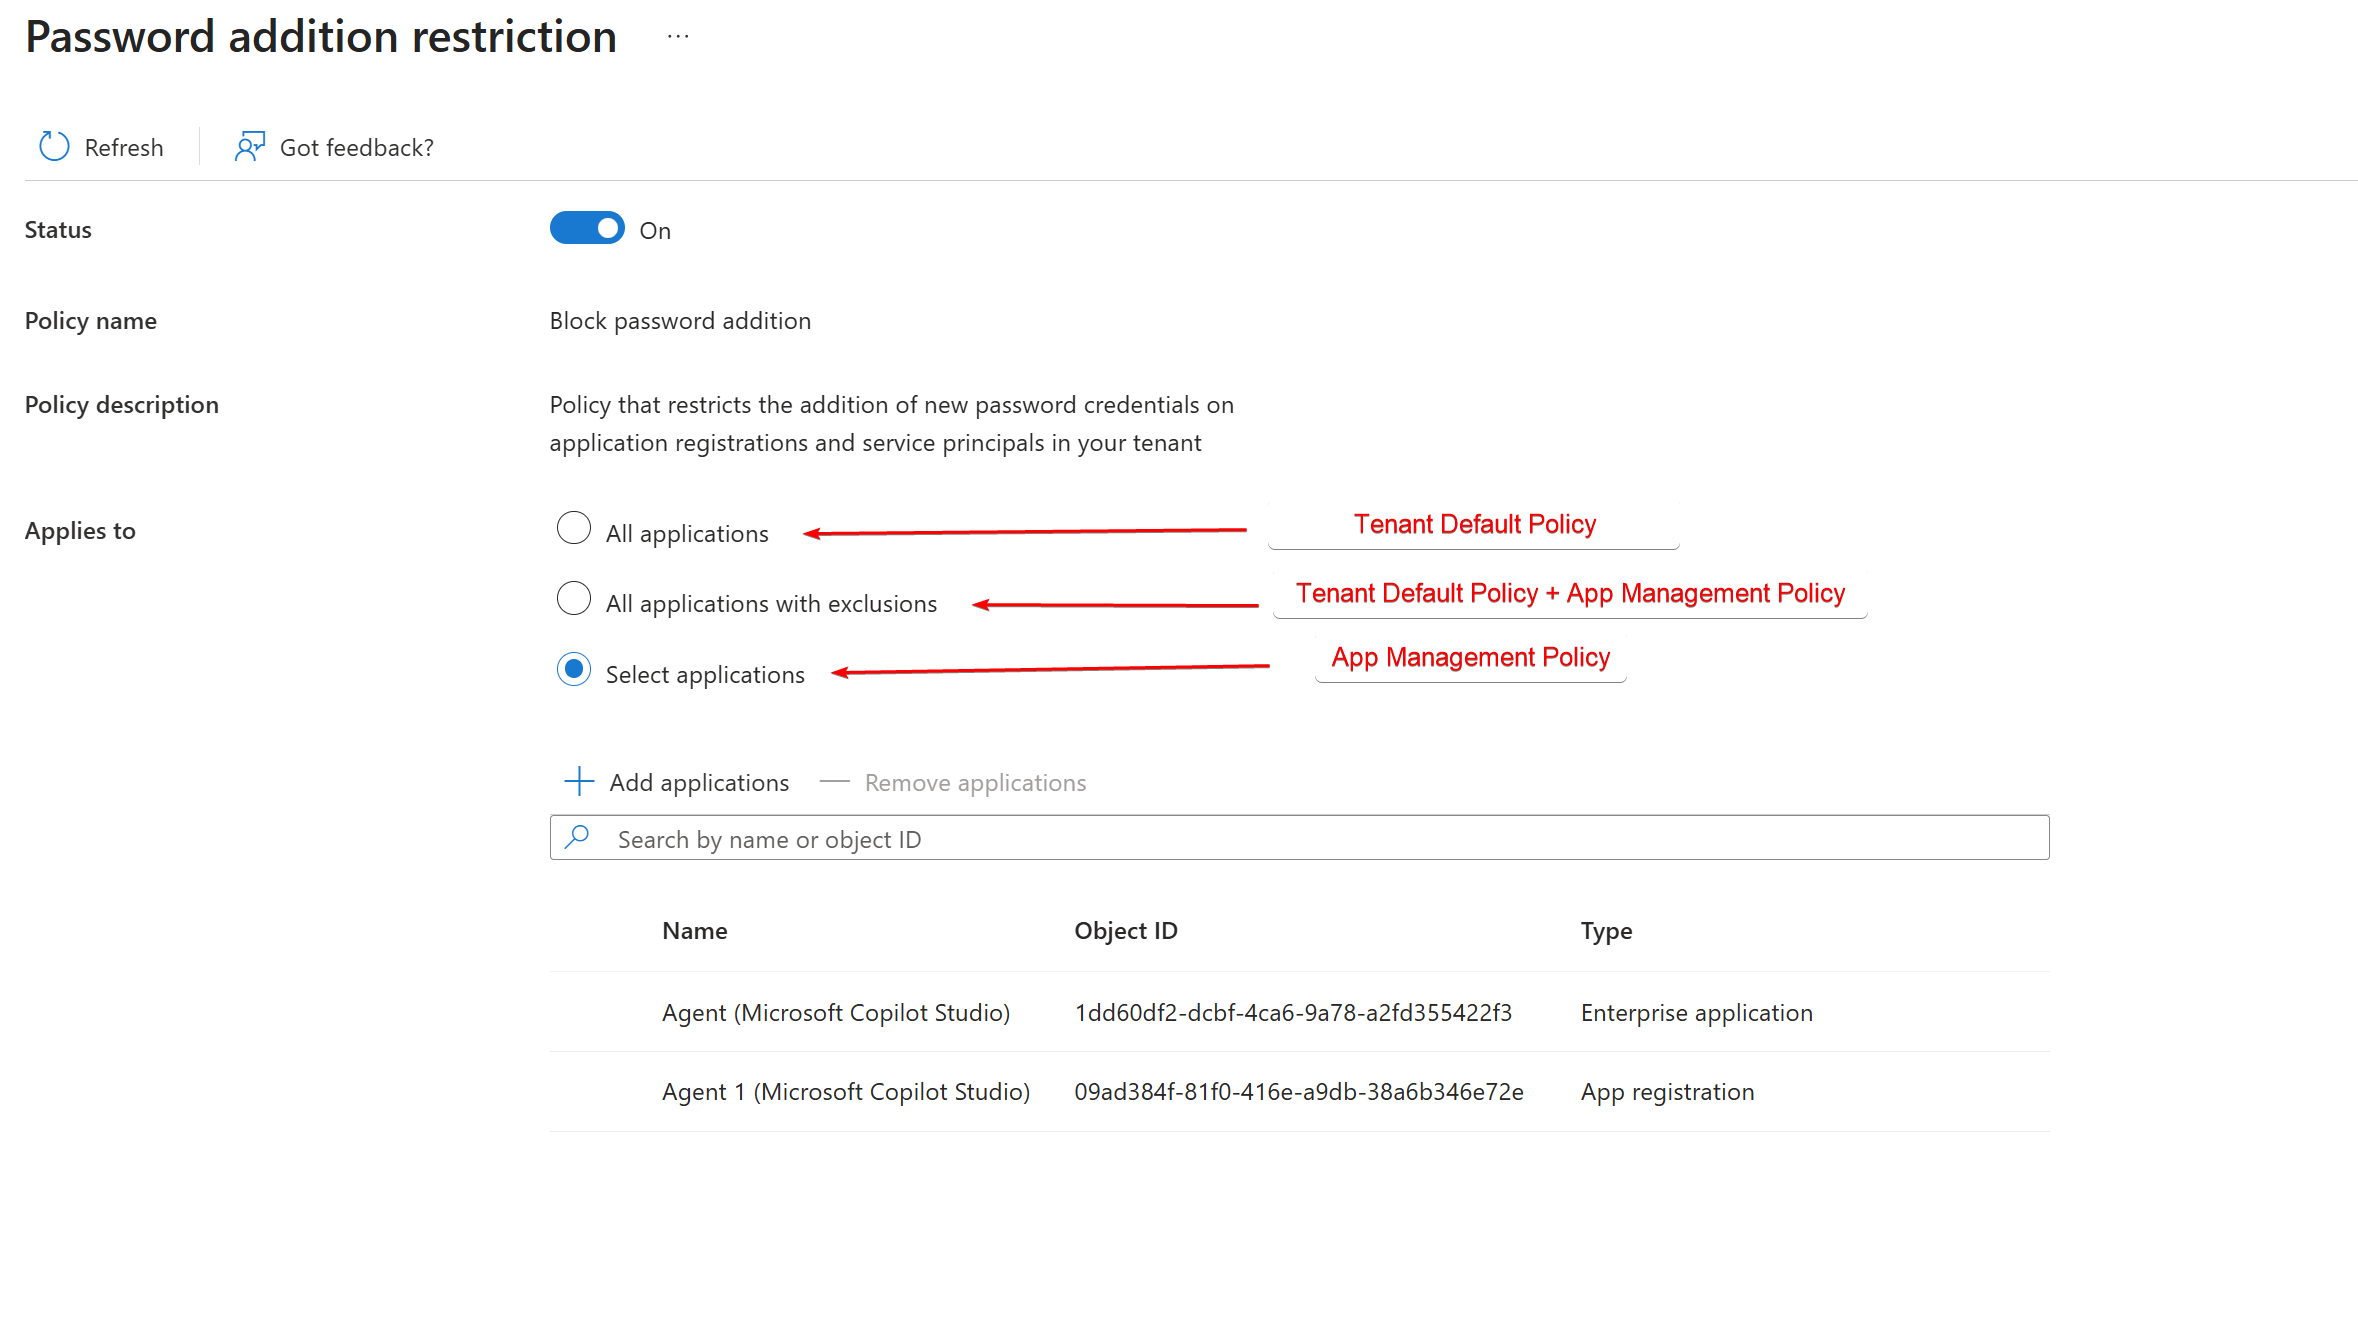
Fact 3. Auto-created policies are a big part of this feature#
You might not see it from the interface, but auto-generated policies are being created in the backend when:
- You apply policies to specific apps only
- You exclude apps from policies
- You configure custom lifetime settings for an app
There are two types of policy controls:
- Tenant default policy that applies to all applications or service principals.
- App (application or service principal) management policies that allow individual applications to be included or excluded from the tenant default policy.
To see what really happens in the background, you can use Graph Explorer to check out both the tenant default policy and the app management policies that are auto-generated, based on your configuration.
Let’s say you have blocked the creation of secrets for two apps only. When calling the Graph API, you can see there is a policy with the matching configuration.
GET https://graph.microsoft.com/beta/policies/appManagementPolicies/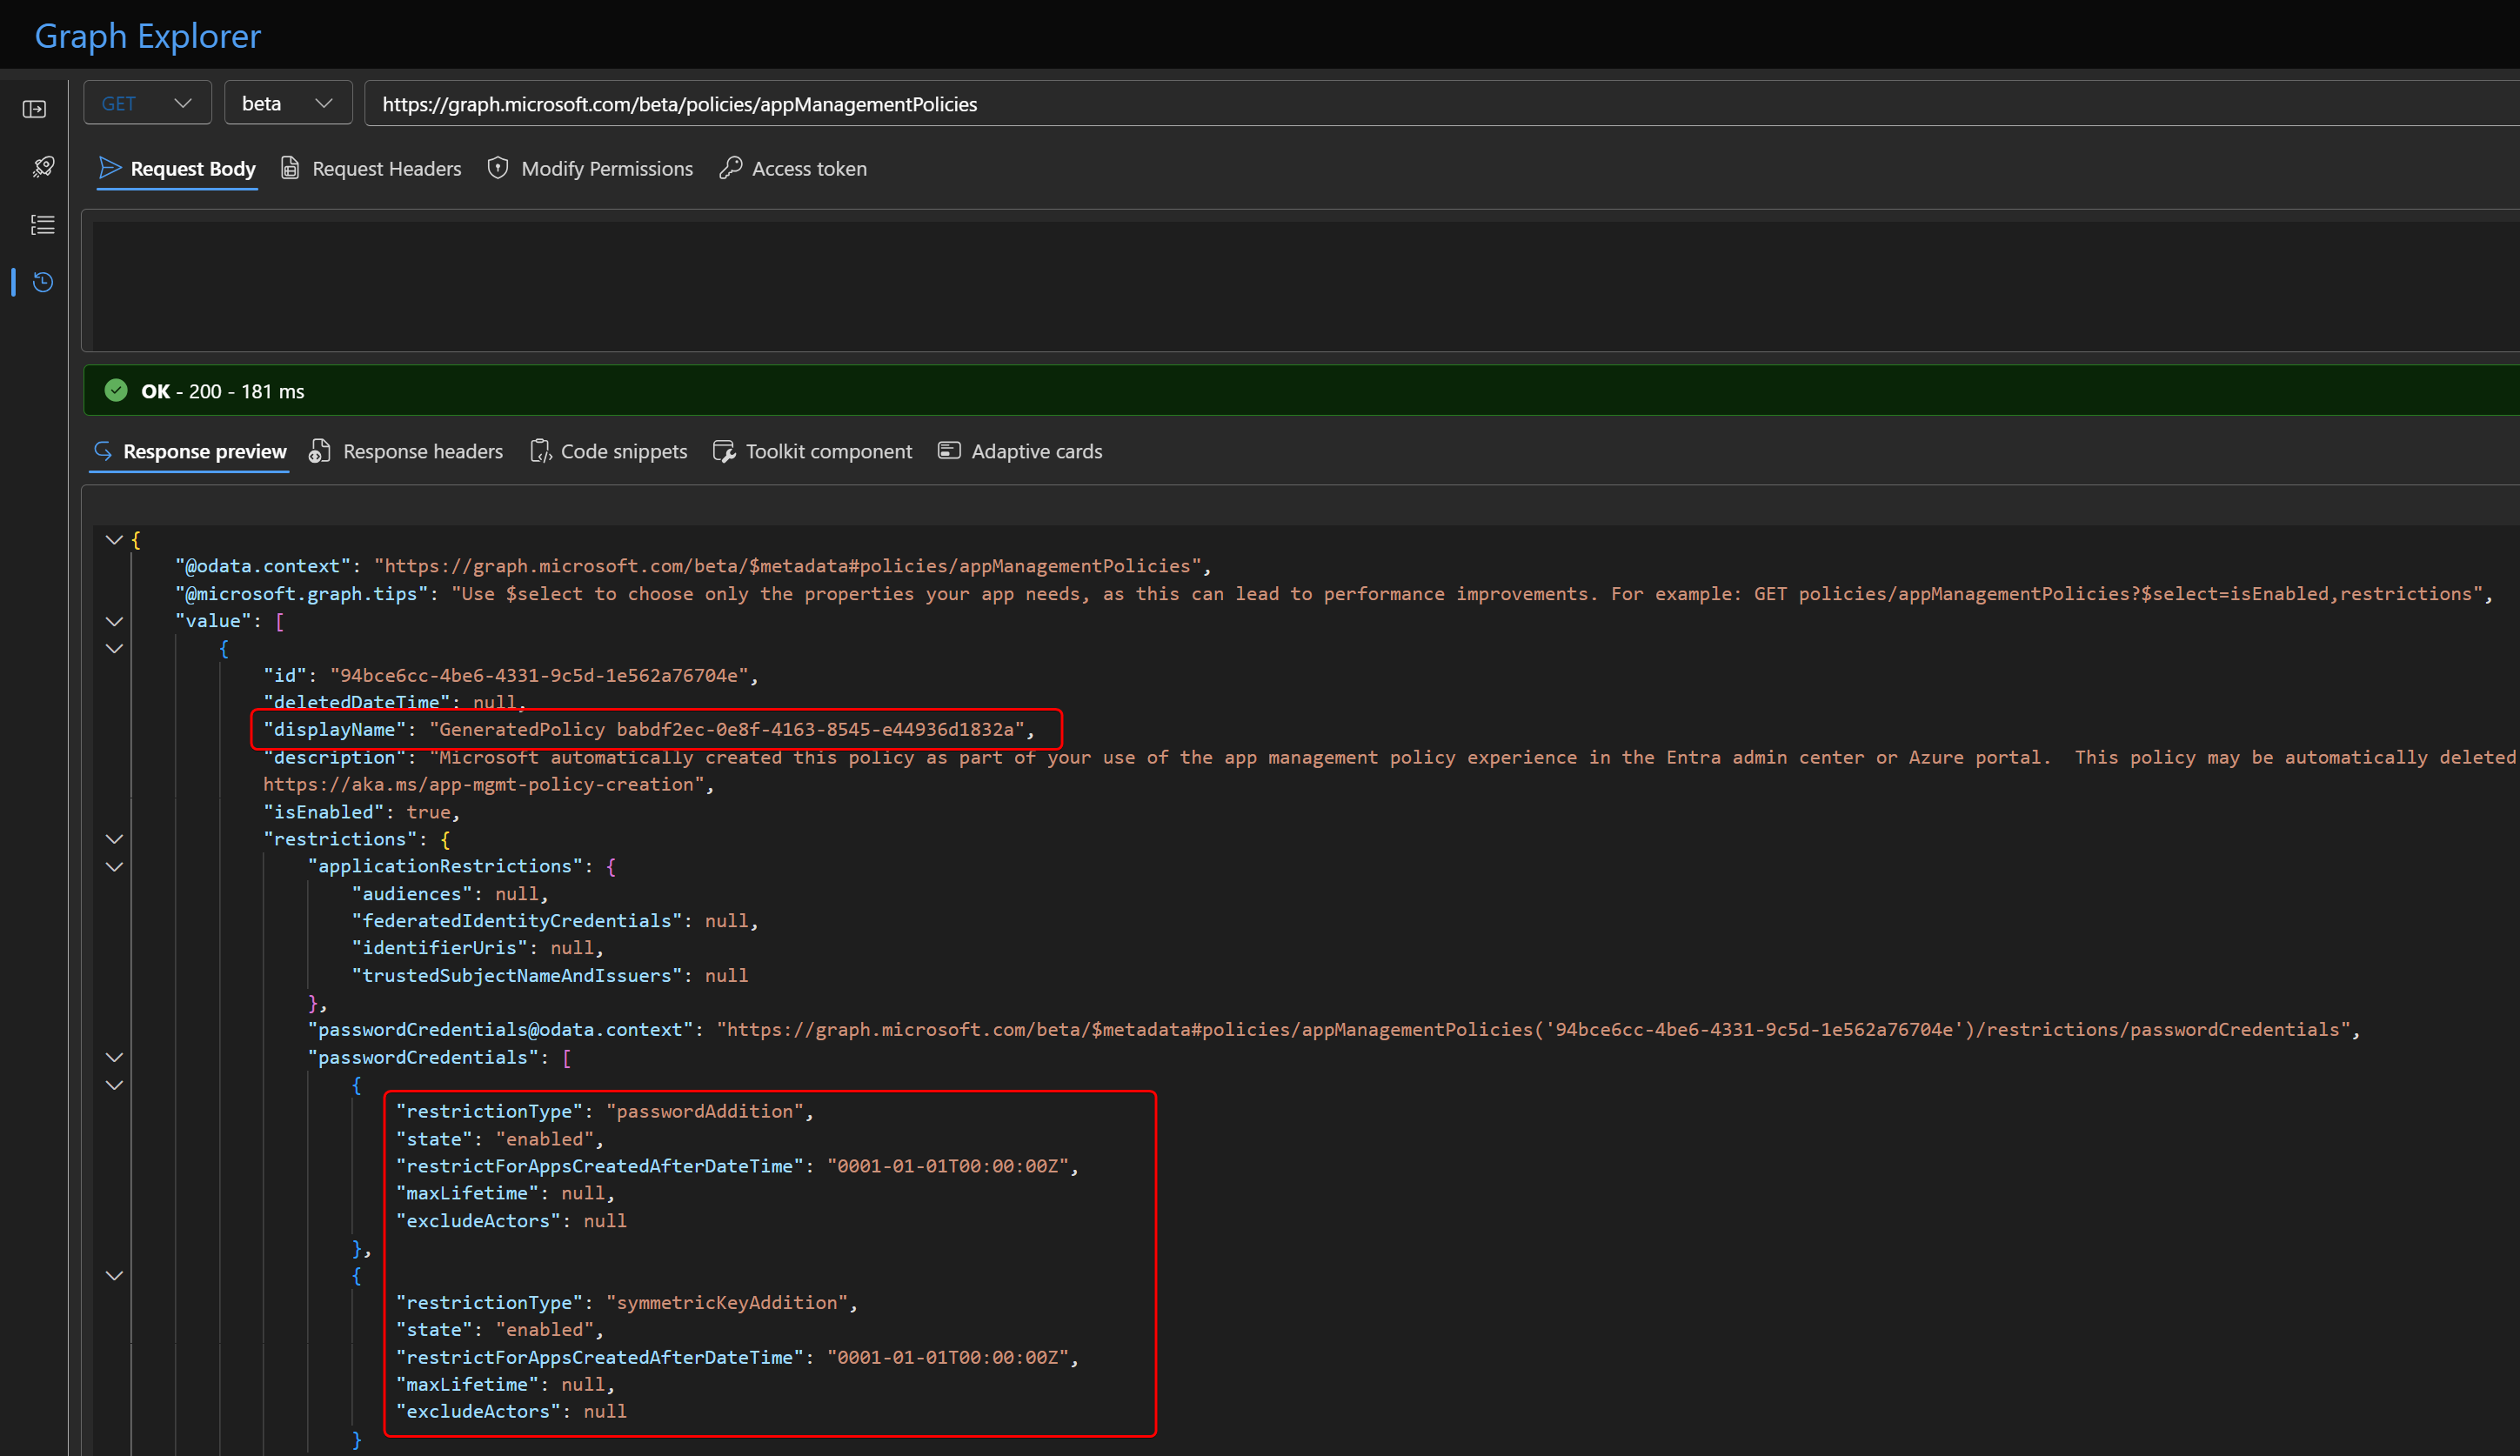
You can dig deeper by getting the ID of the policy and seeing what apps are assigned to this policy.
GET https://graph.microsoft.com/beta/policies/appManagementPolicies/94bce6cc-4be6-4331-9c5d-1e562a76704e/appliesTo?$select=displayName,servicePrincipalType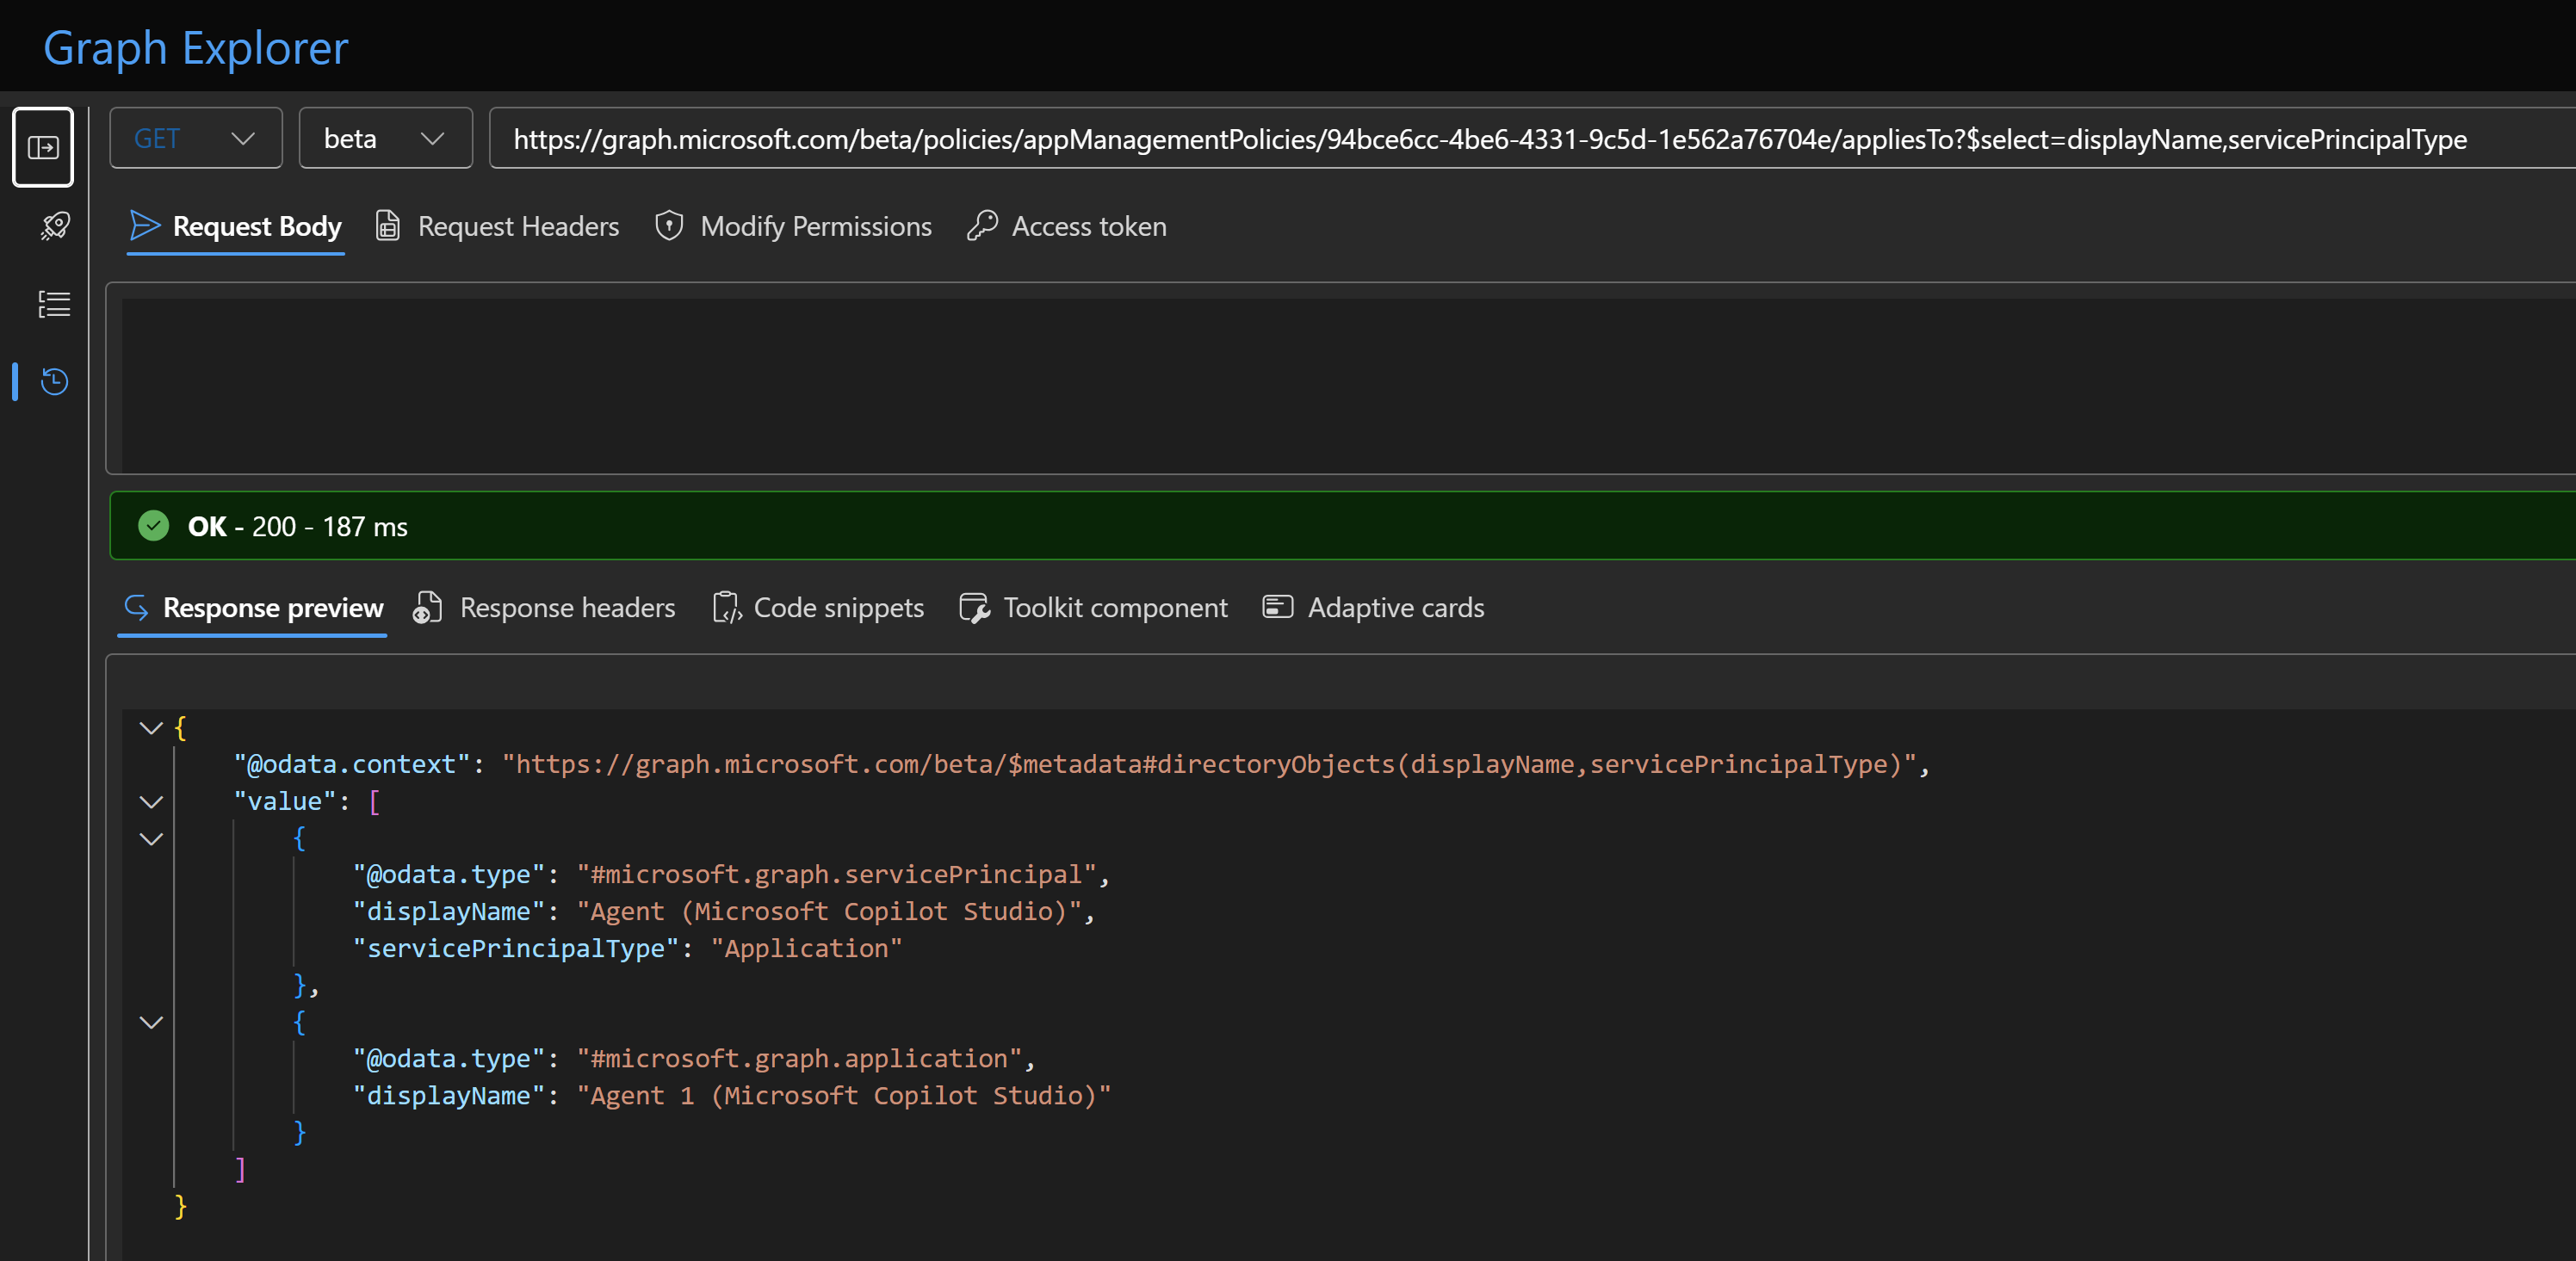
Fact 4. Auto-created policies will be deleted when no longer in use#
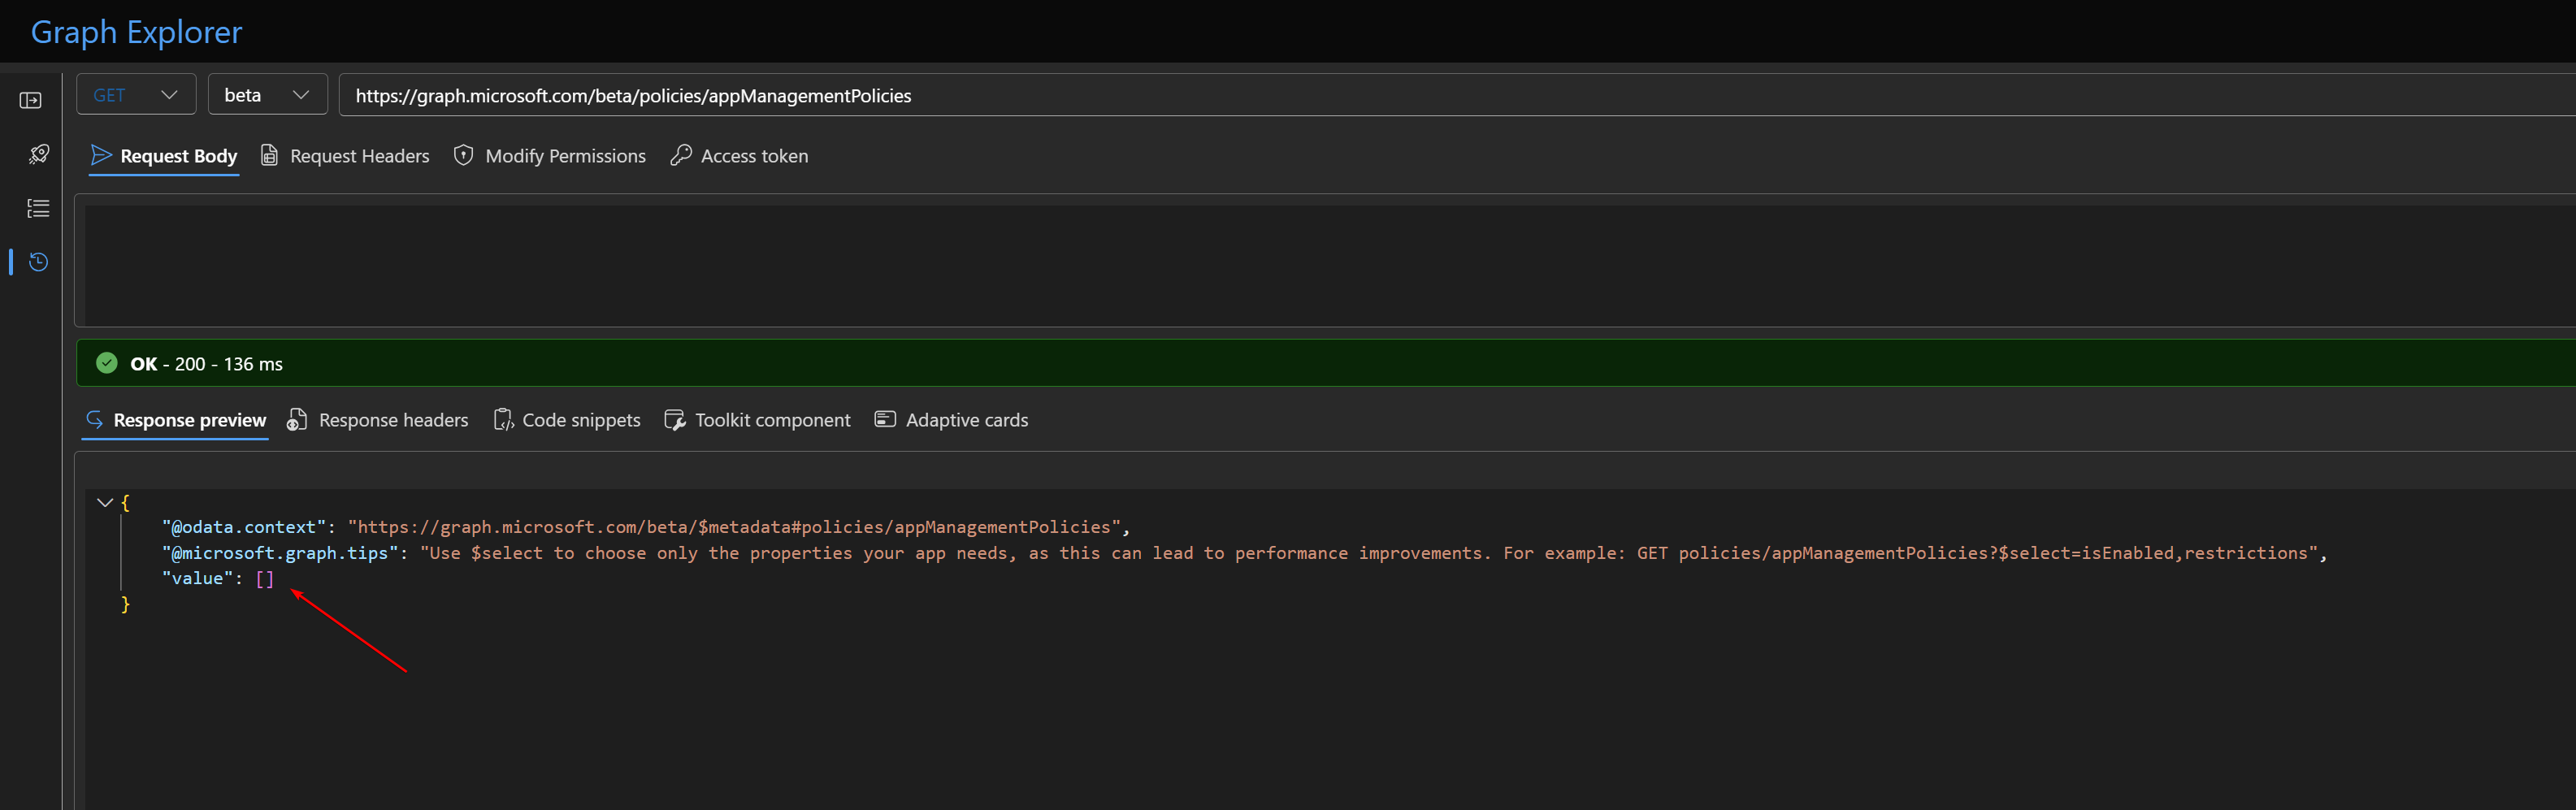
Auto-created policies that have no assignments will be cleaned up automatically.
Let’s delete the two apps from the previous policy, and you’ll see that the custom policies are deleted right away. Adding them again will just create a new policy. So keep that in mind.
Fact 5. Configuring Excluded Actors will create a custom security attribute set#
You can configure so-called excluded callers/actors that are allowed to bypass the policy. This approach allows you to enforce the policy while excluding your current automated solutions or admins from creating secrets, thereby supporting your current needs. Spoiler alert: I couldn’t get this to work.
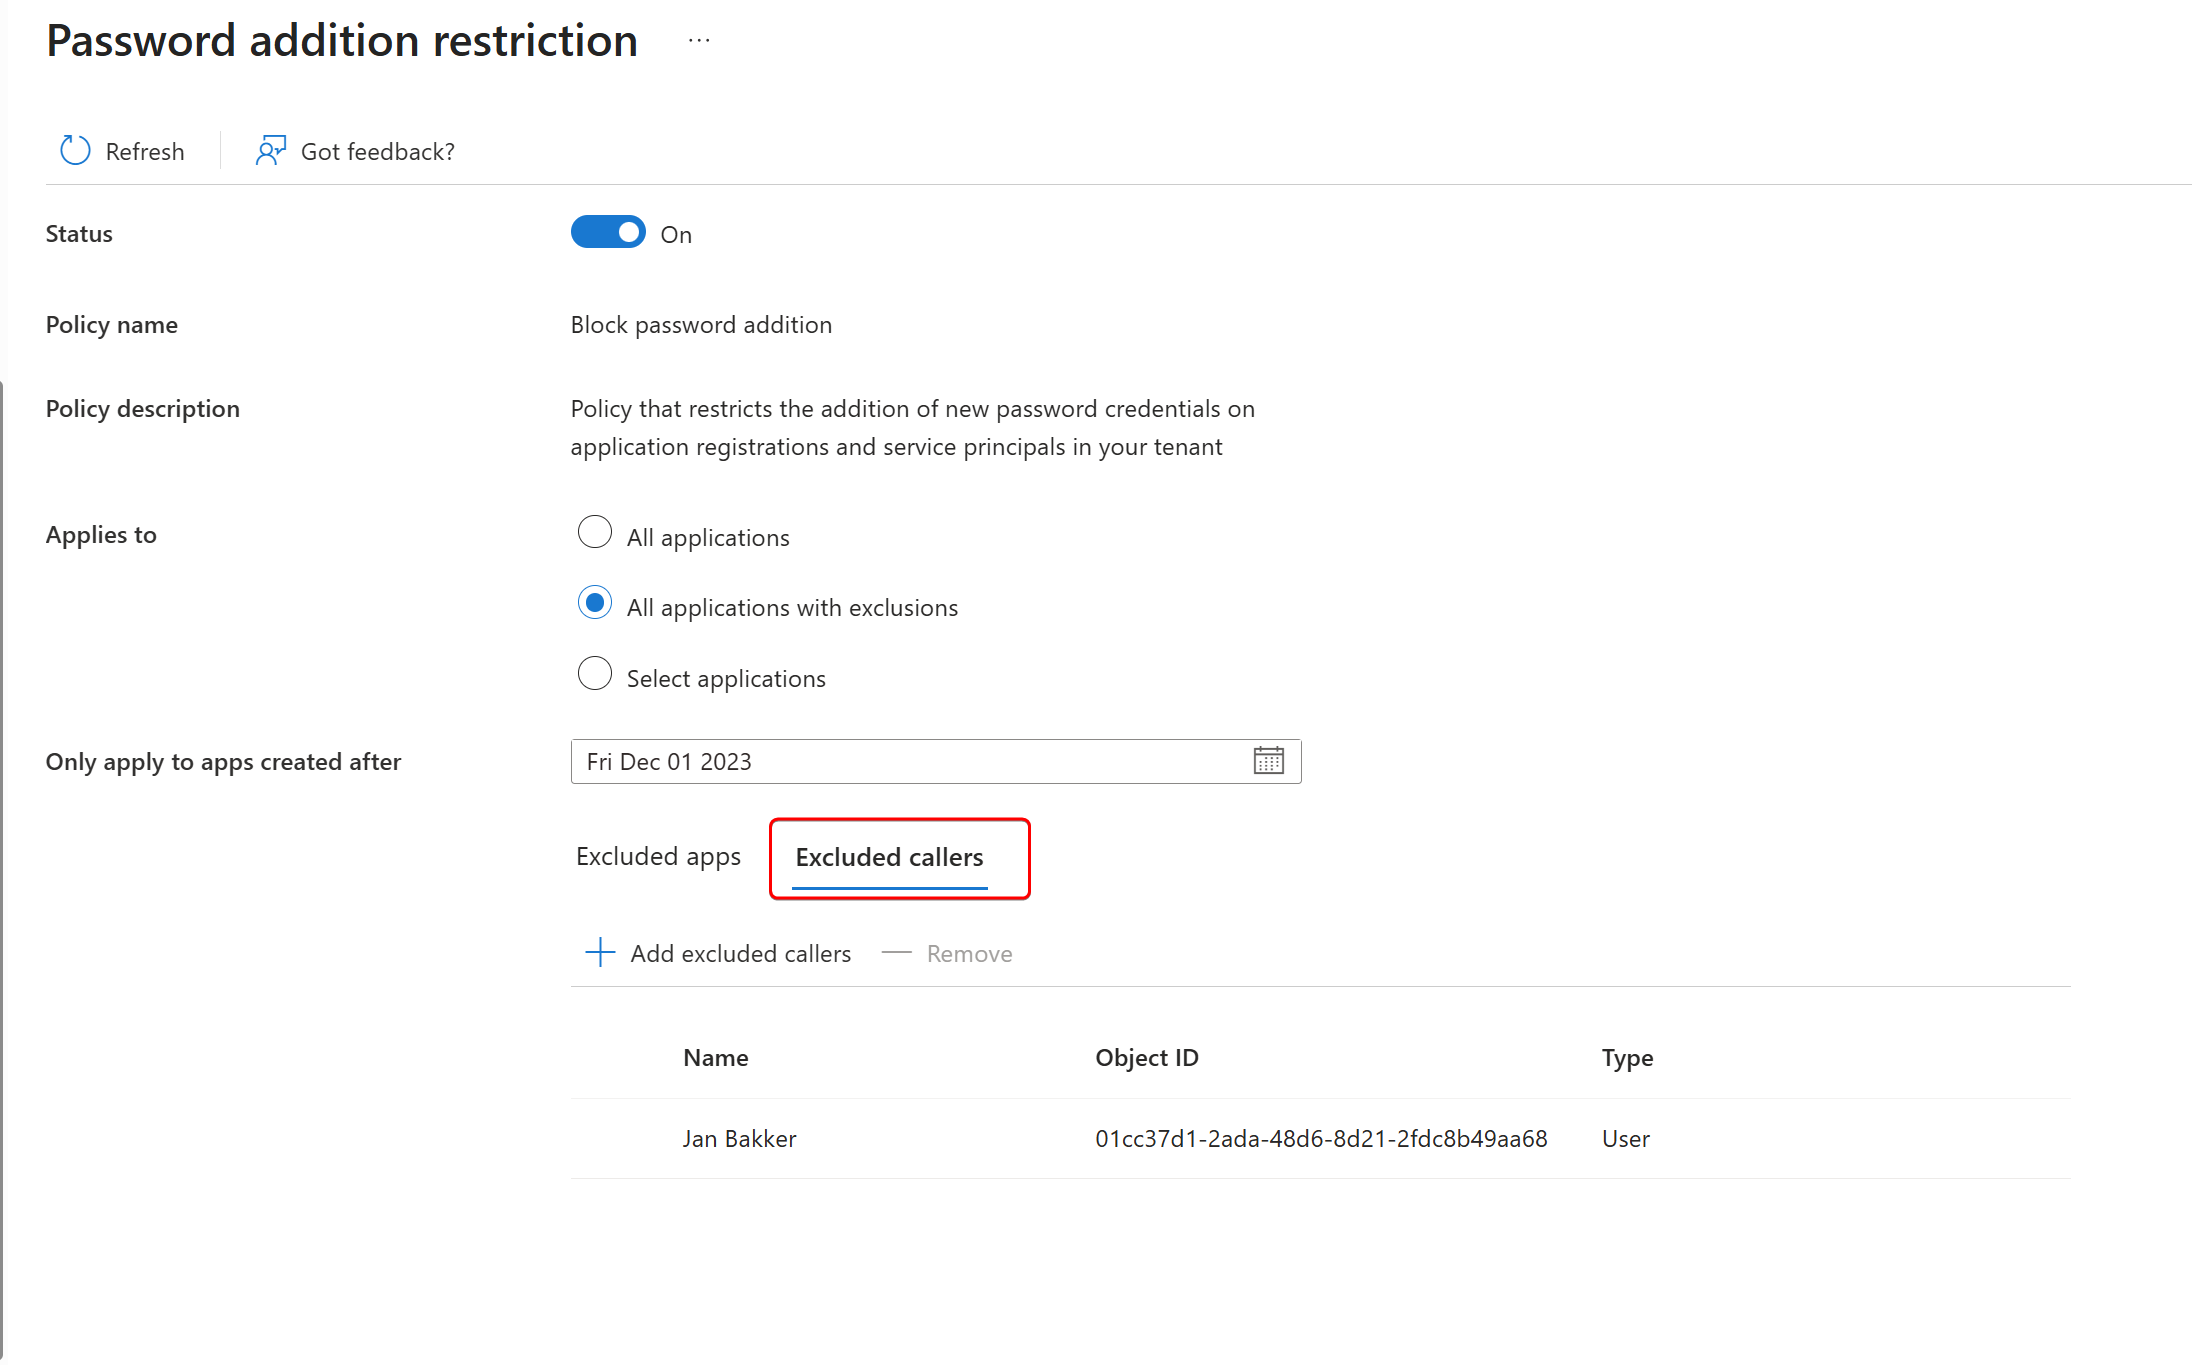
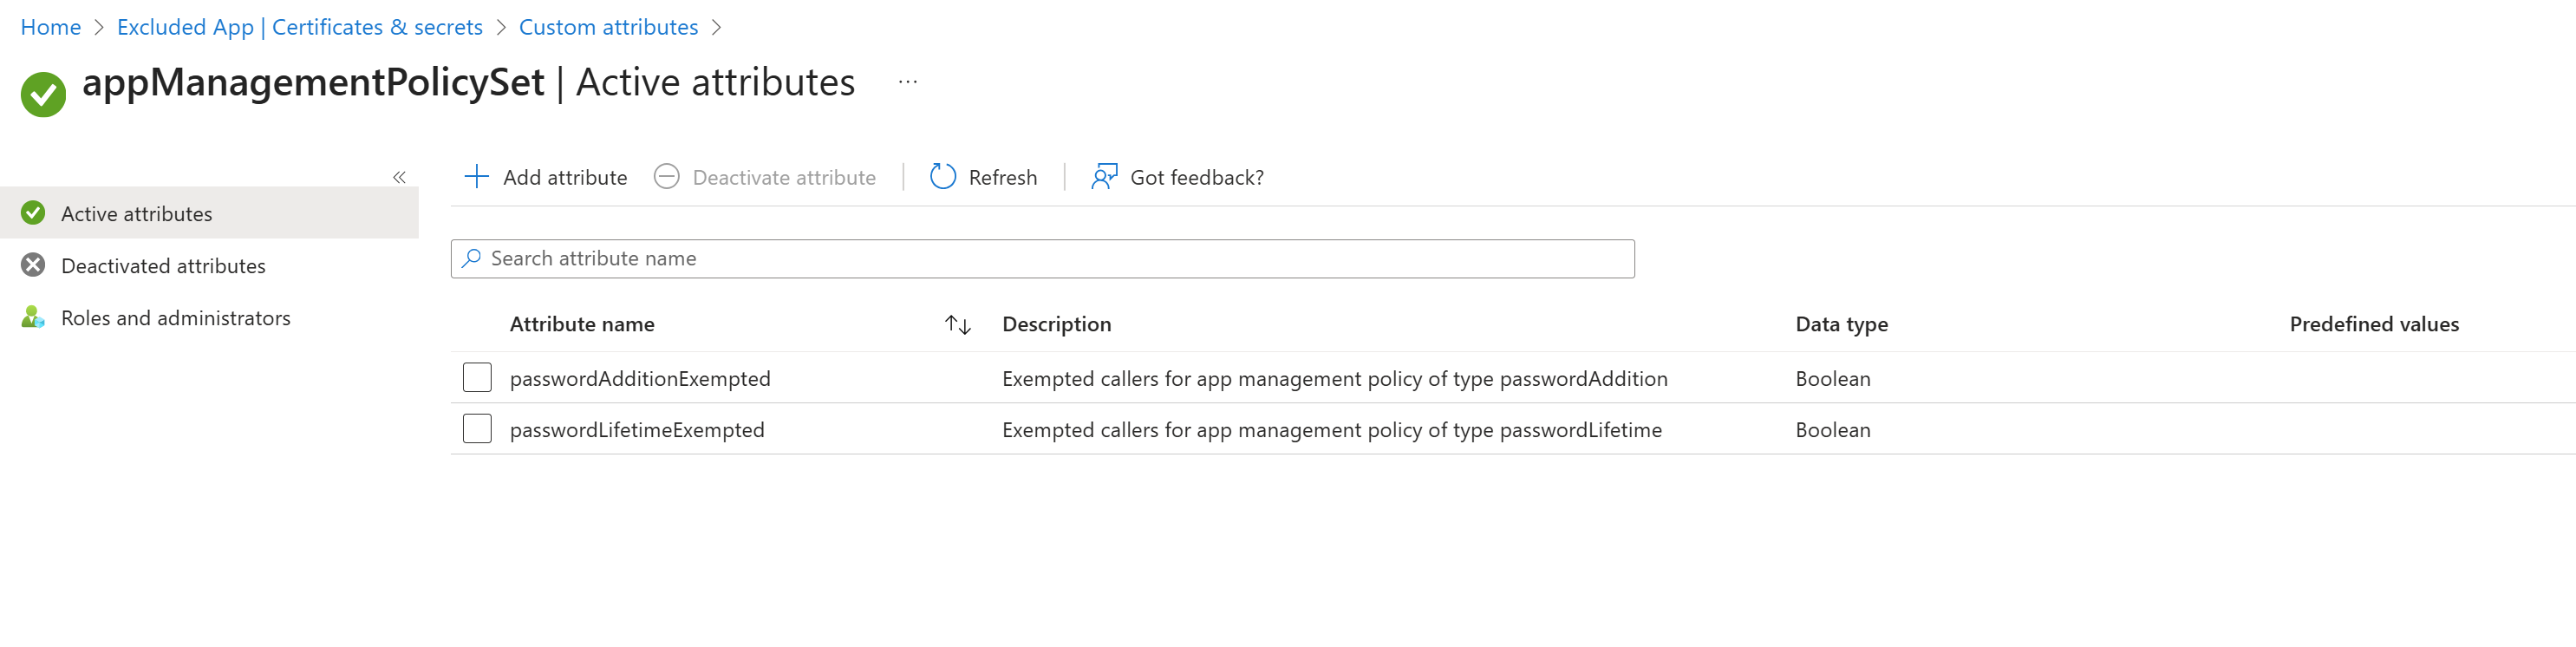
When you configure your first excluded caller, a new attribute set is created.
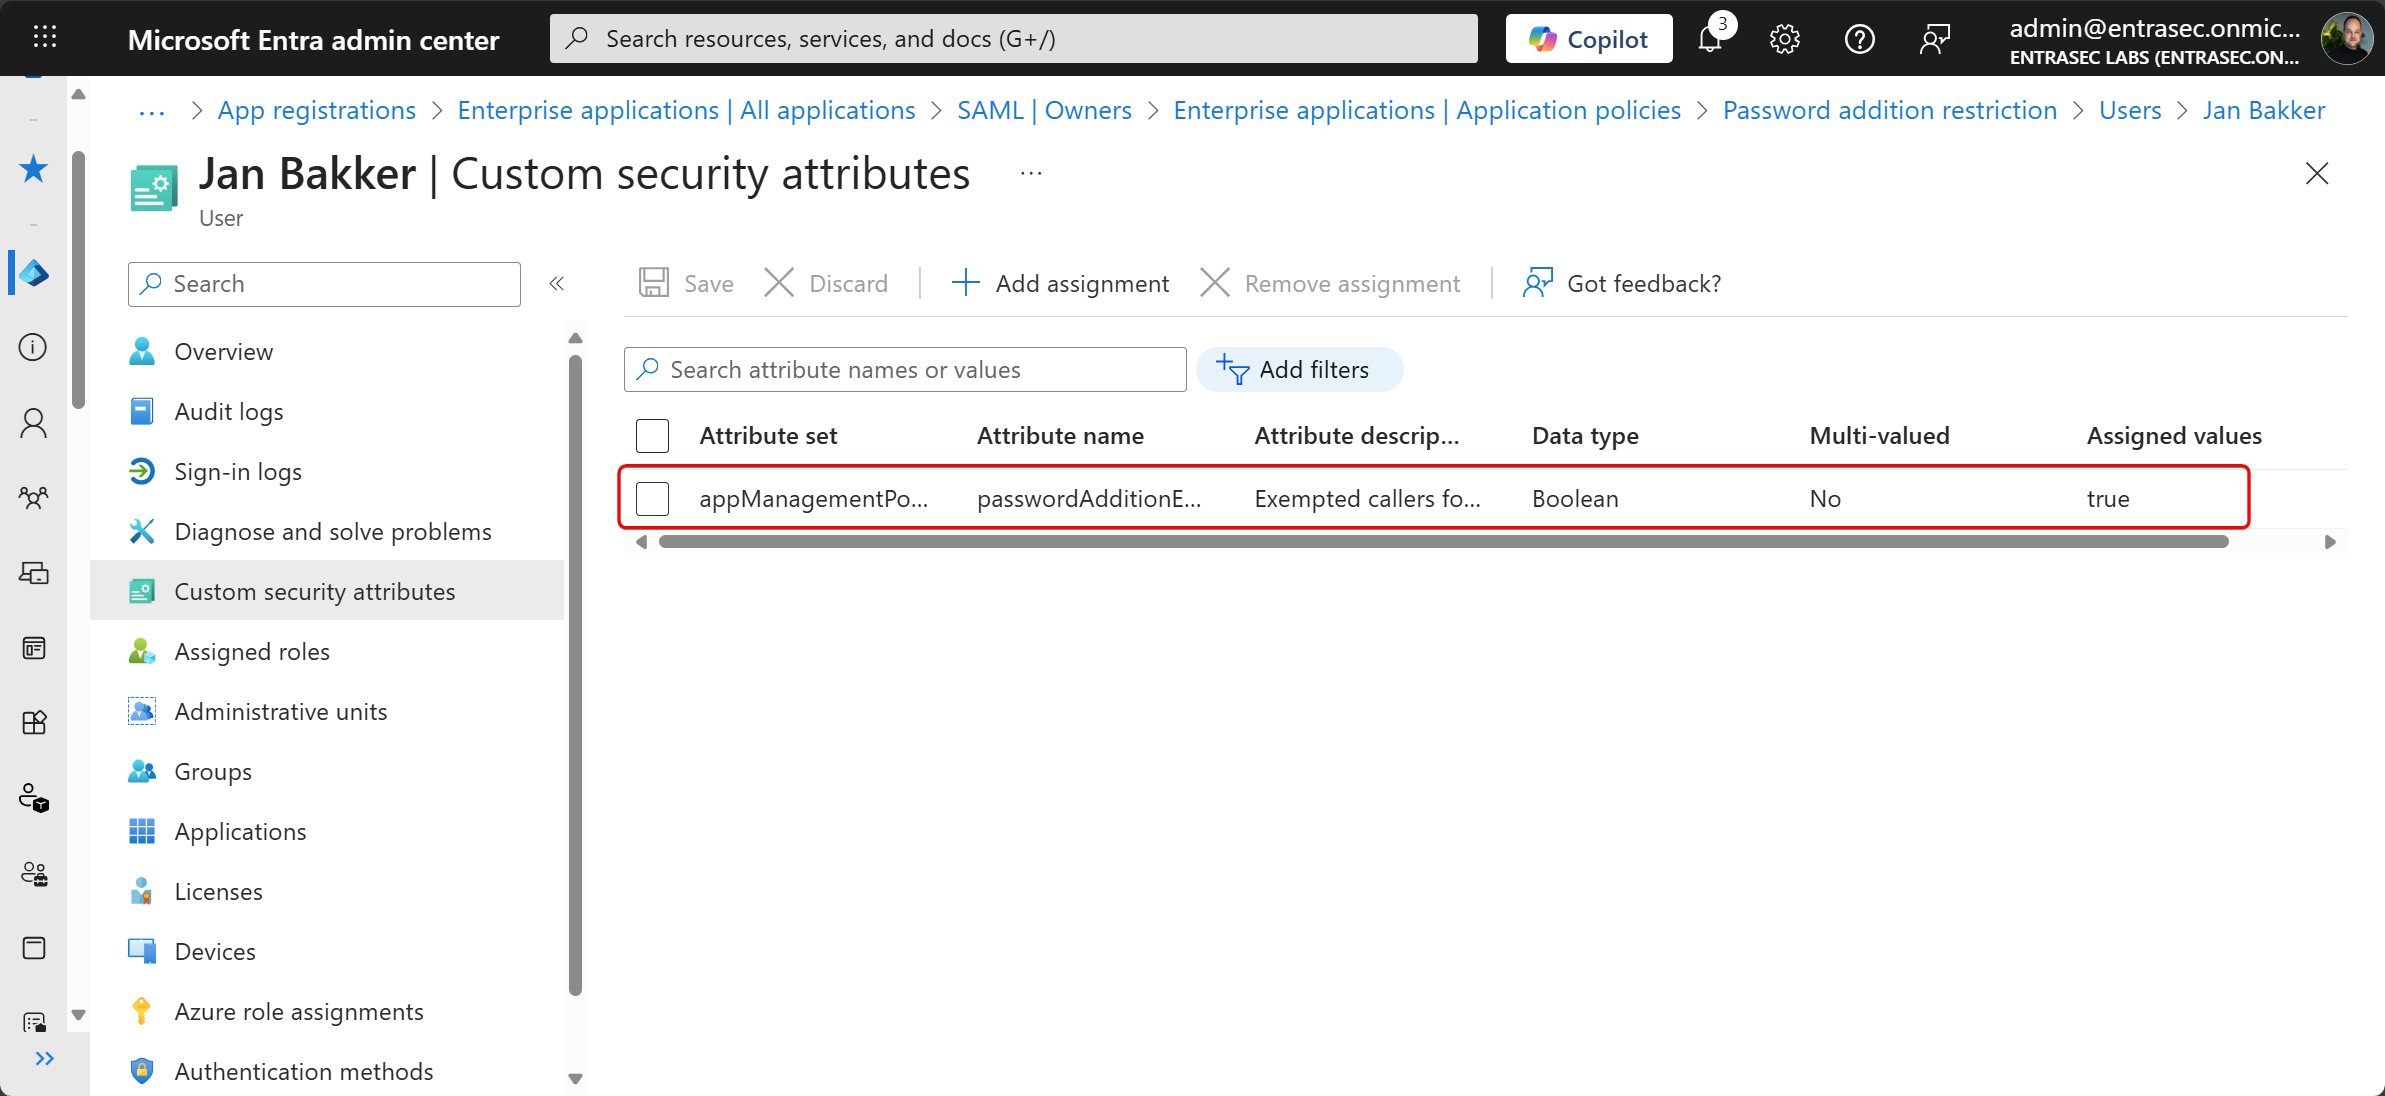
The attribute is then assigned to the excluded user or app.
Fact 5.1 I have no idea how this works.#
The documentation around this ExcludeActor setting is very limited, so I assumed I could exclude my account and use the Graph API to create a secret, but that does not work.
This is how it should work according to the docs:
“Collection of custom security attribute exemptions. If an actor user or service principal has the custom security attribute defined in this section, they’re exempted from the restriction. This means that calls the user or service principal makes to create or update apps are exempt from this policy enforcement.”
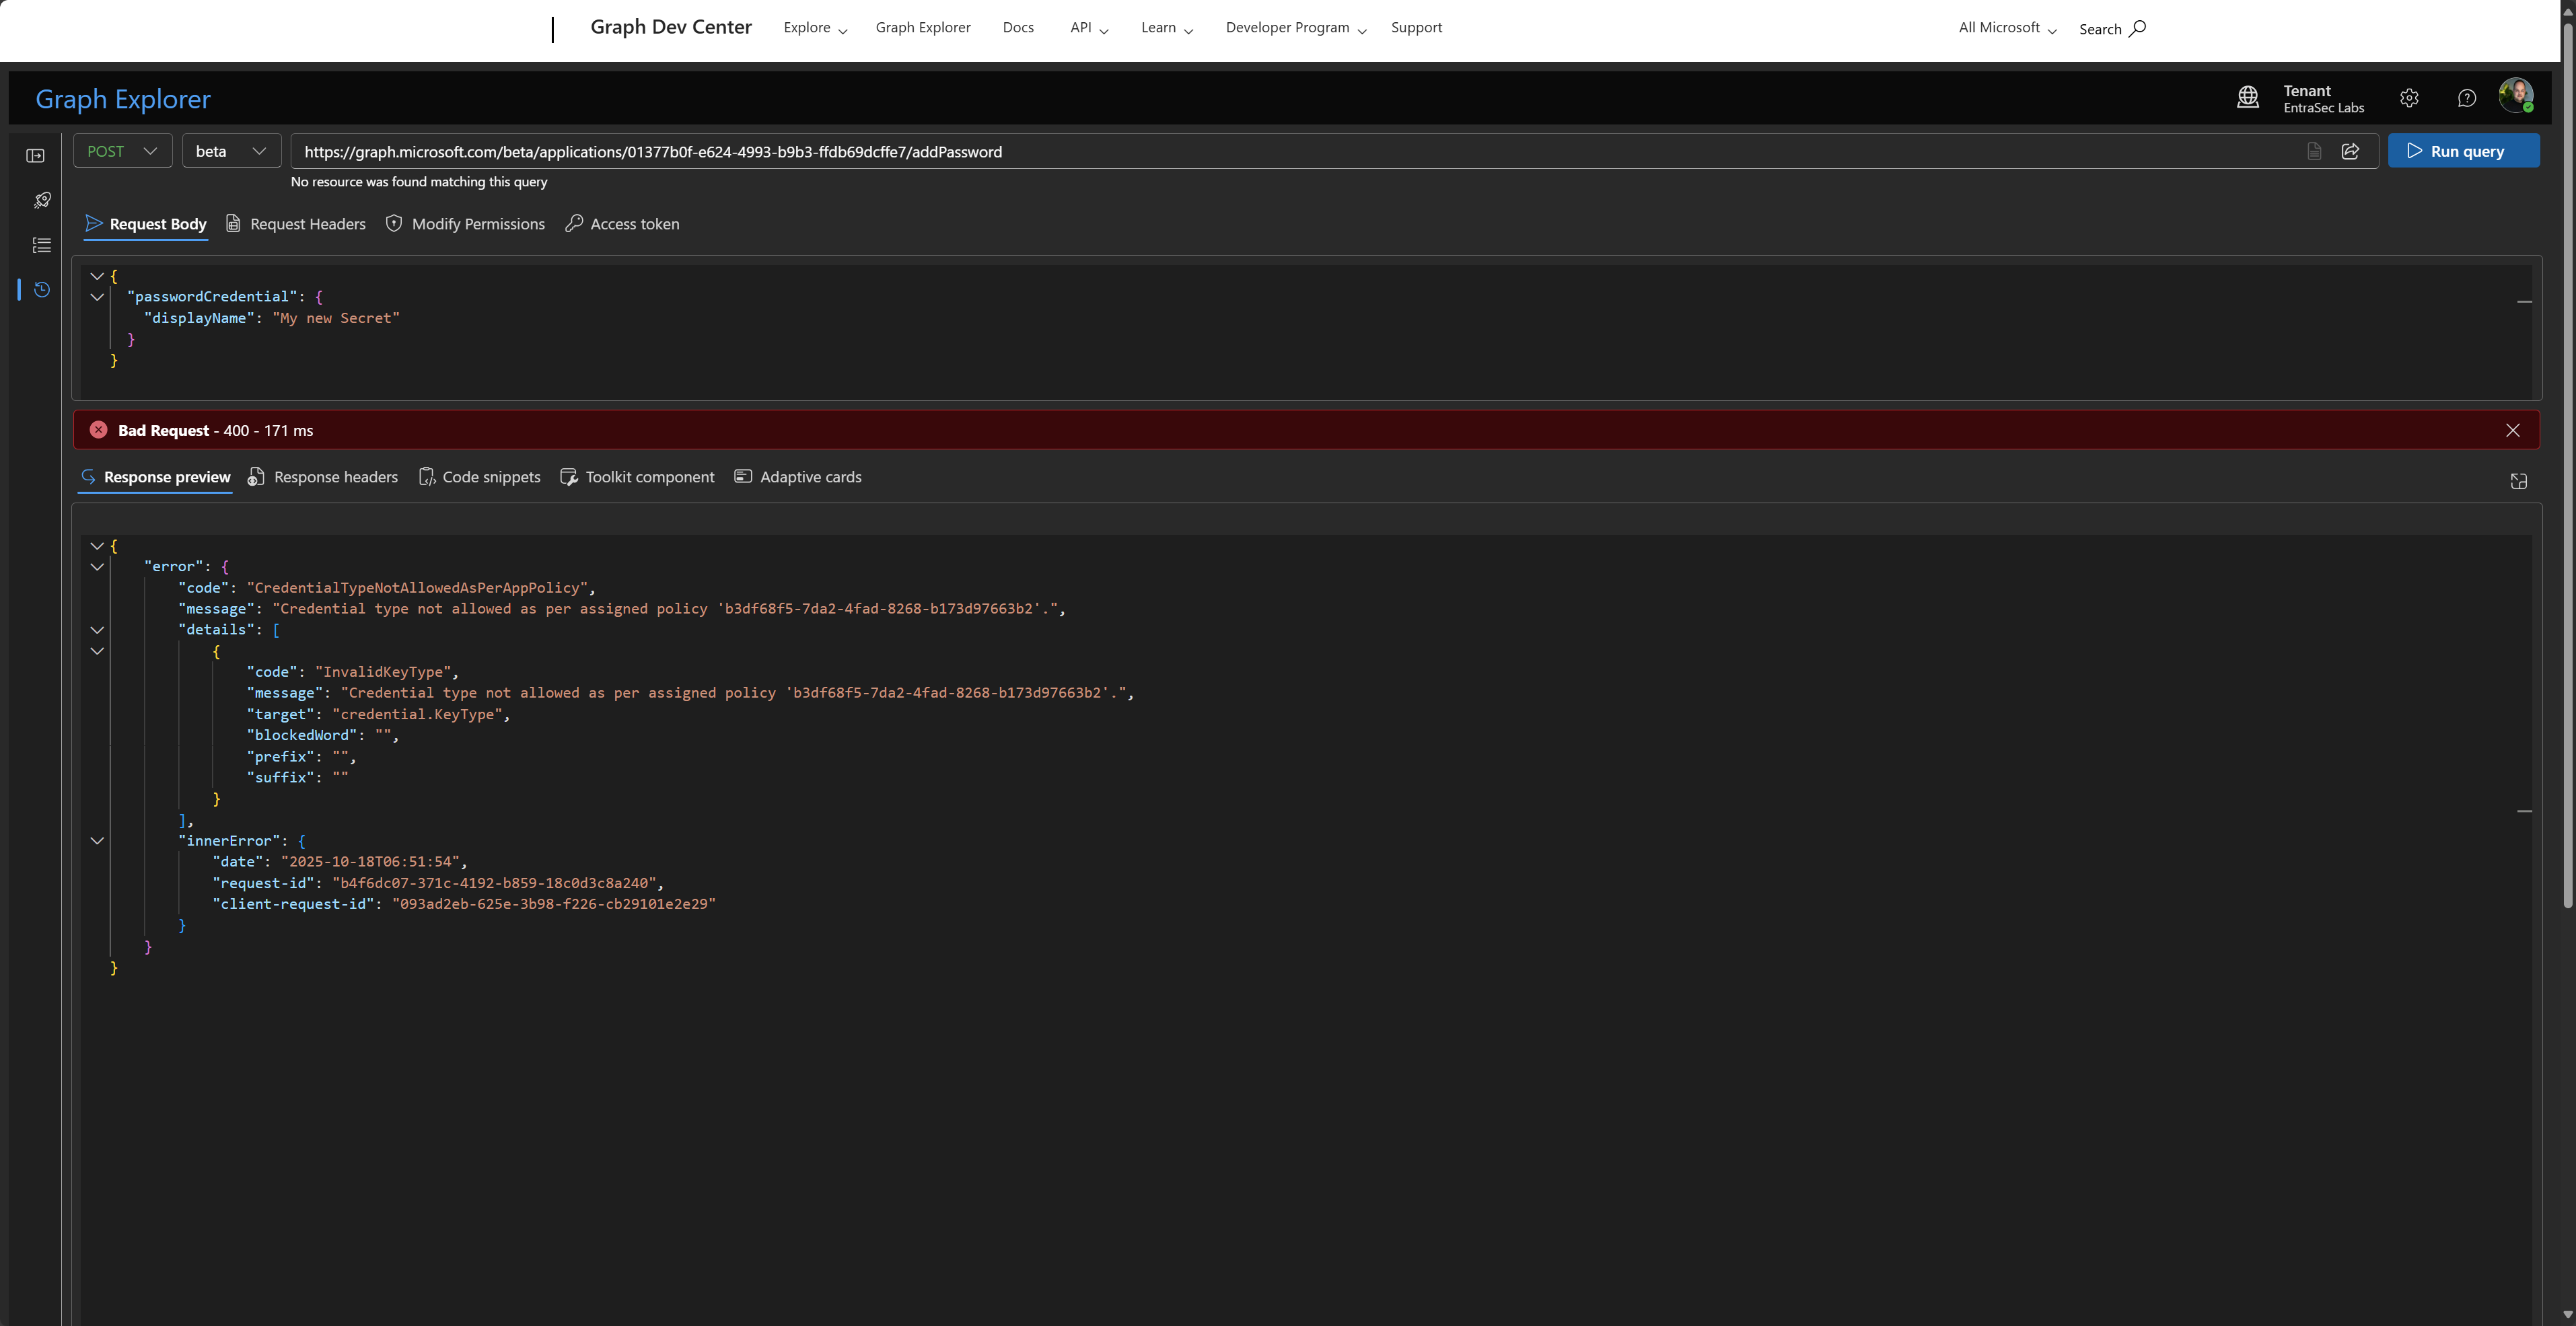
If I’m holding it wrong, please tell me so I can update this post. Update: Found it!
Fact 6. Mixing policies is complex and probably not supported#
I wondered what would happen if I applied two policies to the same app with contradicting or stricter settings, but I could not get that to work. That tells me two things:
- Custom policies are complex, and you can’t see them from the UI.
- Keep it simple. Only use in complex scenarios.
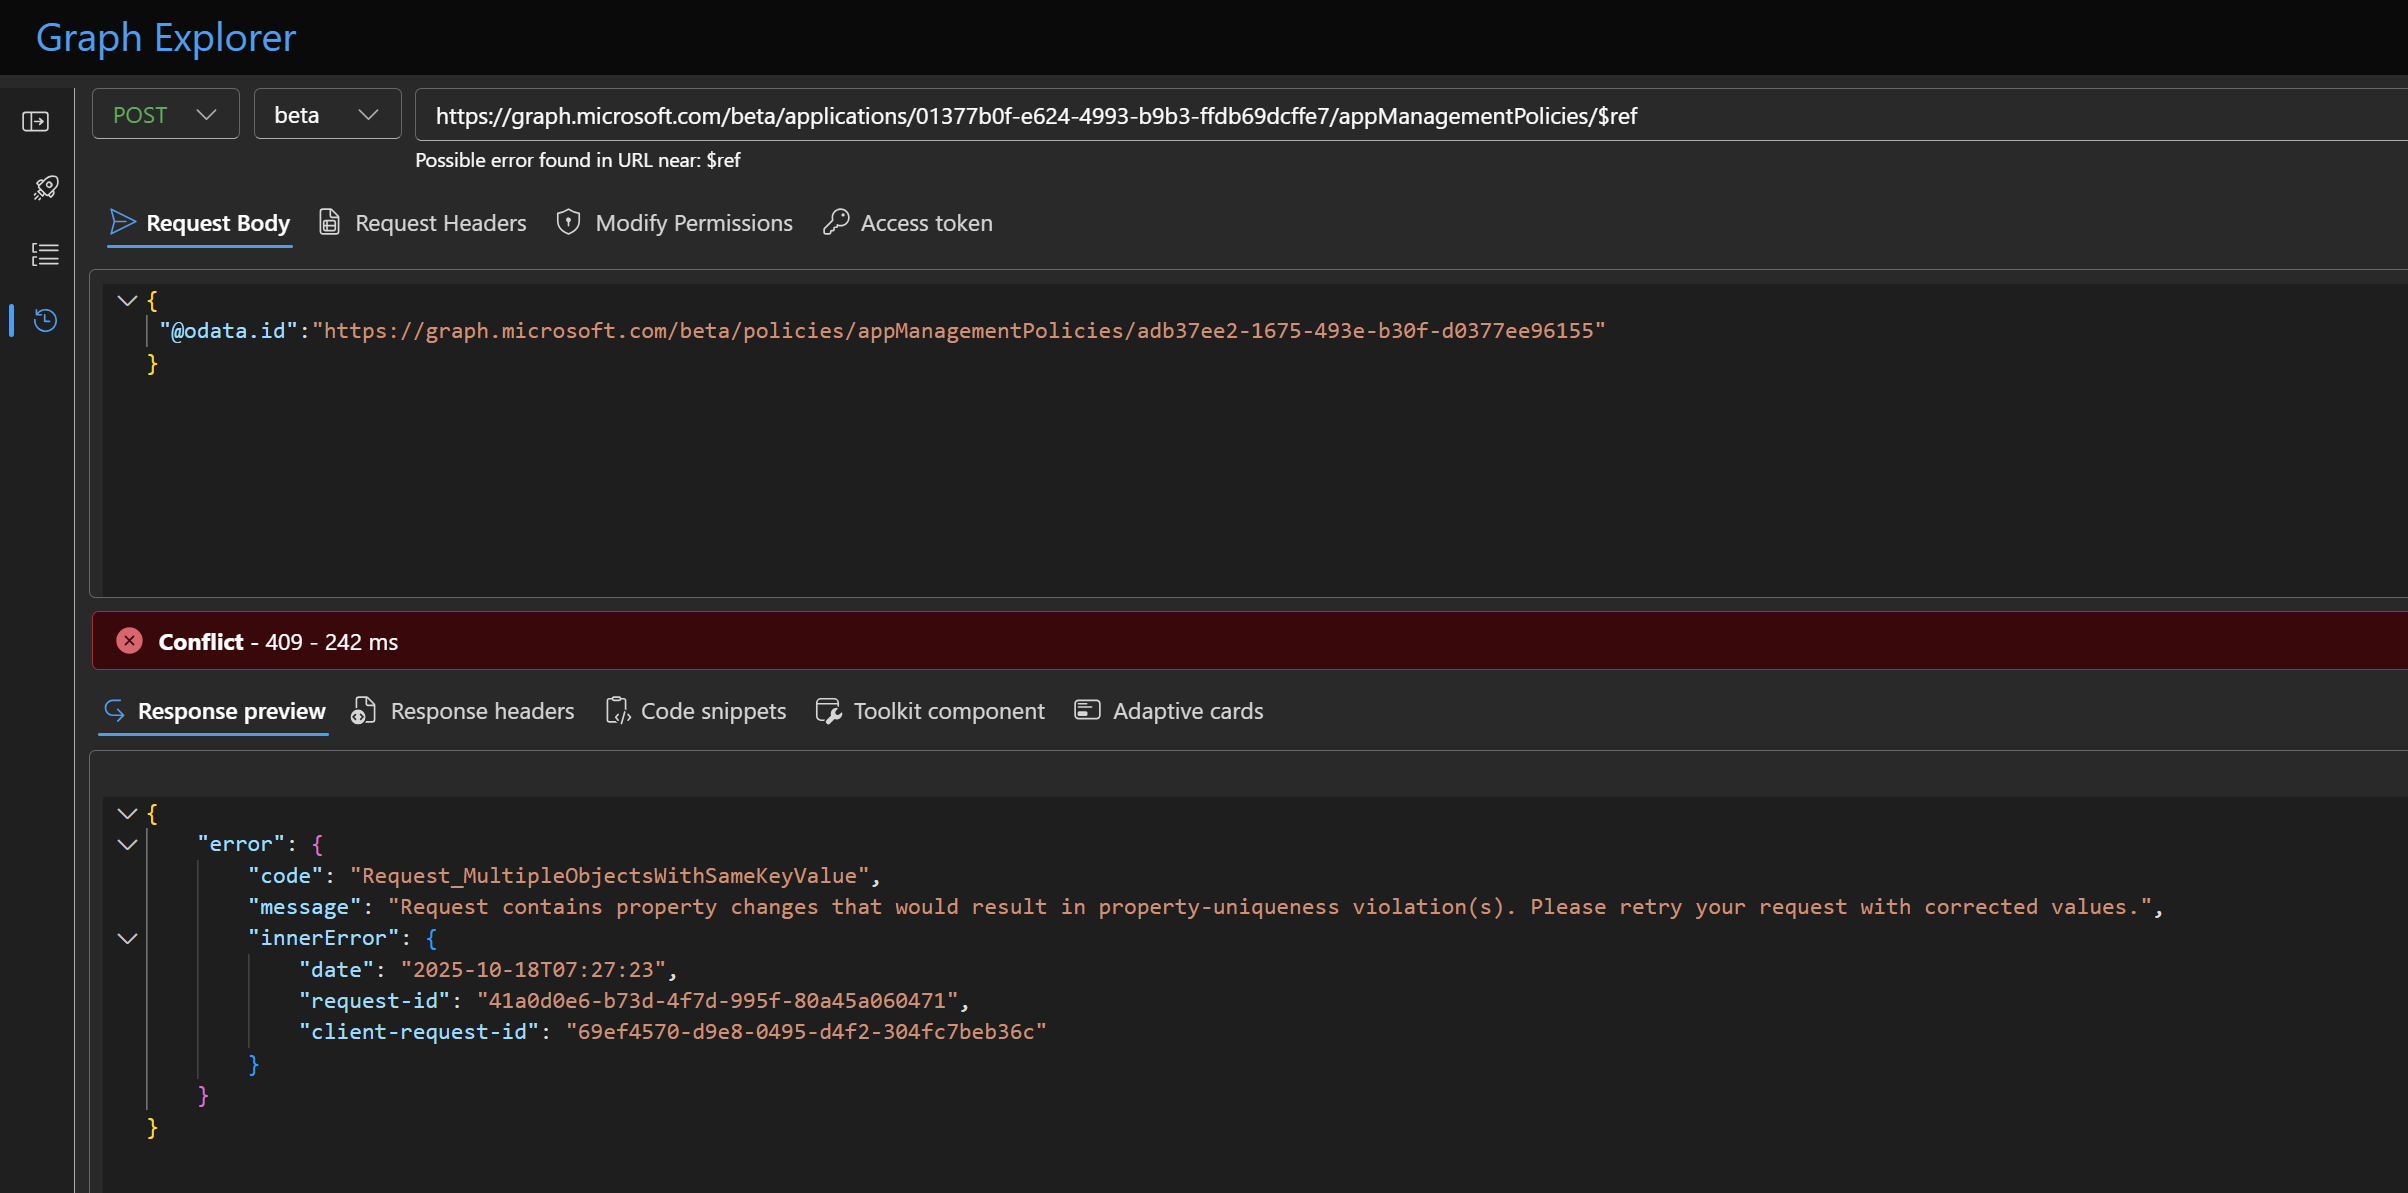
Fact 7. The interface can be confusing sometimes. Don’t let it fool ya.#
This is what I learned, and it took me a while to understand.
There are basically two ways to exclude an app from creating secrets. Both give you another user experience.
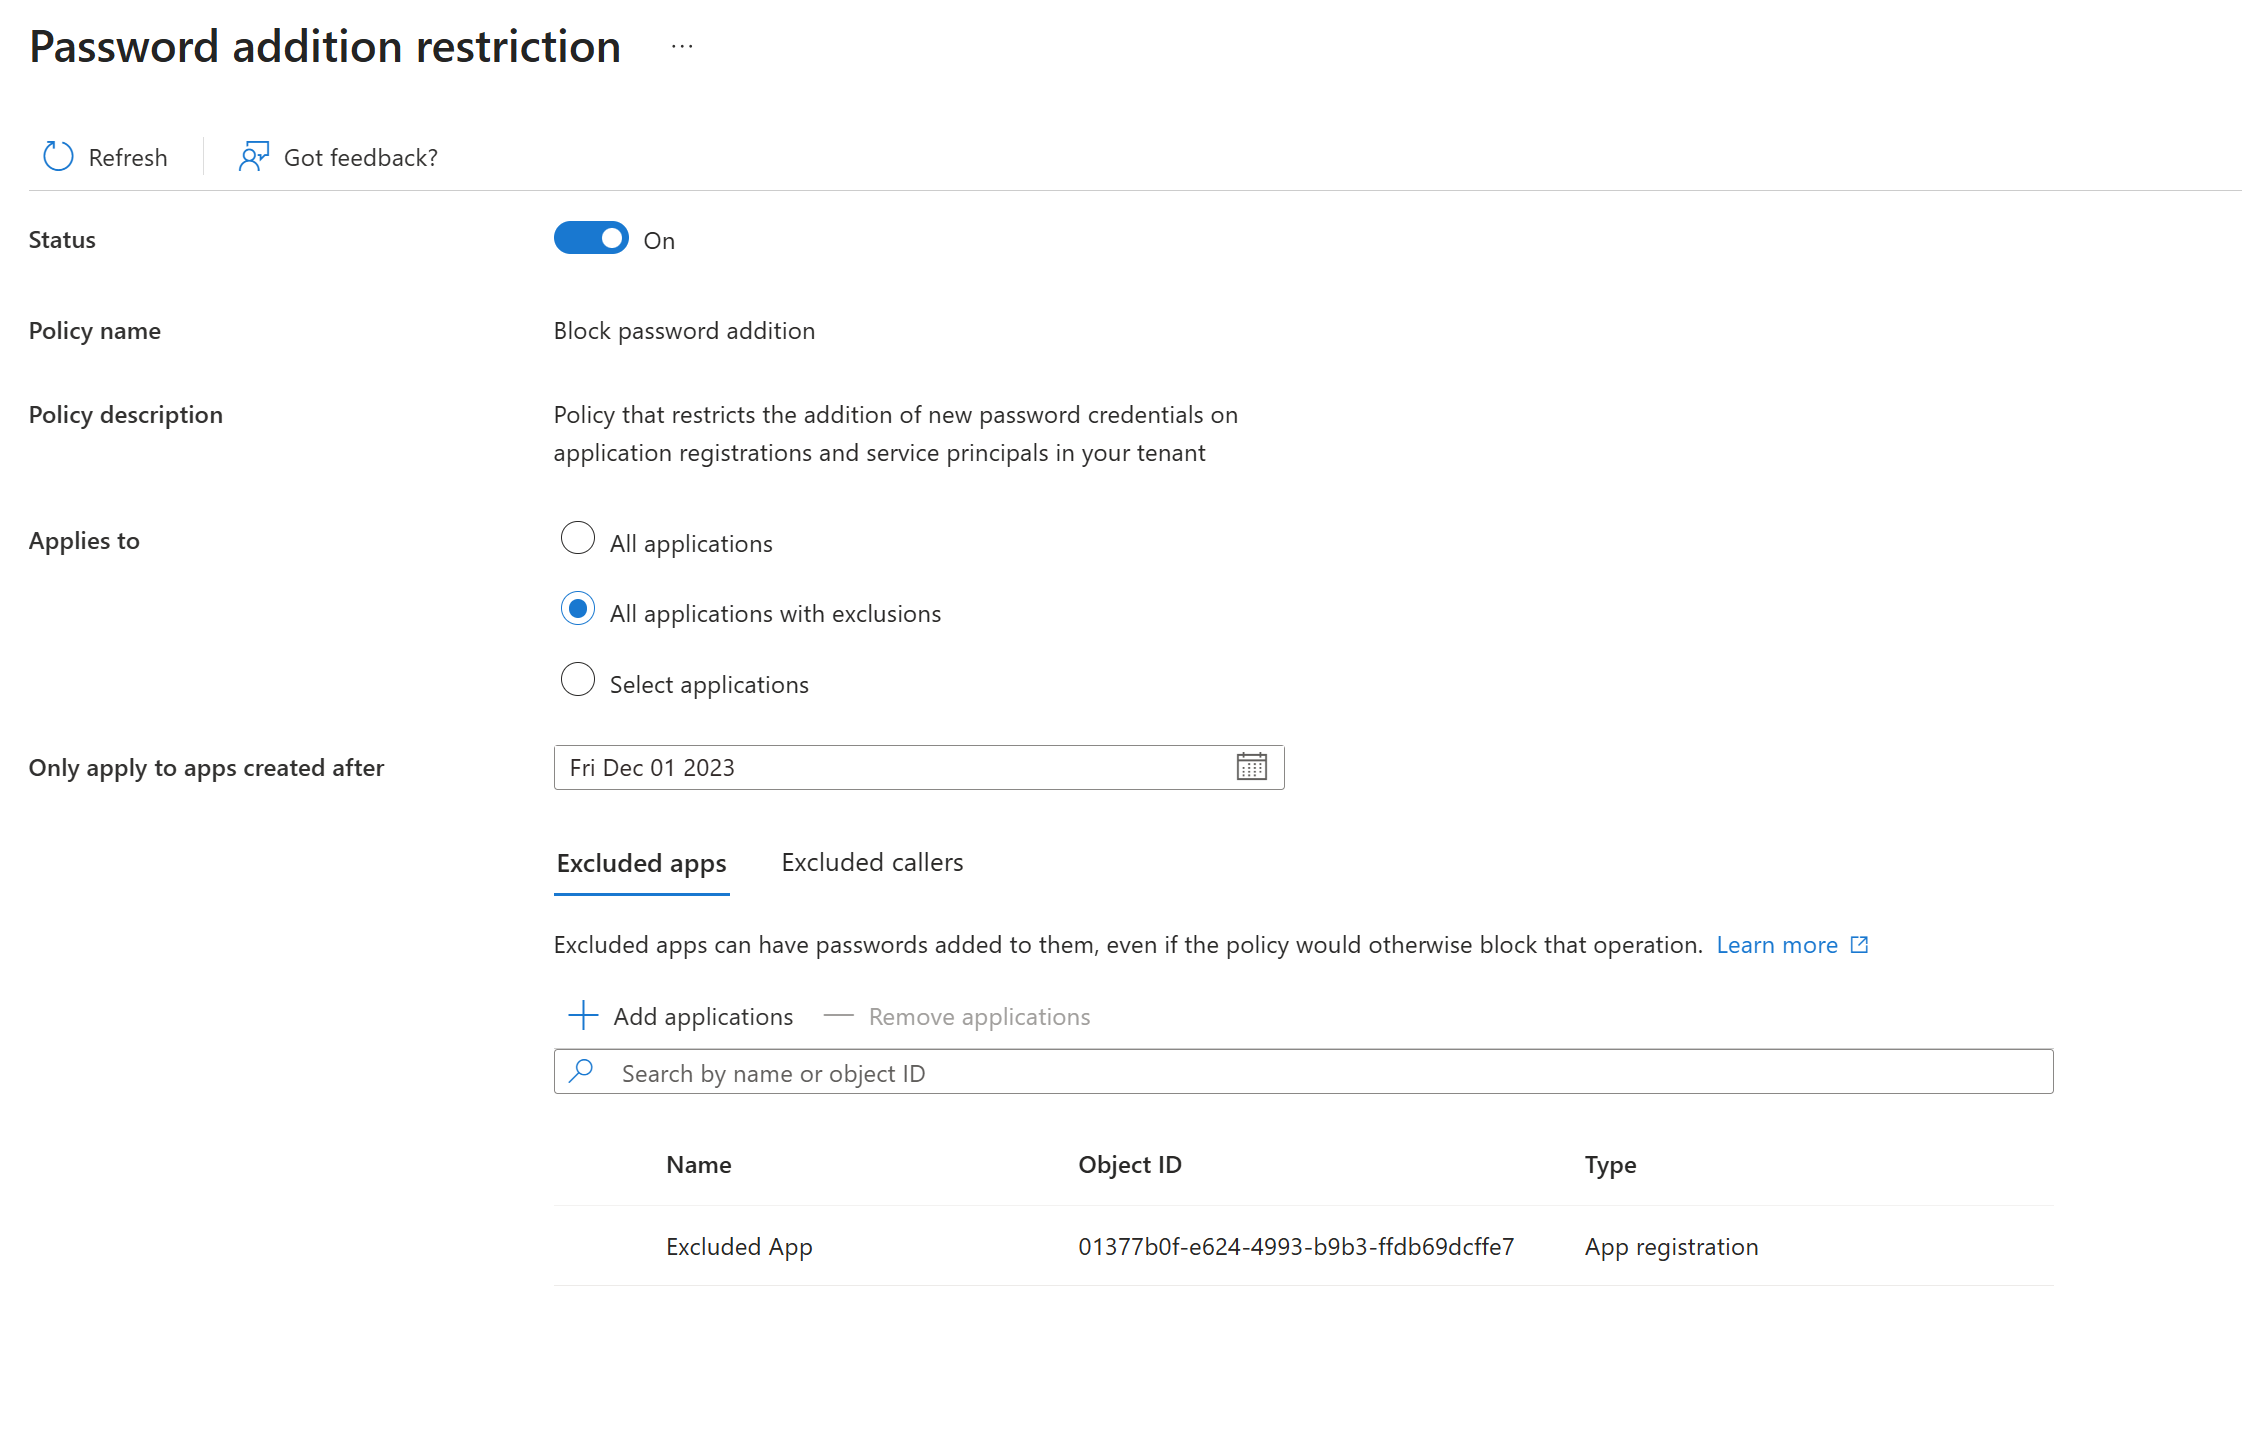
When you exclude an app from the Block password addition, it is allowed to create secrets, and respects the maximum lifetime that you’ve set in the Restrict max password lifetime policy. (default tenant policy)
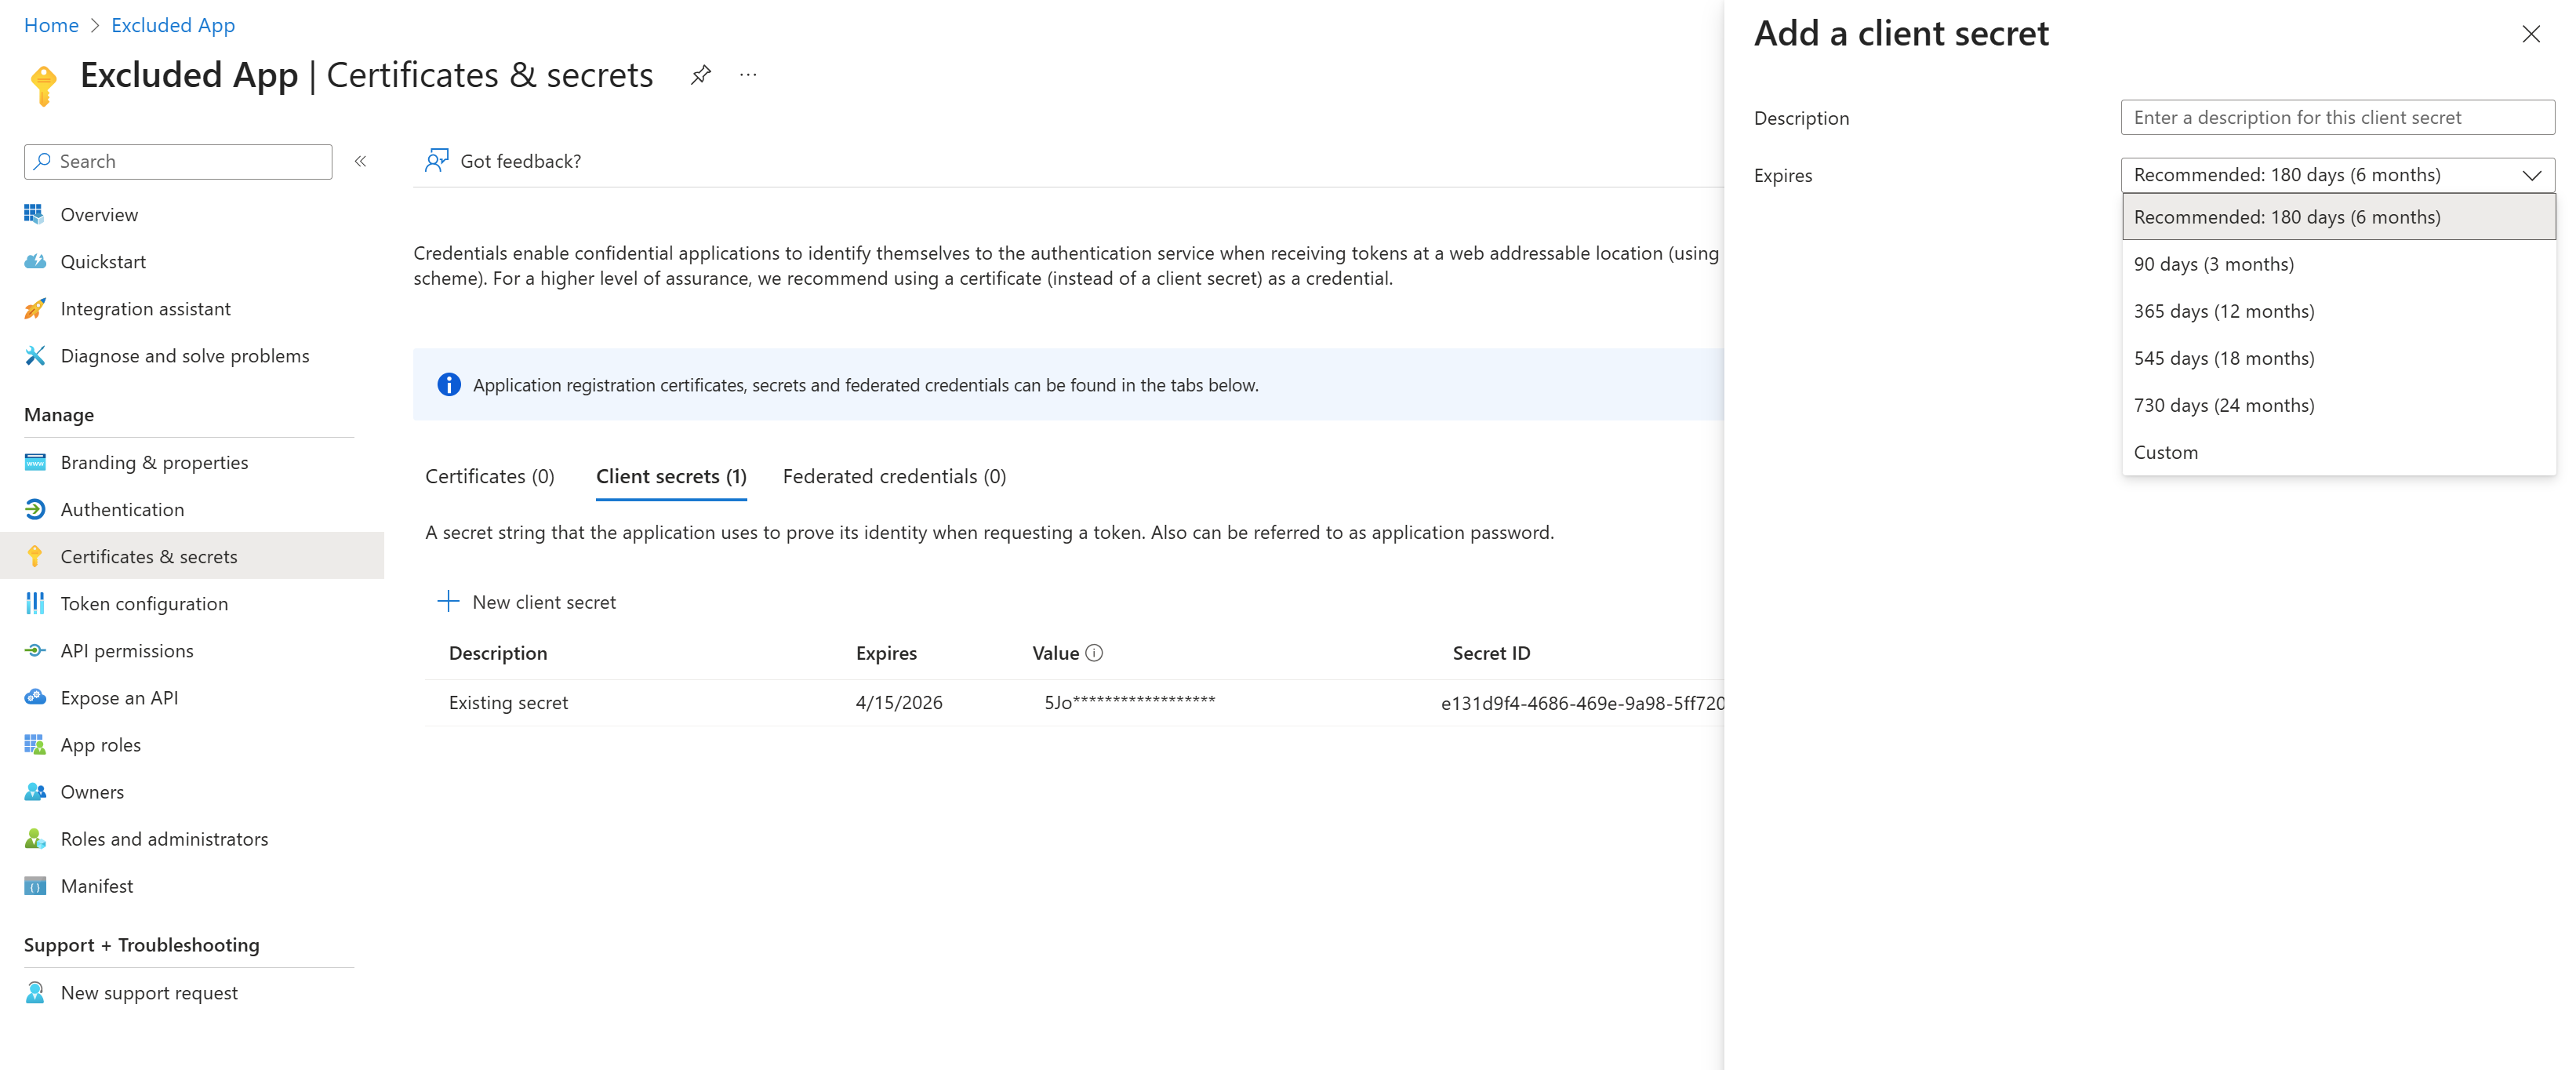
So, when I try to add a secret, this is what the UI looks like. It does not tell me the policy until I try to create the secret.
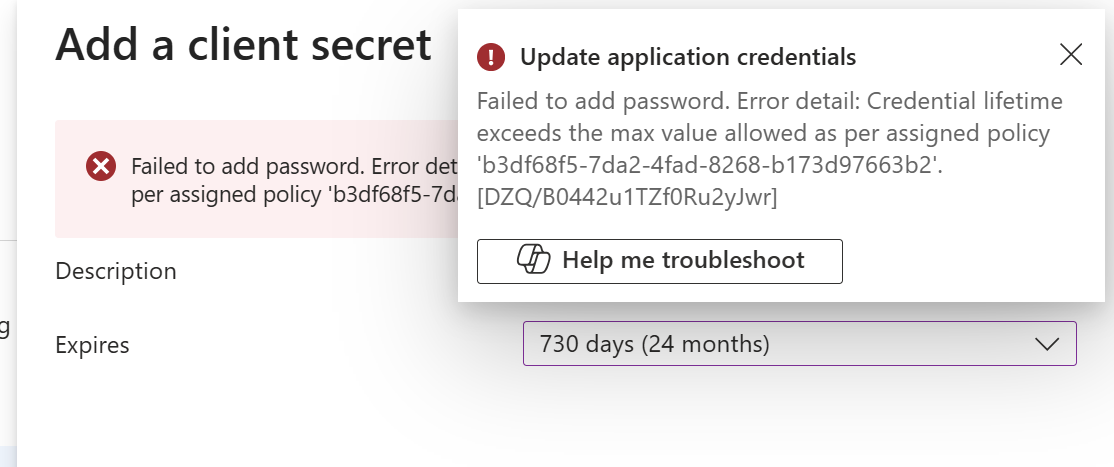
This is when I learn that the policy is in place, but it does not tell me what the maximum lifetime is.
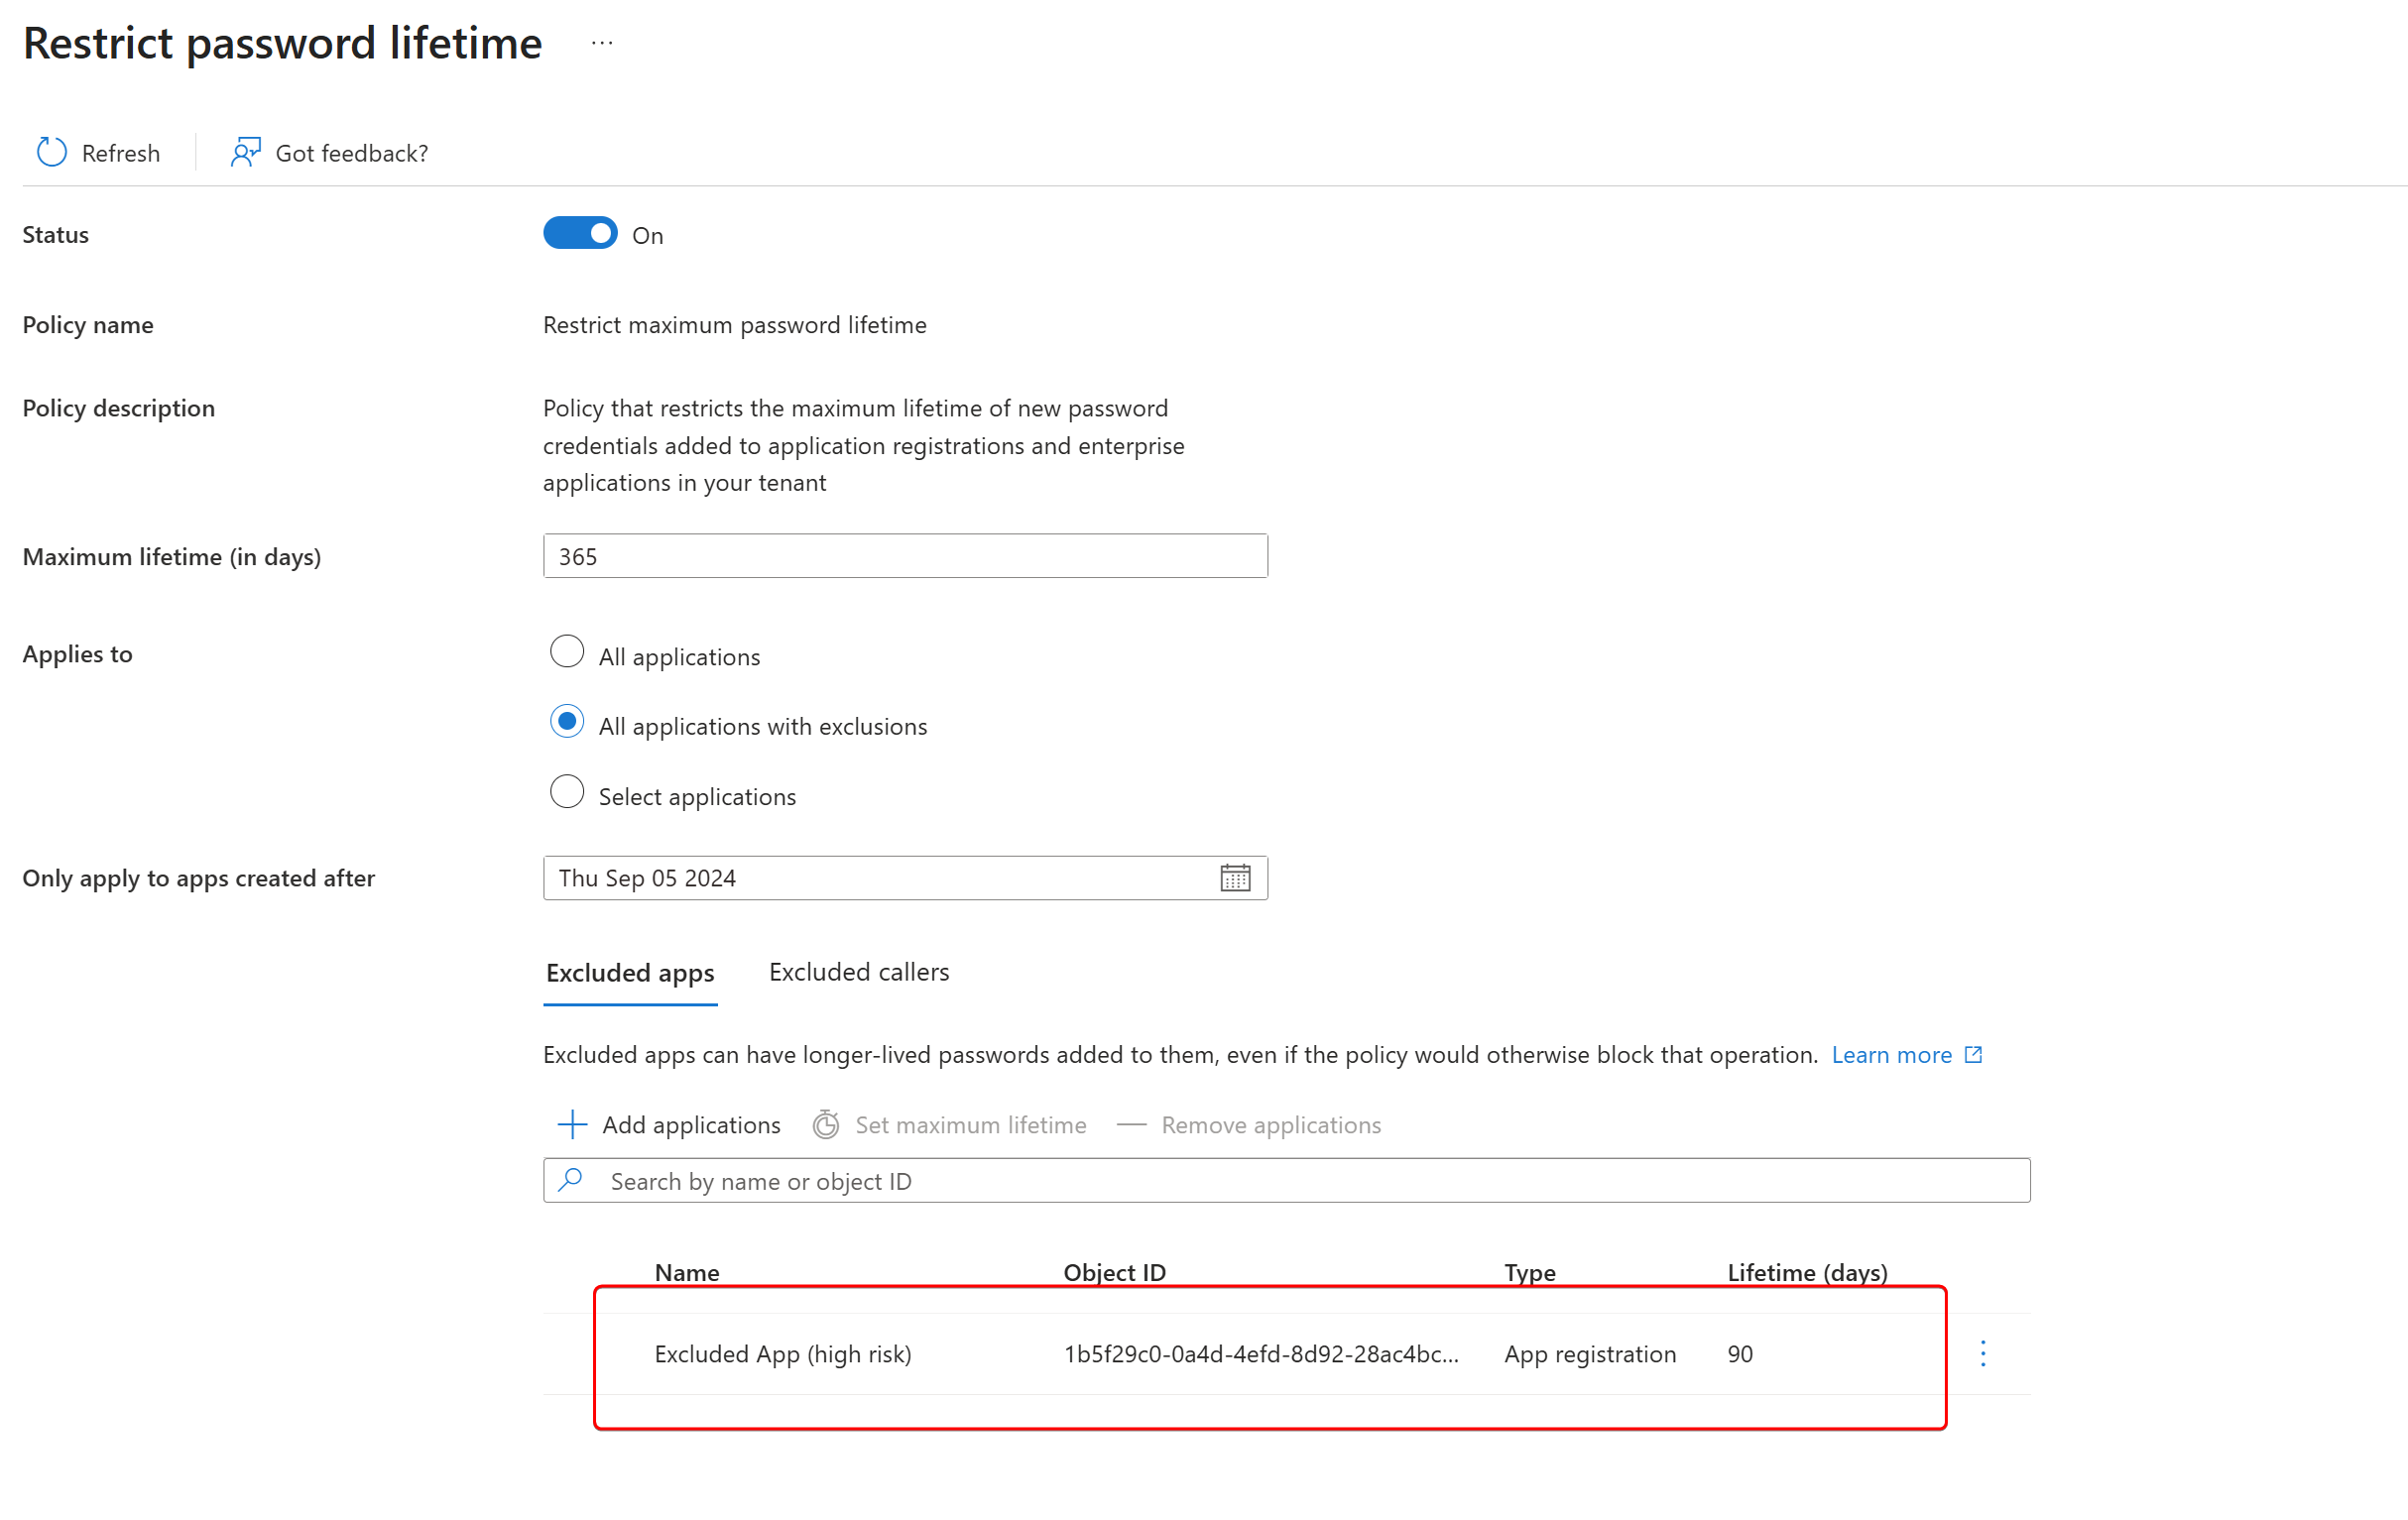
Now let’s exclude an app from the Restrict max password lifetime policy directly. I will set a custom lifetime to this app as well.
Now look at the experience in the browser!
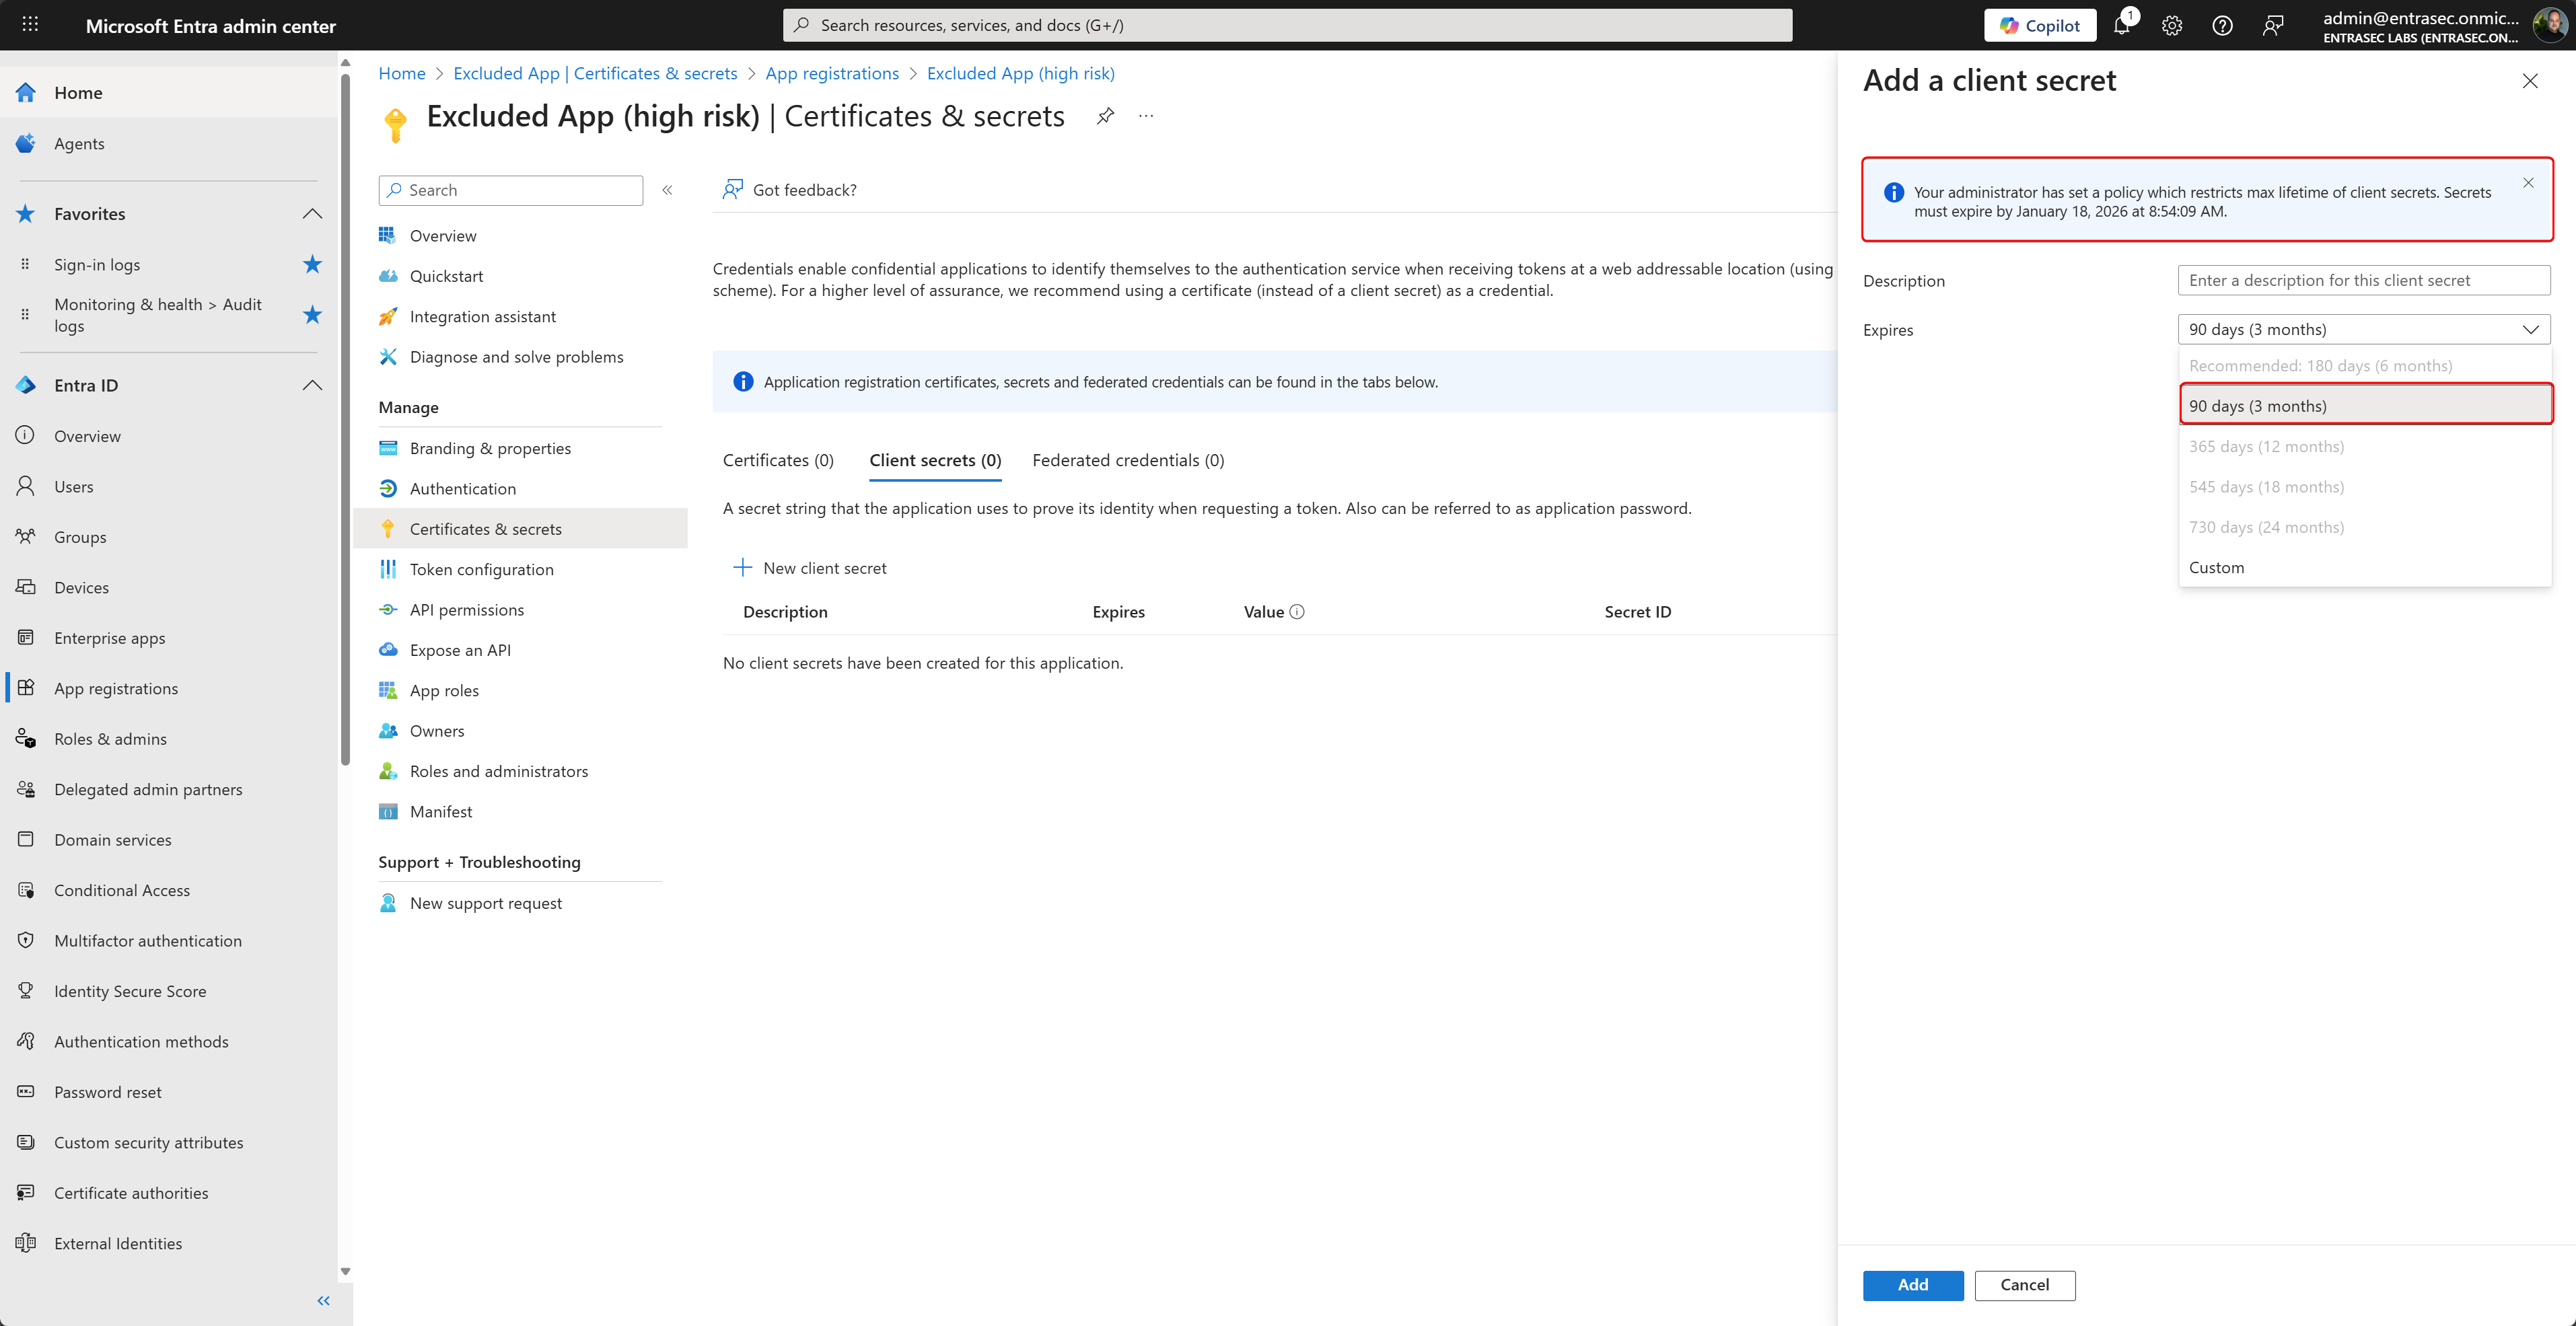
This time, it will tell me the maximum lifetime, and it greys out the other options, which is a better user experience if you ask me.
Two lessons I want to share here:
- Setting the exact days will not always reflect in the browser. Why? 90 days are not exactly 3 months. 180 days is not the same as 6 months. So, to fix that, I use values like 92 and 183 to make it work.
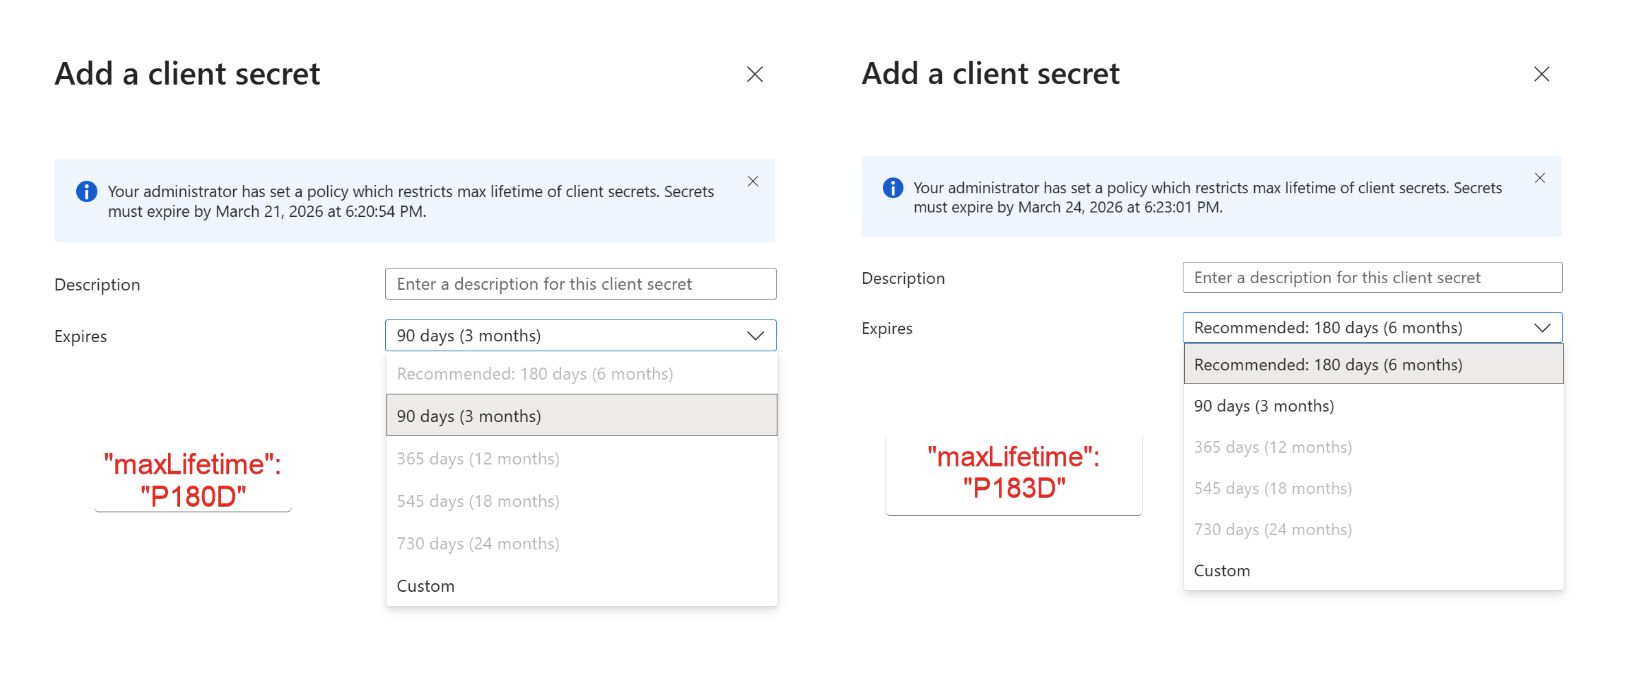
- When switching between two apps with different exclusions, the UI will cache some of these components, so it will show the wrong information. I only realized after hours and hours of troubleshooting why my policies did not work.
Trying to understand a new feature with bugs like this is madness. This kind of bugs would’ve been solved beforehand if Microsoft had a private preview on this.
Fact 8. Policies might have impact on SAML signing certificates#
Please be aware that limiting the certificate lifetime also applies to SAML signing certificates. These certificates are auto-created when adding a new SAML app, but you might need to manually add a new certificate with shorter lifetime to make it work. Gabriel Delaney has written an article on this already, so reach out for details here: Entra ID Application Policies: Beware the Impact on SAML Signing Certificates
Let’s wrap up#
That’s it for today’s post. I will probably do a follow-up on this, as this topic is important in the NHI security and governance field. What I learned for now, is that this feature is a powerful tool to govern your apps and service principals, but that it can also become very confusing sometimes. Hopefully this post will help you to understand the feature a bit more. \
Stay safe!
Comments
Comments load when you scroll here.